Stihl BR 500 Instruction Manual
Hide thumbs
Also See for BR 500:
- Instruction manual (84 pages) ,
- Service manual (62 pages) ,
- Safety manual (18 pages)
Table of Contents
Advertisement
Advertisement
Table of Contents

Related Manuals for Stihl BR 500


Summary of Contents for Stihl BR 500
- Page 1 STIHL BR 500, 550, 600 Instruction Manual...
-
Page 3: Table Of Contents
8.1 Mixing fuel ......... 13 19.1 Blower STIHL BR 500......21 8.2 Refuelling the blower . -
Page 4: Introduction
English 1 Introduction 19.2 Blower STIHL BR 550......22 1 Introduction 19.3 Blower STIHL BR 600. -
Page 5: Symbols In Text
English 3 Overview 3 Overview NOTICE This symbol indicates dangers that can cause damage to property. Blower ► The measures indicated can avoid damage to property. Symbols in Text This symbol refers to a chapter in this instruction manual. 0458-452-0121-H... -
Page 6: Icons
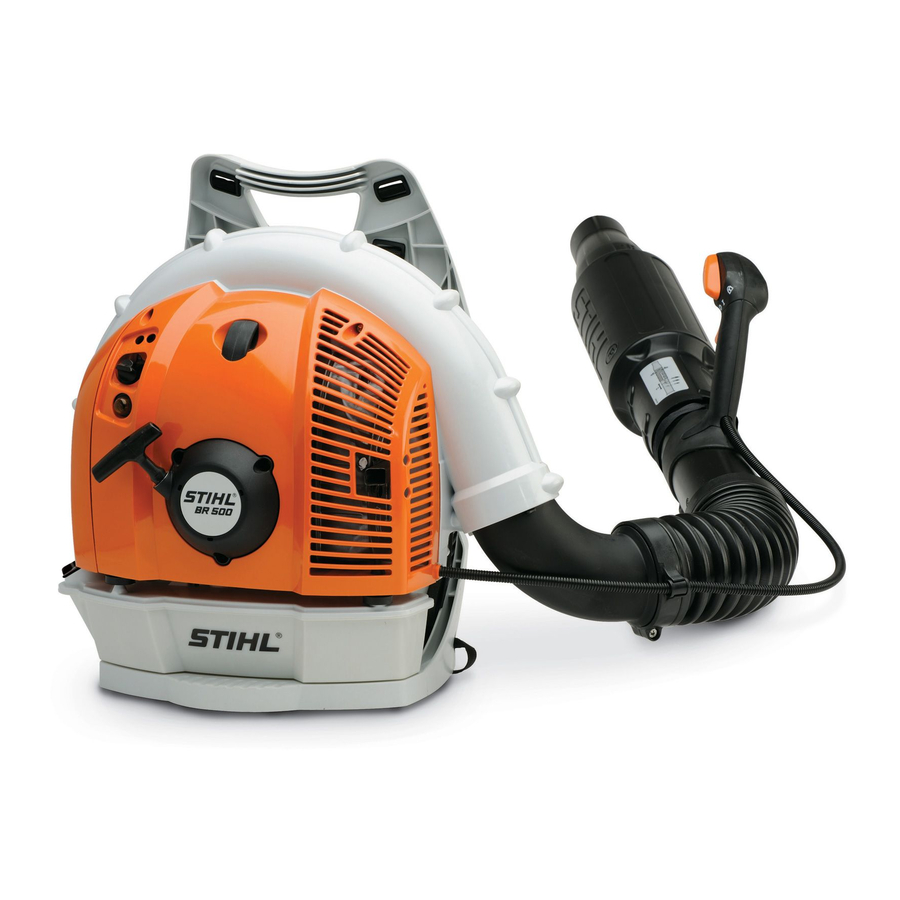
English 3 Overview 1 Master control lever 16 Throttle trigger The Master Control Lever is used to operate and stop the Controls the engine speed. engine. The Master Control Lever is used to lock the 17 Blower tube throttle. The blower tube directs the air stream. 2 Spark plug 18 Nozzle Ignites the fuel-air mixture in the engine. -
Page 7: Safety Precautions
15m (50ft) Do not dispose of the product with domestic waste. Intended Use 4 Safety Precautions The blower STIHL BR 500, BR 550 and BR 600 is designed for blowing leaves, grass, paper and similar materials. WARNING Warning Symbols Meanings of warning symbols on the blower: ■... -
Page 8: Clothing And Equipment
► Wear close-fitting clothing. ► If you have any doubts, be sure to consult a STIHL ► Remove scarves and jewelry. dealer. ■ Wearing unsuitable footwear may cause the user to slip. -
Page 9: Safe Condition
Hot exhaust gas can ignite easily ► Replace worn or damaged labels. flammable materials and cause a fire. ► If you have any doubts, be sure to consult a STIHL ► Keep exhaust gas well away from easily flammable dealer. -
Page 10: Working
► Use a mixture of gasoline and two-stroke engine oil that ► If your clothing comes into contact with fuel or gasoline: is not older than 30 days (STIHL MotoMix: 2 years). Change your clothing. ■ Fuel mix, gasoline and two-stroke engine oil can harm the Working environment. -
Page 11: Transport
This may result in serious injury to people and ► Carry the blower on your back. damage to property. ► Stop work and consult a STIHL servicing dealer. 4.10 Storage ■ The blower may cause vibrations in operation. WARNING ►... -
Page 12: Cleaning, Maintenance And Repair
► Pull off spark plug boot. ► If it is not possible to carry out these steps: do not use the blower. Consult a STIHL servicing dealer. ■ The muffler and engine may be hot after a period of operation. This can result in burn injuries. -
Page 13: Mounting The Blower Tube
English 6 Assembling the Blower Mounting the Blower Tube ► Insert and tighten down the screw (8) firmly. BR 500 BR 550 / BR 600 ► Slide "clamp with throttle cable holder" (2) onto the manifold (1). ► Push the pleated hose (3) onto the elbow (1). -
Page 14: Adjusting Blower For User
English 7 Adjusting Blower for User ► Line up the hole (4) and the lug (3). ► Close buckle (1) on the waist belt. ► Push the nozzle (1) onto the blower tube (2). The nozzle (1) engages. The nozzle need not be removed again. 7 Adjusting Blower for User Fitting and Adjusting the Carrying System ►... -
Page 15: Adjusting The Control Handle
1:50. STIHL recommends you use STIHL MotoMix. If you mix the fuel yourself, use only STIHL two-stroke engine oil or another high-performance engine oil in accordance with JASO FB, JASO FC, JASO FD, ISO-L- EGB, ISO-L-EGC or ISO-L-EGD. -
Page 16: Starting And Stopping The Engine
English 9 Starting and Stopping the Engine ► Turn the tank cap clockwise and tighten it down firmly by hand. The fuel tank is closed. 9 Starting and Stopping the Engine Selecting the correct starting procedure When must the engine be prepared for starting? The engine must be prepared for starting if the following ►... -
Page 17: Starting The Engine
English 9 Starting and Stopping the Engine ► Move the Master Control Lever (1) to position . ► Move the Master Control Lever (1) to position . ► Depress the manual fuel pump (3) at least 6 times. ► Depress the manual fuel pump (2) at least 6 times. ►... -
Page 18: Shut Off The Engine
► Move the choke lever to position assistance. The engine stops. ► If you have any doubts, be sure to consult a STIHL dealer. ► Do not use the blower. Consult a STIHL servicing dealer. The Master Control lever is defective. -
Page 19: Blowing
English 12 After Finishing Work 11.2 Blowing ► Remove filter cover (2) and air filter (3). ► Clean the area around the air filter (3) with a damp cloth or a soft brush. ► Loosen the screw (4). ► Point the nozzle at the ground. ►... -
Page 20: Storing
► Open the fuel tank cap. ► Drain the fuel tank. ► Seal fuel tank. ► Have the fuel tank cleaned by a STIHL dealer. ► Start the engine and run it at idling speed until it stops. 15 Cleaning ►... -
Page 21: Maintenance
English 16 Maintenance Monthly ► Have the fuel tank cleaned by a STIHL dealer. ► Have the pickup body in the fuel tank cleaned by a STIHL dealer. Annually ► Have the blower checked by a STIHL servicing dealer. ► Have the pickup body in the fuel tank replaced by a STIHL dealer. -
Page 22: Troubleshooting
English 18 Troubleshooting 18 Troubleshooting 18.1 Troubleshooting the Blower Most problems can be attributed to the same cause. ► Carry out the following measures: ► Replace the air filter. ► Clean or replace the spark plug. ► Adjust saw for winter or summer operation. ►... -
Page 23: Replacing Air Filter
19 Specifications ► Take out the screws (1). ► Remove filter cover (2). 19.1 Blower STIHL BR 500 ► Clean the area around the air filter (3) with a damp cloth or a soft brush. – Displacement: 64.8 cm³... - Page 24 – Approved spark plug: 2 m/s². – NGK CMR6H from STIHL STIHL recommends wearing ear defenders. – Bosch USR 4AC from STIHL BR 500 – Electrode gap of the spark plug: 0.5 mm – Sound pressure level L measured according to DIN –...
- Page 25 – Version with bike handle: Control handle: 2.5 m/s². manufacturers' spare parts and accessories; accordingly, – Version with Bike Handle: Left handle: 2.1 m/s². STIHL cannot warrant for the use of those parts. Original STIHL spare parts and original STIHL accessories For information on compliance with Employers' Vibration Directive 2002/44/EC see www.stihl.com/vib.
- Page 26 – Measured sound power level: 108 dB(A) – Guaranteed sound power level: 110 dB(A) The technical documents are stored at ANDREAS STIHL AG & Co. KG Produktzulassung. The year of construction, the country of manufacture and the machine number are shown on the blower.
- Page 28 0458-452-0121-H englisch www.stihl.com *04584520121H* 0458-452-0121-H...
Need help?
Do you have a question about the BR 500 and is the answer not in the manual?
Questions and answers