Table of Contents
Advertisement
Advertisement
Table of Contents

Subscribe to Our Youtube Channel
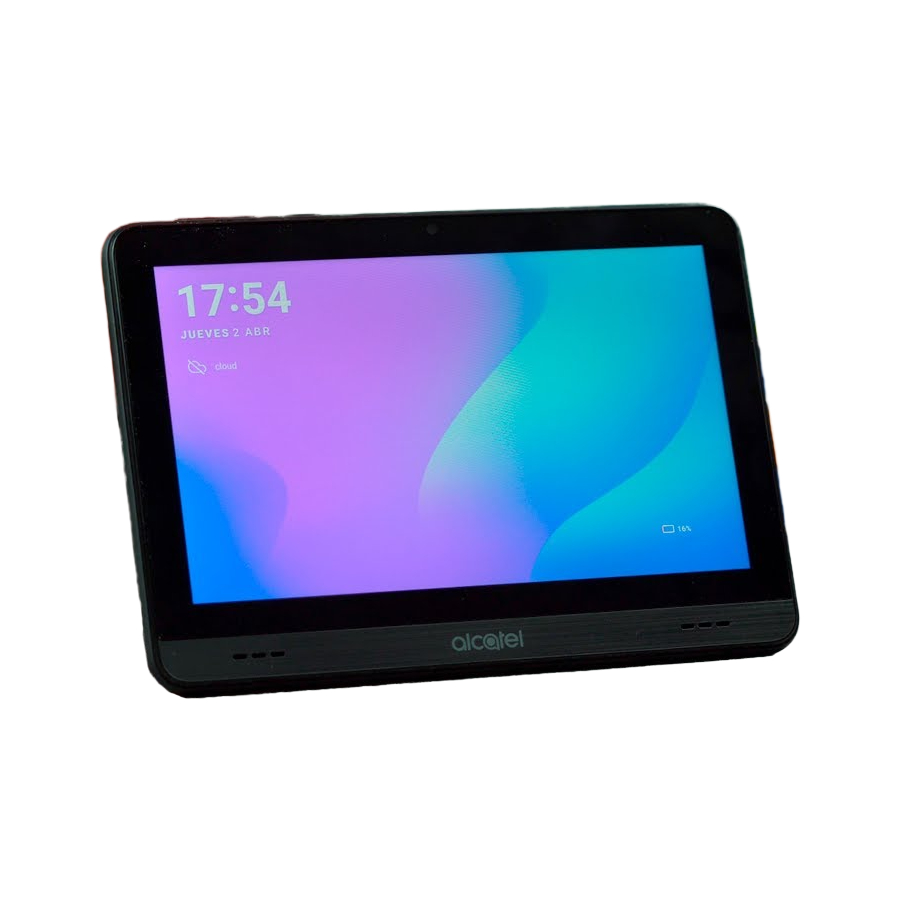
Related Manuals for Alcatel TKEE MINI


Summary of Contents for Alcatel TKEE MINI
- Page 1 For more information on how to use the tablet, please go to www.alcatelmobile.com and download the complete user manual. Moreover, on the website, you can also find answers to frequently asked questions, upgrade the software via Mobile Upgrade, and so much more.
-
Page 3: Table Of Contents
Table of Contents Your mobile ..............4 Keys and connectors ......... 4 Getting started ........... 9 Home screen .............10 Text input ..............19 Using the onscreen keyboard .......19 Text editing ............20 Contacts ...............21 Calendar, Clock, and Calculator ......27 Calendar .............27 Clock ..............29 Calculator ............31 Getting connected ............33 Connecting to the internet ......33... - Page 4 Others ................43 Sound Recorder ..........43 Other applications ..........43 Google applications ..........44 Chrome ..............44 Gmail ..............44 Maps Go ............45 YouTube ..............45 Play Store ............45 Duo ..............46 Settings ................47 Network & internet .........47 Connected devices ..........48 Apps & notifications ........48 Battery ..............48 Display ..............48 Sound ..............49 Storage ...............49...
- Page 5 9.14 Google ..............51 9.15 System ...............51 9.16 About tablet ............53 10 Making the most of your device ......54 10.1 Updates ..............54 11 Accessories ..............55 12 Troubleshooting ............56 13 Specifications .............62 Licences: ................64...
-
Page 6: Your Mobile
Your mobile ......1.1 Keys and connectors... - Page 7 Number Function Power key: • Press: Lock the screen/Light up the screen. • Press and hold: Show the popup menu to select from Power off/Restart/Screenshot. • Press and hold the Power key and Volume down key to take a screenshot. • Press and hold the Power key for at least 10 seconds to force reboot.
- Page 8 Charging the battery. Inserting or removing the microSD card.
- Page 9 Back Home Recent apps...
- Page 10 Recent Apps button • Touch to switch between individual app activities and documents. Home button • From any application or screen, touch to return to the Home screen. • Long press to turn on Google Assitant Now. You can get help such as getting directions and restaurant information based on the content detected on the screen.
-
Page 11: Getting Started
1.2 Getting started 1.2.1 Setting up Charging the battery You are advised to fully charge the battery ( ). Charging status is indicated by a percentage displayed on screen. The percentage increases as the device is charged. To reduce power consumption and energy waste when the battery is fully charged, disconnect your charger from the plug;... -
Page 12: Home Screen
1.3 Home screen You can bring all the items (applications, shortcuts, folders and widgets) you love or use most frequently to your Home screen for quick access. Touch the Home button to switch to the Home screen. Status bar • Status/Notification indicators • Touch and drag down to open the Notification panel. - Page 13 • Enter the application. • Long press to move or remove applications. Enter the Home screen. Reversible screen The device supports the reversible function. From the Home screen, slide up to open the App drawer, then touch Settings > Display > Advanced > Auto-rotate screen, switch the toggle to turn on/off.
- Page 14 Slide/Swipe Slide the screen to scroll up and down the applications, images, and web pages. You can slide the screen horizontally too. Flick Similar to swiping, flicking is a lighter and quicker stroke. Rotate Automatically change the screen orientation from portrait to landscape by turning the device sideways to have a better screen view.
- Page 15 Clear all notifications (ongoing notifications will remain) Quick Settings panel Drag down notification panel to open the Quick Settings panel. You can enable or disable functions or change modes by touching the icons.
- Page 16 Open Settings, to view the full list of settings. 1.3.3 Search bar The device provides a search function which can be used to locate information within applications, the device or the web. Search by text • Touch the Search bar from the Home screen.
- Page 17 • Enter the text/phrase you want to search for. • Touch on the keyboard if you want to search the web. Search by voice • Touch from the Search bar to display a dialog screen. • Speak the word/phrase you want to search for. A list of search results will display for you to select from.
- Page 18 If you have chosen Swipe as the screen lock, you can press the Power key to light up the screen, then swipe up to unlock the screen. Swipe up to unlock the screen 1.3.5 Personalising your Home screen Reposition Long press an item and drag it to the desired position and then release.
- Page 19 Create folders To improve the organisation of shortcuts or applications on the Home screen and the Favourite tray, you can add them to a folder by stacking one item on top of another. To rename a folder, open it and touch the folder’s title bar to input the new name.
- Page 20 Touch one thumbnail and slide it right to close an application. Touch Clear all at the bottom of the screen to close all the running applications. 1.3.7 Volume adjustment Using the volume key Press the Volume key to adjust the volume. Using the settings menu From the Home screen, slide up to open the App drawer, then touch Settings >...
-
Page 21: Text Input
Text input ........2.1 Using the onscreen keyboard Onscreen keyboard settings Go to Settings > System > Languages & input, touch the keyboard you want to set up and a series of settings will become available. Adjust the onscreen keyboard orientation Turn the device sideways or upright to adjust the onscreen keyboard orientation. -
Page 22: Text Editing
Enter text or numbers. Long press to select symbols. Switch between "abc/Abc" mode; Long press to switch to "abc/ABC" mode. Switch to symbol and numeric keyboard. Touch to say something. 2.2 Text editing You can edit the texts you entered. • Long press or double tap within the texts you want to edit. -
Page 23: Contacts
Contacts ........Contacts enables quick and easy access to the contact you want to reach. You can view and create contacts on your device and synchronise them with your Gmail contacts or other applications on the web or on your device. 3.2.1 Consult your Contacts To see your contacts, touch from the App drawer. - Page 24 Long press to select contact(s) to delete Add new contact Deleted contacts will also be removed from other applications on the device or web the next time you synchronise your device. 3.2.2 Adding a contact Touch in the contact list to create a new contact. You are required to enter the contact's name and other contact information.
- Page 25 Add to/Remove from Favourites To add a contact to favourites, you can touch a contact to view details then touch to add the contact to favourites. To remove a contact from favourites, touch the star on the contact details screen. 3.2.3 Editing your contacts To edit contact information, touch in the contact...
- Page 26 The icons available on the Quick contact panel depend on the information you have for the contact and the applications and accounts on your device. 3.2.5 Importing, exporting and sharing contacts This device enables you to import or export contacts between your device and device storage.
- Page 27 From the Contacts screen, touch to open the options menu. Touch Settings > Import/Export, then select to import/export contacts from/to your accounts, internal storage, micro SD card, etc. You can share a single contact or contacts with others by sending the contact's vCard to them via Bluetooth, Gmail, etc.
- Page 28 3.2.7 Synchronising contacts in multiple accounts Contacts, data or other information can be synchronised from multiple accounts, depending on the applications installed on your device. To add an account, touch from the contacts list and touch Settings > Accounts > Add account, or from the Home screen, slide up, then Settings >...
-
Page 29: Calendar, Clock, And Calculator
Calendar, Clock, and Calculator ........4.1 Calendar ............ You can use Calendar to keep track of important meetings, appointments, etc. To view the calendar and create events, slide up from the Home screen, then touch Calendar. 4.1.1 Multimode view You can display the Calendar by Schedule, Day, Week, or Month. - Page 30 Schedule view Day view Week view Month view 4.1.2 To create new events You can add new events from any Calendar view. • Touch • Fill in all required information for this new event. If it is a whole-day event, you can select All-day. • Invite guests to the event.
-
Page 31: Clock
To quickly create an event from the Week view screens, touch an empty spot to select a target area which will then turn , then touch the icon to create the new event. 4.1.3 To delete or edit an event To delete or edit an event, touch the event to enter its details screen. - Page 32 4.2.1 Clock To view the clock, touch on the Clock screen. Touch to add a time zone. 4.2.2 Alarm From the Clock screen, touch to enter the Alarm screen. Turn on to enable the alarm. Touch to add a new alarm: Touch a currently existing alarm to enter the alarm editing screen.
-
Page 33: Calculator
4.2.4 Stopwatch From the Clock screen, touch to enter the Stopwatch screen. • Touch to start the timer. • Touch Lap to show a list of records according to the updated time. • Touch to halt the total and lap times. These will only restart after is touched. - Page 34 Touch DEL to delete digits one by one, or long press DEL to delete all at once.
-
Page 35: Getting Connected
Getting connected ....To connect to the internet with this device, you can use Wi-Fi. 5.1 Connecting to the internet You can connect to the internet when your device is within range of a wireless network. Wi-Fi can be used on your device. -
Page 36: Connecting To A Bluetooth Device
• Touch Settings > Connected devices > Connection preferences > Bluetooth. • Turn on Bluetooth You are recommended to use alcatel Bluetooth headsets, which have been tested and proved compatible with your device. You can go to www.alcatelmobile.com for more... - Page 37 Your device name and other available devices will appear on screen. To rename your device • Touch Settings > Connected devices > Connection preferences > Bluetooth. • Turn on Bluetooth • Touch Device name. • Enter a name, and touch RENAME to confirm. To pair/connect your device with a Bluetooth device To exchange data with another device, you need to turn Bluetooth on and pair your device with the Bluetooth...
-
Page 38: Connecting To A Computer Via Usb
5.3 Connecting to a computer via USB With a USB cable, you can transfer media files and other files between your device and a computer. To connect your device to the computer Use the USB cable that came with your device to connect the device to a USB port on your computer. - Page 39 • On the screen that opens, follow your network administrator's instructions to configure each component of the VPN settings. • Touch SAVE. The VPN is added to the list on the VPN settings screen. Before adding a VPN, you should set screenlock, such as PIN code or password for your device.
- Page 40 To delete a VPN: • Touch the icon next to the selected VPN, then touch FORGET to delete it.
-
Page 41: Multimedia Applications
Multimedia applications ..6.1 Camera ............Your mobile device is fitted with a camera for taking photos and videos. Before using the camera, make sure that you remove the protective lens cover to avoid it affecting your picture quality. To take a photo or video, touch Camera from the Home screen. - Page 42 Touch to take a video Open settings Take a photo View the photos or videos you have taken To take a photo The screen acts as the viewfinder. First, position the object or landscape in the viewfinder, touch the screen to focus if necessary and touch to capture.
-
Page 43: Gallery
6.2 Gallery ............Photo acts as a media player for you to view photos and play videos. In addition, a set of further operations to pictures and videos are available for your choice. To view the photos you have taken, touch photo from the Home screen. - Page 44 Find the picture you want to work on, and touch the picture in the full-screen picture view. Touch share the picture, Touch and select Use as... to set the picture as Contact photo or Wallpaper. Touch to delete picture. Touch to edit picture. Light the picture.
-
Page 45: Others
Others ........7.1 Sound Recorder ........To record voice, slide up from the Home screen, then touch Sound Recorder. Sound Recorder allows you to record voice/sound. 7.2 Other applications ......The previous applications in this section are preinstalled on your device. To read a brief introduction of the preinstalled 3rd party applications, refer to the leaflet provided with the device. -
Page 46: Google Applications
Google applications .... Google apps are preinstalled on your device to improve work efficiency and help you enjoy life. This manual briefly introduces the apps. For detailed features and user guides, refer to related websites or the introduction provided in the apps. You are recommended to register with a Google account to enjoy all the functions. -
Page 47: Maps Go
8.3 Maps Go Google Maps offers satellite imagery, street maps, 360° panoramic views of streets, real-time traffic conditions, and route planning for travelling by foot, car, or public transportation. By using this application, you can get your own location, search for a place, and get suggested route planning for your trips. -
Page 48: Duo
8.6 Duo A video chat mobile app. With phone numbers verified, users can easily video call people from their contact list. -
Page 49: Settings
Settings ........To go to Settings, slide up from the Home screen, then touch Settings. Network & internet 9.1.1 Wi-Fi Using Wi-Fi you can access the internet whenever you are in range of a wireless network. The only thing you have to do is to enter the Wi-Fi screen and configure an access point to connect your device to the wireless network. -
Page 50: Connected Devices
Connected devices Bluetooth allows your device to exchange data (videos, images, music, etc.) within a small range with another Bluetooth supported device (phone, computer, printer, headset, car kit, etc.). For more information on Bluetooth, refer to "6.2 Connecting to a Bluetooth device". Apps &... -
Page 51: Sound
Sound Touch to adjust notification ringtones, music, and other audio settings. 9.7 Storage Touch to monitor device storage and available space. 9.8 Privacy Touch to set Encryption & credential, Device admin apps, etc. Security 9.9 Location Turn on to enable the use of information from Wi-Fi to determine your approximate location, for use in Google Maps, when you search, and so on. -
Page 52: Accounts
Smart lock With Smart lock, you can set your trusted devices, places, voice, etc. To enable this function you must first set a screen lock. 9.11 Accounts Touch to add, remove, and manage your email and other supported accounts. You can also use these settings to control how and whether all applications send, receive, and synchronise data on their own schedules, and whether all applications can synchronise... -
Page 53: Digital Wellbeing & Parental Controls
9.13 Digital Wellbeing & parental controls In this menu you can find how much time you have spent on the tablet and even on each app. You can customise the time limit for using the tablet so that have a healthy and balanced life. In addition, parents are able to restrict their children's usage time to manage their browsing habits. - Page 54 9.15.4 Backup Back up to Google Drive Turn on to back up your device’s settings and other application data to Google servers. If you replace your device, the settings and data you’ve backed up will be restored onto the new device when you sign in with your Google account.
-
Page 55: About Tablet
Factory data reset Erase all of your personal data from internal device storage, including information about your Google account, any other accounts, your system and application settings, and any downloaded applications. Resetting the device does not erase any system software updates you’ve downloaded. -
Page 56: Making The Most Of Your Device
Making the most of your device ........10.1 Updates Use the Updates app to update your device software. To access Updates, go to Settings > System > Advanced > System updates. Touch CHECK FOR UPDATES and the device will search for the latest software. If you want to update the system, touch the DOWNLOAD NEW VERSION button, and when that’s finished, touch INSTALL to complete the update. -
Page 57: Accessories
3. Battery 4. Quick Start Guide 5. Safety and Warranty information 6. LCD sticker 7. Protective Film with alcatel logo (For LATAM by default) • Accessories depend on countries. • Only use the alcatel batteries, chargers, and accessories included along with your device. -
Page 58: Troubleshooting
Troubleshooting ....Before contacting the service centre, here are some instructions to help you troubleshoot your device: • For optimal operation, fully charge the battery. • To improve the device’s performance, remove unnecessary files or apps on your device. • Update your device's software via the Updates application. - Page 59 • When the device falls into a loop during power on animation and the user interface can't be accessed, press and hold the Power key to reset. This eliminates any abnormal OS booting issues caused by third party applications. • If neither method is effective, reset the device by pressing the Power key and the Volume up key at the same time till the screen light, press the Volume up key to choose the recovery mode.
- Page 60 My device can't charge properly • Make sure that you are using the Alcatel charger that comes with the device. • If your device has a removable battery, make sure that your battery is inserted properly and clean the battery contact if it’s dirty. It must be inserted before plugging in the charger.
- Page 61 When I select a number from my contacts, the number can't be dialled • Make sure that you have correctly recorded the number in your file. • Make sure that you have selected the country code when calling an international number. I can't download new files • Make sure that there is sufficient device storage space for your download.
- Page 62 • Extend the email auto-check interval for as long as possible. • Update news and weather information on manual demand, or increase their auto-check interval. • Exit background-running applications if they are not being used for extended periods of time. • Turn off Bluetooth or Wi-Fi when not in use.
- Page 63 The device doesn't ring when a call or message arrives • Make sure that Do Not Disturb mode is not turned on. Go to Settings > Sound > Do Not Disturb preference. • Press the Volume key to adjust volume. I forget some passwords/codes/keys on device • Perform a factory data reset.
-
Page 64: Specifications
Specifications ....... Processor MT8167D Platform Android Q (10.0) Memory 1G ROM + 32GB RAM Dimensions 176*126.1*11.9mm (LxWxT) Weight 268g Display Touchscreen with 1024x600... - Page 65 Connectivity • Bluetooth BT4.2 • Wi-Fi 802.11b/g/n • 3.5 mm audio jack • micro-USB Camera • 2 megapixel back camera • 2 megapixel front camera Audio supported WAV,MP3, MP2, AAC, AMR-NB, formats AMR-WB, MIDI, Vorbis, APE, AAC- plus v1, AAC-plus v2, FLAC, WMA, ADPCM Battery • Rechargeable Lithium-ion battery...
-
Page 66: Licences
TCL Communication Ltd. and its affiliates is under licence. Other trademarks and trade names are those of their respective owners. Alcatel 9317G Bluetooth Declaration ID D047838 The Wi-Fi Logo is a certification mark of the Wi-Fi Alliance. - Page 67 TCL Communication Ltd. You may download the source codes from http:/ / sourceforge.net/projects/alcatel/files/. The provision of the source code is free of charge from the internet. We hereby point out that the end user warranty for infringement IPR is solely limited to the EU.
Need help?
Do you have a question about the TKEE MINI and is the answer not in the manual?
Questions and answers