Table of Contents
Advertisement
Quick Links
Advertisement
Table of Contents

Related Manuals for Bartscher IKF 72-2Z


Summary of Contents for Bartscher IKF 72-2Z
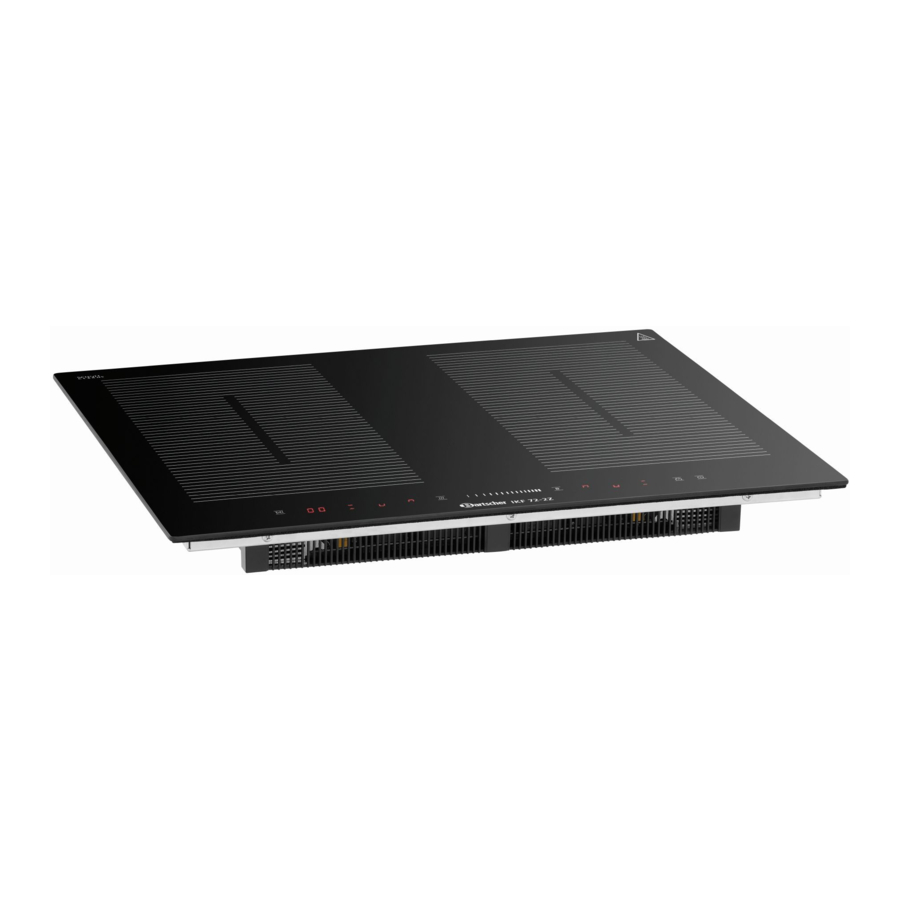
- Page 1 IKF 72-2Z 105862...
- Page 2 Bartscher GmbH Phone: +49 5258 971-0 Franz-Kleine-Str. 28 Fax: +49 5258 971-120 Technical Support Hotline: +49 5258 971-197 D-33154 Salzkotten Germany www.bartscher.com Version: 1.0 Date of preparation: 2020-09-08...
-
Page 3: Table Of Contents
Original instruction manual Safety ......................2 Explanation of Signal Words ..............2 Safety instructions..................3 Intended Use ................... 7 Unintended Use ..................7 General information ..................8 Liability and Warranty ................8 Copyright Protection ................8 Declaration of Conformity ................ 8 Transport, Packaging and Storage .............. -
Page 4: Safety
Safety Diese Bedi enungsanlei tung besc hrei bt di e Installation, Bedi enung und Wartung des Geräts und gilt als wic htige Infor mationsquelle und N achschl agewer k. Di e Kenntnis aller enthaltenen Sic herheits hi nweis e und H andlungs anweisungen schafft die Vorauss etz ung für das sichere und s ac hger echte Ar beiten mit dem Gerät. D arüber hi naus müs sen die für den Ei ns atz ber eic h des Geräts geltenden ör tlichen Unfall verhütungs vorsc hriften und allgemeinen Sicherheits besti mmungen eing ehalten wer den. Dies e Bedi enungs anleitung is t Bes tandteil des Produkts und muss i n unmi ttelbarer N ähe des Ger äts für das In¬s tall ations-, Bedi enungs-, Wartungs- und R einigungspers onal jederzeit z ugänglich auf¬bewahrt werden. Wenn das Ger ät an eine dritte Pers on weiterg egeben wird, muss die Bedi enungsanlei tung mit ausgehändigt wer den. -
Page 5: Safety Instructions
Safety WARNING! The signal word WARNING warns against hazards that may lead to moderate or severe injuries or death if the hazards are not avoided. CAUTION! The signal word CAUTION warns against hazards that may lead to light or moderate injuries if the hazards are not avoided. , di e IMPORTANT! The signal word IMPORTANT indicates possible property damages,... - Page 6 Safety • Always completely unwind the power cord. • Never place the appliance or other objects on the power cord. • Always take hold of the plug to disconnect the appliance from the power supply. • Check the power cord regularly for damage. Do not use the appliance if the power cord is damaged.
- Page 7 Safety • In order to avoid overheating, do not place any aluminium foil or metal plates on the heating surface of the appliance. • Do not heat up sealed containers, e.g. canned food, on the heating area of the induction cooker. Resulting overpressure may cause explosion (rupture) of a container or a can.
- Page 8 Safety Supervised Usage only • Only supervised appliance may be used. • Always remain in an immediate vicinity of the appliance. Halten Sie Verpac kungsmateriali en und Styropor teile von Ki ndern fern. Si e können sich darin verfangen und erstic ken. Operating personnel •...
-
Page 9: Intended Use
Safety Intended Use As described below, every use of the appliance for a purpose differing and/or diverging from its intended standard use, is prohibited and considered to be an unintended use. The following is an intended use: – Preparing and heating-up foods with the use of suitable cookware. Unintended Use An unintended use may lead to personal injuries or property damages caused by hazardous voltage, fire or high temperature. -
Page 10: General Information
General information General information Liability and Warranty All information and instructions in this instruction manual account for legal regulations in force, current level of technical engineering knowledge as well as our expertise and experience, developed over the years. If special models or additional options are ordered, or state-of-the-art technical solutions were implemented, the actual scope of delivery of the appliance may, in some circumstances, differ from descriptions and numerous drawings in this instruction manual. -
Page 11: Transport, Packaging And Storage
Transport, Packaging and Storage Transport, Packaging and Storage Delivery Check Immediately upon reception, check the delivery for completeness and possible shipping damage. In the case of visible transport damage refuse to accept the appliance or accept it conditionally. Mark and note the scope of damage in shipping documents/consignment list of the shipping company and lodge a complaint. -
Page 12: Technical Data
Technical Data Technical Data Technical Specifications Name: Induction hob IKF 72-2Z 105862 Art. No.: Material: aluminium, plastic Heating plate material: SCHOTT CERAN® Number of hobs / induction zones: 4 / 2 Glass hob dimensions (W x D), in mm: 590 x 520... -
Page 13: List Of Components Of The Appliance
Technical Data • Regulation of: output, temperature, time • Timer • Cookware detection • Pause function • Booster function • Lock key (child safety lock) • Digital display • Overheating protection • ON/OFF switch • Indicator lights: ON/OFF, power, temperature, time List of Components of the Appliance Fig. -
Page 14: Functions Of The Appliance
Installation and operation Functions of the Appliance The output of 7.2 kW power may be divided as preferred: to 4 hobs or to 2 induction zones. Owing to this, you may make full use of the induction zone, using cookware of different sizes and shapes. - Page 15 Installation and operation • Place the appliance in a way making the connections easily accessible, so that they may be quickly disconnected if such a need arises. • The appliance should be placed on surfaces that are: – even, with sufficient bearing capacity, resistant to water, dry and resistant to high temperatures;...
- Page 16 Installation and operation Preparation 1. Cut the opening in the worktop table board according to data provide in the figure and table below. 2. During installation, leave at least 50 mm clearance around the opening. Fig. 2 L (mm) W (mm) H (mm) D (mm) A (mm) B (mm)
- Page 17 Installation and operation NOTE! A safe distance between the hob and a cupboard above the hob should be at least 760 mm. Fig. 3 A (mm) B (mm) C (mm) D (mm) E (mm) min. 50 min. 20 Air inlet Air outlet 5 mm Table 2...
- Page 18 Installation and operation 5. After installation, fix the heating plate to the work surface using 4 bolts at the bottom side of the heating plate (see Fig. 5). Adjust the position of the bracket to actual thickness of the worktop table. Fig.
-
Page 19: Operation
Installation and operation Connection — Electrical Power • Verify if the technical specification of the appliance (see the rating plate) correspond to the local electricity grid. • Electrical connection of the appliance to mains power supply must be executed by a qualified electrician, according to international, national and local regulations in force. - Page 20 Installation and operation Suitable Cookware • Iron cookware • Enamelled iron cookware • Steel or enamelled cast iron pots/pans • Cast iron pots/pans • Cookware made of 18/0 stainless steel and aluminium if marked as suitable for induction (mind the description of the cookware) Due to a specific way the induction plate operates, only cookware with a bottom subject to magnetization is suitable.
- Page 21 Installation and operation Before Use 1. Before use, clean the appliance, observing instructions in section 6 'Cleaning'. 2. Dry the appliance thoroughly. 3. Place an appropriate cookware with food on the selected hob or induction zone. 4. Execute the required settings according to indications below. Division of power between hobs/heating zones 1.
- Page 22 Installation and operation • The control elements response to a touch, without the need to press them. • Use the pad of your finger, not the tip of the finger. • Each time a touch is registered, an acoustic signal sounds. •...
- Page 23 Installation and operation When the hob is selected, the '0' indicator blinks. 4. Set the cooking level in the range of 1–9 by swiping with your finger over the control range field, until the required cooking level is displayed in cooking zone selection. Cooking level 1 = the lowest level Cooking level 9 = the highest level 5.
- Page 24 Installation and operation 3. Switch the entire heating plate off by touching the ON/OFF key Careful — hot surfaces! indicates, which hob is hot. The indicator goes off when the surface cools down to a safe temperature. This function may be used for the purpose of energy saving if you want to heat up another cookware piece.
- Page 25 Installation and operation Booster Function De-Activation 1. In the cooking zone selection field, touch the symbol for the previously selected hob to disrupt usage of booster function. – Via another touching of the booster function key , the original setting of the hob is restored.
- Page 26 Installation and operation 2. Touch the warm-keeping function key In the cooking zone selection field, ' will be displayed for the selected hob. Warm-Keeping Function De-Activation 1. Touch the selected hob in the cooking zone selection field. By swiping with your finger over the control range field, revert the setting to the selected cooking level.
- Page 27 Installation and operation Examples of correct and ineffective distribution of cookware on heating zones. Usage as one large heating zone 1. To activate an induction zone as one large heating zone simply touch the right symbols in the cooking zone selection field.
- Page 28 Installation and operation Control Elements Locking/Unlocking Control elements may be locked to prevent accidental usage (e.g., accidental operation of hobs by children). Methods of control elements locking: 1. Touch the lock key The timer indicator displays 'L'. Methods of control elements unlocking: 1.
- Page 29 Installation and operation Using Timer As a Minute Timer 1. Make sure the heating plate is switched off. NOTE! The minute timer display may be used also when no hob/heating zone has been selected. 2. Touch the control range field. The digital display shows '10', and '0' blinks.
- Page 30 Installation and operation 2. Touch the control range field. The digital display shows '10', and '0' blinks. 3. Set the time (e.g., 6) by swiping with your finger over the control range field. 4. Touch the control range field. In the digital display, '1' blinks. 5.
- Page 31 Installation and operation Setting A Number of Hobs To set the time for a number of hobs, perform the same steps as in the case of setting the time for one hob. With concurrent setting of time for a number of hobs, a decimal point for respective hobs is activated.
- Page 32 Installation and operation Automatic Switch-Off / Standard Operating Hours Automatic switch-off is a safety feature of the induction plate. It switches off automatically if user forgets to switch the appliance off. Standard operating hours for various cooking levels are listed in the below table: Warm- Cooking level keeping...
- Page 33 Installation and operation Cooking Level Settings The following settings should be considered guidelines only. Precise setting depends on many factors, including the used cookware piece and the amount of food that is being prepared. With the trial and error method, operate the induction plate to find settings that best suit the selected dishes.
-
Page 34: Cleaning
Cleaning Cleaning Safety Instructions for Cleaning • Before cleaning, disconnect the appliance from the power supply. • Leave the appliance to cool down completely. • Make sure water does not enter the appliance. Do not immerse the appliance in water or other liquids during cleaning. Do not clean the appliance with a pressurized water jet. - Page 35 Cleaning 6. Food residues, which reached the heating plate during boiling over or that melted on the plate, as well as food residues containing sugar should be removed immediately, as soon as possible. It may be difficult to remove them from cooled-down heating plate, and the glass surface may even be permanently damaged.
-
Page 36: Indications And Tips
Indications and Tips Indications and Tips Problem Possible Cause To-Do The appliance Appliance is not connected Connect the appliance to the cannot be switched to the power supply. power supply and switch it Appliance is not switched on. Check the electric power supply. - Page 37 Indications and Tips Problem Possible Cause To-Do Some pans/pots This is caused by the This is normal in the case of make crashing or structure of cookware: layers some cookware adapted to clicking sounds. made of various metals induction plates and is not vibrate differently.
-
Page 38: Possible Malfunctions
Possible Malfunctions Possible Malfunctions Mögliche The table below contains descriptions of possible causes and solutions to malfunctions or errors during operation of the appliance. When malfunction cannot be removed, contact the technical service. Error Code Cause Solution LED indicators No power supply. Check the electric power are not lit. - Page 39 Possible Malfunctions Error Code Cause Solution Heating is Unsuitable cookware. Use suitable cookware. activated during The diameter of the cookware operation and 'u' is too small. blinks in the display panel. Damaged cookware detection Contact the service company. sensor. Overheated heating plate. Switch the appliance off with key and leave it to cool down and restart again.
-
Page 40: Disposal
Disposal Error Code Messages Error Code Cause Solution F1–F6 Defective temperature sensor. Contact the service company. F9–FA IGBT error temperature Contact the service company. sensor. Connection between the display Contact the service company. panel and the main plate unsuccessful. E1/E2 Incorrect supply voltage.
Need help?
Do you have a question about the IKF 72-2Z and is the answer not in the manual?
Questions and answers