Salus iT500 Full User Manual
Hide thumbs
Also See for iT500:
- Instruction manual (74 pages) ,
- User manual (29 pages) ,
- Installer manual (28 pages)
Table of Contents
Advertisement
Advertisement
Table of Contents

Related Manuals for Salus iT500


Summary of Contents for Salus iT500
- Page 1 - FULL USER MANUAL...
-
Page 2: Table Of Contents
3.1 LCD icon description ..................................15 3.2 Button description ..................................15 3.3 iT500RX receiver switch functions ...............................16 3.4 Inserting the batteries in the iT500 Thermostat ..........................17 3.5 First power up sequence ................................18 4. The pairing processes of the iT500 devices .........................19 4.1 Pairing iT500TR with iT500RX receiver ............................19 4.2 Pairing iT300 (additional second zone sensor) with iT500TR thermostat ..................20... - Page 3 8. Operating in OFFLINE MODE ............................39 8.1 Operating modes ..................................39 8.2 Setpoint temperature change (manual mode) ..........................39 8.3 Schedule mode ....................................40 8.3.1 Schedule mode for heating zone .........................40 8.3.2 Schedule mode for hot water system ........................41 8.3.3 Default schedules ...............................42 8.4 Temporary override mode ................................43 8.5 Key lock function ...................................43...
-
Page 5: Introduction
1. Introduction 1.1 Product Compliance This product complies with the essential requirements and other relevant provisions of Directives 2014/53/EU and 2011/65/EU. The full text of the EU Declaration of Conformity is available at the following internet address: www.saluslegal.com. 1.2 Safety Informations •... -
Page 6: Product Overview
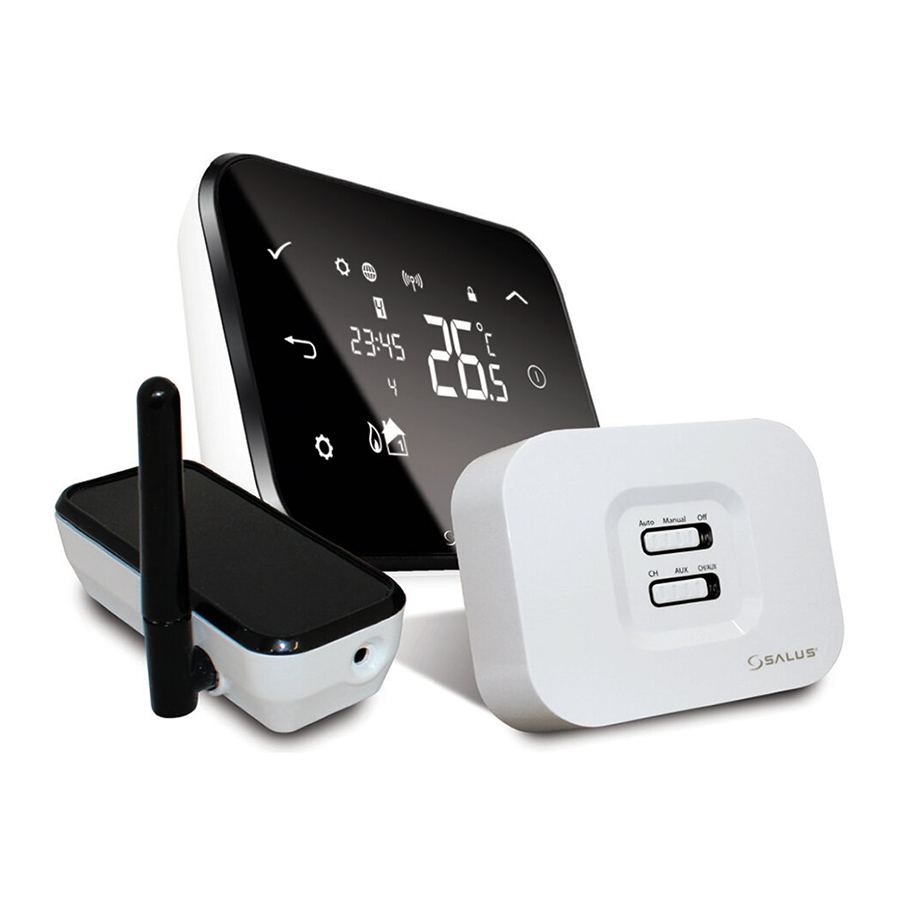
2. Product Overview The SALUS iT500 is an internet thermostat that gives you complete freedom to manage the ambient temperature levels in your home, even when you are not physically at home. IT500 allows to control home temperature through the device or via Internet (mobile app). -
Page 7: Package Content
2.1 Package content 1) iT500TR Thermostat 2) iT500RX Receiver 3) iTG500 Gateway 4) Optional Stand 5) ADSL Cable 6) iTA500 Power adaptor 7) Fixing screws & plugs 8) Wall mount bracket 9) Wall-box cover 2.2 Proper thermostat location Please note: The ideal position to thermostat mounting is about 1,5m under floor level far from heating or cooling sources. -
Page 8: Connection Description
2.3 Connection Description 2.3.1 Wiring diagrams for single heating zone A - Boiler control Hydraulic diagram: Electric diagram: AC 230V iT500TX OUTPUT iT500RX 2 x AA ON / OFF B - Pump control in radiator heating system Hydraulic diagram: Electric diagram: AC 230V iT500TX OUTPUT... -
Page 9: Wiring Diagrams For Single Heating Zone And Hot Water Timer
2.3.2 Wiring diagrams for single heating zone and hot water timer A - Boiler (radiator system) and hot water pump control TIMER Hydraulic diagram: AT10F ON / OFF Electric diagram: AC 230V iT500TX OUTPUT OUTPUT iT500RX 2 x AA AT10F (input) RM-16A Legend:... - Page 10 B - Radiator system pump and hot water pump control (pumps parallel operation or with DHW priority) Hydraulic diagram: TIMER AT10F Electric diagram: Parallel operation of pumps: AC 230V iT500TX OUTPUT OUTPUT iT500RX 2 x AA AT10F...
- Page 11 DHW priority: AC 230V OUTPUT iT500TX OUTPUT iT500RX 2 x AA AT10F Legend: Symbols explanation: L, N - power supply 230V Buffer / Coupler Radiator heating NO, COM, NC - voltage-free output - fuse Pump Hot water tank DHW immersion AT10F thermostat...
-
Page 12: Wiring Diagrams For Two Heating Zones
2.3.3 Wiring diagrams for two heating zones Hydraulic diagram: II zone I zone ON / OFF Hydraulic diagram: II zone I zone ON / OFF... - Page 13 Hydraulic diagram: II zone I zone ON / OFF Hydraulic diagram: II zone I zone ON / OFF...
- Page 14 Electric diagram: AC 230V iT300 2 x AAA (input) OUTPUT OUTPUT (input) (output) iT500RX RM-16A (input) (input) (output) iT500TX RM-16A 2 x AA * Relays RM-16A No. 1 and No. 2 are used only when we want to control the boiler (ON / OFF). Then connect the relay output contacts to the boiler in the place intended for connecting the room thermostat.
-
Page 15: Montage
After first ensuring that the bracket Once clipped into place, ensure the to a suitable wall using the fittings is secure, clip the iT500 into place by unit is securely seated on the bracket. supplied and the built in spirit level. -
Page 16: Before You Start (First Power Up)
3. Before you start (first power up) 3.1 LCD icon description 1. Settings indicator 12. Frost protection mode 2. Internet connection indicator 13. Hot water heating 3. RF signal indicator 14. Hot water indicator 4. Low battery status 15. Cooling mode indicator (zone 2) 5. -
Page 17: It500Rx Receiver Switch Functions
3.3 iT500RX receiver switch functions 1. AUTO - receiver operate in automatic mode (works according to thermostat or app) 2. MANUAL - receiver operate according to the switch located below 3. OFF - receiver is disabled 4. CH - in manual mode, zone 1 is turned ON 5. -
Page 18: Inserting The Batteries In The It500 Thermostat
3.4 Inserting the batteries in the iT500 Thermostat Remove the battery cover from Make a note of the serial number With the unit face down, insert the the base of the iT500 Thermostat. printed inside the base of the first battery supplied into the right iT500 Thermostat. -
Page 19: First Power Up Sequence
...then thermostat will display the The globe icon will appear when software version. the unit automatically connects to the internet via the SALUS iTG500 Gateway. This should take approximately 20 seconds. -
Page 20: The Pairing Processes Of The It500 Devices
4. The pairing processes of the iT500 devices 4.1 Pairing iT500TR with iT500RX receiver PLEASE NOTE! iT500TR THERMOSTAT IS NOT FACTORY PAIRED WITH THE iT500RX RECEIVER! Use a thin object (such as a paper The bottom switch will show a... -
Page 21: Pairing It300 (Additional Second Zone Sensor) With It500Tr Thermostat
3 sec. pairing process. Please note the red LED on the iT300 can continue to flash and eventually timeout. iT500 has successfully paired with Press to return iT300 when the antenna stops to the home screen. flashing. -
Page 22: About It500 Plus Application
5. About iT500 PLUS application Download the iT500 Plus app, create an account and register your device. Follow the on screen instructions to complete all the steps. Features available only on the App: iT500 Plus • HOLIDAY mode • Frost protection temperature setpoint change •... -
Page 23: Registration In The App
5.2 Registration in the app Tap register to create Enter email and password, Enter the code you received Fill all forms and tap Next. a new account. tap Next. via email. Enter the STA device code Please refer to chapter 3.4 how to Your device appears on the Name the device (max. - Page 24 Tap anywhere on tile to enter Thermostat interface in the thermostat interface. schedule mode. When the thermostat is connected to the App, the icon will appear on the App screen and the icon will appear on the thermostat screen. For easier start you can use app “Tutorial”, which is available in the menu. Please see steps below: Tap menu icon.
-
Page 25: Operating In Online Mode (By App)
6. Operating in ONLINE MODE (by app) 6.1 General informations When you first enter the application thermostat will automatically display settings page to force on the user to enter main parameters (such as time zone, operation algorithm, heat/cool mode etc.) Then app will go to home screen and will display the room temperature and setpoint temperature (it will operate in Manual mode as default). -
Page 26: App Interface Of The Thermostat For Dhw Control
6.3 App interface of the thermostat for DHW control Thermostat name Menu button 1 zone/Hot Water switch Hot water active/inactive indicator Boost mode (for 1, 2 or 3 hours) One-time activation of Hot water ON permanently DHW from 06:00 to 20:00 Schedule Mode Hot water OFF permanently Next / current event... -
Page 27: Thermostat Modes
6.4 Thermostat modes 6.4.1 Schedule mode for heating zone By default thermostat is in Manual Mode. Switch to Schedule Mode to programm a schedule. Note that there are 3 types of schedules. Each schedule consist 6 time intervals: • 5+2 (separate schedule for working days and separate schedule for weekends) •... -
Page 28: Schedule Mode For Hot Water System
6.4.2 Schedule mode for hot water system For hot water system there are 3 types of schedules. Each schedule consist 6 time intervals: • 5+2 (separate schedule for working days and separate schedule for weekends) • INDIVIDUAL (separate schedules for each day) •... -
Page 29: Temporary Override Mode
6.4.3 Temporary override mode To temporarily override a setpoint temperature, thermostat must be in schedule mode. Set new setpoint temperature using slide button. Thermostat will keep new setpoint until the next change forced by schedule. See the pictures below: Change the temperature Thermostat has temporary setpoint during active overridden the temperature... -
Page 30: Frost Protection Mode
6.4.5 Frost protection mode In frost protection mode the thermostat is displaying actual room temperature and maintain „frost protection” setpoint temperature specified in thermostat settings. When thermostat works in frost protection mode then you have no possibilities to change temperature setpoint. To activate Frost protection mode online please followe steps below: Frost Protection ON Frost Protection OFF... -
Page 31: Thermostat App Settings
6.5 Thermostat app settings 6.5.1 Clock format, time zone and DST setting Note: Time and date will be automatically added once you connected to the internet. What you have to do manually, though, is to select your temperature format, clock format and time zone. This can be easily done by following these steps: Tap menu icon. -
Page 32: Heat/Cool Mode Change (App)
6.5.2 Heat/Cool mode change (app) IT500 thermostat can be used for heating systems or for cooling systems. Heating mode is default but there is possible to change mode to cooling. Before mode change make sure your system is appropriately adjusted. - Page 33 Changing to Heat Mode Tap menu icon. Go to settings. Select Heat Mode. Tap Save. Using the cursor, set the The Flame icon will turn The heat mode icon will appear on temperature. orange and animated the LCD next to house icon, meaning meaning the thermostat that thermostat is calling for heat.
-
Page 34: Holiday Mode
6.5.3 Holiday mode You can set your iT500TR to holiday mode. During this mode, the thermostat will run like in Frost Protection Mode but for specified amount of time. When activated, a suitcase icon appears on the display of your device. You can set Holiday mode from the App only. It can be set for maximum 31 days. Tap menu icon. -
Page 35: Factory Reset (Removing Thermostat From The App)
6.5.5 Factory Reset (removing thermostat from the app) To make thermostat factory reset and remove it from the iT500 Plus App please follow steps below: Tap Yes. Tap menu icon. Go to Manage devices. Tap delete. After that you will need to add and set your thermostat all over again. -
Page 36: Installation In Offline Mode
The system type is individually adjusted to your system configuration. It will be set by your installer and should only be changed by your installer. One central heating zone One central heating zone plus Two central heating only. hot water. zones. iT500 Display iT500 Display iT500 Display Smartphone Display Smartphone Display Smartphone Display (ONLINE MODE) -
Page 37: System Configuration Selection
7.2 System configuration selection This menu should only be entered by the installer as changes can have a detrimental effect on your heating system. At any time press for return to the previous step or hold for 5 seconds to return to the home screen. Press the power button Press and hold Press... - Page 38 Press button Press button to select temperature unit. to select time zone (GMT). Press button to confirm. Press button to confirm. GMT+1 Hour GMT+2 Hour GMT+3 Hour AUSTRIA BELGIUM ESTONIA BULGARIA RUSSIA* IRELAND POLAND DENMARK TURKEY LITHUANIA PORTUGAL GERMANY SWEDEN CYPRUS BELARUS* ICELAND*...
-
Page 39: Operating In Offline Mode
8. Operating in OFFLINE MODE 8.1 Operating modes Permanent manual mode - automatic mode - antifrost mode 5°C (works according to the schedule) (changing temperature is avaible only through the app) AUTO Press the power button Press button Press and hold to highlight the display. -
Page 40: Schedule Mode
In iT500 thermostat you can define 6 schedule programs per day. You can set different temperature level for each program. While programming specific time interval you must be aware that you are about to set at what time the program will start. For example, if you set program 1 for 6:00 (AM) it means the program is going to run at 6:00 (AM) and will running till the time set for next program. -
Page 41: Schedule Mode For Hot Water System
8.3.2 Schedule mode for hot water system Note: In program schedule for hot water system (HW) you can set 3 schedule programs per day. For each HW program you must define the time of start and the time of the end. 1 DAY ON MODE Press the power button Press... -
Page 42: Default Schedules
8.3.3 Default schedules Your iT500 comes with pre-set default program schedules like shown below. Central Heating PROGRAM WEEKDAY (1 to 5) WEEKDAY (6 to 7) Time 22:00pm Time 22:00pm Setpoint Temp 17ºC Setpoint Temp 17ºC Time 6:00am Time 6:00am Setpoint Temp 22ºC Setpoint Temp 22ºC... -
Page 43: Temporary Override Mode
8.4 Temporary override mode When thermostat is running schedule mode we can temporarily override it by setting new setpoint temperature. Press the power button Press button Press button to confirm. to highlight the display. to change temperature. Temperature will be overridden until the next program change. You can cancel temporary override by holding button for 3 seconds. -
Page 44: User Settings
8.6 User settings 8.6.1 Setting the time and date When connected to the internet, the iT500 will set time and date automatically. However this can also be set manually. Press and hold button. Press button to confirm. Press again button to change value. -
Page 45: Time Zone Selection
8.6.3 Time zone selection Assign the proper time zone to your thermostat. Press the power button Press and hold Using button search time zone to highlight the display. buttons for 3 sec. selection option. Confirm by button. buttons to Thermostat will go to the next change zone. -
Page 46: Hysteresis (Span) Setting
8.6.5 Hysteresis (SPAN) setting To set the proper hysteresis value, please follow steps below: Press the power button Press and hold Using button search SPAN to highlight the display. buttons for 3 sec. option. Confirm by button. buttons to set Thermostat will go to the next hysteresis value. -
Page 47: Thermostat Calibration (Offs)
9. Error codes Error code will appear only when iT500TR thermostat is set for two zones operation and iT300 sensor is not paired or distance between iT500 and iT300 is too big and connection is broken. The following error will then be displayed on the thermostat screen and in the app:... -
Page 48: Temperatures Outside Operating Range
10. Temperatures outside operating range Temperatures below 10 °C are displayed without the leading ‘0’ . Temperatures exceeding the measurable range will be indicated by ‘HI’ for temperatures above the upper limit, and ‘LO’ for temperatures below the lower limit, as shown in the images. Thermostat view: App view („Lo”... -
Page 49: Cleaning And Maintenance
There are no user serviceable parts within the unit; any servicing or repairs could only be carried out by Salus Controls or their appointed agents. 12. Technical Informations... -
Page 50: Warranty
13. Warranty SALUS CONTROLS warrants this product to be free from any defects in material or workmanship and to perform as specified for a period of five years from the date of installation. SALUS CONTROLS reserves the sole responsibility for breach of this warranty by repairing or replacing the defective product. This product includes software that matches the distributor’s identification at the time of sale. - Page 52 SALUS Controls is a member of the Computime Group. Maintaining a policy of continuous product development SALUS Controls plc reserve the right to change specification, design and materials of products listed in this brochure without prior notice. Ver. 8 Issued: 05 II 2021 Soft version: 11.6...
Need help?
Do you have a question about the iT500 and is the answer not in the manual?
Questions and answers