Table of Contents
Advertisement
Quick Links
Advertisement
Table of Contents

Related Manuals for Bristan IRSD1-CP


Summary of Contents for Bristan IRSD1-CP
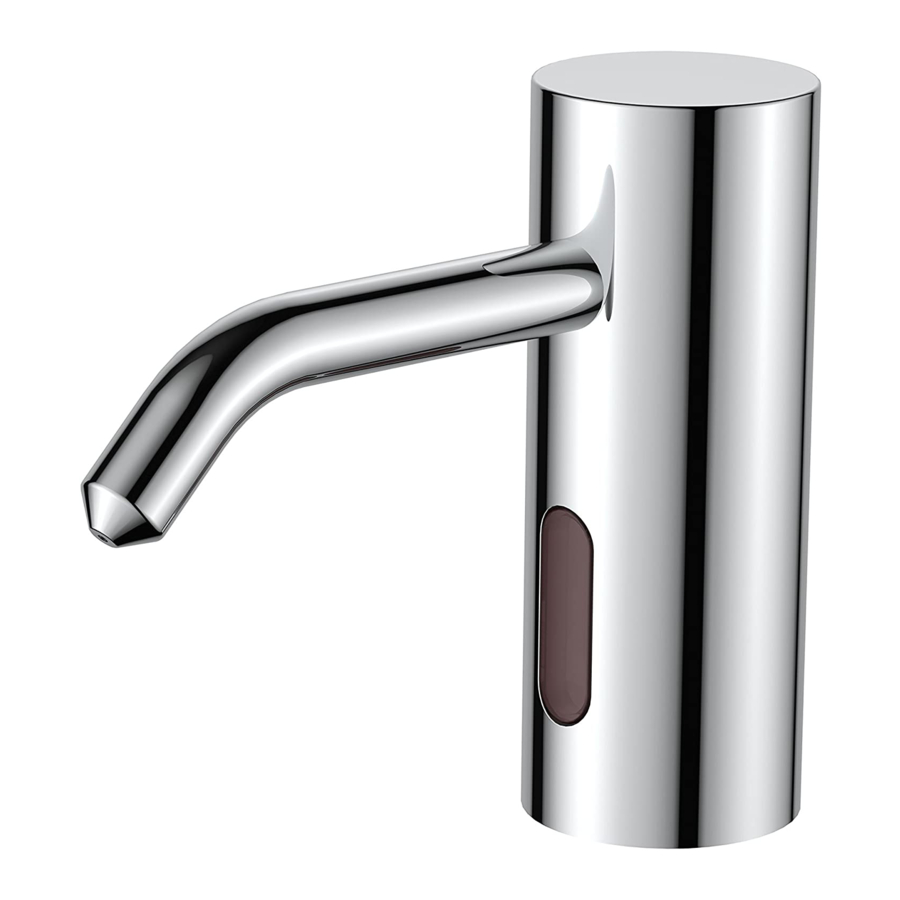
- Page 1 Installation Instructions and User Guide Infrared Automatic Soap Dispensor Models covered: IRSD1-CP, IRSD1-BN, IRSD1-BZ Please keep this booklet for future reference. Installer, when you have read these instructions please ensure you leave them with the user.
-
Page 2: Table Of Contents
All products manufactured and supplied by Bristan are safe and comply to legislative requirements. Providing they are installed correctly and receive regular maintenance in accordance with these instructions your user experience will not be affected. -
Page 3: Important Safety Information
Important Safety Information • Please read these instructions thoroughly and retain for future use. • All products manufactured and supplied by Bristan are safe provided they are installed, used correctly and receive regular maintenance in accordance with these instructions. • If you are in any doubt about your ability to install this product safely you must employ the services of an experienced qualified plumber. -
Page 4: Product Features
Product features More Hygienic The proximity sensor removes the need to touch the spout, reducing the spread of germs and reducing the chance of cross infection. Battery Override Your infrared soap dispenser is supplied with a back up battery pack. In the event of a power failure, the product will automatically switch to battery operated mode to ensure the spout... -
Page 5: Installation Requirements
If the supply cord is damaged, it must be The wire which is coloured blue must replaced by a genuine Bristan supply cord. be connected to the terminal which is Contact Bristan Customer Services on marked with the letter ‘N’ or is coloured 0844 701 6273 to request new spare parts. -
Page 6: Installation
Installation 1. Fit The Spout Fit the spout to the sink / basin ensuring the dispensing cable and sensor cable are threaded through the hole in the sink / basin. 2. Secure Spout to Sink / Basin Screw the metal backnut onto the thread of the spout upto the underside of the sink / basin. - Page 7 Installation - cont. 4. Attach Pump to Bottle Ensure the dispenser tube is located inside the bottle and push the pump down firmly onto the bottle until a loud ‘click’ is Pump heard. To remove the pump from the bottle press the release button in on the side of the pump and pull the pump from the bottle.
- Page 8 Installation - cont. 7. Connect Power Supply Cable Before starting any electrical work ensure the power supply is isolated. Wire the electrical power cable into a switched fused spur off the ring main. The blue wire should be wired to the neutral connection and the brown wire should be connected to the live connection.
-
Page 9: Commissioning
Commissioning Commissioning Sequence Before using the soap dispenser for the first time the following sequence must be carried out. Fill the bottle full of liquid soap. Refer to Dispense specification section on page 3 for the Button correct liquid soap to be used. Locate the dispense button on the side of the pump. -
Page 10: Operation
Operation Using the Automatic Soap Dispenser Place the users hands under the spout within the sensing range. Once the users hands have been detected a small amout of liquid soap will be dispensed from the spout into the users hands. Note: The sensing range 0-8cm from the sensor. -
Page 11: Maintenance
Maintenance This symbol on the product or packaging General Cleaning indicates that this product should not be Your fitting has a high quality finish and disposed of with your other household should be treated with care to preserve waste. Instead, it is your responsibility to the visible surfaces. -
Page 12: Troubleshooting
Troubleshooting Symptom Cause Remedy Spout does not Senor cable not connected. Check that the sensor cable is dispense soap. connected. If not connected, connect sensor cable. Refer to ‘Installation’ section on pages 6-8. Possible blockage in dispense Remove pump from bottle and tube or dispense cable. - Page 13 Troubleshooting - cont. Symptom Cause Remedy Sensor light not Sensor light faulty. Contact Bristan Customer working. Services on 0844 701 6273. Batteries are exhausted. Replace batteries. Short cycles of Incorrect batteries fitted. Replace batteries. Ensure batteries. batteries are 1.5V AA (LR6) Alkaline batteries (preferably =>2000mAh) for good battery life.
-
Page 14: Guarantee
Guarantee At Bristan, we want to make things as • Repair under this guarantee does not easy as possible for our customers. extend the original expiry date. The That’s why we design products that are guarantee on any replacement parts or... - Page 15 ‘phone or with a spare part, then we’ll guarantee period, contact Bristan Care send out one of our Bristan Care Customer Service on 0844 701 6273 with engineers to take a look. Bristan Care...
- Page 16 Part Number: FI Infrared Soap Issue: D2 Useful contact details: Customer Service: 0844 7016273 Bristan Group Ltd. Customer Service Email: Birch Coppice Business Park Customercare@bristan.com Dordon Tamworth Customer Service Fax: Staffordshire 0844 7016275 B78 1SG Reception: Web: www.bristan.com 0844 7016274 Email: enquire@bristan.com...
Need help?
Do you have a question about the IRSD1-CP and is the answer not in the manual?
Questions and answers