Table of Contents
Advertisement
Quick Links
Advertisement
Table of Contents

Related Manuals for Bristan Acute AE 1/2 C


Summary of Contents for Bristan Acute AE 1/2 C
- Page 1 Installation Instructions Acute Tap Range Models covered: AE 1/2 C, AE BASNW C, AE 3/4 C, AE BF C, AE BSM C Please keep this booklet for future reference. Installer, when you have read these instructions please ensure you leave them with the user.
-
Page 2: Table Of Contents
Contents Thank you for choosing Bristan, the UK’s leading taps and showers expert. We have designed this product with your enjoyment in mind. To ensure that it works to its full potential, it needs to be fitted correctly. These fitting instructions have been created to give you all of the information you need and, if you need any further help, please do not hesitate to contact us. -
Page 3: Important Safety Information
Important Safety Information • Please read these instructions thoroughly and retain for future use. • All products manufactured and supplied by Bristan are safe provided they are installed, used correctly and receive regular maintenance in accordance with these instructions. •... -
Page 4: General Specifications
General Specifications Operating pressure range: Minimum 0.2 bar, Maximum 5.0 bar. Maximum static pressure: 10.0 bar. Note: Nominally equal (balanced) inlet supply pressures are recommended for optimum performance with mixer taps. Designed to comply with BS EN 200 for single taps / combination taps and BS EN 817 for single lever mixers, for water systems of type 1 and 2 general technical specifications and to be used within systems designed to BS 6700. -
Page 5: Installation Requirements
Installation Requirements These fittings need to be installed in accordance with the following Installation Requirements and Notes (IRN) to ensure they meet the requirements of the Water Supply (Water Fittings) Regulations 1999 and the Scottish Byelaws 2004. IRN R001 (1/2” Basin Taps, 3/4” Bath Taps, Basin Mixer, Bath Filler, Bath Shower Mixer) See text of entry for Installation Requirements or Notes. - Page 6 Installation Requirements Flexible Connecting Pipes See below for recommended ways to fit the Care must be taken when connecting the flexible connecting pipes. flexible connection pipes to the household pipework to ensure they do not bend sharply and kink or twist. Slight 90°...
-
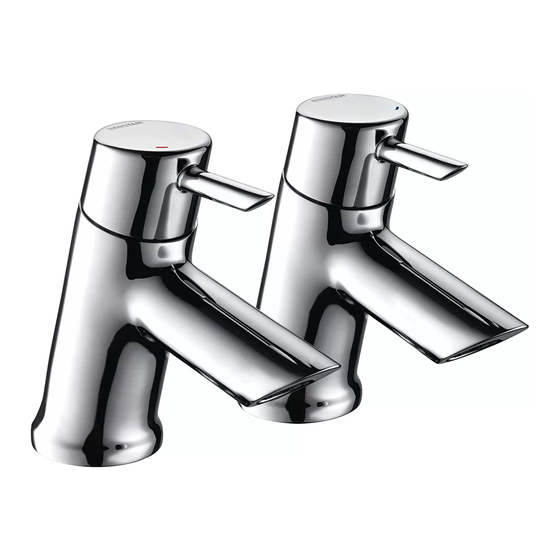
Page 7: Basin Taps
Basin Taps - Dimensions Dimensions are nominal and in millimetres. 15mm Compression fitting with integral isolation valve... -
Page 8: Basin Taps - Installation
Basin Taps - Installation Before installation Flush through the pipework to ensure 10mm hexagonal removal of debris. Turn off mains water supply and close any isolating valves. 1. Attach push-fit connectors Place the ‘push-fit connectors’ into the holes in the basin top, ensure the rubber Push-fit ‘O’... - Page 9 Basin Taps - Installation 4. Fit the tap body Remove the cover caps and grease the push-fit connectors using the sachet of grease provided. Push-fit the tap body onto the connectors. Align the body and tighten both grub screws at the rear of the body using the long end of the 2.5mm hexagonal key as shown below until finger tight.
-
Page 10: Bath Taps
Bath Taps - Dimensions Dimensions are nominal and in millimetres. 22mm Compression fitting with integral isolation valve... -
Page 11: Bath Taps - Installation
Bath Taps - Installation Before installation Flush through the pipework to ensure removal of debris. Turn off mains water supply and close any isolating valves. Push-fit connector 1. Attach push-fit connectors ‘O’ ring Place the ‘push-fit connectors’ into the Locating holes in the bath top, ensure the rubber ‘O’... -
Page 12: Bath Taps
Bath Taps - Installation 4. Fit the tap body Remove the cover caps and grease the push-fit connectors using the sachet of grease provided. Push-fit the tap body onto the connector. Align the body and tighten both grub screws at the rear of the body using the long end of the 2.5mm hexagonal key as shown below until finger tight. -
Page 13: Basin Mixer Tap
Basin Mixer Tap - Dimensions Dimensions are nominal and in millimetres. 15mm Compression fitting with integral isolation valve... -
Page 14: Basin Mixer Tap - Installation
Basin Mixer Tap - Installation Before installation Flush through the pipework to ensure hexagonal removal of debris. Turn off the mains water supply and close any isolating valves. 1. Fit push-fit connector Cold Place the ‘push-fit connector’ into the connector hole in the basin top. - Page 15 Basin Mixer Tap - Installation 3. Attach flexible connecting pipes Important: Before connecting the flexible connecting pipes, please refer to the specific installation requirements on connector page 6. Carefully screw the ‘flexible connecting pipes’ into the ‘push-fit connectors’ and turn the integral isolation valves to the 'closed' position as shown on page 6.
-
Page 16: Basin Mixer Tap
Basin Mixer Tap - Installation 5. Fit the tap body Remove the cover cap and grease the push-fit connector using the sachet of grease provided. Push-fit the tap body onto the connector. Align the body and tighten both grub screws at the rear of the body using the long end of the 2.5mm hexagonal key as shown below until finger tight. -
Page 17: Bath Filler
Bath Filler - Dimensions Dimensions are nominal and in millimetres. 22mm Compression fitting with integral isolation valve... -
Page 18: Bath Filler - Installation
Bath Filler - Installation Before installation Push-fit Flush through the pipework to ensure connectors removal of debris. Turn off the mains water supply and close any isolating ‘O’ rings valves. 1. Attach push-fit connectors Locating pins Place the ‘push-fit connectors’ into the holes in the bath top, ensure the rubber ‘O’... - Page 19 Bath Filler - Installation 3. Attach flexible connecting pipes Important: Before connecting the flexible connecting pipes, please refer to Spacer cover caps the specific installation requirements on page 6. Carefully screw the ‘flexible connecting pipes’ into the ‘push-fit connectors’ and turn the integral isolation valves to the ‘closed’...
-
Page 20: Bath Filler
Bath Filler - Installation Turn on the mains water supply and Cold open the isolating valves using a suitable flatblade screwdriver. Operation Move the hot lever to the left and cold lever to the right to adjust the temperature and increase the flow of water. -
Page 21: Bath Shower Mixer
Bath Shower Mixer - Dimensions Dimensions are nominal and in millimetres. ½" 22mm Compression fitting with integral isolation valve... -
Page 22: Bath Shower Mixer - Installation
Bath Shower Mixer - Installation Before installation Push-fit Flush through the pipework to ensure connectors removal of debris. Turn off the mains water supply and close any isolating ‘O’ rings valves. 1. Attach push-fit connectors Locating pins Place the ‘push-fit connectors’ into the holes in the bath top, ensure the rubber ‘O’... - Page 23 Bath Shower Mixer - Installation 3. Attach flexible connecting pipes Important: Before connecting the flexible connecting pipes, please refer to Spacer cover caps the specific installation requirements on page 6. Carefully screw the ‘flexible connecting pipes’ into the ‘push-fit connectors’ and turn the integral isolation valves to the ‘closed’...
- Page 24 Bath Shower Mixer - Installation 5. Attach the showerhead holder Position the showerhead holder on the wall, bearing in mind the different heights of people likely to use the shower and the length of the hose when connected to the mixer.
- Page 25 Bath Shower Mixer - Installation Operation Shower Cold diverter Move the hot lever to the left and knob cold lever to the right to adjust the temperature and increase the flow of water. Pull the shower diverter knob up and twist to divert the water to the showerhead.
-
Page 26: Maintenance
All bath cleaning and holding dirt, which normal cloths powders and liquids will damage the leave behind. Order through your Bristan surface of your fitting, even the non- stockist (order code: ECLOTH). scratch cleaners. - Page 27 Cleaning the Showerhead will determine how often you should clean your showerhead. Build up of scale in Your Bristan showerhead has a rub- particularly hard water areas combined clean pad for easy cleaning. Simply rub with constant use means you may need your fingers across the rubber spray jets to clean your showerhead once a week.
-
Page 28: Map Of Hard Water Regions In The Uk
Hard Water Regions in the UK Hard to very hard Soft to moderately soft Above 200mg/l as 0 - 100mg/l as calcium carbonate equivalent calcium carbonate equivalent Slightly hard to moderately hard 100 - 200mg/l as calcium carbonate equivalent L WN L WN L WN London area postcodes... - Page 29 Notes Please use this space to add any notes you or your installer may have regarding the plumbing system/installation of this product.
-
Page 30: Guarantee
Guarantee Bristan offers solid guarantees to provide *Labour provided by an approved Bristan you with complete peace of mind. engineer. Guarantee only applies to products with a manufacturing fault. A deferred Taps and Mixers payment will be necessary in order to secure 5 year parts and 1 year labour*. -
Page 31: Service Policy
Our service staff are fully qualified to advise on correct installation procedures and will be able to diagnose whether the fault will require a replacement part or a visit from a Bristan engineer. - Page 32 Part Number: FI ACUTE RANGE Issue: D2 Bristan Group Ltd. Birch Coppice Business Park Dordon Tamworth Staffordshire B78 1SG Web: www.bristan.com Email: enquire@bristan.com A Masco Company...
Need help?
Do you have a question about the Acute AE 1/2 C and is the answer not in the manual?
Questions and answers