
Related Manuals for Hans Grohe AXOR Urquiola 11901 1 Series


Summary of Contents for Hans Grohe AXOR Urquiola 11901 1 Series
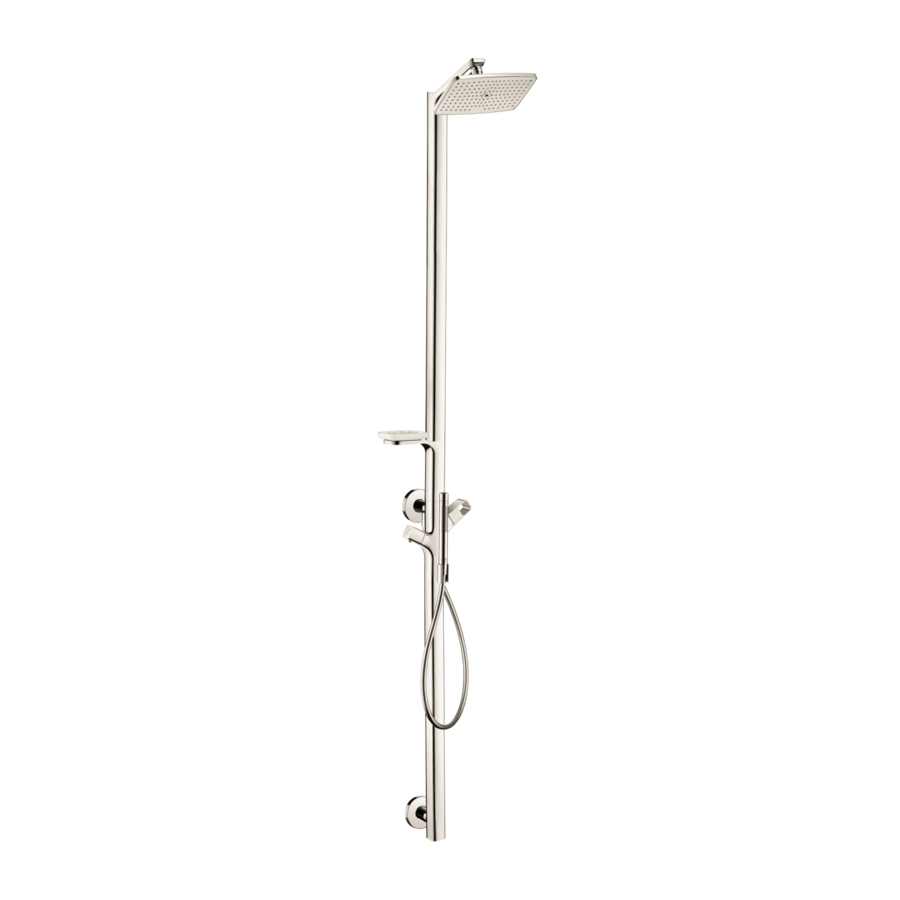
- Page 1 EN Installation / User Instructions / Warranty FR Instructions de montage / Mode d'emploi / Garantie ES Instrucciones de montaje / Manejo / Garantía Urquiola 11901xx1...
-
Page 2: Technical Information
English Technical Information Recommended water pressure 15 - 75 PSI Max. water pressure 145 PSI Recommended hot water temp. 120° - 140° F* Max. hot water temp 176°F* Flow rate - showerhead 2.5 GPM Flow rate - handshower 2.5 GPM *Please know and follow all applicable local plumbing codes when setting the temperature on the water heater. Installation Considerations • For best results, Hansgrohe recommends that • To insure the long life of the thermostatic this unit be installed by a licensed, professional cartridge, regularly run it through its complete plumber. range of temperatures (full hot to full cold). • Please read over these instructions thoroughly be- • To prevent scald injury, the maximum output tem- fore beginning installation. Make sure that you perature of the shower valve must be no higher have all tools and supplies needed to complete than 120°F. In Massachusetts, the maximum out- the installation. put temperature can be no higher than 112° F. • This product requires rough 10902181 (not • This thermostatic mixing valve is for use with a included). The rough must be installed and the showerhead rated at 2.5 GPM (9.5 L/min) or finished wall completed and made watertight... -
Page 3: Données Techniques
Français Données techniques Pression d’eau recommandée 15 - 75 PSI Pression d’eau maximum 145 PSI Température recommandée 120° - 140° F* d'eau chaude Température maximum d'eau chaude 176°F* Capacité nominale - pomme de douche 2.5 GPM Capacité nominale - douchette 2.5 GPM * Vous devez connaître et respecter tous les codes de plom- berie locaux applicables pour le réglage de la température du chauffe-eau. À prendre en considération pour l’installation • Pour de meilleurs résultats, Hansgrohe recom- • Pour empêcher des blessures par ébouillante- mande que ce produit soit installé par un plom- ment, la température de sortie maximale du bier professionnel licencié. robinet de douche ne doit pas excéder 120°F. Au Massachusetts, la température de sortie maxi- • Veuillez lire attentivement ces instructions avant male du robinet de douche ne doit pas excéder de procéder à l’installation. Assurez-vous de dis- 112°F. poser de tous les outils et du matériel nécessaires pour l’installation. -
Page 4: Datos Tecnicos
Español Datos tecnicos Presión recomendada en servicio 15 - 75 PSI Presión en servicio max. 145 PSI Temperatura recomendada del 120° - 140° F* agua caliente Temperatura del agua caliente max. 176°F* Caudal máximo - ducha 2.5 GPM Caudal máximo - teleducha 2.5 GPM *Debe conocer y cumplir todos los códigos locales apli- cables para ajustar la temperatura del calentador de agua. Consideraciones para la instalación • Para obtener mejores resultados, la instalación • Para evitar escaldaduras, la máxima temperatura debe estar a cargo de un plomero profesional de salida de la válvula de la ducha no debe ex- matriculado. ceder los 120°F. En Massachusetts, la máxima temperatura de salida de la válvula de la ducha • Antes de comenzar la instalación, lea estas no debe exceder los 112°F. instrucciones detenidamente. Asegúrese de tener las herramientas y los insumos necesarios para • El mezclador termostático está diseñado para completar la instalación. uso con cabezales de ducha calificados a 2.5 GPM (9.5 L/min) o más. - Page 5 14¾" Tools Required / Outiles Utiles / 9⅞" Herramientas Útiles 17 mm 8 mm 6¼" ¼" / 6 mm This unit meets or exceeds the following: • ASME A112.18.1 • CSA B125.1 • Listed by IAPMO for use in the US and Canada 1¾" 1¾" 3⅝"...
- Page 6 10902181 ¹ ⁄ ₁ ₆ " - ⅛ " 3 mm English Français Español Turn the water off at the main. Avant de commencer, fermez l’eau Cierre el paso del agua en la à la valve principale . entrada del suministro antes de Remove the flush insert from the comenzar . rough. Retirez le compartiment affleurant . Retire el alojamiento de descarga. Cut the plaster shield so that it ex- Coupez les protecteurs de façon Corte los protectores de yeso tends ¹⁄₁₆" - ⅛" outside the surface à ce qu’une partie de ¹⁄₁₆ po - ⅛ de modo que sobresalgan ¹⁄₁₆" of the finished wall. po soit à l’extérieur de la surface - ⅛" de la superficie de la pared du mur fini. terminada.
- Page 7 3 mm English Français Español Install the seat. Installez l'adapteur. Instale el adaptador. Tighten the screws. Serrez les vis. Apriete los tornillos. Seal the wall Scellez le mur Selle la pared around the plaster autour des alrededor del shield with water- protecteurs à protector de yeso proof sealant. l’aide d’un agent con un sellador d’étanchéité.
- Page 8 4 mm English Français Español Install the mounting plate. Installez la plaque de montage. Instale la placa de montaje. Remove the backing from the Retirez la partie arrière des Retire la parte posterior de las tiras adhesive strips on the template. bandes adhésives sur le gabarit. adhesivas de la plantilla.
- Page 9 English Français Español Press the template over the top Appuyez le gabarit sur le support Presione la plantilla sobre el soporte superior. mounting point on the column. supérieur. Push the column inlet over the seat. Poussez l’orifice d’entrée de la Empuje la entrada de la columna colonne sur la pièce d’appui. sobre el asiento. Confirm that the column is level. Veillez à ce que la colonne soit au Verifique que la columna quede Press the column and the template niveau. nivelada. against the wall. Appuyez la colonne et le gabarit Presione la columna y la plantilla contre le mur. contra la pared.
- Page 10 ¼" / 6 mm 8 mm English Français Español Remove the column. Retirez la colonne. Retire la columna. Mark the positions of the screw Marquez les positions des trous de Marque las posiciones de los holes. vissage. orificios para tornillos. Drill the screw holes. Percez les trous de vissage. Perfore los orificios para tornillos. Install the anchors. Installez les chevilles. Instale los pernos de anclaje. Install the upper mounting plate Installez la plaque de montage Instale la placa de montaje supe- using the washers and screws. supérieure en utilisant les rondelles rior utilizando las arandelas y los et les vis. tornillos.
- Page 11 Armaturenfett Grease Nr. 10476220 Armaturenfett Grease Nr. 10476220 English Français Español Lightly lubricate the threads on the Lubrifiez légèrement les filets Lubrique ligeramente las roscas en las placas de montaje con grasa mounting plates using white plumb- sur les plaques de montage en ers grease. utilisant de la graisse de plomberie blanca para plomería. blanche. Push the column over the mounting Empuje la columna sobre las plates. Poussez la colonne sur les plaques placas de montaje. de montage. Tighten the bottom escutcheon Apriete el escudo inferior contra la against the mounting plate. Serrez l’écusson inférieur contre la placa de montaje. plaque de montage. Tighten the top escutcheon against Apriete el escudo superior contra the mounting plate. Serrez l’écusson supérieur contre la placa de montaje. la plaque de montage. Install the soap dish holder on the Installez le porte-savon sur la sec- Instale la portajabonera sobre la top section of the column.
- Page 12 6 mm 17 mm English Français Español Install the top section. Installez la section supérieure de Instale la parte superior de la la colonne. columna. Install the shower arm. Installez le bras de douche. Instale el brazo de ducha. Tighten the screw. Serrez la vis. Apriete el tornillo. Install the showerhead. Installez la pomme de douche. Instale el cabezal de la ducha.
- Page 13 English Français Español Place the black rubber washer in Placez la rondelle en caoutchouc Coloque la arandela de goma negra en un extremo de la one end of the hose. Connect this noir dans l’une des extrémités du end to the handshower outlet. tuyau. Fixez cette extrémité au manguera. Acople este extremo robinet de baignoire. al grifo de la bañera. Place the screen washer in the other end of the hose. Connect Placez le tamis dans l’autre Coloque la arandela de filtro en this end to the handshower. extrémité du tuyau. Fixez cette el otro extremo de la manguera. extrémité à la douchette. Acople este extremo a la ducha Place the handshower in the de mano. holder. Déposez la douchette dans son support. Apoye la teleducha en el soporte. Install the soap dish. Installez le porte-savon. Instale la jabonera.
- Page 14 Set the high temperature limit stop**/ Réglez la butée de limite d’eau chaude** / Fije el tope de límite de alta temperatura** 6 mm **To prevent scald injury, the maximum output tempera- ture of the shower valve must be no higher than 120°F. In Massachusetts, the maximum output temperature can be no higher than 112° F. **Pour empêcher des blessures par ébouillantement, la température de sortie maximale du robinet de douche ne doit pas excéder 120°F. Au Massachusetts, la tempéra- ture de sortie maximale du robinet de douche ne doit pas excéder 112°F. **Para evitar escaldaduras, la máxima temperatura de sal- ida de la válvula de la ducha no debe exceder los 120°F. En Massachusetts, la máxima temperatura de salida de la válvula de la ducha no debe exceder los 112°F.
- Page 15 Justify the handle /Réglez la poignée / Ajuste el mando 6 mm...
- Page 16 Replacement Parts / Pièces détachées / Repuestos 97735000 95416000 95263000 95265000 11491xx0 98194000 95181000 (28x2) 97854xx0 95916000 98913000 98913000 95916000 98283000 11492xx1 97705xx0 98282001 94074000 28532xx1 98127000 (11x2) 94246000 98194000 (28x2) 98123000 (10x1.5) 28282xx0 94074000 97661000 97737000 97673000 xx = colors /couleurs / acabados 97402000 00 = chrome 97854xx0...
- Page 17 User Instructions / Instructions de service / Manejo > 100°F...
- Page 18 Cleaning / Nettoyage / Limpiar scale remover détartrant commercial desincrustante comercial 5 mm > 1 min 5 mm 2 Nm...
- Page 19 scale remover détartrant commercial desincrustante comercial 5 mm 2.5 mm 5 mm 2 Nm 2.5 mm 0.8 Nm QUI C K Clean scale deposits from the spray channels by rubbing across the channels using fingers or a C L EA N sponge. Si les canaux de jet deviennent entartrés, frottez-les avec les doigts ou à l’aide d’une éponge pour en déloger les dépôts. Elimine los depósitos calcificados de los canales de rociado frotándolos con los dedos o una esponja.
-
Page 20: Maintenance / Entretien / Mantenimiento
Maintenance / Entretien / Mantenimiento... - Page 21 Cleaning Recommendation for Hansgrohe Products Modern bathroom faucets, kitchen faucets and shower products are made from different materials to comply with the needs of the market with regard to design and functionality. To avoid damage to the product, it is necessary to take proper care of For best results: • Prevent the buildup of mineral scale and /or soap residue by cleaning your Hansgrohe product(s) when needed. • Select a cleaning agent specifically intended for the type of product. • Do not use these types of cleaners as they will cause damage to your Hansgrohe product: Any cleaning agent containing hydrochloric acid, formic acid, lye, or acetic acid. Abrasive cleaning powders, pads, or brushes. Steam cleaners. “No rinse” cleaning agents. • Always follow the instructions provided by the manufacturer of the cleaning agent. • Do not mix cleaning agents, unless directed by the manufacturer. • Do not spray cleaners directly onto the product as drops could enter openings and gaps and cause damage. When using spray cleaners, spray the cleaner onto a soft cloth or sponge. • Always rinse your Hansgrohe product thoroughly with clear water and polish dry with a soft cloth after cleaning. Important • Residue from soaps and shampoos can cause damage. Rinse the product with clean water after each use. • Residue from basin/tub/tile cleaner can cause damage to faucets and fittings. Immediately rinse any overspray from the Hansgrohe product.
- Page 22 Important • Les residus de produits pour le corps comme les savons liquides, shampooings, gels de douche, teintures pour cheveux, parfums, apres-rasage et vernis a ongles peuvent causer des deteriorations. Rincez le produit avec de l'eau propre après chaque utilisation. • Le résidu provenant des nettoyants pour cuvette/baignoire/carrelage peut endommager les robinets et les raccords de tuyauterie. Rincez immédiatement toute surpulvérisation sur le produit Hansgrohe. • De meme, il est interdit de stocker des detergents ou des produits chimiques sous les produits, par ex. dans un meuble sous lavabo, car les vapeurs qui s'en degagent risquent d'abimer les produits. • Les dommages au produit causés par un mauvais entretien ou par l'utilisation de produits de net- toyage inadéquats ne sont pas couverts par la garantie. • Si un composant du produit est endommagé, remplacez-le, car il existe un risque de blessure. Recomendación de limpieza para los productos de Hansgrohe Hoy en día, las griferías de baño y de cocina así como duchas modernas se componen de materiales muy distintos para satisfacer las exigencias del mercado respecto al diseño y la funcionalidad. Para evitar daños y reclamaciones hay que...
-
Page 23: Limited Consumer Warranty
Limited Consumer Warranty This product has been manufactured and tested to the highest quality standards by Hansgrohe, Inc. (“Hansgrohe”). This warranty is limited to Hansgrohe products that are purchased by a consumer in the United States or Canada after March 1, 1996, and installed in either in the United States or in Canada. WHO IS COVERED BY THE WARRANTY This warranty extends to the original purchaser only. This warranty is non-transferable. WHAT IS COVERED BY THE WARRANTY The warranty covers only your Hansgrohe manufactured product. Hansgrohe warrants this product against defects in material or workmanship as follows: Hansgrohe will replace at no charge for parts only or, at its option, replace any product or part of the product that proves defective because of improper workmanship and/or material, under normal installation, use, service and maintenance. If Hansgrohe is unable to provide a replacement and repair is not practical or cannot be made in timely fashion, Hansgrohe may elect to refund the purchase price in exchange for the return of the product. LENGTH OF WARRANTY Replacement or repaired parts of products will be covered for the term of this warranty, as stated in the following two sentences. If you are a consumer who purchased the product for use primarily for personal, family or household purposes, this warranty extends for as long as you own the product and the home in which the product is originally installed. If you purchased the product for use primarily for any other purpose, including, without limitation, a commercial purpose, this warranty extends only (i) for 1 year, with respect to Hansgrohe & Commercial products, and (ii) for 5 years, with respect to Axor products. THIS WARRANTY DOES NOT COVER, AND HANSGROHE WILL NOT PAY FOR: A. Conditions, malfunctions or damage not resulting from defects in material or workmanship. - Page 24 EXCLUSIONS AND LIMITATIONS REPAIR OR REPLACEMENT (OR, IN LIMITED CIRCUMSTANCES, REFUND OF THE PURCHASE PRICE) AS PROVIDED UNDER THIS WARRANTY IS THE EXCLUSIVE REMEDY OF THE PURCHASER. HANSGROHE NEITHER ASSUMES NOR AUTHORIZES ANY PERSON TO CREATE FOR IT ANY OTHER OBLIGATION OR LIABILITY IN CONNECTION WITH THIS PRODUCT.
Need help?
Do you have a question about the AXOR Urquiola 11901 1 Series and is the answer not in the manual?
Questions and answers