Table of Contents
Advertisement
Quick Links
Advertisement
Table of Contents

Subscribe to Our Youtube Channel
Related Manuals for Hans Grohe Metropol 74513


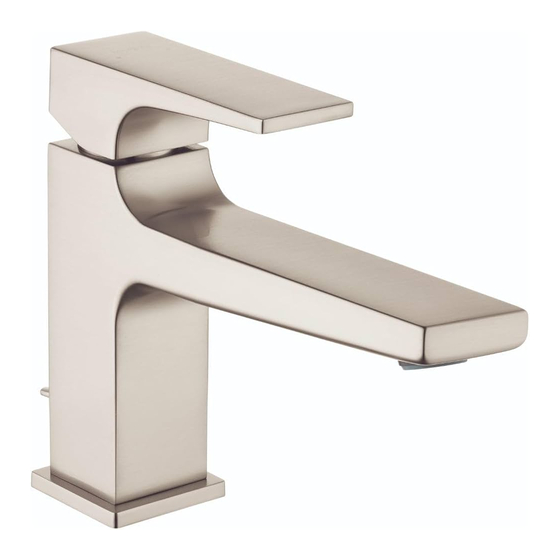
Summary of Contents for Hans Grohe Metropol 74513
- Page 1 EN Installation / User Instructions / Warranty FR Instructions de montage / Mode d'emploi / Garantie ES Instrucciones de montaje / Manejo / Garantía Metropol 100 Metropol 100 32505xx1 74505xx1 Metropol 110 Metropol 110 32506xx1 74506xx1 32510xx1 74510xx1 Metropol 260 Metropol 260 32513xx1 74513xx1...
-
Page 2: Technical Information
English Français Technical Information Données techniques Water pressure Pression d’eau Recommended 15 - 75 PSI (1-5 Bar) recommandée 15 - 75 PSI (1-5 Bar) Maximum 145 PSI (10 Bar) maximum 145 PSI (10 Bar) Hot water temp. Température d'eau chaude Recommended 120°-140° F (48° -60° C)* recommandée 120°-140° F (48° -60° C)* Maximum 158°F (70° C)* maximum 158°F (70° C)* Max. flow rate 1.2 GPM (4.5 L/min) Capacité nominale 1.2 GPM (4.5 L/min) Hole size in mounting surface 1⅜" (34 mm) Dimension du trou dans la surface 1⅜ po (34 mm) Max. depth of mounting surface 1⅝" (40 mm) de montage Profondeur maximale de la surface 1⅝ po (40 mm) de montage * Please know and follow all applicable local plumbing codes when setting the temperature on the water heater. -
Page 3: Datos Tecnicos
Español Datos tecnicos Tools Required / Outiles Utiles / Herramientas Útiles Presión en servicio recomendada 15 - 75 PSI (1-5 Bar) max. 145 PSI (10 Bar) Temperatura del agua caliente recomendada 120°-140° F (48°-60° C)* max. 158°F (70° C)* Caudal máximo 1.2 GPM (4.5 L/min) 9 mm 16 mm Tamaño del orificio en la 1⅜" (34 mm) superficie de montaje Profundidad máxima de la 1⅝" (40 mm) superficie de montaje * Debe conocer y cumplir todos los códigos locales aplica- bles para ajustar la temperatura del calentador de agua. Consideraciones para la instalación • Para obtener mejores resultados, la instalación debe estar a cargo de un plomero profesional matriculado. - Page 4 Metropol 100 Metropol 260 32505xx1/74505xx1 32513xx1/74513xx1 1⅞"/1⅞" (48/48 mm) 1¼" (32 mm) 6⅛" (157 mm) 1⅞"/1⅞" (48/48 mm) 1¼" (32 mm) ⅜ 8" (204 mm) 3¼" 3¼" (81mm) (81mm) ⅜ 32506/74506xx1 only/ Metropol 110 Metropol 110 seulement / solamente 32510xx1/74510xx1 32506xx1/74506xx1 88509xx0 2¼"...
-
Page 5: Installation / Installation / Instalación
Installation / Installation / Instalación 32506xx1 / 74506xx1 English Français Español 32506xx1/74506xx1 only: 32506xx1/74506xx1 32506xx1/74506xx1 sola- seulement: Installez la tirette. mente: Instale el tirador. Install the pull rod. Place the faucet and sealing ring Placez le robinet et l’anneau Coloque el grifo y el aro de sella- on the mounting surface. d’étanchéité sur la surface de do sobre la superficie de montaje. montage. Install the fiber washer, friction Instale la arandela de fibra, la washer, and mounting nut. Installez la rondelle en fibre, la arandela metálica y la tuerca de rondelle métallique et l’écrou de montaje. Tighten the mounting nut by hand. montage. Apriete la tuerca de montaje con la mano. Serrez l’écrou de montage à la main. - Page 6 2.2 ft-lb 3 Nm English Français Español Tighten the tensioning screws. Serrez les vis de pression à l’aide Apriete los tornillos tensores con d’un tournevis. un destornillador. Connect the hoses to the stops. Connectez les tuyaux d’arrivée Conecte las mangueras de sumin- d’eau chaude et d’eau froide aux istro de agua caliente y fría a los Use two wrenches, as shown in butées d’arrêt. topes. the diagram. Utilisez deux clés, tel qu’illustré. Use las dos llaves fijas como se Do not allow the hoses ilustra, to twist. Assurez-vous que les tuyaux ne s’entortillent No permita las manguer- pas.
- Page 7 > 2 min English Français Español Remove the aerator. Retirez l’aérateur. Retire el aireador. Flush the faucet for at least two Rincez le robinet pendant au Lave el grifo durante al menos 2 minutes. moins 2 minutes. minutos. Reinstall the aerator. Installez l’aérateur. Instale el aireador.
- Page 8 Installation / Installation / Instalación shorter longer plus court plus long más corto más largo Petroleum-based plumbers putty can Les mastics de plomberie à base de Masilla de petróleo-basó puede damage the surface of some sinks. pétrole peuvent endommager la dañar la superficie de algún ba- Please consult the manufacturer of the surface de certains lavabos. Veuillez ñeras. Consulte por favor al fabri-...
- Page 9 Justify the handle / Réglez la poignée / Ajuste la manija 140° F 44 PSI 50° F 60 °C 0.3 MPa 10 °C 3 mm 3 mm 91°F (33°C) 97°F (36°C) 100°F (38°C) 196°F (60°C) 109°F (43°C) 122°F (50°C) 131°F (55°C) 3 mm 1.5 ft-lb 2 Nm...
- Page 10 Replacement Parts / Pièces détachées / Repuestos Metropol 100 32505xx1/74505xx1 95704xx0 Metropol 110 (M6x10) 92995xx0 32510xx1/74510xx1 Metropol 260 92625xx0 32513xx1/74513xx1 95704000 92527000 93009xx0 (M6x10) (27x1.5) 92689000 98146000 (25x1.5) 95973001 98865000 98865000 92628000 98866000 98398000 (23x2) 98600001 (600 mm) 96316001 (900 mm) 93098000 92936000 95661000 (32x1.5)
- Page 11 Metropol 110 95704xx0 32506xx1/74506xx1 (M6x10) 92995xx0 92625xx0 95704000 92527000 93009xx0 (M6x10) (27x1.5) 92689000 98146000 (25x1.5) 95973001 98865000 98865000 92628000 98398000 98866000 (23x2) 96657xx0 98600001 88509xx0 (600 mm) 95661000 93098000 92936000 (32x1.5) 93048xx0 98749000 97548000 13961000 xx = colors / couleurs / acabados 00 = Polished Chrome 82 = Brushed Nickel...
- Page 12 User Instructions / Instructions de service / Manejo ouvert fermé abierto cerrar cold chaud froid caliente frío...
- Page 13 Cleaning Recommendation for Hansgrohe Products Modern bathroom faucets, kitchen faucets and shower products are made from different materials to comply with the needs of the market with regard to design and functionality. To avoid damage to the product, it is necessary to take proper care of it. For best results: • P revent the buildup of mineral scale and /or soap residue by cleaning your Hansgrohe product(s) when needed. • S elect a cleaning agent specifically intended for the type of product. • Do not use these types of cleaners as they will cause damage to your Hansgrohe product: ´ Any cleaning agent containing hydrochloric acid, formic acid, lye, or acetic acid. ´ Abrasive cleaning powders, pads, or brushes. ´ Steam cleaners. ´ “No rinse” cleaning agents. • Always follow the instructions provided by the manufacturer of the cleaning agent. • Do not mix cleaning agents, unless directed by the manufacturer. • Do not spray cleaners directly onto the product as drops could enter openings and gaps and cause damage. When using spray cleaners, spray the cleaner onto a soft cloth or sponge.
- Page 14 Important • Les residus de produits pour le corps comme les savons liquides, shampooings, gels de douche, teintures pour cheveux, parfums, apres-rasage et vernis a ongles peuvent causer des deteriorations. Rincez le produit avec de l’eau propre après chaque utilisation. • Le résidu provenant des nettoyants pour cuvette/baignoire/carrelage peut endommager les robinets et les raccords de tuyauterie. Rincez immédiatement toute surpulvérisation sur le produit Hansgrohe. • De meme, il est interdit de stocker des detergents ou des produits chimiques sous les produits, par ex. dans un meuble sous lavabo, car les vapeurs qui s’en degagent risquent d’abimer les produits. • Les dommages au produit causés par un mauvais entretien ou par l’utilisation de produits de nettoyage inadéquats ne sont pas couverts par la garantie. • Si un composant du produit est endommagé, remplacez-le, car il existe un risque de blessure. Recomendación de limpieza para los productos de Hansgrohe Hoy en día, las griferías de baño y de cocina así como duchas modernas se componen de materiales muy distintos para satisfacer las exigencias del mercado respecto al diseño y la funcionalidad. Para evitar daños y reclamaciones hay que tener...
-
Page 16: Limited Consumer Warranty
Limited Consumer Warranty This warranty is limited to products manufactured by Hansgrohe, Inc. excessive water pressure or corrosion. (“Hansgrohe”) that are purchased by a consumer in the United States C. Labor and other expenses for disconnection, deinstallation, or Canada after March 1, 1996, and installed in either the United or return of the product for warranty service (including but States or in Canada. not limited to proper packaging and shipping costs), or for installation or reinstallation of the product.
Need help?
Do you have a question about the Metropol 74513 and is the answer not in the manual?
Questions and answers