AEG MCD2665E User Manual
Hide thumbs
Also See for MCD2665E:
- User manual (36 pages) ,
- User manual (36 pages) ,
- User manual (168 pages)
Table of Contents
Advertisement
Available languages
Available languages
Quick Links
Advertisement
Chapters
Table of Contents

Related Manuals for AEG MCD2665E


Summary of Contents for AEG MCD2665E
- Page 1 User Manual MCD2665E Notice D’Utilisation...
-
Page 2: Table Of Contents
11. ENVIRONMENT CONCERNS........34 FOR PERFECT RESULTS Thank you for choosing this AEG product. We have created it to give you impeccable performance for many years, with innovative technologies that help make life simpler –... -
Page 3: Safety Information
ENGLISH 1. SAFETY INFORMATION IMPORTANT! IMPORTANT SAFETY INSTRUCTIONS: READ CAREFULLY AND KEEP FOR FUTURE REFERENCE. If food being heated begins to smoke, DO NOT OPEN THE DOOR. Turn off and unplug the oven and wait until the food has stopped smoking. Opening the door while food is smoking may cause a fire. - Page 4 Inside the oven cavity or on the door; make sure there are no dents. e) The power supply cord and plug; ensure that they are not damaged. Never adjust, repair or modify the oven yourself. It is hazardous for anyone other than a competent...
- Page 5 ENGLISH Do not cook eggs in their shells and whole hard boiled eggs should not be heated in microwave ovens since they may explode even after microwave cooking has ended. To cook or reheat eggs which have not been scrambled or mixed, pierce the yolks and the whites, or the eggs may explode.
- Page 6 Children should be supervised to ensure that they do not play with the appliance.
- Page 7 ENGLISH If the power supply cord of this toy. Children should be taught all appliance is damaged, it must be important safety instructions: use of pot replaced with a special cord. The holders, careful removal of food exchange must be made by an coverings;...
- Page 8 IMPORTANT! If you are unsure how to connect your oven, please consult an authorised, qualified electrician. Neither the manufacturer nor the dealer can accept any liability for damage to...
-
Page 9: Product Description
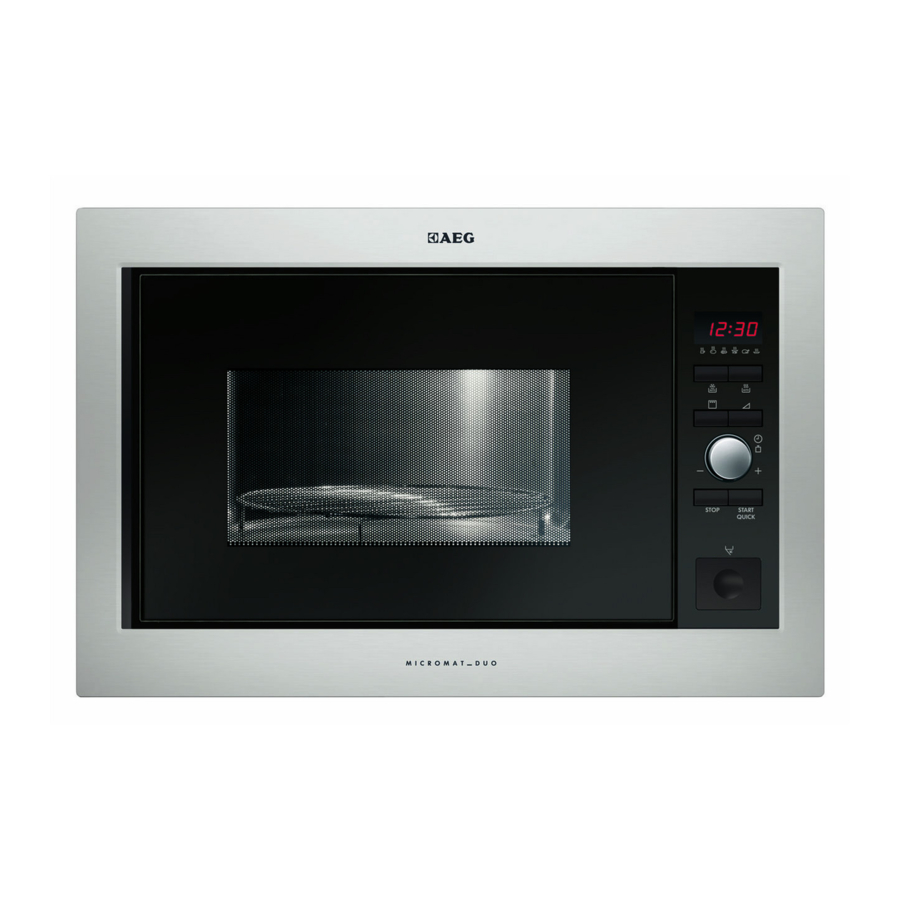
ENGLISH 2. PRODUCT DESCRIPTION 2.1 Microwave Oven Grill heating element Front trim Oven lamp Control panel Door opening button Waveguide cover Oven cavity Seal packing Door seals and sealing surfaces Ventilation openings Outer cover Rear cabinet Power supply cord... - Page 10 2.2 Accessories Check to make sure the following accessories are provided: Turntable Turntable support High rack Low rack • Place the turntable support in the seal packing on the floor of the cavity. • Then place the turntable on the turntable support.
-
Page 11: Control Panel
ENGLISH 3. CONTROL PANEL Digital display indicators Grill Microwave Dual Clock Cooking stages Plus/Minus Auto defrost bread Auto defrost Weight Auto cook indicators Auto cook button Auto defrost button Power level button Grill button Timer/Weight knob Start/Quick button Stop button Door open button... -
Page 12: Before First Use
4. BEFORE FIRST USE 4.1 Econ mode 4. Press the START/QUICK button. The display will show: The oven is set in energy save mode 5. Rotate the TIMER/WEIGHT knob to (Econ). adjust the hour. 1. Plug in the oven. - Page 13 ENGLISH 3. Press the STOP button. 4. The display will show: Econ. 5. Close the door. 6. The oven will count down from 3:00 to zero. 7. When zero is reached, the oven goes into Econ mode and the display goes blank.
-
Page 14: Operation
5. OPERATION 5.1 Microwave safe cookware Microwave Cookware Comments safe Aluminium foil/ Small pieces of aluminium foil can be used to shield food containers from overheating. Keep foil at least 2 cm from the oven walls, as arcing may occur. Foil containers are not recommended unless specified by the manufacturer. - Page 15 ENGLISH 5.2 Microwave cooking advice Microwave cooking advice Composition Foods high in fat or sugar (e.g. Christmas pudding, mince pies) require less heating time. Care should be taken as overheating can lead to fire. Size For even cooking make all the pieces the same size. Temperature of The initial temperature of food affects the amount of cooking time needed.
- Page 16 Your oven can be programmed for up to Cooking time Increasing unit 90 minutes. The input unit of cooking 0-5 minutes 15 seconds time varies from 15 seconds to five 5-10 minutes 30 seconds minutes. It depends on the total length of...
- Page 17 ENGLISH 5.4 Reduced power level Cooking mode Standard time Reduced power level Microwave 900 W 20 minutes Microwave 630 W Grill 20 minutes Grill-50 % Dual Grill Grill-20 minutes Grill-50 % IMPORTANT! If you cook the food over the standard time with only the same cooking mode, the power of the oven will lower automatically to avoid overheating (the microwave...
- Page 18 5.6 Add 30 seconds The START/QUICK button allows you to Extend the cooking time operate the two following functions: You can extend the cooking time for multiples of 30 seconds if the button is Direct Start pressed while the oven is in operation.
- Page 19 ENGLISH To cancel PLUS/MINUS, press the If you select MINUS, the display POWER LEVEL button 3 times. will show If you select PLUS, the display will show 5.8 Grill and dual grill cooking This microwave oven has two grill burning smell when using the grill cooking modes: for the first time, this is normal and does not indicate a fault with the...
- Page 20 Dual grill cooking This mode uses a combination of grill Button Power setting power and microwave power. The Grill x 1 microwave power level is preset to 270 W. Grill x 2 270 W Grill x 3 450 W...
- Page 21 ENGLISH 2. Enter the desired time by rotating the TIMER/WEIGHT knob clockwise until 2.30 is displayed. 3. Check the display. 4. Press the GRILL button once. 5. Enter the desired time by rotating the TIMER/WEIGHT knob clockwise until 5.00 is displayed. 6.
- Page 22 5.10 Auto cook and auto defrost Auto cook and auto defrost Food Symbol Setting automatically works out the correct Gratinated fish fillet Microwave + cooking mode and cooking time. You grill can choose from 6 auto cook and 2 auto...
-
Page 23: Programme Charts
ENGLISH 6. PROGRAMME CHARTS 6.1 Auto cook chart Weight (increasing Auto cook Button Procedure unit)/Utensils Beverage 1-6 cups • Place cup towards edge of turntable. (Tea/Coffee) 1 cup = 200 ml Boiled and 0.2-1.0 kg (100 g) Boiled potatoes: Peel the potatoes and cut jacket potatoes Bowl and lid them into similar sized pieces. - Page 24 6.2 Auto defrost chart Weight (increasing Auto defrost Button Procedure unit)/Utensils Meat/fish/poultry 0.2-1.0 kg (100 g) • Place the food in a flan dish in the Flan dish centre of the turntable. • When the audible bell sounds, turn the food over, rearrange and separate.
- Page 25 ENGLISH 6.3 Recipes for auto cook Gratinated fish fillet ‘Italian’ Grilled skewers 0.5 kg 1.0 kg 1.5 kg 4 pieces 200 g 430 g 630 g fish fillet 400 g pork cutlets, cubed ½ tbsp 1 tbsp 1½ tbsp lemon juice 100 g streaky bacon ½...
- Page 26 Potato and courgette gratin Spinach gratin 0.5 kg 1.0 kg 1.5 kg 0.5 kg 1.0 kg 1.5 kg 150 g 300 g 450 g leaf spinach, 10 g 15 g butter or defrosted, drained margarine to grease the dish...
- Page 27 ENGLISH 6.4 Cooking charts Heating food and drink Quantity Power Time Food/drink Setting Method -g/ml- Level -Min- Milk, 1 cup Micro 900 W do not cover Water, 1 cup Micro 900 W do not cover 6 cups Micro 900 W 8-10 do not cover 1 bowl...
- Page 28 Defrosting and cooking Standing Quantity Power Time Food Setting Method time Level -Min- -Min- Fish fillet Micro 900 W 9-11 cover One plate Micro 900 W 8-10 cover, stir after 6 minutes meal Broccoli/ Micro 900 W add 3-5 tbsps water,...
-
Page 29: Care And Cleaning
ENGLISH 7. CARE AND CLEANING CAUTION! Heat up your oven regularly by using the grill. Remaining food or fat splashed can DO NOT USE COMMERCIAL OVEN cause smoke or a bad smell. CLEANERS, STEAM CLEANERS, Turntable and turntable support ABRASIVE, HARSH CLEANERS, ANY THAT CONTAIN SODIUM HYDROXIDE Remove the turntable and turntable OR SCOURING PADS ON ANY PART... -
Page 30: Troubleshooting
8. TROUBLESHOOTING Problem Check if . . . The microwave • The fuses in the fuse box are working. appliance is not working • There has not been a power outage. properly? • If the fuses continue to blow, please contact a qualified electrician. -
Page 31: Installation
ENGLISH 9. INSTALLATION The microwave can be fitted in position A or B: Niche size Position 560 x 550 x 380 560 x 500 x 380 Measurements in (mm) 9.1 Installing the appliance 1. Remove all packaging and check carefully for any signs of damage. 4 mm 2. - Page 32 IMPORTANT! Ensure the bottom instructions in this operation of the oven is 85 cm or more manual and the conventional oven above the floor. It is important to manufacturer’s installation ensure that the installation of this instructions. product conforms to the 9.2 Connecting the appliance to the power supply...
- Page 33 ENGLISH 9.3 Electrical connections outlet, it must be cut off and the WARNING! THIS APPLIANCE MUST BE appropriate plug fitted. EARTHED Remove the fuse from the cut off plug. The manufacturer declines any liability The cut off plug should then be should this safety measure not be disposed of to prevent the hazard of observed.
-
Page 34: Technical Information
1000 W Microwave Frequency 2450 MHz (Group 2/Class B) Outside Dimensions: MCD2665E 594 mm (W) x 388 mm (H) x 404 mm (D) Cavity Dimensions 342 mm (W) x 207 mm (H) x 368 mm (D) Oven Capacity 26 litres Turntable ø... - Page 35 FRANÇAIS Lors de sa fabrication, cet appareil a été construit selon des normes, directives et/ou décrets pour une utilisation sur le territoire français. Pour la sécurité des biens et des personnes ainsi que pour le respect de l’environnement, vous devez d’abord lire impérativement les préconisations suivantes avant toute utilisation de votre appareil.
- Page 36 11. INFORMATIONS ENVIRONNEMENTALES ......70 POUR DES RÉSULTATS PARFAITS Merci d'avoir choisi ce produit AEG. Nous l'avons créé pour vous offrir des performances irréprochables pour longtemps, avec des technologies innovantes qui vous simplifient la vie - autant de caractéristiques que vous ne trouverez pas forcément sur les appareils ordinaires.
-
Page 37: Avertissements Importants De Sécurité
1. AVERTISSEMENTS IMPORTANTS DE SÉCURITÉ FRANÇAIS REMARQUES ! AVERTISSEMENTS DE SECURITE IMPORTANTES : LES LIRE ATTENTIVEMENT ET LES CONSERVER SOIGNEUSEMENT POUR CONSULTATIONS ULTERIEURES. Si les aliments que chauffe le four viennent à fumer, N’OUVREZ PAS LA PORTE. Mettez le four hors tension, débranchez la prise du cordon d’alimentation et attendez que la fumée se soit dissipée. - Page 38 Si la lampe du four grille, adressez-vous au revendeur ou à un service après vente AEG. Si le cordon d’alimentation de cet appareil est endommagé, faites-le remplacer par un professionnel qualifié.
- Page 39 FRANÇAIS 1.2 Pour éviter toute explosion ou ébullition soudaine ADVERTISSEMENT ! Les liquides ou autres aliments ne doivent pas être réchauffés dans des récipients fermés car ils risquent d'exploser. Le chauffage par micro-ondes des boissons peut avoir comme conséquence l'ébullition éruptive retardée, donc le soin doit être pris en manipulant le récipient.
- Page 40 1.3 Pour éviter toute mauvaise utilisation par les enfants ADVERTISSEMENT ! L’appareil et ses éléments accessibles deviennent très chauds en cours d’utilisation. Il est donc important d’éviter de toucher les éléments chauffants. Les enfants de moins de 8 ans doivent être tenus à l’écart sauf s’ils sont sous surveillance continue.
- Page 41 FRANÇAIS travail ; dans les exploitations agricoles ; par les clients dans les hôtels, motels et autres environnements résidentiels ; dans les chambres d’hôtes et structures similaires. Cet appareil n’est pas destiné à être utilisé à des altitudes de plus de 2 000 m. 1.4 Pour éviter tout danger d’incendie aucun aliment ou produit à...
- Page 42 1.7 Pour éviter toute brûlure d’alimentation soit éloigné des surfaces chauffées, y compris l'arrière du four. Ne Utilisez un porte-récipient ou des gants tentez pas de remplacer vous-même la de protection lorsque vous retirez les lampe du four et ne laissez personne aliments du four de façon à...
- Page 43 FRANÇAIS 1.8 Autres avertissement l’appareil s’il n’est pas utilisé pendant un certain temps (vacances, ...). N’utilisez aucun ustensile métallique car ils Ne modifiez pas ou n’essayez pas de réfléchissent les micro-ondes et peuvent modifier le four. Vous ne devez pas provoquer un arc électrique.
- Page 44 Assurez-vous également que les profonds aux angles arrondis (plats décors ne sont pas à base d’éléments ronds ou ovales), adaptez au mieux les métalliques. Dans le doute, n’hésitez dimensions du plat au volume des pas à procéder au test du verre d’eau.
-
Page 45: Vue D'ensemble De L'appareil
2. VUE D’ENSEMbLE DE L’APPAREIL FRANÇAIS 2.1 Four micro-ondes Elément chauffant du gril Encadrement avant Eclairage du four Bandeau de commande Touche ouverture de la porte Cadre du répartiteur d'ondes Cavité du four Entraînement Cadre d’ouverture de la porte Ouvertures de ventilation Enveloppe extérieure Compartiment arrière Cordon d'alimentation... - Page 46 2.2 Accessoires Vérifiez que les accessoires suivants sont fournis : Plateau tournant Support d'entraînement Trépied haut Trépied bas • Placez le pied du plateau dans l’entraînement sur la base inférieure de la cavité. • Placez ensuite le plateau tournant sur le support de rotation.
-
Page 47: Bandeau De Commande
3. bANDEAU DE COMMANDE FRANÇAIS Affichage numérique Gril Micro-ondes Cuisson combinée Horloge Etapes de cuisson Plus/Moins Décongélation automatique pain Décongélation automatique Quantité Symboles cuisson automatique Touche cuisson automatique Touche décongélation automatique Touche niveaux de puissance Touche gril Bouton rotatif Minuteur/Poids Touche Start/Quick Touche Stop Touche ouverture de la porte... -
Page 48: Avant La Mise En Service
4. AVANT LA MISE EN SERVICE www.aeg.com 4.1 Mode Economie d'énergie Exemple : Pour régler l’horloge à 23:30 (24 heures). Le four est réglé en mode « economie 1. Ouvrez la porte. d'energie » (Econ). 2. L'écran affiche : « Econ » 1. Branchez l'appareil. - Page 49 FRANÇAIS START/QUICK, puis tournez le 2. Le four émet un signal sonore et le bouton rotatif MINUTEUR/POIDS message « LOC » s'affiche : pour régler les minutes. Pour annuler la sécurité enfant, 5. Appuyez sur la touche START/QUICK. appuyez pendant 5 secondes sur 6.
-
Page 50: Utilisation
5. UTILISATION www.aeg.com 5.1 Vaisselle pour fours à micro-ondes Transparent Plats Remarques micro-ondes Film aluminium/ Il est possible d'utiliser de petites sections de film barquettes en aluminium pour prévenir la surchauffe des aliments. Le aluminium film aluminium doit être distant de 2 cm au moins des parois du four pour éviter la formation d'arcs électriques. - Page 51 FRANÇAIS 5.2 Cuisson aux micro-ondes Cuisson aux micro-ondes Composition Les aliments riches en graisse ou en sucre (p. ex. les plum-puddings et les pièces minces) exigent un temps de cuisson moindre. Procédez avec soin, car ils pourraient prendre feu en cas de surchauffe. Taille La cuisson est d'autant plus régulière que les morceaux ont la même taille.
- Page 52 Vous pouvez choisir le temps de cuisson Temps de cuisson Palier de jusqu'à 90 minutes. L’augmentation du 0-5 minutes 15 secondes temps de cuisson varie de 15 secondes à 5-10 minutes 30 secondes cinq minutes. Elle dépend de la durée totale de cuisson indiquée dans le...
- Page 53 FRANÇAIS 5.4 Niveau de puissance réduit Mode de cuisson Temps standard Puissance réduite Micro-ondes 900 W 20 minutes Micro-ondes 630 W Gril 20 minutes Gril - 50 % Combinee Gril - 20 minutes Gril - 50 % IMPORTANT ! Si vous faites cuire cuisson micro-ondes diminue et les des aliments pendant plus éléments gril s’allument par...
- Page 54 5.6 Ajouter 30 secondes Augmentation du temps de cuisson La touche START/QUICK vous permet d’utiliser les deux fonctions suivantes. Démarrage direct Vous pouvez prolonger le temps de cuisson pendant la cuisson manuelle par paliers de 30 secondes en Vous pouvez commencer directement la appuyant de nouveau sur la touche cuisson micro-ondes à...
- Page 55 FRANÇAIS Pour annuler la fonction Si vous sélectionnez PLUS, l'écran PLUS/MOINS, appuyez 3 fois sur affichera la touche de sélection NIVEAUX Si vous sélectionnez MOINS, l'écran affichera DE PUISSANCE. 5.8 Cuisson au gril et cuisson combinée Ce four à micro-ondes possède deux une odeur de brûlé...
- Page 56 Cuisson combinee Ce mode utilise une combinaison de la Configuration de Touche puissance du Gril et de celle du Micro- puissance ondes. Le niveau de puissance du Gril x 1 Micro-ondes est préréglé à 270 W. Gril x 2...
- Page 57 FRANÇAIS 2. Entrez la durée en tournant le bouton rotatif MINUTEUR/POIDS dans le sens des aiguilles d’une montre ou en sens inverse jusqu'à ce que 2.30 soit affiché. 3. Vérifiez l’affichage. 4. Appuyez une fois sur la touche GRIL. 5. Entrez la durée en tournant le bouton rotatif MINUTEUR/POIDS dans le sens des aiguilles d’une montre ou en sens inverse jusqu'à...
- Page 58 5.10 Fonctionnement automatique Le fonction automatique calcule Aliments Symbole Configuration automatiquement le mode et le temps de Filet de poisson Micro-ondes cuisson corrects. vous disposez de 6 gratiné + gril programmes de cuisson automatique et 2 Cuisses de poulet Micro-ondes programmes de décongélation...
-
Page 59: Tableaux De Programmation
6. TAbLEAUx DE PROGRAMMATION FRANÇAIS 6.1 Tableaux des programmes automatiques Quantité Cuisson (Incrément)/ Touche Procédure automatique Utensiles Boisson 1-6 tasses • Placez la tasse au centre du plateau (Thé/Café) 1 tasse=200 ml tournant. Pommes de 0,2-1,0 kg (100 g) Pommes de terre cuites : Pelez les pommes terre cuites et Bol et couvercle de terre et coupez-les en morceaux de taille... - Page 60 6.2 Tableaux des programmes automatiques Quantité Décongélation (Incrément)/ Touche Procédure automatique Utensiles Viande/poisson/ 0,2-1,0 kg (100 g) • Placer les aliments dans un plat à volaille Plat à gratin gratin au centre du plateau tournant. • Quand que le signal sonore retentit,...
- Page 61 FRANÇAIS 6.3 Recettes pour programmes automatiques Filet de poisson gratiné, à "l'italienne" Brochettes de viande panachées 0,5 kg 1,0 kg 1,5 kg 4 pièces 200 g 430 g 630 g de filet de poisson 400 g de côtelettes de porc, coupées ½...
- Page 62 Gratin d’épinards Gratin de pommes de terre et courgettes 0,5 kg 1,0 kg 1,5 kg 0,5 kg 1,0 kg 1,5 kg 150 g 300 g 450 g d’épinards en 10 g 15 g de beurre ou de branches margarine (pour (décongeler,...
- Page 63 FRANÇAIS 6.4 Tableaux de cuisson Rechauffage de boissons et de mets Quant Config- Puissanc Temps Boissons/mets Conseils de préparation -g/ml- uration eNiveau -Min- Lait, 1 tasse Micro 900 W ne pas couvrir Eau, 1 tasse Micro 900 W ne pas couvrir 6 tasses Micro 900 W...
- Page 64 Décongélation et cuisson d’aliments Puiss- Quant Config- Temps Repos Aliments ance Conseils de préparation uration -Min- -Min- Niveau Filet de Micro 900 W 9-11 couvrir poisson Une assiette- Micro 900 W 8-10 couvrir, mélanger au bout repas de 6 minutes...
-
Page 65: Entretien Et Nettoyage
7. ENTRETIEN ET NETTOyAGE FRANÇAIS provoquer la formation d’un arc. Ne ATTENTION ! retirez pas le cadre du rèpartiteur N’UTILISEZ PAS DE DÉCAPE FOURS d’ondes. VENDUS DANS LE COMMERCE OU DE PRODUITS ABRASIFS OU AGRESSIFS, Assurez-vous que l’eau savonneuse ou OU DE PRODUITS QUI CONTIENNENT l’eau ne pénètre pas dans les petites DE LA SOUDE CAUSTIQUE, OU DE... -
Page 66: Cas D'anomalie De Fonctionnement
Le four à micro-ondes ne • Isolez l’appareil de la boîte à fusibles. se met pas à l'arrêt ? • Contactez votre revendeur ou un service après vente AEG agréé. L’éclairage intérieur ne • Contactez votre revendeur ou un service après vente AEG agréé. -
Page 67: Installation
9. INSTALLATION FRANÇAIS Si vous installez le four à micro- ondes en position A ou b : Taille du logement Position 560 x 550 x 380 560 x 500 x 380 Mesures en mm 9.1 Installation de l’appareil 1. Retirez tout l’emballage et contrôlez soigneusement pour détecter les 4 mm traces de détérioration possibles. - Page 68 IMPORTANT ! Installez le four à fournies dans cette notice 85 cm ou plus du sol. Il est d’utilisation et dans les important de s’assurer que instructions d’installation du l’installation de ce produit est fabricant du four conventionnel. bien conforme aux instructions 9.2 Raccordement électrique...
- Page 69 FRANÇAIS 9.3 Connexions electriques ATTENTION ! secteur, elle doit être enlevée et une CET APPAREIL DOIT ÊTRE MIS À prise adaptée doit être installée. LA TERRE Retirer le fusible de la prise enlevée. Le fabricant décline toute responsabilité La prise enlevée doit être mise au rebut en cas de non respect des présentes pour écarter tout risque de choc consignes de sécurité.
-
Page 70: Caractéristiques Techniques
1000 W Fréquence des micro-ondes 2450 MHz (Groupe 2/Classe B) Dimensions extérieures : MCD2665E 594 mm (L) x 388 mm (H) x 404 mm (P) Dimensions intérieures 342 mm (L) x 207 mm (H) x 368 mm (P) Capacité 26 litres Plateau tournant ø... - Page 71 FRANÇAIS...
- Page 72 www.aeg.com/shop...
Need help?
Do you have a question about the MCD2665E and is the answer not in the manual?
Questions and answers