Table of Contents
Advertisement
NX PRO DUAL
USER MANUAL
ÍndEX
Printer Specifications ................................... 2
Main parts of the printer ................................ 3
Elements included in the printer .................... 3
Installation and set up ................................... 4
Quick guide ................................................... 6
Calibrate dual height......................................7
Calibrate Offset U and Y..................................8
Dual options .................................................. 9
Nozzle change...............................................11
Simplify 3D Printing Software........................11
Simplify 3D loading profiles...........................11
Security........................................................13
Basic recomendations ................................. 13
Warranty ......................................................14
Advertisement
Table of Contents

Related Manuals for Tumaker NX PRO DUAL


Summary of Contents for Tumaker NX PRO DUAL
-
Page 1: Table Of Contents
NX PRO DUAL USER MANUAL ÍndEX Printer Specifications ........2 Main parts of the printer ........ 3 Elements included in the printer ....3 Installation and set up ........4 Quick guide ........... 6 Calibrate dual height........7 Calibrate Offset U and Y........8 Dual options .......... -
Page 2: Printer Specifications
printer specifications Printer Volume: 295x220x200 mm Nozzle Diameter: Printer Mirror: 145X220x200 mm 0.2 - 0.4 - 0.6 - 0.8 - 1.2 mm Printer Size: 550x440x410 mm Nozzle Temperature: 45ºC - 300ºC Package Size: 605x501x500 mm Nozzle Heat Up Time: Package Weight: 32 kg 20ºC: 200ºC - 1’... -
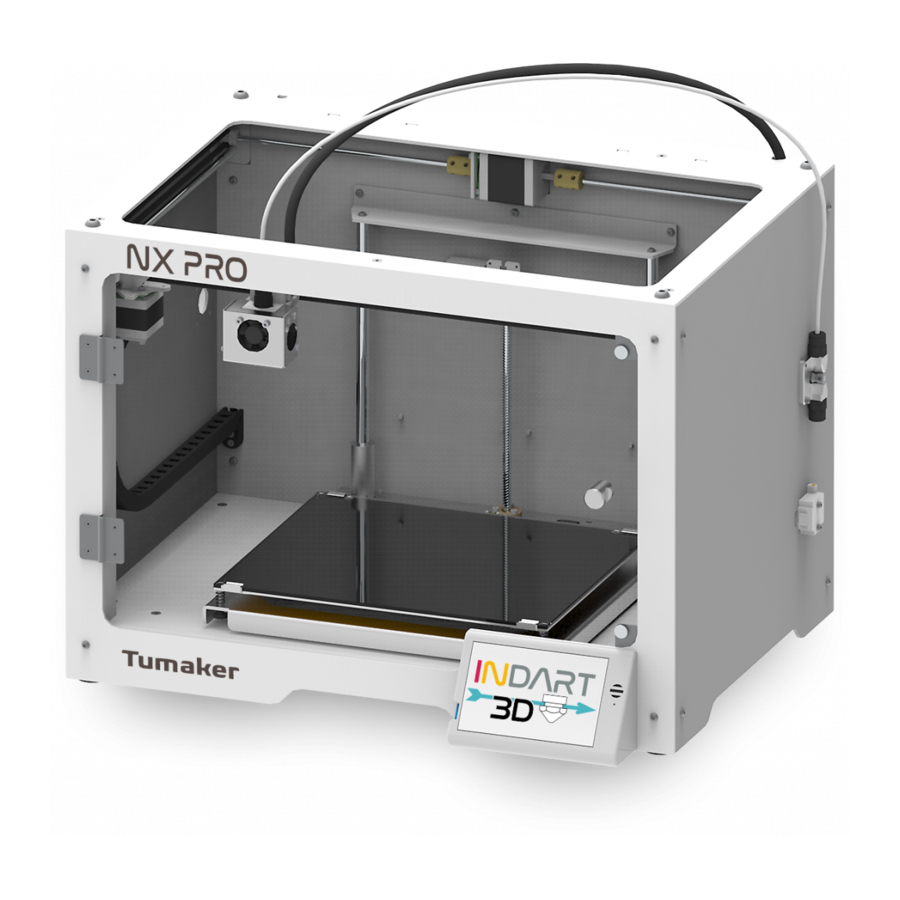
Page 3: Main Parts Of The Printer
Main parts of the printer Main parts of the printer Display Filament input Drive Nozzle Connector Bowden tube Layer fan Frontal fan Filament sensor HOTEND It moves in the X and Y axes by melting the filament of material and depositing it on the platform or heated bed. It has a nozzle that heats up to the required temperature according to the corresponding printing material EXTRUDER... -
Page 4: Installation And Set Up
Installation and set up WIRING DISPLAY To start with the installation and set up, connect the The light indicator will stay on while the printer is on. power cable to the slot on the back of the printer and plug it into the power socket. Switch on the printer by pressing the button. - Page 5 Access the Macros / Others / Connect to the NET section and run it. Next, on the printer screen you will see the assigned IP. If you already have your IP, access from it, go to System and open the config.g file ATENTION changing parameters not indicated in this file may imply the malfunction of the machine In the Network section replace: M552 S2 for M552 S1.
-
Page 6: Quick Guide
QUICK GUIDE Level the Build Plate • Heat the base to the temperature you want to print at • Make sure you have a clean tip • Execute the calibration process found in the Macros “Calibration” section and follow the steps •... -
Page 7: Calibrate Dual Height
Calibrate dual height Step 1 • Access the web interface of the machine • In File Manager / Macros / Height Calibration select DART_Left Height • Calibrate the base to the desired height • Now click on Height DART_Right Step 3 Step 2 •... -
Page 8: Calibrate Offset U And Y
CalibraTE Offset U AND Y Step 1 • Access the web interface of the machine • In File Manager / Macros / Calibrate Offset • Run the file, set the temperature manually and make sure you have filament loaded, it is recommended to load PLA Step 2 •... -
Page 9: Dual Options
Step 3 • In File Manager / System / config.g • In the Tools section modify the parameter U and Y if necessary • To put decimals use “. “ • Supports 2 decimal places Step 4 • Once the change has been made and the plate restarted, print the calibration piece again •... - Page 10 Dual Extruder • Import the two files to print in Dual and click Tools / Dual Extrusion Assistant • Select the base profile template if you have more than one • Configure the material to be used • Place the files in the corresponding Header •...
-
Page 11: Nozzle Change
Nozzle change Below we will explain how to correctly change the nozzle. 1. Remove the material from the head 2. Unscrew the fitting and remove it together with the bowden tube. 3. Remove the nozzle using the tool and fit the new one. 4. - Page 12 Click on Import Select the .frm file In File go to Import FFF profile Click save It will show a message like this Select the .fff file you want to import In the Process select the imported profile Make sure that the imported .frm appears in the G-Code tab...
-
Page 13: Security
Security RISK OF ENTRAPMENT ATTENTION, HOT SURFACE The platform and nozzle of the head can be Do not handle any mechanical parts of the printer heated up to 120ºC and 300ºC depending while it is in operation. on the printing material, therefore caution is recommended. -
Page 14: Warranty
5. A different firmware than the one provided nor the use of a different printing base than the one recommended. 6. Direct or indirect damage resulting from the use of a third-party printing material (one that has not been supplied by Tumaker) or from the use of a consumable in an unsuitable condition (with adhering elements, grease residues or other similar incidents). - Page 15 Indart3D shall not be liable to the Buyer for the failure or inability of Tumaker products to function properly. Nor for any loss, damage, injury or expense of any kind or nature caused directly or indirectly by Tumaker’ s products. If for any reason it is necessary to ship the Product to Indart3D’...
Need help?
Do you have a question about the NX PRO DUAL and is the answer not in the manual?
Questions and answers