Advertisement
Quick Links
SAFETY AND PROPER USAGE
To ensure safe and enduring performance of this product, you must comply strictly with the instructions enclosed herein.
Non-compliance with instructions or improper handling of the product will void your warranty! Usage of this product in
conditions not specified in this manual or in contrary to the instructions hereby provided is considered IMPROPER. The
manufacturer will not be held liable for any damages resulting from improper use of the product.
SAFETY & WARNING INSTRUCTIONS
- Observe valid and generally accepted safety rules when planning, installing and using this product.
- Take proper measures to prevent unintentional operation of the product or damage to it.
- Do not attempt to disassemble this product or lines in the system while they are under pressure.
- Always depressurize the compressed air system before working on the system.
It is important that personnel use safe working practices and observe all regulations and legal requirements for safety
when operating this product. When handling, operating or carrying out maintenance on this product, personnel must
employ safe engineering practices and observe all local health & safety requirements & regulations. International users
refer to regulations that prevail within the country of installation. Most accidents, which occur during the operation and
maintenance of machinery, are the result of failure to observe basic safety rules or precautions. An accident can often be
avoided by recognizing a situation that is potentially dangerous. Improper operation or maintenance of this product could
be dangerous and result in an accident causing injury or death. The manufacturer cannot anticipate every possible
circumstance, which may represent a potential hazard. The WARNINGS in this manual cover the most common potential
hazards and are therefore not all-inclusive. If the user employs an operating procedure, an item of equipment or a method
of working which is not specifically recommended by the manufacturer he must ensure that the product will not be
damaged or made unsafe and that there is no risk to persons or property.
NEVER CHANGE ORIGINAL COMPONENTS WITH ALTERNATIVES
WARNING
This product can expose you to chemicals
including lead, which is known to the State of California to cause
cancer and/or birth defects or other reproductive harm. For more
information, go to www.P65Warnings.ca.gov
1.
2.
3.
PSI
5.
6.
100mm
100mm
8.
9.
L + N to external
Switch point
To Power supply
EXPLODED VIEW
Housing screw (4*)
Housing top part
L + N relay PCB
Housing bottom part
Permanent
Power cable
Ball valve
Washer (2*)
Bolt (2*)
4.
7.
10.
11.
PSI
Screw (2*)
L + N relay PCB
L + N to external
switch point
INSTALLATION INSTRUCTIONS
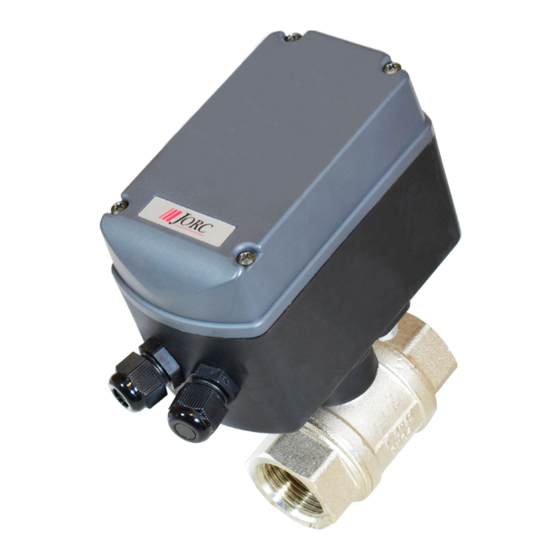
Before installing this product, make sure it complies with your request and that it suits your application!
1. Unpack the motorized ball valve and visually inspect for any transport damage incurred after
leaving our factory.
2. Depressurise the system before installation or maintenance is carried out!
3. Locate a suitable point in your compressed air system to connect this product. We advise to install
it as close to your compressed air tank as possible. Installation notes:
- Make sure that no solid matter (e.g. sealing compound residue) gets into the product during the
installation. - Make sure that the pipeline is thoroughly clean. - Use quality sealing compound only!
- Use proper tools for fixing the valve part to your pipe work! - Never use the product as a lever.
4. The motorized ball valve part of this product usually operates in any mounting position.
However we recommend that the product is mounted upright or side-ways.
5. Minimum space required around the unit is 100 mm, to allow for manual operation.
6. Unscrew the top cover. Make sure not to damage the cables that are attached.
7. Feed the cable, coming from the source you want to switch the motorized ball valve with,
trough the cable gland and connect the cables to the connector on the 'L+N relay'.
8. Close the top cover, making sure not to damage any cables. Connect the Power cord to a suitable
Permanent power supply. Make sure the
voltages used for the external switch point and the power supply for the ball valve are equal!
9. Make sure that your power supply voltage and frequency comply with those stated on the product
before you switch it on!
10. Restore system pressure.
11. Your motorized ball valve, controlled by external switch point, is now ready to perform!
Screw (2*)
7075 LS & 7077 LS
Housing screw (4*)
Housing top part 1
Housing screw (4*)
Housing top part 2
Permanent
Power cable
L + N to external
switch point
Housing bottom part
Ball valve
Advertisement

Summary of Contents for Jorc 7075 LS
- Page 1 This product can expose you to chemicals including lead, which is known to the State of California to cause cancer and/or birth defects or other reproductive harm. For more 7075 LS & 7077 LS information, go to www.P65Warnings.ca.gov INSTALLATION INSTRUCTIONS Before installing this product, make sure it complies with your request and that it suits your application! 1.
- Page 2 1” VERSION MANUAL OVERRIDE VALVE INDICATOR 1” You can manually open and close the valve by pushing the actuator towards the ball valve and turning it left or right 90°. RED = OPEN No colour (metal) = CLOSED Please note: After a manual override the actuator will be 90° rotated versus the ball valve.


Need help?
Do you have a question about the 7075 LS and is the answer not in the manual?
Questions and answers