
Subscribe to Our Youtube Channel
Related Manuals for Insignia NS-TDRE67W1


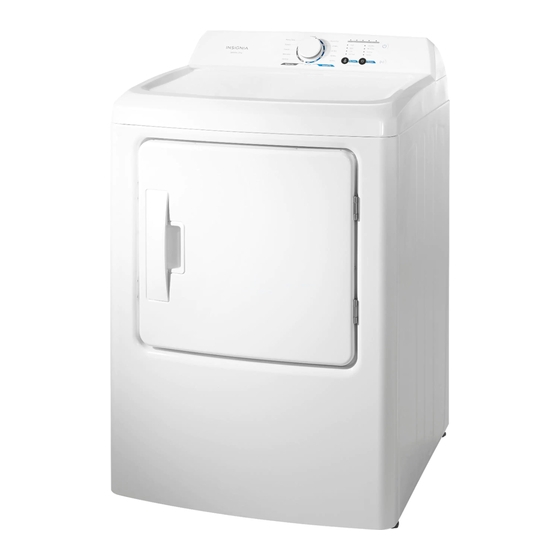
Summary of Contents for Insignia NS-TDRE67W1
- Page 1 USER GUIDE 12-Cycle Electric and Gas Dryers NS-TDRE67W1/NS-TDRG67W1 Before using your new product, please read these instructions to prevent any damage.
-
Page 2: Table Of Contents
Contents Introduction ............3 IMPORTANT SAFETY INSTRUCTIONS . -
Page 3: Introduction
SAFETY & PRECAUTIONS 12-Cycle Electric and Gas Dryers Introduction Congratulations on the purchase of your new Insignia dryer. Insignia dryers feature the latest in design and capabilities and will provide reliable and trouble-free performance. IMPORTANT SAFETY INSTRUCTIONS READ AND KEEP THESE INSTRUCTIONS FOR... - Page 4 SAFETY & PRECAUTIONS NS-TDRE67W1/NS-TDRG67W1 The level of risk is shown by the following indications. WARNING This symbol indicates the possibility of death or serious injury. CAUTION This symbol indicates the possibility of injury or damage to property. WARNING This symbol indicates the possibility of dangerous voltage constituting a risk of electrical shock is present that could result in death or serious injury.
- Page 5 SAFETY & PRECAUTIONS 12-Cycle Electric and Gas Dryers WARNING To reduce the risk of fire, electric shock, or injury to persons when using your appliance, follow basic precautions, including the following: • Read all instructions before using the appliance. • Use this appliance only for its intended purpose as described in this User Guide.
- Page 6 CAUTION • Do not sit on top of the dryer. • Because of continuing product improvements, Insignia reserves the right of change specifications without notice. For complete details, see the Installation Instructions packed with your product before selecting cabinetry, making cutouts, or beginning installation.
-
Page 7: Features
INSTALLATION INSTRUCTIONS 12-Cycle Electric and Gas Dryers • Oxidation creates heat. If this heat cannot escape, the items can become hot enough to catch fire. Piling, stacking, or storing these kinds of items may prevent heat from escaping and can create a fire hazard. •... -
Page 8: Back Components
INSTALLATION INSTRUCTIONS Back components Electric Dryer Wiring box Back venting hole Gas Dryer Power cord (gas dryer only) Gas inlet www.insigniaproducts.com... -
Page 9: Control Panel
INSTALLATION INSTRUCTIONS 12-Cycle Electric and Gas Dryers Control panel ITEM DESCRIPTION Turn to select the cycle for the type of load. The cycle you select determines the heat control for the cycle. The Normal, Heavy Duty, Towels, Casual, Delicates, and Sanitize cycles are Sensor Dry cycles. Cycle The Quick Dry, Time Dry (20M, 40M, 60M, 80M), and Air fluff cycles selector... -
Page 10: Unpacking Your Dryer
INSTALLATION INSTRUCTIONS Unpacking your dryer WARNING: • Packing materials can be dangerous to children. Keep all packing materials (such as plastic bags and polystyrene) out of the reach of children. • Unpack your dryer and inspect it for shipping damage. Make sure that you have received all the items shown in Package contents on page 7. - Page 11 INSTALLATION INSTRUCTIONS 12-Cycle Electric and Gas Dryers • Do not install or store your dryer in an area where it will be exposed to water or weather. Keep the dryer area clear of combustible materials, gasoline, and other flammable vapors and liquids. Your dryer produces combustible lint. Keep the area around the dryer lint-free.
- Page 12 INSTALLATION INSTRUCTIONS 30.0 in. 76.3 cm 49.2 in. 125.0 cm Installing side-by-side, or in an alcove, closet, or other recessed area WARNING: • You must exhaust your dryer to the outside to reduce the risk of fire when installed any place inside the house. •...
- Page 13 INSTALLATION INSTRUCTIONS 12-Cycle Electric and Gas Dryers Installing in a closed cabinet Minimum clearances between your dryer and adjacent walls or other surfaces are: • Either side: 1 in. (2.5 cm) • Rear: 5 in. (12.7 cm) • Top: 24 in. (61 cm) •...
- Page 14 INSTALLATION INSTRUCTIONS Note: The dryer can be installed in either the left or right side of the cabinet. 1.0 in. (2.5 cm) 1 in. (2.5 cm) 27.0 in. (68.6 cm) 1.0 in. (2.5 cm) 3 in. (7.6 cm) in. (310 in.
-
Page 15: Exhausting Requirements
INSTALLATION INSTRUCTIONS 12-Cycle Electric and Gas Dryers Exhausting requirements WARNING: • Do not exhaust your dryer into a chimney, a wall, a ceiling, an attic, a crawl space, or a concealed space in a building. • Your dryer must be exhausted to the outside to reduce the risk of fire when installed in an alcove or closet. -
Page 16: Duct Requirements
INSTALLATION INSTRUCTIONS Duct requirements WARNING: You are responsible for correctly installing the exhaust system. • Use a 4-inch (10.2 cm) diameter rigid aluminum or rigid galvanized steel duct. Do not use a smaller duct. • Ducts larger than 4 inches (10.2 cm) in diameter can result in increased accumulation of lint and changes in performance. -
Page 17: Electric Requirements
INSTALLATION INSTRUCTIONS 12-Cycle Electric and Gas Dryers For best results, the static pressure in any exhaust system should be between 0.3 to 0.8 inches of water column, and it cannot be less than 0 under any circumstances with an installed duct with a four inch diameter. Measurement must be done with the empty dryer working with a manometer at the point where the exhaust duct connects to the dryer. - Page 18 INSTALLATION INSTRUCTIONS Electrical connections An individual branch (or separate) circuit serving only your dryer is recommended. DO NOT USE AN EXTENSION CORD. Gas models - U.S. and Canada A 120-volt, 60Hz AC approved electrical service, with a 15 ampere fuse or circuit breaker is required.
-
Page 19: Gas Requirements
INSTALLATION INSTRUCTIONS 12-Cycle Electric and Gas Dryers Using a three-wire outlet If your outlet is a three-wire (three-prong) outlet, choose a three-wire power supply cord with ring or spade terminals and UL listed strain relief. The three-wire power supply cord must: •... -
Page 20: Grounding Requirements
INSTALLATION INSTRUCTIONS Gas ignition: Your dryer uses an automatic ignition system to ignite the burner. There is no constant burning pilot. COMMONWEALTH OF MASSACHUSETTS INSTALLATION INSTRUCTIONS Your dryer must be installed by a licensed plumber or gas fitter. A “T” handle manual gas valve must be installed in the gas supply line to the installed dryer at the location of operation. -
Page 21: Changing The Dryer Vent Location (Optional)
INSTALLATION INSTRUCTIONS 12-Cycle Electric and Gas Dryers Changing the dryer vent location (optional) This dryer is shipped to vent from the back. It can also be configured to vent to the bottom or left side. BACK VIEW 3.6 in. (9.3 cm) 12.1 in. - Page 22 INSTALLATION INSTRUCTIONS Remove the two rear exhaust retaining screws, then pull out the exhaust duct. Retaining screw Rear exhaust duct Press the tabs on the knockout, then carefully remove the knockout for the desired vent opening. Push the adapter duct onto the blower housing of the dryer. Adapter duct DRYER SIDE/BACK VIEW Knockout...
- Page 23 INSTALLATION INSTRUCTIONS 12-Cycle Electric and Gas Dryers Bottom venting TOP VIEW SIDE VIEW 4.5 in. (11.4 cm) 3.5 in. (9.3 cm) 1.5 in. (3.8 cm) 12.1 in. (30.8 cm) Remove the two rear exhaust retaining screws, then pull out the exhaust duct. Retaining screw Rear exhaust duct Press the tabs on the knockout, then carefully remove the knockout for the...
-
Page 24: Installing Your Dryer
INSTALLATION INSTRUCTIONS Attach aluminum tape to the back of the dryer to seal the original dryer vent hole. Aluminum tape Elbow Installing your dryer Important: We recommend that you use a qualified installer to install your dryer. Tools you will need Phillips screwdriver Flat-head screwdriver Level... -
Page 25: Step-By-Step Instructions
INSTALLATION INSTRUCTIONS 12-Cycle Electric and Gas Dryers Step-by-step instructions Note: If a gas dryer is being installed, you will need to call a licensed professional to do the installation. Step 1: Make sure that the floor is a solid, level surface •... - Page 26 INSTALLATION INSTRUCTIONS Connect one end of the exhaust ducting to the venting hole on the back of your dryer, then use aluminum tape to secure the ducting to your dryer. The crimped ends of the duct sections must point away from your dryer. Use a 4 in. (10.2 cm) diameter rigid metal duct.
- Page 27 INSTALLATION INSTRUCTIONS 12-Cycle Electric and Gas Dryers Connect all the pipe joints and tighten with a wrench. Note: An additional fitting is required to connect the 3/4 in. (1.9 cm) female thread end of a flexible connector to the 3/8 in. (1 cm) male threaded end on the dryer.
- Page 28 INSTALLATION INSTRUCTIONS Step 5: Connect the power cord (U.S. models only) Important: • Before you connect the power cord, review the electric requirements in Electric requirements on page 17. • Before testing or operating your dryer, make sure that your dryer is grounded. See Grounding requirements on page 20.
- Page 29 INSTALLATION INSTRUCTIONS 12-Cycle Electric and Gas Dryers Four-wire outlet - for electric dryers: Center terminal block screw Neutral grounding wire Black wire (white) External ground connector Red wire Neutral wire (white or center wire) Green or bare copper wire of the power cord 3/4"...
- Page 30 INSTALLATION INSTRUCTIONS Step 6: Level your dryer • If your dryer is not level, carefully tilt your dryer just enough to adjust the leveling feet on the bottom of your dryer. Extend the feet only as much as is necessary. If the feet are extended too much, your dryer may vibrate. Level Loosen Tighten...
-
Page 31: Reversing The Dryer Door
INSTALLATION INSTRUCTIONS 12-Cycle Electric and Gas Dryers Reversing the dryer door Make sure that the power cord is unplugged. While supporting the door, remove the four hinge screws from the door, then lift the door to remove it and set the door aside. Remove two screws Remove two screws CAUTION: Be careful not to drop the door when removing the screws. - Page 32 INSTALLATION INSTRUCTIONS Remove the 12 screws around the door. Outside door board Inside door board Pull the inside door board from the outside door board. Rotate the outside door board 180°, then reassemble it with the inside door board with the screws you removed previously. www.insigniaproducts.com...
- Page 33 INSTALLATION INSTRUCTIONS 12-Cycle Electric and Gas Dryers Install the hinges onto the left side of the dryer. Align the hinges on the door with the hinge screw holes on the front of your dryer, then secure the door with the four screws you previously removed.
-
Page 34: Using Your Dryer
OPERATING INSTRUCTIONS Using your dryer WARNING: To reduce the risk of fire, electric shock, or injury to persons, read the IMPORTANT SAFETY INSTRUCTIONS before operating this appliance. Drying a load of clothes Step 1: Turn on your dryer • Press the (power) to turn on your dryer. -
Page 35: Unloading Your Dryer
OPERATING INSTRUCTIONS 12-Cycle Electric and Gas Dryers Step 4: Start your dryer Press the (start/pause) button. The Drying indicator illuminates. If you need to pause the cycle (for example to add or remove items or adjust the load), press the (start/pause) button, then open the door. -
Page 36: Dryer Options And Settings
OPERATING INSTRUCTIONS Dryer options and settings • • Settings in bold are initial settings. The (dot) indicates optional functions you can select. • For best results, follow the wet load size recommendations noted for each cycle: • Small load: Fill the dryer drum with three to four items, not more than 1/4 full. - Page 37 OPERATING INSTRUCTIONS 12-Cycle Electric and Gas Dryers FABRIC CYCLE TEMP DRYNESS TYPE AMOUNT High 60 Min No Heat High 80 Min No Heat Air Fluff No Heat www.insigniaproducts.com...
-
Page 38: Special Laundry Tips
OPERATING INSTRUCTIONS Special laundry tips ITEMS DRYING GUIDE • Follow the care label instructions or dry using the 60 Min or 80 Min cycle (Medium Temp). • Make sure that the item is thoroughly dry before using or Bedspreads and storing. -
Page 39: Fabric Care Chart
OPERATING INSTRUCTIONS 12-Cycle Electric and Gas Dryers Fabric Care Chart Follow the cleaning and care labels on clothes and other fabrics. Wash Cycle Normal Permanent Press / Wrinkle Resistant / Wrinkle Control Gentle/Delicates Hand wash Water Temperature Warm Cold Bleach Any bleach (when needed) Only non-chlorine (color-safe) bleach (when... - Page 40 OPERATING INSTRUCTIONS Warning symbols for laundering Gentle/Delicates Do not wash Special Instructions Do not wring Line dry/ Hang to dry Do not bleach Drip dry Do not tumble dry Dry flat No steam (added to iron) Heat Setting Do not iron High Dry clean Medium...
-
Page 41: Maintaining Your Dryer
OPERATING INSTRUCTIONS 12-Cycle Electric and Gas Dryers Maintaining your dryer Cleaning the exterior • Clean with a soft, damp cloth. Do not use abrasive substances. • Protect the surface from sharp objects. • Do not place any heavy or sharp objects or a detergent box on the dryer. Keep them in a separate storage area. -
Page 42: Troubleshooting
USER MAINTENANCE INSTRUCTIONS Troubleshooting CAUTION: Do not try to repair your dryer yourself. Doing so invalidates the warranty. PROBLEM SOLUTION Dryer does • Make sure that the dryer door is closed completely. not start. • If you opened the door during the drying cycle, press the (start/pause) button again. - Page 43 USER MAINTENANCE INSTRUCTIONS 12-Cycle Electric and Gas Dryers PROBLEM SOLUTION Dryer shuts • The dryer load is too small. Add more items or a few towels and off before the restart the cycle. clothes are • The dryer load is too large. Remove some items and restart the dried.
-
Page 44: Understanding The Error Codes
USER MAINTENANCE INSTRUCTIONS Understanding the error codes Your dryer is equipped with an automatic error-monitoring system to detect and diagnose problems at an early stage. When an error occurs, the dryer beeps for five seconds every 15 minutes. After 24 hours, the dryer turns off automatically. -
Page 45: One-Year Limited Warranty
Product is determined to be defective by an authorized Insignia repair center or store personnel, Insignia will (at its sole option): (1) repair the Product with new or rebuilt parts; or (2) replace the Product at no charge with new or rebuilt comparable products or parts. - Page 46 • Damage due to incorrect operation or maintenance • Connection to an incorrect voltage or power supply • Attempted repair by any person not authorized by Insignia to service the Product • Products sold “as is” or “with all faults”...
- Page 47 1-877-467-4289 (U.S. and Canada) or 01-800-926-3000 (Mexico) INSIGNIA is a trademark of Best Buy and its affiliated companies. Distributed by Best Buy Purchasing, LLC 7601 Penn Ave South, Richfield, MN 55423 U.S.A. V1 ENGLISH ©2020 Best Buy. All rights reserved.
Need help?
Do you have a question about the NS-TDRE67W1 and is the answer not in the manual?
Questions and answers
When I took the cover off to make electrical connections there is a white wire already attached the to middle lug on the dryer. It appears to just loop around and connects to the top of that same lug. Does that white wire stay on that lug or go to the green ground screw?
The white wire on the Insignia NS-TDRE67W1 dryer connects to the middle lug (center terminal block screw), not the green ground screw.
This answer is automatically generated