Advertisement
Quick Links
TRANSMITTER REGISTRATION (PAIRING) IN THE SYSTEM
You need to register the transmitter in the EXTA LIFE system to:
● remotely bind transmitter inputs to specific EXTA LIFE receivers (without physical access to
the receivers),
● bind a specific input to playback scene(s),
● use a button connected to a transmitter input as a condition to execute a logical function.
To register the transmitter in the EXTA LIFE system, connect the EXTA LIFE controller and install
the EXTA LIFE mobile app. The transmitters are saved as registered in the EXTA LIFE system
only if they have been successfully paired with the EXTA LIFE controller. Procedure:
1. Launch the EXTA LIFE mobile app and open the Devices screen.
2. Select the Transmitters tab and press the "+" button to start discovering the remote con-
trols. The discovery takes up to 60 s. You can terminate it early by pressing Stop. To find the
transmitter, trigger any of its inputs during the discovery. If the transmitter is in range of the
EXTA LIFE controller, it will appear on the on-screen list with its default icon and name, which
is the transmitter model (RNP-21) with its six-digit ID in the suffix . You do not need to stop
the discovery to register more than one transmitter/remote control.
3. Once the discovery has been completed or stopped manually, check the selection boxes next
to the discovered transmitters on the list to choose those you want to pair with the EXTA LIFE
controller . You can check more than one transmitter with the selection boxes. You can use
the pop-up menu to modify the transmitter's name before pairing.
4. Press PAIR to pair the selected transmitters. The selected transmitters will be paired with the
EXTA LIFE system after a short moment and appear in the Transmitters tab .
5. A default icon is assigned to each paired transmitter.
6. You can pair one transmitter at a time; once PAIR has been pressed, you can assign a new
name to the transmitter. When pairing more than one transmitter at the same time, they will be
saved under their default names.
7. You can also modify the default names of the RNP-21 transmitters once they have been
paired.
8. Only when paired can the transmitter be used to set up the EXTA LIFE system configuration
(remote assignment of receivers, scenes or logical functions).
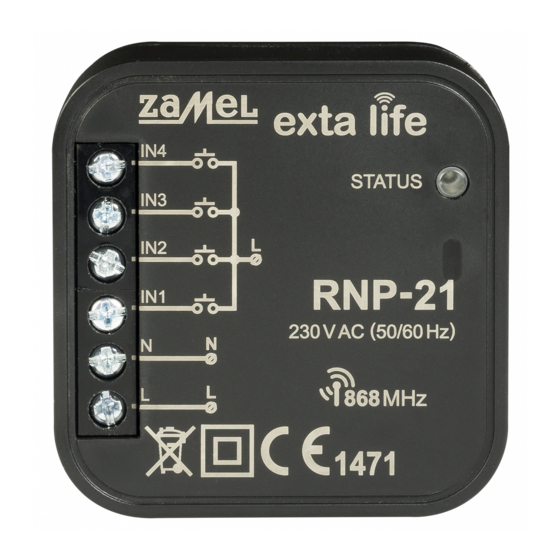
OVERVIEW
Control inputs IN1 ÷ IN4
Supply terminals L, N
DESCRIPTION
The RNP-21 transmitter enables wireless control of EXTA LIFE system receivers. It is designed to
implement such functions as turning on/off lighting, adjusting illumination, opening/closing roller
shutters and garage doors. It is designed for installation in flush mounting boxes (min. Ø60 mm) un-
der existing equipment. It enables the use of electrical installation equipment from any manufacturer
and causes no restrictions to the interior design and nature. The transmitter has four inputs triggered
with 230 VAC voltage. The triggering is achieved by applying phase voltage to the right input. The
transmitter enables independent control of up to four circuits / channels. Built-in LED for transmis-
sion signalling. The RF transmission is encrypted for increased control security.
FEATURES
● Radio transmitter for installation in a mounting box (min. Ø60 mm),
● remote control of EXTA LIFE system receivers,
● installation under traditional mounting equipment,
● capable of independent control of up to four receivers (circuits),
● encrypted RF transmission,
● 230 VAC power supply,
● long operating range (up to 300 m in open areas).
CONNECTION
P1 P2 P3 P4
Signalling LED: green (transmission)
Advertisement

Related Manuals for Zamel EXTA LIFE RNP-21


Summary of Contents for Zamel EXTA LIFE RNP-21
- Page 1 TRANSMITTER REGISTRATION (PAIRING) IN THE SYSTEM OVERVIEW You need to register the transmitter in the EXTA LIFE system to: Control inputs IN1 ÷ IN4 Signalling LED: green (transmission) ● remotely bind transmitter inputs to specific EXTA LIFE receivers (without physical access to the receivers), ● bind a specific input to playback scene(s), ● use a button connected to a transmitter input as a condition to execute a logical function. Supply terminals L, N To register the transmitter in the EXTA LIFE system, connect the EXTA LIFE controller and install the EXTA LIFE mobile app. The transmitters are saved as registered in the EXTA LIFE system only if they have been successfully paired with the EXTA LIFE controller. Procedure: 1. Launch the EXTA LIFE mobile app and open the Devices screen. 2. Select the Transmitters tab and press the “+” button to start discovering the remote con- DESCRIPTION trols. The discovery takes up to 60 s. You can terminate it early by pressing Stop. To find the transmitter, trigger any of its inputs during the discovery. If the transmitter is in range of the The RNP-21 transmitter enables wireless control of EXTA LIFE system receivers. It is designed to EXTA LIFE controller, it will appear on the on-screen list with its default icon and name, which implement such functions as turning on/off lighting, adjusting illumination, opening/closing roller is the transmitter model (RNP-21) with its six-digit ID in the suffix . You do not need to stop...
- Page 2 INSTALLATION OPERATION The RNP-21 transmitter is designed for installation in mounting boxes. The enclosure dimensions Upon a short press of a button connected to a given input, the transmitter sends an RF command to enable installation both in flush (min. Ø60) and surface mounting boxes. For flush mounting installa- the EXTA LIFE system components. It is indicated with the green LED flashing on the transmitter. tion, it is recommended to use deep or pocket boxes. To respond properly to the signal from the given transmitter input, the transmitter must first be paired with it. See the applicable EXTA LIFE receiver user manuals for pairing instructions (programming The device shall be connected to a 1-phase system in accordance with applicable standards. The specific inputs in the receiver memory). The transmitter will only transmit when a button connected activities related to the installation, connection and adjustment should be performed by qualified to the given input is pressed and then released. No RF signal is transmitted as long as a button is electricians, familiar with the user manual and functions of the device. For safety purposes, do not held pressed. install the device without an enclosure or with a damaged enclosure, because it causes an electric The presented mode of operation translates to transmitter functionality with bistable connectors shock hazard. connected to inputs IN1…IN4. For example, if the connector connected to input IN1 is to work with For installation, use a Philips screwdriver with a diameter of up to 3.5 mm. a receiver in “bistable” mode, the connector must be closed to activate the receiver. However, to 1. Disconnect the supply circuit with a fuse, an overcurrent circuit breaker or an isolator connected re-activate the receiver (if it has been turned off, for example with a remote control), first open and to the corresponding circuit. close the connector again. 2. Check the voltage-free status of the power cords with a suitable tool. 3. Connect the wires to the terminals according to the connection diagram. You can use up to four OPERATING CONSIDERATIONS transmitter inputs (from IN1 to IN4).
Need help?
Do you have a question about the EXTA LIFE RNP-21 and is the answer not in the manual?
Questions and answers