Table of Contents
Advertisement
Quick Links
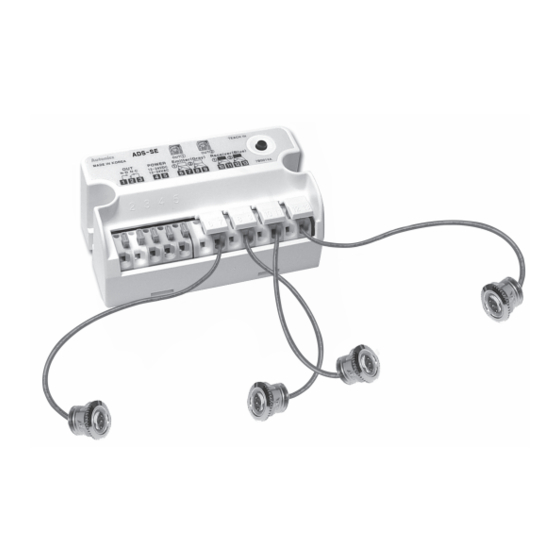
ADS-SE
Door Side Sensor
Features
● Long sensing distance: 0 to 10m
● High ambient intensity of illumination:
Max. 100,000lx of sunlight
● Easy to connect sensor head to controller
● Easy sensitivity setting
(automatic sensitivity setting by one push method)
● Self-diagnosis function
● Compact Size (W77×L44×H30mm)
Please read "Caution for your safety" in operation
manual before using.
Specifications
Model
Sensing type
Sensing distance
Power supply
Power/Current consumption
Contact composition 1c
Contact
※ 1
Contact capacity
output
Relay life cycle
Response time
Output holding time
Available sensor set
Indicator
Light source
Ambient illumination Sunlight: Max. 100,000㏓ (receiver illumination)
Environ-
Ambient temperature -20 to 55℃, storage: -25 to 60℃
ment
Ambient humidity
Protection structure
Sensor cable length
Sensor cable
Material
Accessory
Unit weight
※ 1: Do not use Load which is beyond the rated capacity of contact point of Relay.
It can cause bad insulation, contact fusion, bad contact, relay breakdown, and fire etc.
※ Please purchase 1 set of sensor separately when mounting 2 sets of sensor.
※ The mounting bracket of sensor (ADS-SB12, ADS-SB10) is sold separately.
※ It is enable to purchase a controller separately.
※ The temperature or humidity mentioned in Environment indicates a non freezing or condensation environment.
C-10
ADS-SE
Through-beam type
0 to 10m
12-24VAC ±10% 50/60Hz / 12-24VDC ±10% (ripple P-P: max. 10%)
AC: Max. 2VA / DC: Max. 50mA
50VDC 0.3A (resistive load)
Mechanical- Min. 5,000,000 operations, Electrical- Min. 100,000 operations
Approx. 50ms (from light OFF)
Approx. 500ms (from light ON)
2set
Operation indicator: Red LED, Green LED(Refer to C-14 to 15 for the display status in operation)
Infrared LED (850nm modulated)
35 to 85%RH, storage: 35 to 85%RH
IP30 (IEC standard)
10m
Ø2.4mm, 1-wire, 5m (AWG26, core diameter: 0.16mm, number of cores: 7, insulator out diameter: Ø1.32mm)
Sensor - Holder: Acrylonitrile butadiene styrene, Lens: Polymethyl methacrylate,
Lens guide: Polycarbonate, Nut: Cu-Zn
Controller - Housing: Acrylonitrile butadiene styrene, Cover: Acrylonitrile butadiene styrene,
LED CAP: Polymethyl methacrylate, Bolt: Steel chromium molybdenum (brass, Ni-plate)
Sensor: 1 set (ADS-SH), Fixing bolt for controller: 2 pieces
Approx. 300g
Advertisement
Table of Contents

Related Manuals for Autonics ADS-SE


Summary of Contents for Autonics ADS-SE
- Page 1 ADS-SE Door Side Sensor Features ● Long sensing distance: 0 to 10m ● High ambient intensity of illumination: Max. 100,000lx of sunlight ● Easy to connect sensor head to controller ● Easy sensitivity setting (automatic sensitivity setting by one push method) ●...
- Page 2 Door Side Sensor Unit Description Photoelectric ● Controller (ADS-SEC) ● Sensor (ADS-SH) Sensors Sensor set Body Fiber Optic Lens Sensors Head holder Door/Area Sensors Proximity Sensors Pressure Sensors Rotary 1. Display LED (red) Encoders 2. Display LED (green) 3. Sensitivity setting button Connectors/ Emitter Receiver...
- Page 3 ADS-SE Installation Caution for sensor installation 1. Sensing distance is 10m. Install it in the rated distance. 2. Install the sensor with more than 50cm gap from the bottom and ceiling. It may cause malfunction by reflected beams from the surface of the bottom and ceiling.
- Page 4 Door Side Sensor Installation Photoelectric Sensors Controller installation Warning When fixing controller Fiber • Fix controller with the bolts (M4×20, 2pcs). Process the Optic • Do not screw the bolts too tightly. Sensors fixing hole of controller by M4 included in the package. The fixing hole of controller may be broken.
- Page 5 ADS-SE Proper Usage Sensitivity setting Caution For mounting hole Set sensitivity after mount this product for a normal • Check the wiring again with the connection diagram. operation. It sets the optimum sensitivity automatically at • When set the sensitivity, the transmitted beam must not the controller according to installed environment.
- Page 6 Door Side Sensor Operation Check Photoelectric Please check the operation flow chart below. Sensors : light ON, : light OFF Fiber Optic Sensors Operation Door/Area Sensors Human or material is passing Proximity • Normal operation Sensors between sensors Status Power OFF •...
Need help?
Do you have a question about the ADS-SE and is the answer not in the manual?
Questions and answers