Autonics BD Series Reference Manual
Laser displacement sensors - amplifier unit
Hide thumbs
Also See for BD Series:
- User manual (84 pages) ,
- Manual (14 pages) ,
- Product manual (6 pages)

Related Manuals for Autonics BD Series


Summary of Contents for Autonics BD Series
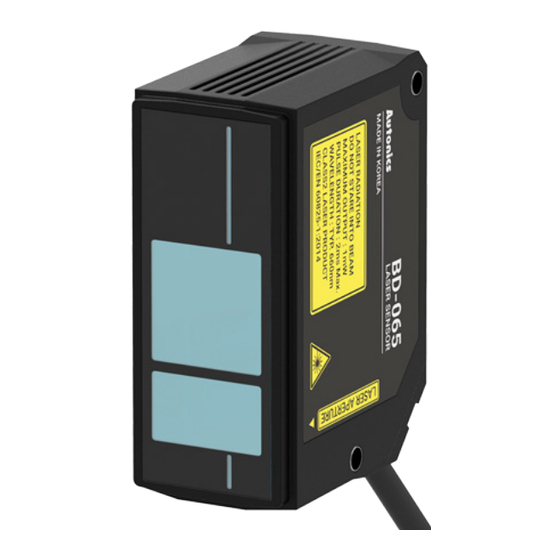
- Page 1 BD Series Laser Displacement Sensors - Amplifier unit Operations Reference Manual MSO-BDU1-V1.8-EN...
-
Page 3: Table Of Contents
Contents Thank You for Purchasing The Product ............ ... - Page 4 2.3.12. Offset [OFFSET] ............. . ...
-
Page 5: Thank You For Purchasing The Product
Thank You for Purchasing The Product Thank you for purchasing Autonics products. Please familiarize yourself with the information contained in the Safety Considerations section before using this product. This manual contains information about the porduct and its proper use, and should be kept in a place where it will be easy to access. - Page 6 6 Autonics | BD Series...
-
Page 7: Manual Guide
(www.autonics.com) to download a copy. • The manual’s content may vary depending on changes to the product’s software and other unforeseen developments within Autonics, and is subject to change without prior notice. Upgrade notice is provided through our homepage. • We contrived to describe this manual more easily and correctly. However, if there are any corrections or questions, please notify us these on our website. - Page 8 8 Autonics | BD Series...
-
Page 9: Manual Symbols
Manual Symbols Failure to follow instructions can result in serious injury or death. Failure to follow instructions can lead to a minor injury or product damage. Supplementary information for a particular feature. An example of the concerned feature’s use. Important information of the concerned feature’s use. Manual Symbols ... - Page 10 10 Autonics | BD Series...
-
Page 11: Precautions For Safety
Precautions for Safety Be sure to follow the 'Safety Precautions' to prevent accidents or dangers in advance by using the product safely and correctly. Warning 1. Fail-safe device should be installed when using the unit with machinery that may cause serious injury or substantial economic loss. - Page 12 ◦ Installation category II Specifications and dimensions described in this user’s manual are subject to change without notice for product improvement. Be sure to observe the precautions in the instruction manual, manual, and technical explanation (catalog, website). 12 Autonics | BD Series...
-
Page 13: Function
1. Function 1.1. Display When Power is ON When the sensor head is connected and power is applied to the amplifier for the first time or the sensor head is replaced, the control output type setting screen is displayed. Follow the steps below to set the output type. -
Page 14: Mode Setting
▲ PEAK) monitoring • Minimum value monitoring: ▼ Parameter group key over 2 seconds MODE Refer to 2.2, “Setting Range and Initial Value” for parameter related defaults and setting ranges related to each mode. 14 Autonics | BD Series... -
Page 15: Run Mode
1.2.2. RUN Mode PV (present value) display • For individual use: Displays the present value (PV). • When using arithmetic function: The arithmetic function indicator (CALC) of the master amplifier turns on and the calculation result is displayed, and the judgment output is executed based on the corresponding value. -
Page 16: Emission Optimization
Gain setting value change) ◦ The measurement may be inaccurate if this function is used when measuring an object that does not move or whose reflectance changes. Return Automatic after executing the emission optimization function 16 Autonics | BD Series... -
Page 17: Zero-Point Adjustment
1.2.4. Zero-point Adjustment When the zero adjustment function is executed, sets the present value (PV) to the offset setting value, and displays the amount of displacement based on this. The amount of displacement is displayed based on the reference distance determined for each sensor head model, but after the zero adjustment function is executed, it is displayed based on reference distance minus offset value. -
Page 18: Sensitivity Setting
▲ • LOW manual sensitivity: key for over 2 seconds MODE ▼ Settings • Move digit: ◀ ▶ • Change the corresponding digit number: ▲ ▼ Return key for less than 2 seconds MODE 18 Autonics | BD Series... - Page 19 1.2.5.2. Teaching (Auto Sensitivity) Set the judgment output (HIGH/GO/LOW) range automatically. Parameter 1 group teaching mode After setting the teaching mode to be used in the SENS parameter, enter the teaching mode. For details of selecting the teaching mode, refer to 2.3.2, “Teaching (Auto Sensitivity) [SENS]”.
- Page 20 Return Auto after executing the 2-point teaching function 20 Autonics | BD Series...
-
Page 21: Control Output Type
1.2.6. Control Output Type Set the control/analog output type. This setting mode appears when the sensor head is connected to the amplifier and power is applied for the first time. After that, you can reset it by entering the mode below. Refer to 1.1, “Display When Power is ON”... -
Page 22: Maximum/Minimum Value (High/Low Peak) Monitoring
Display LLLL if no present value exists. Return or automatically when there is no key input for 5 seconds ◀ ▶ ▼ ▲ 1.2.8. Parameter Group For parameter setting method, check the item 2.1, “Setting”. 22 Autonics | BD Series... -
Page 23: Error Display And Trouble Shooting
1.3. Error Display and Trouble Shooting In the error state, ERROR appears on the present value (PV) display. Take action according to the processing method for each setting value (SV) display part below. [SV display error message] (Alarm output) Cause Solution [HEAD] (O) Disconnection of sensor head / amplifier unit / cable or sensor head malfunction... - Page 24 1. Check that the load on the output stage is within the rated range. 2. Check if the output terminal is in contact with another wire or frame. [AIF] (O) Poor connection between amplifier unit or communication module 24 Autonics | BD Series...
- Page 25 Turn off the power, check the connection between the amplifier unit or the communication module, and then re-apply the power. If you connect an incompatible firmware version of the product, it will not work properly. Check the firmware version and needs to update to compatible version. 1.3.
- Page 26 26 Autonics | BD Series...
-
Page 27: Parameter
2. Parameter 2.1. Setting • In RUN mode, enter key for more than 2 seconds. MODE • In parameter setting mode, use the arrow keys to change the parameter group and press the ◀ ▶ key to enter the parameter group. MODE •... - Page 28 Fixed error output_Judgment HIGH, GO, LOW [FIxOU2] BD-030/065/100: BD-030/065/100: -99.999 to 99.999 Offset [OFFSET] 0.000 BD-300/600: -999.99 to 999.99 BD-300/600: 0.00 Supports only over 5.0 firmware version of the amplifier unit (BD-A1) and communication converter (BD-C) 28 Autonics | BD Series...
- Page 29 Parameter 2 group [PARA2]: setting related to measurement value processing Parameter name Setting range Default OFF: Off, ADD-AB: Add, SUB-AB: Subtract, Calculation [CALC] AVG: Average Gain [GAIN] 1, 2, 3 AVF: Moving average filter, DIFF: Differential Filter [FILTER] filter Number of moving average 1, 2, 4, 8, 16, 32, 64, 128, 256, 512, 1024, 2048, samples [AVF] 4096...
- Page 30 CLR-B0: Initialize bank 0 CLR-B1: Initialize bank 1 Initialization [INIT] CLR-B2: Initialize bank 2 CLR-B3: Initialize bank 3 CLR-A: Initialize all banks Parameter 4 groups are not saved for each bank and are used in common. 30 Autonics | BD Series...
-
Page 31: Parameter 1 Group [Para1]
2.3. Parameter 1 Group [PARA1] Describes the items in parameter 1 group consisting of output type, displacement, display method, and operation setting related functions when measurement is not possible. For the setting range and default of each item in the group, refer to 2.2, “Setting Range and Initial Value”. -
Page 32: Output Type [Nonc]
Number of displayed digits )000 Display 3 digit after the decimal point Display 2 digit after the decimal point Display 1 digit after the decimal point Display integer Sensor head BD-300 / 600 models are not supported. 32 Autonics | BD Series... -
Page 33: High/Low Limit Display Scale [H-Sc / L-Sc]
2.3.6. High/Low Limit Display Scale [H-SC / L-SC] The present value (PV) is converted into an arbitrary linear range (scale) and displayed. High limit display scale [H-SC] High limit display scale value for maximum input value Low limit display scale [L-SC] Low limit display scale value for minimum input value Activated when the 'PV display [DISP]' parameter setting value is 'Scale [SCALE]'. -
Page 34: Hysteresis [Hys]
In order to prevent output instability due to fluctuations in the present value (chattering), a specific value is set between the ON/OFF of the output to delay the switching of the output. Hysteresis operation timing chart 34 Autonics | BD Series... -
Page 35: High/Low Limit Analog Output Scale [H-An / L-An]
2.3.8. High/Low Limit Analog Output Scale [H-AN / L-AN] It converts the present value (PV) into an arbitrary linear range (scale) and outputs it as an analog signal. High limit analog scale [H-AN] High limit analog output scale value for maximum input value Low limit analog scale [L-AN] Low limit analog output scale value for minimum input value It is activated when the 'Analog output [A-OUT]' parameter setting value is not 'Off... -
Page 36: Error Output Displacement [Errout]
(judgment output OFF / analog output ON) • Alarm output does not work while error output is occurring. • Fixed error output_Judgment [FIxOU2] supports only over 5.0 firmware version of the amplifier unit (BD-A1) and communication converter (BD-C). Example graph 36 Autonics | BD Series... -
Page 37: Fixed Error Output_Analog [Fixout]
2.3.10. Fixed error output_Analog [FIxOUT] In case of a measurement error, an arbitrarily set analog value is output. Activated when the value of 'Analog output [A-OUT]' is not 'Off [OFF]' and the value of 'Error output displacement [ERrOUT]' is 'Fixed value output [FIX]'. Setting range and default for each analog output Analog output setting value Setting range... -
Page 38: Offset [Offset]
If the displacement is 1.23, and the offset value is 10.00, the displacement is expressed as 10.00 when performing zero adjustment. This function supports only over 5.0 firmware version of the amplifier unit (BD-A1) and the communication converter (BD-C) 38 Autonics | BD Series... -
Page 39: Parameter 2 Group [Para2]
2.4. Parameter 2 Group [PARA2] Describes the items in parameter 2 group consisting of the sensor head present value processing related functions. For the setting range and default of each item in the group, refer to 2.2, “Setting Range and Initial Value”. 2.4.1. - Page 40 Displays the difference in the present values of the two sensor head. Use it to measure the step, lift, and curvature of the sensing object. • Equation: Sensor head A measurement – sensor head B measurement Subtract calculation function installation example 40 Autonics | BD Series...
- Page 41 Average [AVG] Displays the average of measurement values of two or over sensor head (up to 8 units). Use it to measure the flatness of the sensing object. • Equation: (Present value of sensor head A + present value of sensor head B + … + present value of sensor head N) ÷...
-
Page 42: Gain [Gain]
2.4.3. Filter [FILTER] Set up a filter that adjusts the deviation of the sensor head readings. BD series supports 'Moving average filter [AVF]', 'Differential filter [DIFF]', 'Number of median samples [MEDIAN]' functions. • The median filter function can be set through a separate parameter. -
Page 43: Number Of Moving Average Samples [Avf]
Setting this parameter to OFF disables the median filter function. The BD series displacement sensor processes the sensor measurement value in the order of median filter → moving average / differential filter and displays the current value. -
Page 44: Hold [Hold]
Minimum value [BOTTOM] Outputs and maintains the minimum value within the sampling time. The output starts after sampling ends, and the output stays on until the next sampling ends. 44 Autonics | BD Series... - Page 45 Difference value [P-P] Outputs and maintains the difference between the maximum and minimum values within the sampling time. The output starts after sampling ends, and the output stays on until the next sampling ends. This function can be used for vibration and eccentricity measurements. Starting value [SAMPLE] It outputs and maintains the value at the moment of entering the sampling time.
- Page 46 Average value [AVG] Outputs and maintains the average of the present values during the sampling time. The output starts after sampling ends, and the output stays on until the next sampling ends. 46 Autonics | BD Series...
-
Page 47: Hold Timing Input [Holdt]
2.4.7. Hold Timing Input [HOLdT] Set the sampling time input method for the hold function. • It is activated when the hold [HOLD] setting value is not OFF. • When 'Over/Under auto trigger level [AtUP] / [AtDW]' among setting items is set, it sequentially switches to 'Trigger level [AtLV]' and 'Hysteresis [AtHYS]' setting mode. -
Page 48: Auto Trigger Level [Atlv]
2.4.9. Auto Trigger Hysteresis [AtHYS] Set trigger hysteresis for auto trigger mode among hold timing input methods. Appears when the 'Hold timing input [HOLdT]' parameter setting value is set to 'Over/Under auto trigger level [AtUP]/[AtDW]'. 48 Autonics | BD Series... -
Page 49: Timer [T-Mode]
2.4.10. Timer [T-MODE] Set the timing of judgment (HI/GO/LOW) output. 'Timer [T-MOD]' and 'Hold [HOLD]' functions cannot be used at the same time. When the timer setting function is activated, the hold function setting is automatically switched to OFF. On delay [OND] After judgment, output is delayed by the set time. -
Page 50: Timer Time [Time]
2.4.11. Timer Time [TIME] Set the time to delay or hold judgment output. Appears when the 'Timer [T-MODE]' parameter setting value is set to 'On delay [ OND]', 'Off delay [OFD]' mode. 50 Autonics | BD Series... -
Page 51: Parameter Group 3 [Para3]
2.5. Parameter Group 3 [PARA3] Describes the items in parameter 3 group consisting of external input related settings. For the setting range and default of each item in the group, refer to 2.2, “Setting Range and Initial Value”. 2.5.1. External Input [D-IN□] Set the external input function to be assigned to external input 1 to 4 lines. - Page 52 After assigning the corresponding function, you can apply a signal to stop the laser emission. • Minimum input time: 4 ms • Laser emission ON – OFF switching time: 12 ms • Laser emission OFF – ON switching time: 20 ms Laser OFF timing chart 52 Autonics | BD Series...
- Page 53 Zero-point adjustment [ZERO] Assign the zero adjustment function. After assigning the relevant function, you can apply a signal to set the present value (PV) as the origin. • Minimum input time: 4 ms • Zero calibration execution time: Up to 1 sec •...
-
Page 54: Parameter 4 Group [Para4]
Present value (PV) display: Green, Setting value (SV) display: Red, and the decimal point is displayed at the top of the character. Example of normal display and reverse display Present value (PV) display: DIR Setting value (SV) display: 10.000 54 Autonics | BD Series... -
Page 55: Bank [Bank]
2.6.2. Bank [BANK] Parameter settings can be stored and recalled in up to 4 banks. Check the bank number You can check the bank number being used in the setting value check mode by entering the arrow keys during RUN mode. ◀... -
Page 56: Lock Mode [Lock]
2. As shown below, the key lock parameter setting value and OFF text appear and the lock is released. Lock Settings 1. In RUN mode, press the arrow keys for more than 3 seconds. ◀ ▶ 2. Lock mode is set with Lock mode parameter and ON as below. 56 Autonics | BD Series... -
Page 57: Initialization [Init]
2.6.5. Initialization [INIT] Depending on the parameter selection, the bank and all settings can be initialized. Reset Settings 1. Select parameter 4 group 'Initialization [INIT]' parameter. When the key is pressed, the MODE OFF text on the setting value (SV) display part flashes. 2. - Page 58 Dimensions or specifications on this manual are subject to change and some models may be discontinued without notice. www.autonics.com...
Need help?
Do you have a question about the BD Series and is the answer not in the manual?
Questions and answers