Table of Contents
Advertisement
Quick Links
Advertisement
Table of Contents

Subscribe to Our Youtube Channel
Related Manuals for Pelgrim OVS524RVS


Summary of Contents for Pelgrim OVS524RVS
- Page 1 OVS524RVS OVS524MAT Instructions for use Oven...
- Page 2 Instructions for use EN 3 - EN 30 Pictograms used Important information EN 2...
-
Page 3: Table Of Contents
CONTENTS Your oven Introduction Control panel Desciption Guide rails/Telescopic guide rails Accessories Door Cooling fan First use What to do first ‘Settings menu’ How to open the ‘Settings menu’ Operation How to operate the oven Using the oven Functions table Steam cooking Using the timer Selecting additional functions... -
Page 4: Your Oven
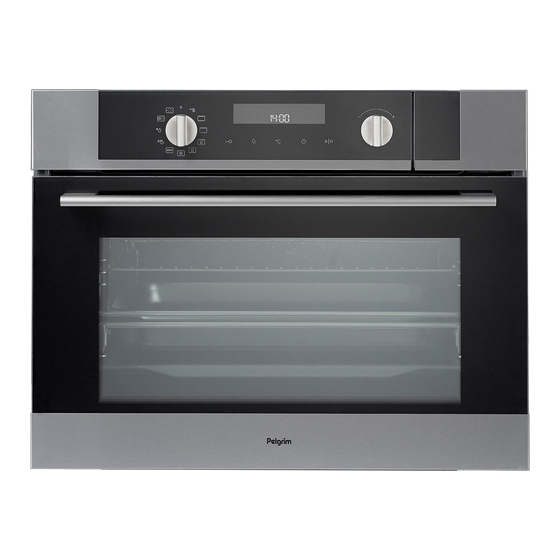
YOUR OVEN Introduction Congratulations on choosing this Pelgrim steam oven. This product is designed to offer simple operation and optimum user-friendliness. The oven has a wide range of settings, enabling you to select the correct cooking method every time. This manual shows how you can best use this oven. In addition to information about operating the oven, you will also find background information that may be useful when using the appliance. -
Page 5: Control Panel
YOUR OVEN Control panel 1. Off 2. Fast preheat 3. Top + bottom heat 4. Grill 5. Grill + fan 6. Hot air + bottom heat Mode selector 7. Hot air 8. ECO Hot air 9. Steam clean 10. Defrosting 11. -
Page 6: Desciption
YOUR OVEN Description 1. Control panel 2. Water reservoir cover 2. Oven levels 3. Oven door Level 4 Level 3 4. Door handle Level 2 Level 1 Guide rails/Telescopic guide rails • The oven has four or five guide rails (Level 1 to 4/5), depending on the model. - Page 7 YOUR OVEN Note: not all accessories are suitable/available for every appliance (it may also differ by country). When purchasing, always provide the exact identification number of your appliance. Please see the sales brochures or check online for more details about optional accessories. Accessories that can be supplied with your appliance (depending on the model) Enamelled baking tray;...
-
Page 8: Door
YOUR OVEN Door • The door switches interrupt the operation of the oven when the door is opened during use. The oven continues operating when the door is closed. • This oven has a ‘Soft close door system’. When closing the oven door, this system dampens the movement, from a certain angle, and silently closes the oven door. -
Page 9: First Use
FIRST USE What to do first Remove all equipment, accessories, and utensils from the cavity and clean them with warm water and regular detergent. Do not use any abrasive cleaners. ▷ When the appliance heats up for the first time, the characteristic smell of a new appliance will be emitted. -
Page 10: How To Open The 'Settings Menu
FIRST USE ▷ Soak the test paper strip for 1 second in water. Wait 1 minute and observe the number of stripes on the paper. Check the table for appropriate water hardness setting. Test strip number/ French deg. Display Type German deg. -
Page 11: Operation
OPERATION How to operate the oven In this chapter you can read about the steps of the cooking process you have to follow. 1. Select an oven function. • Rotate the ‘Mode selector’ to select an oven function. The symbol and default settings of the selected function appear in the display. - Page 12 OPERATION As long as a setting is blinking in the display, it is possible to adjust it by rotating the ‘Multi-function selector’. If you do not press the ’Start / stop’ key to confirm, the setting is stored automatically after three seconds. •...
- Page 13 OPERATION 3. Start the cooking process. • Press the ’Start / stop’ key. The oven will start the oven function set and heat the oven to the selected temperature. The temperature symbol in the display will flash. When the oven has reached the selected temperature, you will hear an acoustic signal and the temperature symbol in the display will remain illuminated.
-
Page 14: Use
Using the oven The oven has 10 oven functions and 1 cleaning function. Consult the table to select the appropriate oven function to prepare a dish. Also consult the instructions for preparation on the dish packaging. Remarks • Each oven function features basic or default settings which can be adjusted. - Page 15 Function Description Grill • Heating by means of the upper element and grill element. • This mode can be used with dishes and baked goods that require a distinctive bottom crust or browning. Use just before the end of the baking or roasting time.
- Page 16 Function Description ECO Hot air • Heating by means of hot air. ECO hot air uses less energy but gives the same result as the hot air setting. Cooking takes a few minutes longer. • This mode can be used for roasting meat and baking pastry.
-
Page 17: Steam Cooking
Function Description Steam • Food is cooked by steam. The steam is provided by the steam generator and injected into the cavity by interval. • This mode is suitable for steaming food like vegetables, fish, eggs, fruits and rice. • Place the perforated steam dish in the non- perforated steam dish on the second shelf level. -
Page 18: Using The Timer
Filling the water reservoir Always fill the reservoir prior to using a steam function. Use clean and cold tap water, bottled water without added minerals or distilled water suitable for consumption. 1. Open the water reservoir cover. 2. Use the handle to remove the reservoir from the oven. 3. - Page 19 Setting the ‘cooking time’ In this mode, you can define the duration of the oven operation (cooking time). 1. Select an oven function with the ‘Mode selector’ and set the temperature. 2. Press the ‘Timer key’ (several times) to select a timer function. The icon for the selected timer function will light up and ‘00:00’...
-
Page 20: Selecting Additional Functions
6. Press the ‘Start / stop key’ to start the cooking process. The display will show the cooking time and end time alternately and the end time symbol will flash in the display. When the oven starts operating, the end time symbol will disappear and the elapsed cooking time will be displayed. - Page 21 • The child lock remains activated even after the oven has been switched off. The child lock needs to be deactivated before you can select a new function. Oven lighting • Oven lighting is switched on automatically when the door is opened or when the oven is switched on.
-
Page 22: Cleaning
CLEANING Cleaning your oven Clean your oven regularly to prevent grease and food particles from building up, especially on inside and outside surfaces, door and door seals. • Clean outside surfaces with a soft cloth and warm soapy water. Rinse and dry. •... -
Page 23: Cleaning The Steam System (Descaling)
CLEANING Please note: The time duration of the cleaning program cannot be changed while the function is running. Turn the ‘Mode selector’ to the ‘0’ position to stop the cleaning program. Cleaning the steam system (descaling) Water is used for the steaming process. Water contains calcium and magnesium. -
Page 24: Cleaning The Water Reservoir Filter
CLEANING 7. When the display shows ‘End’, press the ‘Start / stop key’. The rinsing procedure is complete. 8. Remove the water reservoir, remove the liquid, and rinse the water reservoir. Every time you clean the water tank or descale the appliance, also clean the water reservoir filter. -
Page 25: Removal And Reinsertion Of The Oven Door
CLEANING Removal and reinsertion of the oven door 1. Open the door completely to the horizontal position. 2. Slightly pull up the locking pins on both sides (A) and then tilt them all the way forward (B). 3. Now slowly close the door until you feel a slight resistance. 4. -
Page 26: Removal And Reinsertion Of The Oven Door Glass
CLEANING Removal and reinsertion of the oven door glass Oven door glass may be cleaned from the inside, but you will have to remove the glass from the door. First remove the oven door (see chapter ‘Removal and reinsertion of the oven door’). 1. -
Page 27: Replacing The Oven Light Bulb
CLEANING Replacing the oven light bulb The lamp in this household appliance is only suitable for illumination of this appliance. The lamp is not suitable for household room illumination. The light bulbs (2x) (halogen G9, 230 V, 25 W) are a consumer items and therefore not covered by warranty. -
Page 28: Troubleshooting
TROUBLESHOOTING General If you have problems with your oven, then consult the error overview below. Should the problems persist, then please contact the Customer Services Department. The food stays raw • Check whether the timer has been set and you have pressed the ‘confirm key’. - Page 29 Repairs should only be performed by a qualified service technician. If maintenance is required, then remove the mains plug from the socket and contact the Pelgrim customer service. Have the following information to hand when you call: • The model number and serial number (stated on the inside of the oven door) •...
-
Page 30: Your Oven And The Environment
YOUR OVEN AND THE ENVIRONMENT Disposing of the appliance and the packaging This product is made from sustainable materials. However, it must be disposed of in a responsible manner at the end of its useful life. The government can provide you with information about this. The packaging of the appliance can be recycled. - Page 31 EN 31...
- Page 32 When contacting the service department, have the complete type number to hand. You will find the addresses and phone numbers of the service organisation on the guarantee card. The instructions for use can also be found on our website: www.pelgrim.nl www.pelgrim.be *616901* 616901...
Need help?
Do you have a question about the OVS524RVS and is the answer not in the manual?
Questions and answers