
Related Manuals for Bissell POWERCLEAN 2035 Series


Summary of Contents for Bissell POWERCLEAN 2035 Series
- Page 1 POWERCLEAN ® Drum Vacuum ___________ USER GUIDE 2035 SERIES ATTENTION THE HOSE IS INSIDE THE DRUM. REMOVE THE TOP COVER TO REMOVE.
-
Page 2: Safety Instructions
No plug adapter should be used with this appliance. with all local codes and ordinances. Grounding Pin www.BISSELL.ca... -
Page 3: Table Of Contents
Thanks for buying a BISSELL® vacuum! We love to clean and we’re excited to share one of our innovative products with you. We want to make sure your vacuum works as well in two years as it does today, so this guide has tips on using (page 7), maintaining (pages 8-9), and if there is a problem, troubleshooting (page 10). -
Page 4: Product View
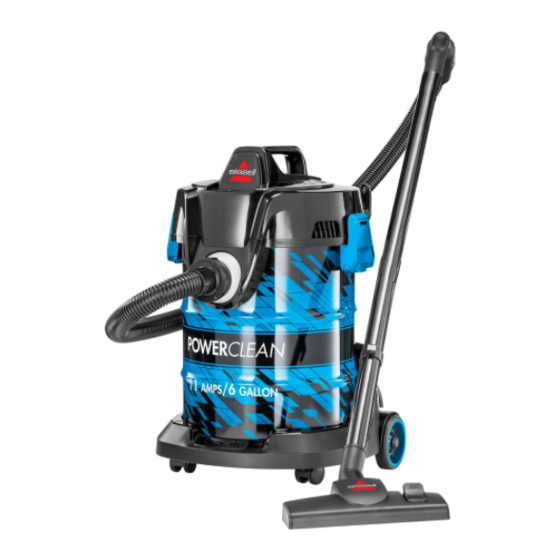
Product View Handle Extension Wand Air Flow Reglator Carry Handle Cover Clip Crevice Tool Blower Hose Function Connector and Connection Suction Inlet ON/OFF Switch Parking Cover Hook Clip Dusting Brush Multi-Surface Floor Tool Brush Switch www.BISSELL.ca... - Page 5 Once assembled, you can store your Connect the Multi-Surface Floor Tool to vacuum by inserting the Parking Hook end of the Extension Wand and twist (located on the Extension Wand) into the slightly to tighten. storage slot on the rear of the vacuum. www.BISSELL.ca...
-
Page 6: Assembly
Tools Use the Crevice Tool to reach in tight, Use the Dusting Brush to clean narrow spaces. The Crevice Tool can curtains, draperies, and side tables and also be used to pick up wet messes. window ledges. www.BISSELL.ca... -
Page 7: Operations
To use the Blower function, insert the For above floor cleaning, disconnect the hose with the notch facing upward and floor tool from the end of the Extension twist clockwise to lock in place. Wand and attach desired accessory. www.BISSELL.ca... -
Page 8: Maintenance & Care
Wait for dust to settle, remove bag and discard. Return filter, ensuring its seal covers the top of the wall of the Dirt Replace vacuum Top Cover and close Container all the way around. clips. www.BISSELL.ca... - Page 9 Once completely dry, return Filter to the Dirt Container. Return the dry Ensure the Filter Large Fabric Filter, basket is installed place vacuum Top and surrounding Cover and close entire tank wall. Turn clips. clockwise to seal. www.BISSELL.ca...
-
Page 10: Troubleshooting
Crack or hole in the main Hose. If there is a crack or hole, order a new hose from www.BISSELL.com. Clog in the Floor Tool. Remove debris and any other Vacuum entanglements that may be won’t pick... -
Page 11: Warranty
This warranty is exclusive and in lieu of EXCLUSIONS identified below, upon receipt any other warranties either oral or written. of the product BISSELL will repair or replace Any implied warranties which may arise (with new, refurbished, lightly used, or... -
Page 12: Product Registration
We’ll contact you with any important product maintenance reminders and alerts. Visit BISSELL.ca/registration! Parts & Supplies For Parts and Supplies, go to BISSELL.ca and enter your model number in the search fi eld. We’re Waggin’ Our Tails! BISSELL® proudly supports BISSELL Pet Foundation®...
Need help?
Do you have a question about the POWERCLEAN 2035 Series and is the answer not in the manual?
Questions and answers