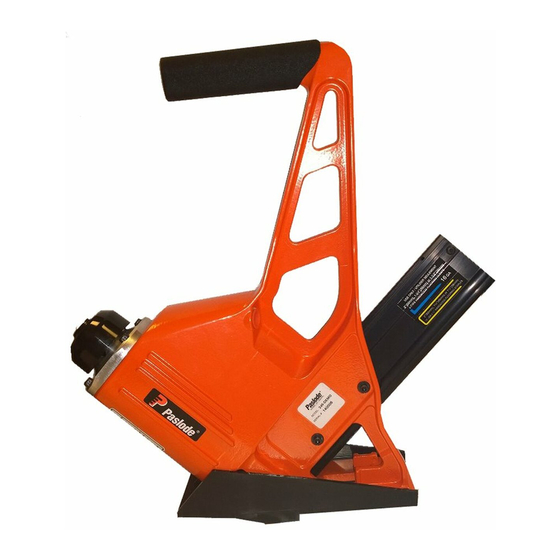
Summary of Contents for Paslode F2N1-200
- Page 1 MODEL F2N1-200 IMPORTANT OPERATING MANUAL DO NOT DESTROY It is the customer's responsability to have all operators and service personnel reand and understand this manual. Printed in Canada 12/14...
-
Page 2: Safety Measures
PASLODE PNEUMATIC TOOL F2N1-200 The pneumatic flooring tool F2N1-200 is a professional precision tool specially developed for the installation standard 3/4" solid hardwood flooring. Weighting only 10.4 pounds (4.7 kg), this ergonomically designed tool makes the installation of hardwood floor very easy, allowing the operator to set and fasten the boards in the standing position. - Page 3 CONNECTION & AIR SUPPLY SYSTEM To ensure maximum performance and efficiency, and also a minimum of care, this pneumatic tool requires clean, dry air. It is necessary to use a filter and a pressure regulator. This tool needs a detachable male coupler with 3/8" NPT male treads. The use of a 3/8" (1 cm) diameter air supply hose is recommended.
- Page 4 Check the compressed air supply hose before connecting to ensure that they are free from dirt or particles that can alter the performance of the tool. Pay special attention to any air leaks. Do not use a compressed air pressure higher than 110 psi (7.6 bar). Higher pressure can cause premature wear or damage to certain components.
-
Page 5: Loading The Tool
LOADING THE TOOL The F2N1-200 2-in-1 tool can be used with either standard 16 flooring cleats or with 15½ flooring staples Loading 16 cleats: • Use only standard16 L-type flooring cleats in lengths of 1½" (38 mm), 1¾" (44 mm) or 2"... - Page 6 Important notes: • It is not required to pull back the slider before inserting nails or staples into the magazine. • Use only one type of fasteners (either nails or staples). • Remove one strip of fasteners if the slider does not engage behind the fasteners (overfeed).
-
Page 7: Operation
OPERATION Unload tool and rest it onto the subflooring, Connect the hose and cycle tool once or twice without fasteners. Use only the 2.5 lbs (1.1 kg) hammer supplied with the tool. The use of other type of hammers may affect performance. The rubber face of the hammer can be used with care to help position the boards. -
Page 8: Maintenance And Repair
MAINTENANCE & REPAIR This tool requires minimal lubrication. A few drops of oil weekly in the air inlet is sufficient. Check periodically to make sure that all screws are tight. If screws are loosening up, the use of a medium strength adhesive sealant is recommended. Disassembly of the tool must be done in a clean environment. -
Page 9: Troubleshooting
TROUBLESHOOTING This section will help to diagnose common problems and will give suggestions to solve them. , ALWAYS DISCONNECT THE AIR SUPPLY HOSE O PREVENT INJURY WHEN ADJUSTING SERVICING OR DISASSEMBLING THE TOOL IRST HECK THE OMPRESSED AIR SUPPLY Many of problems come from a faulty or inadequate compressed air supply system. Before attempting to repair the tool, the following points should be checked: •... - Page 10 ASTENERS ARE NOT SET COMPLETELY • First, verify air supply • Clean tool and lubricate tool; particularly the head assembly • Increase air pressure when working with harder woods; do not exceed 110 psi (7.6 bar) • Check the driving blade for broken end •...
-
Page 11: Replacement Parts
REPLACEMENT PARTS Part # Description Notes P-043V Valve assembly P-118 Cylinder Includes o-rings & band-valve P-145 Slider Includes coil spring P-206 Head Includes o-ring Q-006A P-235C 2-in-1 magazine P-237 Driving blade P-254 Handle grip P-316 Main body P-429 Foot P-433 Plastic base P-525A Bumper... - Page 12 A-870 Roller base Designed for maximum comfort and speed. Bearing-mounted for precision left or right gliding witout coming off the flooring board. To order accessories contact Paslode Customer Service info@itwconstruction.ca 1-800-387-6472...
-
Page 13: Warranty Statement
C o-rings & piston ring WARRANTY STATEMENT Paslode’s sole liability hereunder will be to replace any part of accessory which proves to be defective within the specific time period. Any replacement part or accessories provided in accordance with this warranty will carry a warranty for the balance of the period of warranty applicable to the part it replaces.


Need help?
Do you have a question about the F2N1-200 and is the answer not in the manual?
Questions and answers