Mitsubishi Electric MELSEC iQ-R Series User Manual
Hide thumbs
Also See for MELSEC iQ-R Series:
- Programming manual (2110 pages) ,
- User manual (760 pages) ,
- Reference manual (498 pages)
Table of Contents
Advertisement
Advertisement
Table of Contents

Related Manuals for Mitsubishi Electric MELSEC iQ-R Series


Summary of Contents for Mitsubishi Electric MELSEC iQ-R Series
- Page 1 MELSEC iQ-R CC-Link System Master/Local Module User's Manual (Startup) -RJ61BT11...
-
Page 3: Safety Precautions
SAFETY PRECAUTIONS (Read these precautions before using this product.) Before using this product, please read this manual and the relevant manuals carefully and pay full attention to safety to handle the product correctly. The precautions given in this manual are concerned with this product only. For the safety precautions of the programmable controller system, refer to the user's manual for the CPU module used. - Page 4 [Design Precautions] WARNING ● When connecting an external device with a CPU module or intelligent function module to modify data of a running programmable controller, configure an interlock circuit in the program to ensure that the entire system will always operate safely. For other forms of control (such as program modification, parameter change, forced output, or operating status change) of a running programmable controller, read the relevant manuals carefully and ensure that the operation is safe before proceeding.
- Page 5 [Security Precautions] WARNING ● To maintain the security (confidentiality, integrity, and availability) of the programmable controller and the system against unauthorized access, denial-of-service (DoS) attacks, computer viruses, and other cyberattacks from external devices via the network, take appropriate measures such as firewalls, virtual private networks (VPNs), and antivirus solutions.
- Page 6 [Wiring Precautions] WARNING ● Shut off the external power supply (all phases) used in the system before installation and wiring. Failure to do so may result in electric shock or cause the module to fail or malfunction. ● After installation and wiring, attach a blank cover module (RG60) to each empty slot and an included extension connector protective cover to the unused extension cable connector before powering on the system for operation.
- Page 7 [Wiring Precautions] CAUTION ● Individually ground the FG and LG terminals of the programmable controller with a ground resistance of 100 ohms or less. Failure to do so may result in electric shock or malfunction. ● Use a solderless terminal with an insulation sleeve for terminal block wiring. Note that up to two solderless terminals can be connected per terminal block.
- Page 8 [Wiring Precautions] CAUTION ● Programmable controllers must be installed in control panels. Connect the main power supply to the power supply module in the control panel through a relay terminal block. Wiring and replacement of a power supply module must be performed by qualified maintenance personnel with knowledge of protection against electric shock.
- Page 9 [Startup and Maintenance Precautions] CAUTION ● When connecting an external device with a CPU module or intelligent function module to modify data of a running programmable controller, configure an interlock circuit in the program to ensure that the entire system will always operate safely. For other forms of control (such as program modification, parameter change, forced output, or operating status change) of a running programmable controller, read the relevant manuals carefully and ensure that the operation is safe before proceeding.
- Page 10 [Operating Precautions] CAUTION ● When changing data and operating status, and modifying program of the running programmable controller from an external device such as a personal computer connected to an intelligent function module, read relevant manuals carefully and ensure the safety before operation. Incorrect change or modification may cause system malfunction, damage to the machines, or accidents.
-
Page 11: Conditions Of Use For The Product
Notwithstanding the above restrictions, Mitsubishi Electric may in its sole discretion, authorize use of the PRODUCT in one or more of the Prohibited Applications, provided that the usage of the PRODUCT is limited only for the specific applications agreed to by Mitsubishi Electric and provided further that no special quality assurance or fail-safe, redundant or other safety features which exceed the general specifications of the PRODUCTs are required. -
Page 12: Compliance With Emc And Low Voltage Directives
DIRECTIVES Method of ensuring compliance To ensure that Mitsubishi Electric programmable controllers maintain EMC and Low Voltage Directives when incorporated into other machinery or equipment, certain measures may be necessary. Please refer to one of the following manuals. • MELSEC iQ-R Module Configuration Manual •... -
Page 13: Table Of Contents
CONTENTS SAFETY PRECAUTIONS ..............1 CONDITIONS OF USE FOR THE PRODUCT . -
Page 14: Relevant Manuals
This manual does not include information on the module function blocks. For details, refer to the Function Block Reference for the module used. e-Manual refers to the Mitsubishi Electric FA electronic book manuals that can be browsed using a dedicated tool. -
Page 15: Terms
A system that takes control and performs network communications in a redundant system CPU module A generic term for the MELSEC iQ-R series CPU modules Cyclic transmission A function by which data are periodically exchanged among stations on the same system using link... - Page 16 Term Description Remote I/O net mode A mode used to perform high-speed communications in a system consisting of a master station and remote I/O station(s) only Remote I/O station A station that exchanges I/O signals (bit data) with the master station by cyclic transmission This station cannot perform transient transmission.
-
Page 17: Chapter 1 Part Names
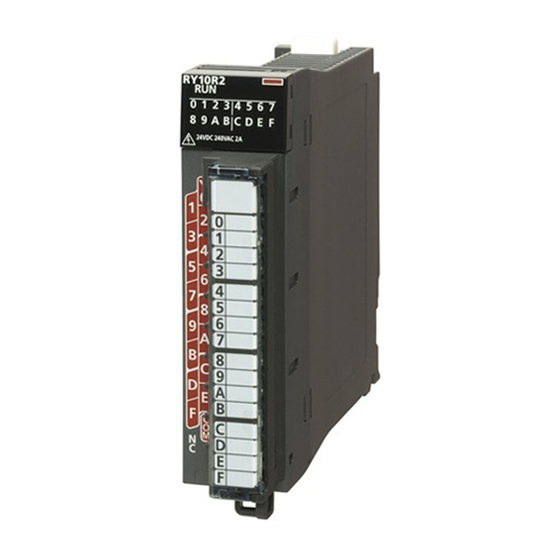
PART NAMES This section describes the part names of the master/local module. Name Description RUN LED Indicates the operating status. On: Normal operation Off: A hardware error or a watchdog timer error has occurred. ERR. LED Indicates the error status of the module. The details of errors can be checked by using the following. - Page 18 Name Description Dot matrix LED Indicates the station number set in the module. The following is indicated during the offline or test mode. Offline: "" Line test based on module parameter settings: "L.T." Hardware test: "H.T." Terminal block Used to connect a Ver.1.10-compatible CC-Link dedicated cable. ( Page 32 WIRING) The SLD and FG terminals are connected inside the module.
-
Page 19: Chapter 2 Specifications
SPECIFICATIONS This chapter describes the specifications of the master/local module. Performance Specifications This section describes the performance specifications of the master/local module. Item Description Transmission speed Selected from 156kbps, 625kbps, 2.5Mbps, 5Mbps, and 10Mbps. Maximum number of connectable modules (master station) Number of occupied stations (local 1 to 4 stations (The number of stations can be changed using the engineering tool.) station) - Page 20 Number of link points by the number of occupied stations The following table lists the number of link points by the number of occupied stations. Item CC-Link Ver.1 CC-Link Ver.2 Extended cyclic setting Single Double Quadruple Octuple Number of link 1 station Remote I/O (RX, 32 points (30...
-
Page 21: Maximum Number Of Connectable Modules
Maximum Number of Connectable Modules A CC-Link system can be configured with the number of modules satisfying the following conditions. Station type Maximum number of connectable modules Master station 1 module in each system Local station Up to 26 modules Up to 64 modules Intelligent device station Remote device station... - Page 22 Remote net Ver.1 mode The following table lists the maximum number of connectable modules of when a system is configured only with Ver.1- compatible slave stations. For the modes, refer to the following. Page 23 Modes For one master station, 64 modules of a remote I/O station, remote device station, local station, standby master station, and intelligent device station can be connected in total.
- Page 23 Remote device net Ver.1 mode The following table lists the maximum number of connectable modules for a system configured in the remote device net Ver.1 mode. For the modes, refer to the following. Page 23 Modes For one master station, 64 modules of a remote I/O station and remote device station can be connected in total. Note, however, that the following conditions must be satisfied.
-
Page 24: Maximum Overall Cable Length
Maximum Overall Cable Length This section describes how transmission speed, a station-to-station cable length (1), and maximum overall cable length (2) are related when a system is configured with products of CC-Link Ver.1.10 or later and Ver.1.10-compatible CC-Link dedicated cables. For the identification of the CC-Link Version, refer to the installation manual issued by the CC-Link Partner Association. -
Page 25: Modes
Modes Select the mode according to the system used for the master/local module. Depending on the mode, the addresses of storage positions for RX, RY, RWr, and RWw differ. List of modes Mode Application Connectable slave station Remote net Ver.1 mode To configure a new system (only with Ver.1-compatible slave stations) Ver.1-compatible slave station Remote net Ver.2 mode... -
Page 26: Chapter 3 Function List
FUNCTION LIST Cyclic transmission This section describes the functions of the CC-Link system. For details on the functions, refer to the following. MELSEC iQ-R CC-Link System Master/Local Module User's Manual (Application) : Available, : Partially available, : Not available Function Description Availability... - Page 27 Transient transmission : Available, : Not available Function Description Availability Master Local Standby station station master station Communications in the same system Performs the transient transmission to other stations using dedicated instructions and the engineering tool. ...
- Page 28 Others : Available, : Not available Function Description Availability Master Local Standby station station master station Reserved station function Prevents slave stations that are not actually connected (but will be connected in future) from detecting as "Data Link Faulty Station" in the master station and local station.
-
Page 29: Chapter 4 Procedures Before Operation
PROCEDURES BEFORE OPERATION This chapter describes the procedures before operation. System configuration Configure the CC-Link system and set the parameters which are required for start-up, the station number for the slave station, and the transmission speed. • Wiring ( Page 32 WIRING) •... - Page 30 MEMO 4 PROCEDURES BEFORE OPERATION...
-
Page 31: Chapter 5 System Configuration
SYSTEM CONFIGURATION CC-Link System Configuration A CC-Link system is configured with a master station (1), remote I/O station (2), remote device station (3), intelligent device station (4), and local station (5). Connect the terminating resistors (6) to the stations at both ends. The CC-Link version and the number of slave stations that can be connected vary depending on the mode of the master/local module. -
Page 32: Precautions For The System Configuration
Precautions for the System Configuration Please consider the following for system design to prevent incorrect input from a remote station. When turning on and off the power Power on the remote station, then start data link. In addition, stop data link before turning off the remote station. Failure to do so may cause an incorrect input. - Page 33 Access to a station with the station number 64 ■Access from other stations using an engineering tool and GOT Access to a local station with the station number 64 cannot be performed from other stations. Changing the station number to the one other than 64 allows access from other stations.
-
Page 34: Chapter 6 Wiring
WIRING This chapter describes the specifications of the master/local module wiring. Terminal Block Screws and tightening torque Tighten the terminal block screws within the specified torque range. Screw type Tightening torque range Terminal block screw (M3 screw) 0.42 to 0.58Nm Terminal block mounting screw (M3.5 screw) 0.66 to 0.89Nm Solderless terminal... -
Page 35: Wiring Procedure
Wiring Procedure Wiring to terminal block This section describes wiring to the terminal block. Connect a Ver.1.10-compatible CC-Link dedicated cable as shown below. Ver.1.10-compatible CC-Link dedicated cable Terminal to connect DA line (blue) DB line (white) DG line (yellow) Shield wire •... -
Page 36: Product For Wiring
Product for Wiring Cables that can be used Use Ver.1.10 compatible CC-Link dedicated cables. Note, the cables need not be connected in the order of station number. Terminating resistor to be used Connect the terminating resistors included with the modules at both ends of the modules in the CC-Link system. T-branch Connection This section describes how to connect the Ver.1.10 compatible CC-Link dedicated cables in T-branch. - Page 37 Communication specifications for a T-branch connection The following table lists the communication specifications upon T-branch connection. For those not listed below, refer to the performance specifications. ( Page 17 Performance Specifications) Item Specifications Remarks Transmission speed 625kbps 156kbps 10M, 5M, and 2.5Mbps cannot be used.
-
Page 38: Chapter 7 Communication Examples
COMMUNICATION EXAMPLES This chapter describes programming and start-up examples of the master/local module. Example of Communications Between a Master Station and a Remote Device Station This section describes an example of how to set the initial settings for the remote device station and perform an analog input and analog output. - Page 39 Link device assignment This section describes the RX, RY, RWr, or RWw assignment of program examples. • Remote net Ver.1 mode is used in this program examples. When the remote net Ver.2 mode or remote device net Ver.2 mode is used, the buffer memory addresses of storage locations vary. ( Page 20 Remote net Ver.1 mode) •...
- Page 40 The assignment by each signal of the AJ65VBTCU-68ADVN and AJ65VBTCU-68DAVN are shown below. CPU module Remote station Device Module name Signal name X1000 AJ65VBTCU-68ADVN RX00 CH.1 A/D conversion completion flag X1001 RX01 CH.2 A/D conversion completion flag X1002 RX02 CH.3 A/D conversion completion flag X1003 RX03 CH.4 A/D conversion completion flag...
- Page 41 ■RY assignment Each number in the figure, No.1 and No.4, represents a station number. AJ65VBTCU-68ADVN AJ65VBTCU-68DAVN R04CPU RJ61BT11 (No. 1) (No. 4) Y1000 160H (352) RY00 · · · Y101F 161H (353) RY1F RY20 Y1020 162H (354) · · No. 1 No.
- Page 42 The assignment by each signal of the AJ65VBTCU-68ADVN and AJ65VBTCU-68DAVN are shown below. CPU module Remote station Device Module name Signal name Y1000 AJ65VBTCU-68ADVN RY00 Use prohibited Y1017 RY17 Y1018 RY18 Initial data processing completion flag Y1019 RY19 Initial data setting request flag Y101A RY1A Error reset request flag...
- Page 43 ■RWr assignment Each number in the figure, No.1 and No.4, represents a station number. AJ65VBTCU-68ADVN AJ65VBTCU-68DAVN R04CPU RJ61BT11 (No. 1) (No. 4) 2E0H (736) RWr0 · · · 2E3H (739) RWr3 RWr4 2E4H (740) · · No. 1 No. 1 ·...
- Page 44 The assignment by each signal of the AJ65VBTCU-68ADVN and AJ65VBTCU-68DAVN are shown below. CPU module Remote station Device Module name Signal name AJ65VBTCU-68ADVN RWr0 CH.1 digital output value RWr1 CH.2 digital output value RWr2 CH.3 digital output value RWr3 CH.4 digital output value RWr4 CH.5 digital output value RWr5...
- Page 45 ■RWw assignment Each number in the figure, No.1 and No.4, represents a station number. AJ65VBTCU-68ADVN AJ65VBTCU-68DAVN R04CPU RJ61BT11 (No. 1) (No. 4) W100 1E0H (480) RWw0 · · · W103 1E3H (483) RWw3 RWw4 W104 1E4H (484) · · · No.
- Page 46 The assignment by each signal of the AJ65VBTCU-68ADVN and AJ65VBTCU-68DAVN are shown below. CPU module Remote station Device Module name Signal name W100 AJ65VBTCU-68ADVN RWw0 A/D conversion enable/prohibit specification W101 RWw1 CH.1 to 4 input range setting W102 RWw2 CH.5 to 8 input range setting W103 RWw3 Average processing specification...
-
Page 47: Settings For A Master Station
Settings for a master station Connect the engineering tool to the CPU module of the master station and set parameters. Set the CPU module as follows. [Project] [New] Click the [OK] button to add the module labels of the CPU module. Set the master/local module as follows. - Page 48 Click the [OK] button to add the module labels of the master/local module. Set the items in "Required Settings" as follows. [Navigation window] [Parameter] [Module Information] [RJ61BT11] [Required Settings] Set the network configuration as follows. [Navigation window] [Parameter] [Module Information] [RJ61BT11] [Basic Settings] [Network Configuration Settings] 7 COMMUNICATION EXAMPLES 7.1 Example of Communications Between a Master Station and a Remote Device Station...
- Page 49 Set the link refresh settings as follows. [Navigation window] [Parameter] [Module Information] [RJ61BT11] [Basic Settings] [Link Refresh Settings] Set the supplementary cyclic settings as follows. [Navigation window] [Parameter] [Module Information] [RJ61BT11] [Application Settings] [Supplementary Cyclic Settings] Set the target station number of the remote device initial setting as follows.
- Page 50 In "Remote Device Initial Setting Procedure Registration" window, right-click the icon and click "Hexadecimal" of the "Input Format". Set the items in the initial settings as follows. • Initial setting for an AJ65VBTCU-68ADVN (station No.1) Setting the initial setting executes the following processing from the first condition. Condition Description The CH.1 and CH.2 are set to the A/D conversion enable.
- Page 51 • Initial setting for an AJ65VBTCU-68DAVN (station No.4) Setting the initial setting executes the following processing from the first condition. Condition Description The CH.1 and CH.2 are set to the analog output enable. An output range is set. • CH.1: 0 to 5V •...
-
Page 52: Settings For A Remote Device Station
Settings for a remote device station Set the station number, transmission speed, and mode using the switches on the remote device station. Switch setting on an AJ65VBTCU-68ADVN • Station number setting switch, transmission speed setting switch: Only the station No.4 turns on. (station No.1, 156kbps) •... -
Page 53: Checking The Data Link Status
Checking the data link status Check whether the master station and remote device station are normally operating data link. Power on the remote station, then master station to start data link. When the LEDs are in the following states, data link is being performed normally. •... -
Page 54: Program Example
Program example • Master station (station No.0) Classification Label name Description Device Module label BT11_1.bIn_ModuleFailure Module failure BT11_1.bIn_DataLink Own station data link status BT11_1.bIn_ModuleReady Module ready BT11_1.bReq_RemoteDeviceStationInitialization Remote device station initialization procedure registration SB000D instruction BT11_1.bCompl_RemoteDeviceStationInitialization Completion status of remote device station initialization SB005F procedure BT11_1.bnSts_DataLinkError_Other[1]... - Page 55 7 COMMUNICATION EXAMPLES 7.1 Example of Communications Between a Master Station and a Remote Device Station...
- Page 56 (0) The data link status is checked. (26)When 'Remote device station initialization procedure registration instruction' (SB000D) is turned on, the initial setting is executed. When the initial setting is completed, the input value of the AJ65VBTCU-68ADVN is converted into a digital value. (30)When 'Initialization_68ADVN' (X20) is turned on, the initial setting of the AJ65VBTCU-68ADVN is changed.
-
Page 57: Appendix
APPENDIX Appendix 1 External Dimensions The following figure shows the external dimensions of the master/local module. 27.8 (Unit: mm) APPX Appendix 1 External Dimensions... -
Page 58: Index
INDEX ..... . . 17 Connection cable ..... . 13 Cyclic transmission . - Page 59 MEMO...
-
Page 60: Revisions
Japanese manual number: SH-081267-D This manual confers no industrial property rights or any rights of any other kind, nor does it confer any patent licenses. Mitsubishi Electric Corporation cannot be held responsible for any problems involving industrial property rights which may occur as a result of using the contents noted in this manual. -
Page 61: Warranty
WARRANTY Please confirm the following product warranty details before using this product. 1. Gratis Warranty Term and Gratis Warranty Range If any faults or defects (hereinafter "Failure") found to be the responsibility of Mitsubishi occurs during use of the product within the gratis warranty term, the product shall be repaired at no cost via the sales representative or Mitsubishi Service Company. -
Page 62: Trademarks
TRADEMARKS The company names, system names and product names mentioned in this manual are either registered trademarks or trademarks of their respective companies. In some cases, trademark symbols such as ' ' or ' ' are not specified in this manual. SH(NA)-081269ENG-D... - Page 64 SH(NA)-081269ENG-D(2103)MEE MODEL: RJ61BT11-U-IN-E MODEL CODE: 13JX10 HEAD OFFICE : TOKYO BUILDING, 2-7-3 MARUNOUCHI, CHIYODA-KU, TOKYO 100-8310, JAPAN NAGOYA WORKS : 1-14 , YADA-MINAMI 5-CHOME , HIGASHI-KU, NAGOYA , JAPAN When exported from Japan, this manual does not require application to the Ministry of Economy, Trade and Industry for service transaction permission.
Need help?
Do you have a question about the MELSEC iQ-R Series and is the answer not in the manual?
Questions and answers