ZyXEL Communications IES-1248-51V Support Notes
Hide thumbs
Also See for IES-1248-51V:
- User manual (682 pages) ,
- Specifications (4 pages) ,
- User manual (654 pages)

Subscribe to Our Youtube Channel
Related Manuals for ZyXEL Communications IES-1248-51V


Summary of Contents for ZyXEL Communications IES-1248-51V
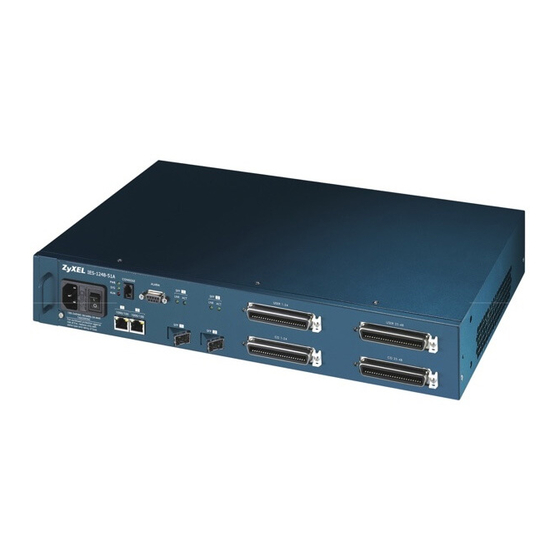
- Page 1 IES-1248-51V 48-port ADSL2+ remote IP DSLAM with embedded Media Gateway Support Notes Version 3.53 November 2007...
-
Page 2: Table Of Contents
FAQ ..............................82 What is the IES-1248-51V? ..................82 What is the maximum line rate of IES-1248-51V? ........... 82 How many sessions are allowed to access IES-1248-51V at the same time?..82 All contents copyright (c) 2007 ZyXEL Communications Corporation. - Page 3 What kind of the voice CODECs does the IES-1248-51V support? ......85 What is the ADSL chipset of IES-1248-51V? ............85 How many VLAN ID and Static VLAN entry does IES-1248-51V support? ....86 What does it mean if the ALM LED lights on? ............86 What is the default console rate of IES-1248-51V? ..........
-
Page 4: Application Notes
Application Notes How to configure the Voice over IP (VoIP) features The IES-1248-51V is an IP-based DSLAM that connects ADSL and voice subscribers to the Internet. It provides 48 aggregated lines of POTS connectivity, designed to connect the subscriber with the PSTN. Each telephone line interface is a FXS port connecting to the subscriber’s telephone via copper wire. - Page 5 Bye: User A hangs up. OK: User B replied a OK message confirming receipt of the Bye request and the call is terminated. For more information about SIP messages, please see RFC 3261. All contents copyright (c) 2007 ZyXEL Communications Corporation.
-
Page 6: Parameters Specially For Voip Service
IES-1248-51V Support Notes Parameters specially for VoIP service The IES-1248-51V is different form other xDSL series pizza-box. Following table display some novel attributes in IES-1248-51V only. Operators should be careful with these parameters while deploying VoIP. Item Description IP Address... - Page 7 7. DTMF (digital tone multi frequency) Relay is voice band signal normally used to identify which dial button is pressed on the phone. Now IES-1248-51V supports four types of DTMF processing. User can configure to bypass DTMF signal as in-band voice, relay it as RFC2833/RFC2833 like (Cisco compatible) RTP packets, or relay it by SIP INFO messages.
- Page 8 Country code Some VoIP parameters/settings have different values according to which country operator deploy the IES-1248-51V. To ease the complexity of configuration, we build a list of packages for choice in advance. All contents copyright (c) 2007 ZyXEL Communications Corporation.
-
Page 9: How To Set Up A Voip Environment
IES-1248-51V Support Notes How to set up a VoIP environment Below is an example of using IES-1248-51V to provide VoIP services. The IES-1248-51V is installed in the operators’ estate. The voice signal between the access node and the customer site is still analog, the same as POTS. - Page 10 IES-1248-51V Support Notes We will use the built-in web configurator and take the following steps to configure the IES-1248-51V. It will allow User A and User B to communicate with each other via VoIP service. 1) System login. 2) Set the IES-1248-51V’s VoIP service IP address to 192.168.10.11.
- Page 11 IES-1248-51V Support Notes Configure the IES-1248-51V 1) System login. Connect to the IES-1248-51V via Internet browser. The default IP address of IES-1248-51V is 192.168.1.1. Enter the default username and password to access the device: Username: admin Password: 1234 The main screen is the first screen that displays when you access the web configurator.
- Page 12 IES-1248-51V Support Notes 2) Set the IES-1248-51V’s VoIP service IP address to 192.168.10.11. Please take the following steps to set up the IES-1248-51V’s VoIP IP configuration. a. In the navigation panel, click Basic Setting > IP Setup. The IP Setup screen appears.
- Page 13 Click VID 2’s index number. c. Click to select the Active check box. d. In the ENET2 field, select Fixed and clear the Tx Tagging check box. e. Click the Add button. All contents copyright (c) 2007 ZyXEL Communications Corporation.
- Page 14 Type 2 in the PVID field of ENET2. h. Select 7 from the Priority drop-down list box of ENET2. This will assign the highest 802.1p priority to the untagged VoIP frames received on ENET2. Click Apply. All contents copyright (c) 2007 ZyXEL Communications Corporation.
- Page 15 Type 192.168.10.1 in the Proxy Server IP / Domain Name field and 5060 in the Port field. Select 7 from the 802.1p Priority drop-down list box. g. Click the Add button to create the profile. All contents copyright (c) 2007 ZyXEL Communications Corporation.
- Page 16 Type 112 in the Name field. Type 112 in the Password field, and retype it in the Retype Password to Confirm field. g. Click the Add button to create the 112 profile for User B. All contents copyright (c) 2007 ZyXEL Communications Corporation.
- Page 17 IES-1248-51V Support Notes All contents copyright (c) 2007 ZyXEL Communications Corporation.
- Page 18 Enter 111 in the VoIP Tel Number field. c. Select sipserver from the SIP Profile dorp-down list box. d. Select 111 from the Call Service Profile drop-down list box. e. Click Apply. All contents copyright (c) 2007 ZyXEL Communications Corporation.
- Page 19 Click to select the Enable check box. h. Enter 112 in the VoIP Tel Number field. Select sipserver from the SIP Profile dorp-down list box. Select 112 from the Call Service Profile drop-down list box. k. Click Apply. All contents copyright (c) 2007 ZyXEL Communications Corporation.
- Page 20 IES-1248-51V Support Notes You can see details of the VoIP settings configured on the two ports in the Port View screen. All contents copyright (c) 2007 ZyXEL Communications Corporation.
- Page 21 IES-1248-51V Support Notes 7) Save your configuration. Click Config Save > Config Save on the navigation panel, and then click the Save button to save your configuration to nonvolatile memory. All contents copyright (c) 2007 ZyXEL Communications Corporation.
- Page 22 Some information of RTP and SIP is only shown when communication is established. For the following example, port 1 is the caller, and port 2 is the callee. Their communication is established. This screen shows port 1’s line status and information. All contents copyright (c) 2007 ZyXEL Communications Corporation.
- Page 23 IES-1248-51V Support Notes The following screen shows port 2’s line status and information. All contents copyright (c) 2007 ZyXEL Communications Corporation.
- Page 24 ) MLT Test Screen You can use this screen to perform a variety of standard Metallic Line Tests on the lines connected to IES-1248-51V’s ports. Click VoIP > Diagnostic > MLT Test on the navigation panel. The following screen appears.
-
Page 25: Provide Different Dsl Port Speeds To Different Subscribers
IES-1248-51V Support Notes Provide Different DSL Port Speeds to different subscribers An ISP may provide different Line speeds for each DSL port. In our IES-1248-51V have an easy way to configure the line speed for each port. It can create some profiles which can set different parameters to meet the different users’... - Page 26 Set up High Speed Profile. Give this profile a name like Profile_HighSpeed and input the MaxRate for Up Stream and Down Stream. In this case, we set 1280Kbps and 24992Kbps for Up Stream and Down Stream. All contents copyright (c) 2007 ZyXEL Communications Corporation.
- Page 27 Copy the settings of port 1 to the ports from 2 to 24. After finishing port 1 setting, the screen will be back to the xDSL port Setting screen. Select port 1 in Copy Port All contents copyright (c) 2007 ZyXEL Communications Corporation.
- Page 28 ADSL2+ mode in Mode combobox. That will fix the mode on ADSL2+ mode. Copy the settings of port 25 to the ports from 26 to 48. You can follow the same procedures as port 1. All contents copyright (c) 2007 ZyXEL Communications Corporation.
- Page 29 The encapsulation must be RFC 1483 for bridge mode. The Multiplexing should be the same as IES-1248-51V. The LLC-based is default mode of IES-1248-51V. Additionally, we must check if the VPI/VCI is the same as IES-1248-51V. The default VPI/VCI of IES1248-51V is 0/33.
- Page 30 Multiplexing are the same as the menu 4. Setting “Edit ATM Options=Yes” will enter Menu 11.6. 2.4 Menu11.6: Remote Node ATM Layer Options Check the values above are the same as the IES-1248-51V. All contents copyright (c) 2007 ZyXEL Communications Corporation.
-
Page 31: How To Configure 802.1Q Vlan
IES-1248-51V Support Notes You can click Basic Setting and xDSL Line Data in navigation Panel to display configuration screen as shown. Select the port connected to the IES-1248-51V. You will see the link speed and link mode. How to configure 802.1Q VLAN A VLAN (Virtual Area Network) allows a physical network to be partitioned into multiple logical networks. -
Page 32: How To Set Up A Vlan Environment
ZyXEL Prestige 660R-61 CPE here. Because the two ports belong to different VLAN want to go to the Internet via Uplink port of IES-1248-51V, we need to set up an extra VLAN and let the two ports be members of this VLAN. - Page 33 IES-1248-51V Support Notes Add VLAN20. Assign Port 2, ENET1 and ENET2 to be members of VLAN20 as shown. Add VLAN200. Assign Port 1, Port2, ENET1 and ENET2 to be members of VLAN200 as shown. All contents copyright (c) 2007 ZyXEL Communications Corporation.
- Page 34 After set up the three VLAN, we can see Vlan10, Vlan20 and Vlan200 as shown. Now, click VLAN Port Setting to set the PVID. We assign VLAN 200(PVID) to ENET1, ENET2. Also, we assign VLAN 10 and VLAN 20 to Port1 and port2, respectively as shown. All contents copyright (c) 2007 ZyXEL Communications Corporation.
-
Page 35: Triple Play Application
IES-1248-51V Support Notes 1.3 Port Isolation If we just want to isolate ports of IES-1248-51V and don’t want to set any VLAN, there is another easy way to do this. Click Basic setting, Switch Setup in navigation panel to display configuration screen as shown. Check Port isolation Active check box. -
Page 36: How To Set Up A Multiple Pvcs Environment
In IES-1248-51V, we can set the two services with different VLANs and assign the PVCs with different VLAN, priority and ATM QoS. That will make the video traffic get the higher priority than data traffic. - Page 37 Tx Tagging on ENET1. 1.2 VC profile setup Click Basic Setting and xDSL Profile Setup in navigation panel to display the configuration screen as shown. Click VC profiles in this screen. All contents copyright (c) 2007 ZyXEL Communications Corporation.
- Page 38 IES-1248-51V Support Notes Add Defval_CBR VC profile. Set up Encap, Class, PCR and CDVT as shown. Encap should be LLC the same as IES-1248-51V. Class should be CBR which has higher priority in ATM QoS. 1.3 Multiple PVCs setup Click Basic Setting and xDSL Port Setup in navigation panel to display the configuration screen as shown.
- Page 39 Then we add the VPI/VCI with 0/34. We apply the DEFVAL profile to this channel. 2. Prestige 660R-61 Settings We need to set two channels. One is 0/33 and the other is 0/34. From former All contents copyright (c) 2007 ZyXEL Communications Corporation.
- Page 40 Multiplexing are the same as the menu 4. Setting “Edit ATM Options=Yes” will enter Menu 11.6. 2.2 Menu11.6: Remote Node ATM Layer Options We should set up another VPI/VCI with 0/34 the same as the IES-1248-51V. 3. ES-2024 settings 3.1 VALN Click Advanced Application and VLAN in navigation panel to display configuration screen as shown.
- Page 41 IES-1248-51V Support Notes Add VLAN10. Assign Port 1, Port 10 to be members of VLAN10 as show. We need to check the Tx Tagging on Port 10. All contents copyright (c) 2007 ZyXEL Communications Corporation.
- Page 42 Tx Tagging on Port 10. 3.2 PVID setup Click Advanced Application and VLAN in navigation panel to display configuration screen as shown. Click VLAN Port Setting to show PVID setup screen. All contents copyright (c) 2007 ZyXEL Communications Corporation.
- Page 43 Let 10 be the PVID of Port 1 and 20 be the PVID of Port 2. In this application, you will see the video traffic will go via 0/33 and data traffic All contents copyright (c) 2007 ZyXEL Communications Corporation.
-
Page 44: 802.1X Application
If PC1 is not unauthorized, the traffic from PC1 to application server will be blocked. If PC2 is an authorized client, then it can access to the application server. From the figure, IES-1248-51V acts as an authenticator. Authentication... - Page 45 Authentication and click Apply button to enable 802.1x authentication. Check Enable to turn on 802.1x authentication on that port. You can leave other settings as default values. Click Apply to save your changes. All contents copyright (c) 2007 ZyXEL Communications Corporation.
- Page 46 You can use the existed user account or create the new one by clicking Add New User button. Remember the client site MUST use the account in RADIUS server. All contents copyright (c) 2007 ZyXEL Communications Corporation.
- Page 47 Check the Enable IEEE 802.1x authentication for this network and select the MD5-challenge in EAP type combobox. Please see the following figure. When the 802.1x starts, it will prompt you to enter the user name and password. Please see the following figure. All contents copyright (c) 2007 ZyXEL Communications Corporation.
- Page 48 After click the icon, there will be a dialog for entering the user name and password. Click ok after input the correct user name and password that are in the database of authentication server. The settings of client site are finished. All contents copyright (c) 2007 ZyXEL Communications Corporation.
-
Page 49: Setting Up The Syslog Server
Syslogd and Kiwi's Syslog Daemon ( http://www.kiwisyslog.com/ ). When DSL or Ethernet ports are linked up/down, IES-1248-51V sends a record to Syslog server. The Syslog server can be placed on the network, which IES-1248-51V can access. Syslog server Network IES-1248-51... - Page 50 SysLog in the navigation panel to display configuration Enable UNIX Syslog. Assign the UNIX Syslog Server screen as shown. Check the IP, 192.168.1.77 in this case. Then press the Apply button and the setup is complete. All contents copyright (c) 2007 ZyXEL Communications Corporation.
-
Page 51: Setting Up The Ring Environment
IES-1248-51V Support Notes When DSL ports are linked up/down, IES-1248-51V sends a record to Syslog server. We can see these logs in Kiwi’s Syslog server. Setting up the Ring Environment The Ring topology is used to guarantee the network being normal even if one link between two device broken. -
Page 52: How To Set Up A Ring Environment
-51V How to set up a Ring Environment. We set up Ring environment with one IES-1248-51V, one IES-2000 and one ES-4024. A PC behind IES can connect the PC in the network even one of the links broken. Following sections will describe the detailed procedures to set up the environment. - Page 53 Click Active to enable Spanning Tree Protocol. Then enable it on ENET1 port and ENET2 port. 2. Setup IES-2000 2.1 Enable Spanning Tree protocol Click Switch Setup in the navigation panel to display configuration screen as shown. Then check Spanning Tree Protocol to enable it. All contents copyright (c) 2007 ZyXEL Communications Corporation.
- Page 54 2.2 Enable Spanning Tree protocol on Ethernet ports Click Port Setup in the navigation panel to display configuration screen as shown. Click msc to display MSC card Port setup. Click Uplink2 to set up this port. All contents copyright (c) 2007 ZyXEL Communications Corporation.
- Page 55 IES-1248-51V Support Notes Check Spanning Tree Protocol to enable it. Take the same procedures with Uplink1. Please see the following figure. All contents copyright (c) 2007 ZyXEL Communications Corporation.
- Page 56 You will see the Spanning Tree Protocol Status page. Click Configuration to configure panning tree protocol settings. Click Active to enable Spanning Tree Protocol. Then enable it on Port 1 and Port 2. All contents copyright (c) 2007 ZyXEL Communications Corporation.
- Page 57 We can see the link between port 2 of ES4024 and Uplink1 of IES2000 will be blocked as shown after we connect. After we remove the cable between port 1 of IES-1248-51V and port 1 of ES4024, the connection still exists. We can remove any one of the cable. That will not affect the connection.
-
Page 58: Setting Up The Igmp Snooping/Igmp Filtering
IGMP groups. This can be applied in Video service providers. They can only open some specific channels (groups) to specific ports. Internet Video Server Ethernet Port IGMP Router Port 1 Video Client All contents copyright (c) 2007 ZyXEL Communications Corporation. -
Page 59: How To Set Up Igmp Snooping/Igmp Filtering
IES-1248-51V Support Notes How to set up IGMP snooping/IGMP filtering Here, we only set up the IES-1248-51V to support IGMP snooping and IGMP filtering. Please refer to the user guide of the Video Server and the subscriber device. We assume the video server provides three channels, movie 1 on 240.10.10.8 group, movie 2 on 240.10.10.9 group and movie 3 on 240.10.10.10 group. - Page 60 Then we need to apply the profile to port 1. Click Basic Setting, xDSL Profiles Setup in the navigation panel to display configuration screen as shown. Click the port index 1 to set up this port. All contents copyright (c) 2007 ZyXEL Communications Corporation.
-
Page 61: Static Multicast
IP DSLAM. So administrator must do any configuration of static multicast filter to pass such routing protocol and other related application smoothly. Some Well-known multicast group address: 224.0.0.1---------all systems on this subnet All contents copyright (c) 2007 ZyXEL Communications Corporation. - Page 62 This feature can also be combined with IGMP Snooping feature to make ports know multicast traffic that are not learned by IGMP Snooping or forbid specified ports to receive multicast traffic learned by IGMP Snooping. Application Scenario Scenario Description All contents copyright (c) 2007 ZyXEL Communications Corporation.
-
Page 63: How To Configure Static Multicast Filter
2. Please key in “01:00:5e:00:00:01” in the “Adding new entry” and click “Add” to bring up the following screen. “V” displays for member and “-” displays for non-member. All contents copyright (c) 2007 ZyXEL Communications Corporation. - Page 64 IES-1248-51V Support Notes 3. Please do the same step to add “01:00:5e:00:00:02” static multicast entry. 4. Please add channel 1 multicast MAC address “01:00:5e:01:01:01” and channel 2 multicast MAC address “01:00:5e:02:02:02” as above. All contents copyright (c) 2007 ZyXEL Communications Corporation.
- Page 65 2 channels. Please single-click “port 1” to change its status of group address “01:00:5e:01:01:01” and “01:00:5e:02:02:02” as non-member. 6. For port 2, set it as non-member of channel 2 “01:00:5e:02:02:02” All contents copyright (c) 2007 ZyXEL Communications Corporation.
- Page 66 MAC address. How to achieve the same goal by CLI command? >switch smcast set 1,2,3 01005e000001 join >switch smcast set 1,2,3 01005e000002 join >switch smcast set 1 01005e010101 leave All contents copyright (c) 2007 ZyXEL Communications Corporation.
-
Page 67: Limit The Users Behind The Certain Dsl Port
Internet or allow PCs with specific MAC address to access the Internet. They can easily to achieve this with Port Security and MAC filter features. Internet Ethernet Port Port 3 PC 1 PC 2 PC 3 All contents copyright (c) 2007 ZyXEL Communications Corporation. -
Page 68: How To Set Up Mac Filter/Port Security
You will see the MAC address in the MAC field. Then check the Active check box of Port 3 and press Apply button to enable this feature. Only the MAC addresses listed here can access the Internet behind certain ports. All contents copyright (c) 2007 ZyXEL Communications Corporation. - Page 69 Click Management, MAC Table in the navigation panel to display configuration screen as shown. And select port 3. You will see the MAC table will be shown as you configured in previous steps. All contents copyright (c) 2007 ZyXEL Communications Corporation.
-
Page 70: Dhcp Relay Option 82 Application
Ethernet Port Port 25 DHCP Client to set up DHCP Relay Option 82 Environment Here, we will set up an environment to allow a PC get DHCP IP address in specific IP All contents copyright (c) 2007 ZyXEL Communications Corporation. - Page 71 CPE to the 25 DSL port. Please see former applications for Detailed settings. 3. IP Com mander settings pen IP Commander. Right click “IP commander and then click “connect new server”. All contents copyright (c) 2007 ZyXEL Communications Corporation.
- Page 72 IES-1248-51V Support Notes Input the DHCP IP address or domain name and click “ok”. Our IP is 192.168.1.99. Input user name and password. The default user name is “administrator” and All contents copyright (c) 2007 ZyXEL Communications Corporation.
- Page 73 “incognito”. It will bring up the following screen, please make sure that your DHCP is in “online” status. Then click “wizard” in the top tool bars and select “rule wizard”. All contents copyright (c) 2007 ZyXEL Communications Corporation.
- Page 74 IES-1248-51V Support Notes Give a name and description to the new rule. Assign a range of IP addresses or just one IP address to this rule. In our case, we set All contents copyright (c) 2007 ZyXEL Communications Corporation.
- Page 75 IES-1248-51V Support Notes the IP pool from 192.168.1.201 to 192.168.1.203. After input IP pool, we select “DHCP Option” in Keywords combobox. All contents copyright (c) 2007 ZyXEL Communications Corporation.
- Page 76 Please note that the first 2 bytes define port number, the second 2 bytes is VLAN ID and the other bytes are the Option 82 string. After you finish above step, you will see the following figure. All contents copyright (c) 2007 ZyXEL Communications Corporation.
- Page 77 IES-1248-51V Support Notes Then pop up the following screen and you can just press Next button. Then you can add DHCP template (option) such as gateway, DNS server and so on. All contents copyright (c) 2007 ZyXEL Communications Corporation.
- Page 78 IES-1248-51V Support Notes Here we use “192.168.1.1” as gateway IP address of DHCP client PC. You can apply DDNS service to DHCP server or not. All contents copyright (c) 2007 ZyXEL Communications Corporation.
- Page 79 IES-1248-51V Support Notes The rule creation has been finished. All contents copyright (c) 2007 ZyXEL Communications Corporation.
-
Page 80: Filter Some Certain Packet
After finishing all above procedures, your PC will get the IP address 192.168.1.201 when you send a DHCP request. Filter Some Certain Packet ISP may want to filter some kinds of packets. IES-1248-51V provides “Packet Filter” function to filter some specific packets, like IP, ARP, DHCP, EAPoL, PPPoE, NETBIOS and IGMP. - Page 81 Please select port 1 and clear the NetBios check box. Meanwhile, you will see Filter Out in NetBios check box. Press Add button make the change take effect. So you will see the port 1 will block the NetBios protocol packets. All contents copyright (c) 2007 ZyXEL Communications Corporation.
-
Page 82: Cascade Two Ies-1248-51V (Daisy Chain Mode)
IES-1248-51V (Daisy-chain mode) How to setup Daisy-chain mode In this case, we daisy-chain two IES-1248-51V. Please see the figure above. We only set the one connected to the ISP as Daisy-Chain mode. In Daisy-Chain mode, connect the Ethernet Port 1 to the Ethernet backbone and connect the Ethernet Port 2 to another IES-1248-51V. -
Page 83: Faq
IP packet-switched network. The IES-1248-51V uses SIP for network signaling to establish or tear down a voice call. DTMF signals are also translated into SIP signals (or transmitted in the voice band). -
Page 84: What Kind Of The Multicasting Functionalities Does Ies-1248-51V Support
• SDP (RFC 2327) What kind of the Media Gateway Communication protocols are supported? • IP/UDP/RTP encapsulation for IPV4 • RTP (RFC 1889), RTCP (RFC 1890) • Session Timer Protocol (RFC 4028) All contents copyright (c) 2007 ZyXEL Communications Corporation. -
Page 85: What Are The Limitations For Each Adsl Port Of Ies-1248-51V
RFC 2833 like SIP INFO • FAX/Modem pass through (T.38 or G.711) via RTP What are the limitations for each ADSL port of IES-1248-51V? Number of Mac filter: 10 Number of PVC: 8 Number of PPVC: 2 Number of PPVC member: 8... -
Page 86: What Are The Voip Limitations Of Ies-1248-51V
Number of numbering plan table: Per table limitations: Number of entries per numbering plan table: What kind of the voice CODECs does the IES-1248-51V support? IES-1248-51V supports G.711a/u, G.726, G.729 a/b and G.723.1. What is the ADSL chipset of IES-1248-51V? Broadcom All contents copyright (c) 2007 ZyXEL Communications Corporation. -
Page 87: How Many Vlan Id And Static Vlan Entry Does Ies-1248-51V Support
Each DSL port only allows joining up to 16 static VLAN entries. What does it mean if the ALM LED lights on? The ALM LED lights when the IES-1248-51V is overheated, the fans are not working properly, the voltage readings are outside the tolerance levels or an alarm has been detected on the ALARM input pins. -
Page 88: Appendix A - Installation Of Ser
See the manual for more instructions. You can start the MySQL daemon with: cd /usr ; /usr/bin/safe_mysqld & You can test the MySQL daemon with the benchmarks in the 'sql-bench' directory: cd sql-bench ; run-all-tests All contents copyright (c) 2007 ZyXEL Communications Corporation. -
Page 89: Real-Time Monitor
400: 0 401: 0 403: 0 404: 0 407: 0 408: 0 483: 0 4xx: 0 500: 0 5xx: 0 6xx: 0 xxx: 0 failures: 0 UsrLoc Stats Domain Registered Expired 'location' 0 4 To stop ser server [root@VOIP root]# /usr/sbin/serctl stop [root@VOIP root]# /etc/rc.d/init.d/ser stop All contents copyright (c) 2007 ZyXEL Communications Corporation. -
Page 90: Mysql Setup
Up Since: Sun Jan 28 00:52:03 2007 Up time: 853 [sec] Transaction Statistics Current: 0 (0 waiting) Total: 2 (0 local) Replied localy: 4 Completion status 6xx: 0, 5xx: 0, 4xx: 2, 3xx: 0,2xx: 0 All contents copyright (c) 2007 ZyXEL Communications Corporation.
Need help?
Do you have a question about the IES-1248-51V and is the answer not in the manual?
Questions and answers