Table of Contents
Advertisement
Quick Links
Advertisement
Table of Contents

Related Manuals for Electrolux KGV9539IK


Summary of Contents for Electrolux KGV9539IK
- Page 1 KGV9539IK User Manual...
-
Page 2: Table Of Contents
9. TECHNICAL DATA...................25 WE’RE THINKING OF YOU Thank you for purchasing an Electrolux appliance. You’ve chosen a product that brings with it decades of professional experience and innovation. Ingenious and stylish, it has been designed with you in mind. So whenever you use it, you can be safe in the knowledge that you’ll get great results every time. - Page 3 ENGLISH instructions in a safe and accessible location for future reference. 1.1 Children and vulnerable people safety This appliance can be used by children aged from 8 • years and above and persons with reduced physical, sensory or mental capabilities or lack of experience and knowledge if they have been given supervision or instruction concerning the use of the appliance in a safe way and understand the hazards involved.
- Page 4 CAUTION: The cooking process has to be supervised. • A short term cooking process has to be supervised continuously. WARNING: Danger of fire: Do not store items on the •...
-
Page 5: Safety Instructions
ENGLISH temperatures of more than 50°C above room temperature. WARNING: Use only hob guards designed by the • manufacturer of the cooking appliance or indicated by the manufacturer of the appliance in the instructions for use as suitable or hob guards incorporated in the appliance. - Page 6 Contact our Authorised • Remove all the packaging, labelling Service Centre or an electrician to and protective film (if applicable) change a damaged mains cable. before first use. • The shock protection of live and • This appliance is for household use insulated parts must be fastened in only.
-
Page 7: Installation
ENGLISH can cause scratches on the glass / • Do not use water spray and steam to glass ceramic. Always lift these clean the appliance. objects up when you have to move • Clean the appliance with a moist soft them on the cooking surface. - Page 8 Model ........• it is no longer than 1500 mm; PNC ......... • it shows no throttles; Serial number ......• it is not subject to traction or torsion; • it does not get in touch with cutting 3.2 Gas Connection edges or corners;...
- Page 9 ENGLISH 4. Touch 7. Touch To enter the mode. To confirm the gas type. 5. Timer display shows selected gas Touch to exit the mode or wait for type. Automatic Switch Off function activates. 6. Touch to set the gas type according to table below.
- Page 10 Make sure that 1. Connect the green and yellow (earth) the ground connection agrees with the wire to the terminal which is marked standards and regulations. with the letter 'E', or the earth symbol • Do not let the power cable to heat up , or coloured green and yellow.
- Page 11 ENGLISH min. 2 mm min. 2 mm < 20 mm > 20 mm min. 500 mm min. 500 mm 30 mm 12 mm 57 mm 12 mm 57 mm 28 mm 41 mm 28 mm 41 mm 38 mm 31 mm 38 mm 31 mm min.
- Page 12 CAUTION! min 40 mm Install the appliance only on a worktop with flat surface. 3.9 Installing hob under the min 5 mm (max 150 mm) hood 60 mm If you install the hob under a hood, please see the A.
-
Page 13: Product Description
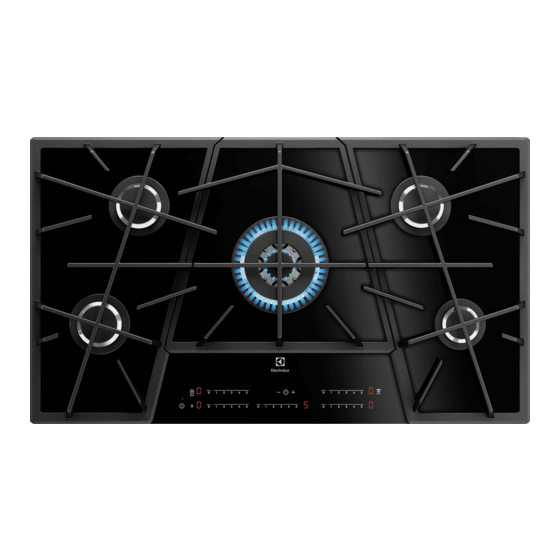
ENGLISH 4. PRODUCT DESCRIPTION 4.1 Cooking surface layout Semi-rapid burner Multi Crown burner Auxiliary burner Control panel 4.2 Control panel layout Use the sensor fields to operate the appliance. The displays, indicators and sounds tell which functions operate. Sen‐ Function Comment field ON / OFF... -
Page 14: Daily Use
Sen‐ Function Comment field To activate and deactivate the Timer. To increase or decrease the time. Area for Hob²Hood infra‐ To hood communication. red signal Control bar To set the heat setting for the burner. 4.3 Heat setting displays... - Page 15 ENGLISH 5.1 Burner overview After 20 seconds of non-use, the hob deactivates. 2. After light animation, when you see on display, touch the control bar at the correct heat setting or move your finger along the control bar until you reach the correct heat setting. To set or change the heat setting.
- Page 16 5.4 Automatic Switch Off 2. Touch for 3 seconds, to activate the lock. comes on in all control The function deactivates the hob bars. automatically if: 3. Touch to turn the cooktop off. • all burners are deactivated, • you do not set the heat setting after...
- Page 17 ENGLISH When the time comes to an end, the For most of the hoods, the sound operates and 00 flashes. remote system is originally 4. Touch deactivated. Activate it To stop the sound. before you use the function. For more information refer to The function has no effect the hood user manual.
-
Page 18: Hints And Tips
WARNING! After end of cooking, the hood does not turn off automatically. Turn it off manually. 6. HINTS AND TIPS 6.3 Diameters of cookware WARNING! Refer to Safety chapters. Use cookware with diameters applicable to the 6.1 Cookware size of burners. - Page 19 Heat to boiling function To find the full range of cooker hoods which work with this function refer to our Simmering consumer website. The Electrolux cooker hoods that work with this function must Blending, melting in‐ have the symbol gredients 6.5 Examples of cooking...
-
Page 20: Care And Cleaning
Bur‐ gers Bur‐ gers Bur‐ gers Fries 20-30 Be‐ cha‐ 5-10 5-10 Rice por‐ 10-20 30-40 ridg 1) Stirring continuously 2) Without lid 7. CARE AND CLEANING WARNING! WARNING! Refer to Safety chapters. Do not use knives, scrapers or similar instruments to clean the surface of the 7.1 General information... - Page 21 ENGLISH hand and dry them. If necessary, remove stubborn stains with a paste cleaner. 3. After you clean the pan supports, make sure that they are in correct positions. 4. For the burner to operate correctly, make sure that the arms of the pan supports are aligned with the centre of the burner.
-
Page 22: Troubleshooting
7.6 Periodic maintenance conditions of the gas supply pipe and the pressure adjuster, if fitted. Speak to your local Authorised Service Centre periodically to check the 8. TROUBLESHOOTING WARNING! Refer to Safety chapters. 8.1 What to do if... Problem... - Page 23 ENGLISH Problem Possible cause Remedy You can hear sparking for Air currents around the Make sure that air currents a few seconds after the burner. from windows or doors do flame goes out and auto‐ not extinguish the flame. matic re-ignition is per‐ Burner cap or crown are Place burner cap and formed.
- Page 24 Problem Possible cause Remedy There is an error in the Disconnect the hob from and the number come hob. the electrical supply for some time. Disconnect the fuse from the electrical system of the house. Con‐ nect it again. If comes on again, speak to an Au‐...
-
Page 25: Technical Data
ENGLISH 9. TECHNICAL DATA 9.1 Hob dimensions Width 890 mm Depth 510 mm 9.2 Other technical data G30/G31 (3B/P) 30/30 Gas original: 734 g/h mbar TOTAL POW‐ Gas replace‐ G20 (2H) 20 mbar 10,2 kW ment: Electric supply: 220-240 V ~ 50-60 Hz Appliance cate‐... - Page 28 www.electrolux.com/shop...
Need help?
Do you have a question about the KGV9539IK and is the answer not in the manual?
Questions and answers