Table of Contents
Advertisement
Available languages
Available languages
Owner's Manual
Manual del Propietario
020251
(2900 PSI)
Questions? Help is just a moment away!
Preguntas? La ayuda es justa un momento lejos!
Call: Pressure Washer Helpline
Llame: Línea Directa del Lavador a Presión
1-800-743-4115 M-F 8-5 CT
web: www.briggsandstratton.com
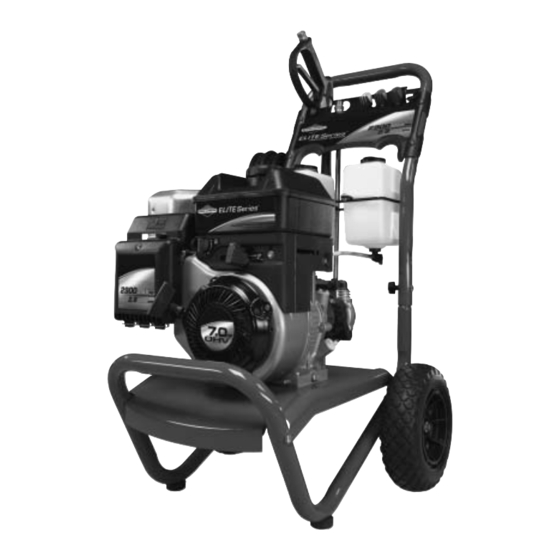
Your unit may vary slightly in
appearance from that shown.
CAUTION
PRECAUCIÓN
Before using this product,
Antes de utilizar el producto,
BRIGGS & STRATTON POWER PRODUCTS GROUP, LLC
read this manual and follow
lea este manual y siga todas
JEFFERSON,WISCONSIN, U.S.A.
all Safety Rules and
las Reglas de Seguridad e
Operating Instructions.
Manual No. 196723GS Revision 1 (02/25/2005)
Instrucciones de Uso.
Advertisement
Chapters
Table of Contents

Related Manuals for Briggs & Stratton Elite 020251


Summary of Contents for Briggs & Stratton Elite 020251
-
Page 1: Manual Del Propietario
020251 (2900 PSI) Questions? Help is just a moment away! Preguntas? La ayuda es justa un momento lejos! Call: Pressure Washer Helpline Llame: Línea Directa del Lavador a Presión 1-800-743-4115 M-F 8-5 CT web: www.briggsandstratton.com Your unit may vary slightly in appearance from that shown. -
Page 2: Table Of Contents
Know its applications, its limitations and any hazards involved. This manual contains information for a pressure washer that operates up to a maximum of 2,900 PSI and at a maximum flow rate of 2.8 gallons per minute.This high quality residential system features NeverFlat™... -
Page 3: Section 1: Safety Rules
Fire or explosion can cause severe burns or death. WHEN ADDING FUEL • Turn pressure washer OFF and let it cool at least 2 minutes before removing gas cap. • Fill fuel tank outdoors. • DO NOT overfill tank. Allow space for fuel expansion. - Page 4 • DO NOT touch hot surfaces. • Allow equipment to cool before touching. • The pressure washer must be at least 5 feet from structures having combustible walls and/or other combustible materials. • Keep at least 3 feet of clearance on all sides of pressure washer for adequate cooling, maintenance and servicing.
-
Page 5: Section 2 - Features And Controls
KNOW YOUR PRESSURE WASHER Read this owner’s manual and safety rules before operating your pressure washer. Compare the illustrations with your pressure washer to familiarize yourself with the locations of various controls and adjustments. Save this manual for future reference. -
Page 6: Section 3 - Assembly
PREPARING PRESSURE WASHER FOR USE If you have any problems with the assembly of your pressure washer or if parts are missing or damaged, call the pressure washer helpline at 1-800-743-4115. To prepare your pressure washer for operation, you will need to perform these tasks: Fill out and send in registration card. -
Page 7: Add Engine Oil And Fuel
Figure 5 — Attach Chemical Hose to Chemical Injection Fitting on Pump Add Engine Oil and Fuel • Place pressure washer on a level surface. CAUTION Any attempt to crank or start the engine before it has been properly filled with the recommended oil will result in equipment failure. -
Page 8: Section 3 - Assembly
• Always wear eye protection when using this equipment or in vicinity of where equipment is in use. • Before starting the pressure washer, be sure you are wearing adequate eye protection. Checklist Before Starting Engine Review the unit’s assembly to confirm you have performed... -
Page 9: Pressure Washer Location
• DO NOT operate pressure washer inside any building or enclosure. The pressure washer must be at least 5 ft. (152 cm) from structures having combustible walls and/or other combustible materials. Leave at least 3 ft. (92 cm) all around pressure washer including overhead, for adequate cooling, maintenance and servicing. -
Page 10: How To Stop Your Pressure Washer
• DO NOT touch hot surfaces. • Allow equipment to cool before touching. • The pressure washer must be at least 5 feet from structures having combustible walls and/or other combustible materials. • Keep at least 3 feet of clearance on all sides of pressure washer for adequate cooling, maintenance and servicing. -
Page 11: Low Pressure
Follow these instructions to change ProjectPro™ nozzles: Engage trigger lock on spray gun. CAUTION A pressure washer produces a high pressure spray which increases risk of injury and damage to unit. • NEVER exchange ProjectPro™ nozzles without locking the trigger lock on the trigger. -
Page 12: Cleaning And Applying Detergent
Section 4: Operation • For maximum rinsing (higher pressure and lower flow), for stubborn or hard to reach surface such as second story surfaces, paint removal, oil stains, rust removal or other stubborn substances (tar, gum, grease, wax, etc.), select red Max ProjectPro™... -
Page 13: Section 4 - Operation
• Operate this unit on a stable surface. • Be extremely careful if you must use the pressure washer from a ladder, scaffolding or any other relatively unstable location. • Firmly grasp spray gun with both hands when using high pressure spray to avoid injury if gun kicks back. -
Page 14: Specifications
Shipping Weight ......90 lbs. GENERAL MAINTENANCE RECOMMENDATIONS The pressure washer warranty does not cover items that have been subjected to operator abuse or negligence.To receive full value from the warranty, the operator must maintain the pressure washer as instructed in this manual. -
Page 15: Nozzle Maintenance
Shut off engine and turn off water supply. -
Page 16: Section 5 - Maintenance
(Figure 23). Figure 23 - Changing Pump Oil Tilt pressure washer to drain oil into an approved container until it drips slowly from pump. Tilt pressure washer in opposite direction and empty premeasured pump oil bottle into same opening (a small funnel may be helpful). -
Page 17: Section 6 - Storage
Flush chemical system by selecting one tank, turning its chemical shut-off valve to “On” position and run pressure washer with black nozzle. Flush until first tank is empty.Turn its chemical shut-off valve to “Off” position. Flush other tank the same way. -
Page 18: Section 7 - Troubleshooting
Section Troubleshooting TROUBLESHOOTING Problem Pump has following problems: failure to produce pressure, erratic pressure, chattering, loss of pressure, low water volume. Detergent fails to mix with spray. Engine runs good at no-load but "bogs" when load is added. Engine shuts down during operation. -
Page 19: Warranty Period
LIMITED WARRANTY WATER PRESSURE WASHER PUMP (Not available in the USA) A A l l l l O O t t h h e e r r... -
Page 20: Instrucciones De Seguridad
Sección Reglas de Seguridad CONSERVE ESTAS INSTRUCCIONES TABLA DE CONTENIDOS Sección 1 - Reglas De Seguridad ..... . 20-22 Sección 2 - Características y Controles ....23 Sección 3 - Montaje . -
Page 21: Sección 1: Reglas De Seguridad
ADVERTENCIA Al motor funcionar, se produce monóxido de carbono, un gas inodoro y venenoso. El respirar el monóxido de carbono, producirá náusea, desmayo o la muerte. Algunas sustancias químicas o los detergentes pueden ser perjudiciales si inhalados o ingeridos, causando la náusea severa, desmayando o para envenenar. - Page 22 Sección 1: Reglas de Seguridad ADVERTENCIA Los motores al funcionar producen calor. La temperatura del silenciador y de las áreas cercanas puede alcanzar o pasar los 150ºF (65ºC). Quemaduras severas pueden ocurrir al hacer contacto. Los residuos como hojas, hierba, maleza, etc. se pueden inflamar.
-
Page 23: Características Y Controles
CONOZCA SU MAQUINA LAVADORA DE PRESION Lea el manual del propietario y las reglas de seguridad antes de poner en marcha su máquina lavadora a presión. Compare las ilustraciones con su máquina lavadora a presión para familiarizarse con las ubicaciones de los diferentes controles y ajustes. Guarde este manual para referencias futuras. -
Page 24: Conecte El Manubrio Y Bandeja Accesoria
Sección Montaje MONTAJE IMPORTANTE: Lea totalmente el manual del propietario antes que intente ensamblar u operar su lavador a presión. Remueva el Lavador a Presión del Empaque • Remueva la bolsa con las piezas, incluidas con el lavador de alta presión. •... -
Page 25: Sección 3: Montaje
Inserte el perno del soporte a través de los orificios desde interior de la unidad y sujete una perilla de plástico desde el fuera de la misma unidad.Apriete manualmente (Figura 25). Figura 25 - Sujetar el Manubrio Coloque la bandeja de accesorios sobre los orificios del asa (vista desde la parte delantera de la unidad). -
Page 26: Conecte La Manguera Y El Suministro De Agua A La Bomba
Sección 3: Montaje Conecte la Manguera y el Suministro de Agua a la Bomba IMPORTANTE: Usted deberá armar la extensión para boquillas y conectar todas las mangueras antes de darle arranque al motor. La bomba resultará dañada si arranca el motor sin tener todas las mangueras conectadas y el suministro agua abierto. -
Page 27: Operación
CÓMO USAR SU LAVADORA A PRESIÓN Si tiene problemas operando su máquina lavadora a presión, por favor llame a la línea de ayuda para máquinas lavadoras a presión al 1-800-743-4115. Ubicación del Lavadora a Presión Espacio Libre Alrededor del Lavadora a Presión ADVERTENCIA Al motor funcionar, se produce monóxido de carbono, un gas inodoro y venenoso. -
Page 28: Sección 4: Operación
Sección 4: Operación Pour démarrer le moteur, suivez les instructions qui figurent dans le manuel d'utilisation. Consulte también la etiqueta de instrucciones situada en la limpiadora a presión. ADVERTENCIA El rápido repliegue del cable del arrancador (retroceso) impedirá que el usuario suelte el cable a tiempo y tirará... -
Page 29: La Presión Baja
Cómo Usar el Sistema de Boquillas ProjectPro™ El conector rápido del prolongador de la boquilla permite cambiar la boquilla y montar una de las cuatro diferentes que incluye el sistema ProjectPro™. Las boquillas ProjectPro™ varían el presión y patrón de rociado como se muestra en la Figura 37. Figura 37 —... - Page 30 Sección 4: Operación • Para un enjuagado de máxima potencia (alta presión y bajo caudal), para superficies rebeldes o de difícil acceso, como superficies de plantas altas, eliminación de pintura, manchas de aceite, eliminación de óxido u otras sustancias difíciles (alquitrán, resina, grasa, cera, etc.), seleccione la boquilla ProjectPro™...
-
Page 31: Sistema De Enfriamiento Automático (Alivio Térmico)
Aplique el detergente sobre la superficie seca, comenzando en la parte inferior del área y dirigiéndose hacia arriba, utilizando movimientos largos, parejos y superpuestos. Permita que el detergente penetre de 3 a 5 minutos antes de enjuagar.Vuelva a aplicar cuando sea necesario para evitar que la superficie se seque. -
Page 32: Recomendaciones Generales
Sección Mantenimiento ESPECIFICACIONES Presión de Salida Máxima ..... 2900 PSI Caudal Máximo ....2.8 galones por minuto (gpm) Detergente Use el detergente adecuado para lavadores a presión Temperatura del Suministro de Agua . -
Page 33: Mantenimiento De La Boquilla
Coloque el anillo 'o' en la ranura respectiva. Empuje el anillo 'o' hasta que quede ajustado contra el colador del filtro en línea. Conecte la extensión para boquillas a la pistola de rociado de la manera descrita anteriormente en este manual. Mantenimiento de la Boquilla Si siente una sensación pulsante al momento de apretar el gatillo de la pistola rociadora, puede que sea causada por la presión excesiva... -
Page 34: Mantenimiento Del Motor
Sección Sección 5 y 6: Mantenimiento y Almacenamiento Incline la limpiadora a presión hacia el lado contrario y llene la bomba con el aceite recomendado a través del mismo orificio (puede utilizar para ello un embudo pequeño). Instale el tapón negro de aceite de la bomba y apriételo firmemente. -
Page 35: Diagnosticos De Averías
REPARACION DE DAÑOS Problema La bomba presenta los siguientes problemas: no produce presión, produce una presión errada, traqueteo, pérdida de presión, bajo volumen de agua. El detergente no se mezcla con el rociado. El motor funciona bien cuando no tiene cargas, pero funciona "mal" cuando se conecta una carga. -
Page 36: Garantia
POLÍTICA DE GARANTÍA PARA EL PROPIETARIO DE EQUIPOS BRIGGS & STRATTON POWER PRODUCTS GROUP, LLC Fecha de entrada en vigor: 1 de Febrero de 2005. Sustituye a todas las garantías sin fecha y a las de fecha anterior al 1 de Febrero de 2005 Briggs &...
Need help?
Do you have a question about the Elite 020251 and is the answer not in the manual?
Questions and answers