
Related Manuals for Manitowoc National Crane NC1400H


Summary of Contents for Manitowoc National Crane NC1400H
- Page 1 Supplement to Service Manual Boom Cable Tensioning © 2017 Manitowoc Published 03-23-2017, Control# 641-01...
- Page 2 THIS PAGE BLANK...
- Page 3 This Supplement provides information regarding the proper Cable Tensioning Tensioning of Extend and Retract Cables and Positive Lock Tensioning Setup Procedure of adjustment hardware on National Crane Boom cable assemblies. The information provided here supplements the Tensioning must be done with the boom in the horizontal Service Manual and must be used in conjunction with all position.
- Page 4 543 retract cables. 123 extend cables. 321 retract cables. Four section boom with two stage cylinder. 234 extend cables. Cable tensioning to be in the following order: 432 retract cables. 321 retract cables Three section boom with one stage cylinder. 123 extend (synchronizing) cables.
- Page 5 Tightening until the retraction gap between the first and At this time the third, second and first extendable sections second section and the retraction gap between the should extend and retract equally and bottom out against the stops simultaneously. second and the third are equal. At this time the second and first extendable sections should 345 and 543 cable balancing extend and retract equally and bottom out against the stops...
- Page 6 4- Section Boom w/ 2 Stage Cylinder Cable Positioning 1/2/3 EXTEND 2/3/4 EXTEND 1ST STAGE BASE 2ND STAGE 3RD STAGE 4th STAGE 8860-2 4/3/2 RETRACT 3/2/1 RETRACT FIGURE 3 Cable Tightening Sequence 4 Section Boom with Two Retraction Stage Extend Cylinder Measure the retraction gaps between the first and second section and the second and third section.
- Page 7 The fourth section should have moved out. Tighten the 432 retract cable located at the front bottom of the second section the difference in the retraction gap Tightening until the extension gap between the third and measurements. fourth section is equal to the extension gap between the second and third section.
- Page 8 Tightening until the retraction gap between the first and Tightening until the extension gap between the third and second section and the retraction gap between the fourth section is equal to the extension gap between the second and the third are equal. second and third section.
- Page 9 Extend and retract the boom a few times and then Tighten the 321 retract cable located at the front bottom repeat measuring the extension gaps. of the base section the difference in the retraction gap measurements. The third section should have moved out. Extend and retract the boom a few times and then Tightening until the extension gap between the first and repeat measuring the retraction gaps.
- Page 10 Third (positive lock) nut installation is to be placed on each of Metric Series with Coarse Threads the extend cables. The retract cables do not require the third (positive lock) nut. Minimum Cable end TORQUE The third nut should be hand tightened until the tapped hole Nut Type Thread Size Property...
- Page 11 An untrained operator subjects himself and others to death or serious injury. Do not operate this crane unless: • You are trained in the safe operation of this crane. Manitowoc is not responsible for qualifying personnel. • You read, understand, and follow the safety and operating recommendations contained in the crane manufacturer’s manuals and...
- Page 12 SECTION CONTENTS Crane Warm-up Procedures......... . . 1 Engine.
- Page 13 (40°F). Lubrication section of your crane’s Operator Manual, by Warm-up Procedures: contacting your local Manitowoc distributor, or by contacting Manitowoc Crane Care directly). Without operating the hoist function, warm the hydraulic oil (see Hydraulic Oil System, page 2).
- Page 14 Axles crane’s hydraulic pumps or motors, stop the operation and engine immediately and contact a Manitowoc NOTE: For National Crane axle warm-up procedures, refer distributor. to chassis manufacturer’s manual. • From 10°C to 4°C (50°F to 40°F): Crane operation with...
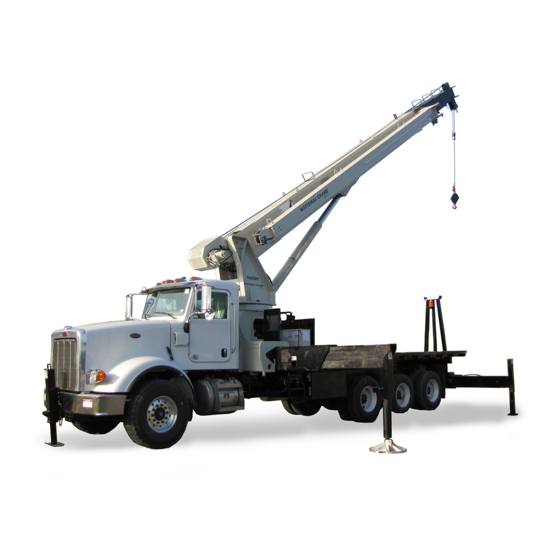
- Page 15 National Crane 1400H OPERATOR AND SERVICE MANUAL...
- Page 17 An untrained operator subjects himself and others to death or serious injury. Do not operate this crane unless: • You are trained in the safe operation of this crane. Manitowoc is not responsible for qualifying personnel. • You read, understand, and follow the safety and operating recommendations contained in the crane manufacturer’s manuals and...
- Page 18 CALIFORNIA PROPOSITION 65 WARNING Diesel engine exhaust and some of its constituents are known to the State of California to cause cancer, birth defects, and other reproductive harm. CALIFORNIA PROPOSITION 65 WARNING Battery posts, terminals, and related accessories contain chemical lead and lead compounds, chemicals known to the State of California to cause cancer, birth defects or other reproductive harm.
-
Page 19: Table Of Contents
TABLE OF CONTENTS See end of this Manual for Alphabetical Index SECTION 1 - SAFETY INFORMATION Safety Messages ............1-1 General . - Page 20 Truck Cab Controls ........... . . 2-1 Power Take-Off .
- Page 21 Wire Rope Installation..........3-6 Installing Cable on the Hoist .
- Page 22 Internal Cable Sheave Lubrication........5-19 Four Section Cable Tensioning .
- Page 23 Configuration 2 - 14127H ..........7-4 Configuration 3 - 14100H .
- Page 24 This Page Blank...
-
Page 25: Safety Messages
1400H OPERATOR AND SERVICE MANUAL SAFETY INFORMATION SECTION 1 SAFETY INFORMATION SECTION CONTENTS Safety Messages......1-1 Special Operating Conditions and Equipment . -
Page 26: Signal Words
Identifies hazards that may result in death or serious Following any accident or damage to equipment, the injury if the message is ignored. Manitowoc distributor must be immediately advised of the incident and consulted on necessary inspections and repairs. Should the distributor not be immediately available, contact should be made directly with Manitowoc Product Safety at the address below. -
Page 27: Operator Qualifications
1400H OPERATOR AND SERVICE MANUAL SAFETY INFORMATION thorough knowledge of all such relevant work rules is necessary. An untrained operator subjects himself and others to death or serious injury. You must not operate this machine unless: • You have been trained in the safe operation of this machine. -
Page 28: Rated Capacity Limiter (Rcl) Systems (If Equipped)
(HCAS), a safe load indicator (SLI), or • When a Load Indicator, Rated Capacity Indicator, or an EKS5; Manitowoc refers to these systems as a rated Rated Capacity Limiter is inoperative or malfunctioning, capacity limiter (RCL) throughout its Operator and Service the designated person responsible for supervising the Manuals.) -
Page 29: Working Area Limiter (If Equipped)
1400H OPERATOR AND SERVICE MANUAL SAFETY INFORMATION Caution must be used when lowering the boom, extending Never interfere with the proper functioning of operational the boom or hoisting up. Let out load line(s) simultaneously aids or warning devices. to prevent two-blocking the boom tip(s) and the hook block, Working Area Limiter (If Equipped) etc. -
Page 30: Load Charts
SAFETY INFORMATION 1400H OPERATOR AND SERVICE MANUAL Carefully follow the procedures in this Operator Manual when extending or retracting the outriggers. Death or serious injury could result from improper crane setup on outriggers. KEEP THE BOOM SHORT. Swinging loads with a long line can create an unstable condition and possible structural The operator must select the proper Load Chart and Rated failure of the boom. -
Page 31: Lifting Operations
SAFETY INFORMATION upon the direction from which the wind is blowing (e.g., wind a loss of control in handling the load. Manitowoc on the rear of the boom can result in decreased forward recommends that, if the wind speed (velocity) is between... -
Page 32: Counterweight
The crane is improperly operated. reached instability. The “balance point” for stability testing according to SAE and Manitowoc criteria is a condition of Do not rely on the crane’s tipping to determine your lifting loading wherein the load moment acting to overturn the capacity. -
Page 33: Pile Driving And Extracting
• All hoist hooks shall be equipped with a positive locking It is not the intention of Manitowoc to recommend specific latch. types or makes of pile driving and pile extraction equipment, but rather to advise of the operational requirements to help... - Page 34 Electrocution Hazard! Manitowoc cranes are not equipped with all features Electrocution can occur even without direct contact with the required to operate within OSHA 29CFR1926.1408, Table crane.
-
Page 35: Set-Up And Operation
1400H OPERATOR AND SERVICE MANUAL SAFETY INFORMATION Set-Up and Operation not assure that electrical contact will not occur. Even if codes or regulations require the use of such devices, failure to During crane use, assume that every line is energized (“hot” follow the rules listed here may result in serious injury or or “live”) and take the necessary precautions. -
Page 36: Electrical Contact
If taglines are used, they must be non-conductive. 29CFRI926.1431 for Construction. • Every precaution must be taken to dissipate induced Use of a Manitowoc crane to handle personnel is acceptable voltages. Consult a qualified RF (radio frequency) provided: 1-12 Published 10-30-2014 Control # 040-09... -
Page 37: Environmental Protection
Manitowoc continues to recommend that cranes be properly of amusement or sport. maintained, regularly inspected and repaired as necessary. Manitowoc reminds crane owners to ensure that all safety decals are in place and legible. Manitowoc continues to urge National Crane 1-13 Published 10-30-2014 Control # 040-09... -
Page 38: Service And Repairs
• Stop the engine and disconnect the battery. affects its original design and is not authorized and approved by Manitowoc is strictly prohibited. All replacement parts • Controls should be properly tagged. Never operate the must be Manitowoc approved. Such action invalidates all... -
Page 39: Lubrication
The nominal strength of a wire rope Wire Rope should never be used as its working load. Use only the wire rope specified by Manitowoc as indicated • Each type of fitting attached to a wire rope has a specific on the crane’s Load Chart. -
Page 40: Sheaves
SAFETY INFORMATION 1400H OPERATOR AND SERVICE MANUAL • Never overload a wire rope. This means never use the Rope stretch (elongation). wire rope where the load applied to it is greater than the Integrity of end attachments. working load determined by the rope manufacturer. Evidence of abuse or contact with another object. -
Page 41: Batteries
1400H OPERATOR AND SERVICE MANUAL SAFETY INFORMATION weekly. Inoperable, damaged and/or worn sheaves cause Engine rapid deterioration of wire rope. Fuel the crane only with the engine turned off. Do not smoke Ensure sheaves carrying ropes that can be momentarily while fueling the crane. -
Page 42: Travel Operation
SAFETY INFORMATION 1400H OPERATOR AND SERVICE MANUAL exercised anytime any crane function is being performed Before traveling a crane, check suitability of proposed route while the cable is hooked into the hookblock tie down. with regard to crane height, width, and length. Never back up without the aid of a signal person to verify the TRAVEL OPERATION area behind the crane is clear of obstructions and/or... -
Page 43: Work Practices
Operator Manual when extending or retracting the system that have not been evaluated and approved by outriggers. Death or serious injury could result from improper Manitowoc Crane Care. crane set up on outriggers. Do not step on surfaces on the crane that are not approved Be familiar with surface conditions and the presence of or suitable for walking and working. -
Page 44: Lifting
SAFETY INFORMATION 1400H OPERATOR AND SERVICE MANUAL Sparks from the crane’s electrical system and/or engine exhaust can cause an explosion. Do not operate this crane in an area with flammable dust or vapors, unless good ventilation has removed the hazard. Carbon monoxide fumes from the engine exhaust can cause suffocation in an enclosed area. -
Page 45: Hand Signals
1400H OPERATOR AND SERVICE MANUAL SAFETY INFORMATION Check the hoist brake by raising the load a few inches, If the boom should contact an object, stop immediately and stopping the hoist and holding the load. Be sure the hoist inspect the boom. Remove the crane from service if the brake is working correctly before continuing the lift. - Page 46 SAFETY INFORMATION 1400H OPERATOR AND SERVICE MANUAL 1-22 Published 10-30-2014 Control # 040-09...
-
Page 47: Boom Extension
If applicable to your crane, frequently check all air tanks for intended to allow the crane to be placed in the most stable water in freezing weather. and secure position. However, Manitowoc recognizes that National Crane 1-23 Published 10-30-2014 Control # 040-09... -
Page 48: Temperature Effects On Hook Blocks
SAFETY INFORMATION 1400H OPERATOR AND SERVICE MANUAL If applicable to your crane, always handle propane tanks extended 7.6 m (25 ft) in which the oil cools 15.5°C (60°F) according to the supplier’s instructions. would retract approximately 196 mm (7 3/4 in) [see Table 1- 2]. - Page 49 1400H OPERATOR AND SERVICE MANUAL SAFETY INFORMATION Table 1-2: Boom Drift Chart (Cylinder length change in inches) Coeff. = 0.00043 (in / °F) STROKE Temperature Change (°F) (FT.) 0.26 0.52 0.77 1.03 1.29 1.55 1.81 2.06 2.32 2.58 0.52 1.03 1.55 2.06 2.58...
-
Page 50: Overload Inspection
50%. overloads of 50% or higher, crane operation must be stopped immediately and Crane Care must be contacted for • Stop operating the crane and contact Manitowoc corrective action. Crane Care immediately for overloads of 50% and higher. - Page 51 1400H OPERATOR AND SERVICE MANUAL SAFETY INFORMATION Boom Inspection 9, 10 2, 3 9, 10 National Crane 1-27 Published 10-30-2014 Control # 040-09...
- Page 52 SAFETY INFORMATION 1400H OPERATOR AND SERVICE MANUAL Overload less than 25% Sheaves, Inspect all for damage. Rope Guides Collar-Wear Pads, Pad Inspect for damage. Retainers Overload from 25% to 49% Sheaves, Inspect all for damage. Rope Guides Collar-Wear Pads, Pad Inspect all for damage.
- Page 53 1400H OPERATOR AND SERVICE MANUAL SAFETY INFORMATION Superstructure Inspection 10,11 National Crane 1-29 Published 10-30-2014 Control # 040-09...
- Page 54 SAFETY INFORMATION 1400H OPERATOR AND SERVICE MANUAL Overload less than 25% Lift Cylinder Inspect for leaking. See topic in Introduction section of Wire Rope Inspect all for damage. Service Manual. Turntable See topic in Swing section of Service Check bolts for proper torque. Bearing Manual.
- Page 55 1400H OPERATOR AND SERVICE MANUAL SAFETY INFORMATION Carrier Inspection 5, 6 National Crane 1-31 Published 10-30-2014 Control # 040-09...
- Page 56 SAFETY INFORMATION 1400H OPERATOR AND SERVICE MANUAL Overload less than 25% Stabilizer Inspect for leaking. Cylinders Outrigger Inspect for deformation and cracked welds. Pads Overload from 25% to 49% Stabilizer Inspect for leaking. Cylinders Outrigger Inspect for deformation and cracked welds. Pads Outrigger Inspect for deformation and cracked welds.
-
Page 57: Truck Cab Controls
1400H OPERATOR AND SERVICE MANUAL OPERATING CONTROLS SECTION 2 OPERATING CONTROLS SECTION CONTENTS Truck Cab Controls ......2-1 Operation . -
Page 58: Cold Weather Operation
OPERATING CONTROLS 1400H OPERATOR AND SERVICE MANUAL Control Functions operating conditions and display boom and load information. Refer to RCL manual in this owners manual. Turn – Operate the lever to RIGHT to rotate the boom in a clockwise direction. Operate the lever to LEFT to rotate the RCL CPU –... -
Page 59: Engine
Lubrication section, by contacting your local Manitowoc and to circulate gear lubricant through the planetary distributor, or by contacting Manitowoc Crane Care directly). gear sets. Swing Drive and Turntable Bearing CAUTION Warm-up Procedures for Temperatures Above -7°C... - Page 60 OPERATING CONTROLS 1400H OPERATOR AND SERVICE MANUAL • Above 95°C (200°F): No crane operation is allowed. Let the crane’s hydraulic oil cool by running the engine at idle with no functions actuated. Published 10-30-2014 Control # 040-09...
- Page 61 1400H OPERATOR AND SERVICE MANUAL OPERATING CONTROLS National Crane Published 10-30-2014 Control # 040-09...
-
Page 62: Rated Capacity Limiter
OPERATING CONTROLS 1400H OPERATOR AND SERVICE MANUAL Rated Capacity Limiter Warnings The RCL is an operational aid which alerts a crane General Information operator of approaching overload conditions and also warns The PAT Rated Capacity Limiter (RCL) DS 160 has been of two block conditions which could cause damage to designed to provide the crane operator with the essential equipment and harm personnel. - Page 63 1400H OPERATOR AND SERVICE MANUAL OPERATING CONTROLS System Description data is the reference information used to calculate the operating conditions. The PAT Rated Capacity Limiter DS 160 consists of a central micro processor unit, operating console, length/ Boom length and boom angle are registered by the angle sensor, pressure transducers, and anti-two- block length/angle sensor, mounted inside the cable reel which is switches.
- Page 64 OPERATING CONTROLS 1400H OPERATOR AND SERVICE MANUAL 1. ANTI-TWO-BLOCK SWITCHES 2. PRESSURE TRANSDUCERS 3. LENGTH/ANGLE SENSOR/ANTI-TWO-BLOCK CABLE REEL 4. RCL DISPLAY CONSOLE 5. CENTRAL PROCESSOR UNIT 6. ANTI-TWO-BLOCK WEIGHT Published 10-30-2014 Control # 040-09...
-
Page 65: Operating Procedures
1400H OPERATOR AND SERVICE MANUAL OPERATING CONTROLS OPERATING PROCEDURES properly installed on the hoist load line on the first fall of rope coming off the boom tip. All members of the crew should become thoroughly familiar with the location and operation of controls, the Proper installation of the ATB weight is as shown in the correct operating procedure, the maximum lifting capacities following picture. - Page 66 OPERATING CONTROLS 1400H OPERATOR AND SERVICE MANUAL Installation of Anti-Two-Block Retainer in Locking DANGER Position (see Fig. 1 and 2) Pull the cable out of the switch and bend back parallel to Failure to reposition the anti-two-block switch the boom and hold (1) weight and properly connect the cord assemblies will Slide the flag from left side with its slot over the cable prevent the anti-two-block system from functioning...
- Page 67 1400H OPERATOR AND SERVICE MANUAL OPERATING CONTROLS Turn the flag for best visibility for the operator (5). For storage, clip the flag to the switch using the provided spring clip (5) attached to the switch. Pre-Operation Inspection and Calibration Verification After the electrical connections have been checked to insure that the system is properly connected for the crane (REF) SPRING...
-
Page 68: Work Site Position
OPERATING CONTROLS 1400H OPERATOR AND SERVICE MANUAL DANGER DANGER If the light and audible alarm do not function as The RCL will warn the operator when hoist and described and the crane movements are not stopped, loadline overload occurs but will allow the boom up the system is not working properly. - Page 69 1400H OPERATOR AND SERVICE MANUAL OPERATING CONTROLS Va r i a t i o n i n c h a s s i s , o u t r i g g e r a n d m o u n t i n g When Lifting Over the Front of the Truck and the Vehicle configurations will cause outrigger foot loading to differ on is Equipped with a Front Jack...
-
Page 70: Outrigger Monitoring System (Oms) (Optional-Standard In North America)
OPERATING CONTROLS 1400H OPERATOR AND SERVICE MANUAL OUTRIGGER MONITORING SYSTEM (OMS) When power is on and both stabilizers beams are fully extended and both outriggers beams are at the mid-extend (OPTIONAL—STANDARD IN NORTH position, the Outrigger Status Indicator flashes green, AMERICA) indicating a lift can be made using the capacities from the mid-extend outrigger load chart. -
Page 71: Maintenance
Calibrate Calibrating the cylinder length sensor requires a laptop Outrigger Cylinder Length Sensor equipped with the HED Conductor software and a USB cable connector (p/n 80009992). Contact your Manitowoc distributor for further assistance. Stabilizer Proximity Switch (version 1) 7958-1 7939-4... -
Page 72: Before Making The Lift
OPERATING CONTROLS 1400H OPERATOR AND SERVICE MANUAL Stabilizer Proximity Switch (version 2) performed by metering the control lever and the foot throttle. Check the operating area for electric power lines. RCL Set Up and Programming Procedure The DS-160 operators manual located in this book contains instruction for proper setup and operation of the RCL system. -
Page 73: Series 1400H Load Chart - Full Span Outriggers
1400H OPERATOR AND SERVICE MANUAL OPERATING CONTROLS All outriggers are extended with positive contact on firm, When lifting maximum loads, always operate the crane level surface, the tires are free of the ground and the slowly and smoothly or the RCL will stop operation machine is level within 1°. - Page 74 OPERATING CONTROLS 1400H OPERATOR AND SERVICE MANUAL This chart gives the correct reeving for all loads listed on the continue to operate. Booming up a hoist and loadline load chart. overload in areas where the boom capacity exceeds the loadline capacity can cause serious damage to the hoist DANGER and loadline.
- Page 75 1400H OPERATOR AND SERVICE MANUAL OPERATING CONTROLS NATIONAL CRANE CORPORATION SERIES 14100H NOTE: WITH 30-54 FT JIB Operate with jib by radius when main boom FULL-SPAN is fully extended, if necessary increase boom OUTRIGGER angle to maintain loaded radius. RCL OPERATING CODE 10.
-
Page 76: Series 1400H Load Chart - Mid Span Outriggers
OPERATING CONTROLS 1400H OPERATOR AND SERVICE MANUAL 1 PART LINE 2 PART LINE 3 PART LINE 6 PART LINE 7 PART LINE 8 PART LINE NOTICE 4 PART LINE 5 PART LINE • Do not deadhead line block against boom tip when extending boom. - Page 77 1400H OPERATOR AND SERVICE MANUAL OPERATING CONTROLS NATIONAL CRANE CORPORATION SERIES 14100H WITH 30-54 FT NOTE: JIB MID-SPAN OUTRIGGER 16. Operate with jib by radius when main boom is FULL-SPAN REAR STABILIZER fully extended, if necessary increase boom angle to maintain loaded radius. 17.
-
Page 78: General Rules When Operating The Hoist
OPERATING CONTROLS 1400H OPERATOR AND SERVICE MANUAL 1 PART LINE 2 PART LINE 3 PART LINE 6 PART LINE 7 PART LINE 8 PART LINE NOTICE 4 PART LINE 5 PART LINE • Do not deadhead line block against boom tip when extending boom. -
Page 79: Shut Down And Preparation For Road Travel
1400H OPERATOR AND SERVICE MANUAL OPERATING CONTROLS Check the environmental factors before lifting. After you Ensure the swingaway, if so equipped, is properly have determined that the load is within safe crane stowed and secured or removed from crane. capacity, you must check wind, crane level, outrigger footing, or any other factors which could make handling WARNING a maximum rated load dangerous because of adverse... - Page 80 OPERATING CONTROLS 1400H OPERATOR AND SERVICE MANUAL 12. Exit the cab, lock the door, and stow the access ladder. 13. Secure any loads or lifting devices on truck bed or body. 14. Ensure tires are properly inflated. 15. Disengage the Power Take Off (PTO) and start truck from the truck cab.
-
Page 81: Jib Safety And Operation
1400H OPERATOR AND SERVICE MANUAL OPERATING CONTROLS JIB SAFETY AND OPERATION JIB IN OPERATING POSITION JIB IN STOW POSITION National Crane 2-25 Published 10-30-2014 Control # 040-09... -
Page 82: Safety Tips For Jib Operation
OPERATING CONTROLS 1400H OPERATOR AND SERVICE MANUAL SAFETY TIPS FOR JIB OPERATION CAUTION The anti-two-block switch weight and cord must be attached to the jib when deployed. • Boom tip attachment can contact jib in stowed position Do not lift load with the boom tip when the jib is pinned when boom is fully retracted. - Page 83 1400H OPERATOR AND SERVICE MANUAL OPERATING CONTROLS 22. For manually extendable jibs, pull extension retention CAUTION pin E, and extend second section out by pulling on sheave case. The second section jib, as it extends, will Use Caution during this step. The jib is free to hit a mechanical stop that allows for extension pin E s w i n g a w a y f r o m t h e b o o m u p o n b o o m installation.
-
Page 84: Jib Maintenance
OPERATING CONTROLS 1400H OPERATOR AND SERVICE MANUAL Stowing Procedure 13. Using boom telescope function, slowly retract boom. The ramp/side stow bracket assembly on the side of the NOTE: When lowering the boom below horizontal, two 1st section jib will engage the hook on the side of the 1st persons may be required. -
Page 85: Jib Jack
1400H OPERATOR AND SERVICE MANUAL OPERATING CONTROLS JIB JACK ear. At this time the final jib pin can be easily tapped into position. Operation If hole alignment is “over shot” due to jacking too far, the jack can simply be relieved and the process repeated. To The jib pin alignment device consists of a hydraulic jack relieve the jack, use the flattened end of jack handle to slowly mounted horizontally on the underside of the jib. - Page 86 OPERATING CONTROLS 1400H OPERATOR AND SERVICE MANUAL STANDARD HAND SIGNALS FOR CONTROLLING CRANE OPERATIONS SWING. Arm extended, point with STOP. Arm extended, palm EMERGENCY STOP. Both arms HOIST. With forearm vertical, LOWER. With arm extended finger in direction of swing of down, move arm back and forth extended, palms down, move forefinger pointing up, move hand...
-
Page 87: Oil Cooler
1400H OPERATOR AND SERVICE MANUAL OPERATING CONTROLS OIL COOLER After the truck has been started and PTO engaged, oil flow will be determined by oil viscosity. During cold weather Specifications operation, most of the return oil will flow over the 15 psi (1 bar) relief valve because of cold oil in the heat exchanger. - Page 88 OPERATING CONTROLS 1400H OPERATOR AND SERVICE MANUAL 2-32 Published 10-30-2014 Control # 040-09...
-
Page 89: Section 3 - Maintenance
1400H OPERATOR AND SERVICE MANUAL MAINTENANCE SECTION 3 MAINTENANCE SECTION CONTENTS Inspection and Maintenance ....3-1 Environmental Conditions ....3-3 Inspection . -
Page 90: Weekly Inspections
MAINTENANCE 1400H OPERATOR AND SERVICE MANUAL 17. Proper condition and operation of RCL and anti-two- 10. Boom extension cables for proper tension or evidence of block system to include switch, weight and chain at abnormal wear. boom tip (and jib tip if equipped), power cords and reel 11. -
Page 91: Adjustments And Repairs
1400H OPERATOR AND SERVICE MANUAL MAINTENANCE Adjustments and Repairs NOTE: Wire rope may be purchased through Manitowoc Crane Care. Before adjustments and repairs are started on a crane, Any deterioration observed in the wire rope should be noted the following precautions shall be taken as applicable:... -
Page 92: Inspection
MAINTENANCE 1400H OPERATOR AND SERVICE MANUAL Daily Inspections All cable in continuous service must be inspected at the beginning of each work day. Inspect the eye end and length of cable that is used in daily operation. The end should be inspected for abrasion, corrosion, broken wires, and loose or broken servings. -
Page 93: Care Of Wire Rope
1400H OPERATOR AND SERVICE MANUAL MAINTENANCE Care of Wire Rope Handle wire rope with care to prevent damage to the individual wires which affect the overall strength and performance of the rope. Do not allow the formation of kinks, because this displaces the strands of wire from their original position and relation to each other causing severe bending and unequal tensions in the strands. -
Page 94: Wire Rope Installation
MAINTENANCE 1400H OPERATOR AND SERVICE MANUAL lifting ropes. High strength, rotation resistant is preferred and straight and without kinks. Attach wedge socket as furnished standard by National Crane. This rope eliminates shown in the Loadline Section. Torque cable clamp (clip) single part line load spin. - Page 95 1400H OPERATOR AND SERVICE MANUAL MAINTENANCE Terminator Type Wedge Installation 20 × ROPE DIA. (MINIMUM) “No- “No-Go” INCORRECT INCORRECT INCORRECT “Go” “Go” Wedge Rope Tail Clipped to CORRECT Backward Backward live Line Rope Size (inch) 7/16 9/16 1-1/8 1-1/4 *Torque lb-ft * The tightening torque values shown are based upon the threads being clean, dry, and free of lubrication.
-
Page 96: Installing Cable On The Hoist
MAINTENANCE 1400H OPERATOR AND SERVICE MANUAL INSTALLING CABLE ON THE HOIST CAUTION If cable is wound from the storage drum, the reel should be rotated in the same direction as the hoist. NOTE: The cable should preferably be straightened before installation on the hoist drum. -
Page 97: General
Where questions arise, contact your National Potentially harmful waste used in Manitowoc cranes includes Crane Distributor or Manitowoc Crane Care. — but is not limited to — oil, fuel, grease, coolant, air... -
Page 98: Arctic Lubricants And Conditions
Therefore, always check with an authorized performance and life. The most important factors in selecting Manitowoc distributor or Manitowoc Crane Care if in doubt of an oil for hydraulic service are viscosity and anti-wear the suitability of a specific fluid or lubricant. -
Page 99: Hydraulic Oil Inspection
® protected using Boeshield T-9 Premium Metal Protectant. Manitowoc Crane Care has Boeshield T-9 Premium Metal Environmental and other conditions can dramatically affect Protectant available in 12 oz. cans that can be ordered the condition of hydraulic oil and filters. Therefore, specific through the Parts Department. - Page 100 Lubrication intervals are to be used only as a guide. Actual intervals should be formulated by the operator to correspond accordingly to conditions such as continuous duty cycles and/or hazardous environments. Table 4-1 Manitowoc Lube Specification Symbol Description Cold Weather - Standard 40°C (-40°F)
-
Page 101: Lubrication Points
1400H OPERATOR AND SERVICE MANUAL LUBRICATION Lubrication Points RECOMMENDED APPLICATION PROCEDURE FREQUENCY LUBRICANT 1. Hydraulic Oil Reservoir Hydraulic Oil Check Weekly Fill As Required Change Semi-Annually 2. Oil Filter, Magnetic Plug Change or Clean After First 40 Hrs. Then Quarterly 3. -
Page 102: Boom Lubrication
LUBRICATION 1400H OPERATOR AND SERVICE MANUAL 19. Retract Sheaves Chassis Grease Grease Gun w/ Nozzle tip. See Weekly Extend boom until retract sheave #200S Silver Streak Special Boom Maintenance Section grease holes are visible through Multi-Lube (light) access holes along side of boom. 20. -
Page 103: Outrigger Beam Lubrication
1400H OPERATOR AND SERVICE MANUAL LUBRICATION WEAR PAD ACCESS HOLES FIRST SECTION BOOM GREASE ACCESS HOLES Outrigger Beam Lubrication Recommended lubricant is EP-3MG grease. Fully extend and set the outriggers. Refer to (Figure 4-1.) DANGER Apply grease to all wear pads and contact surfaces at Do not, under any circumstances, work at an elevated the side and bottom of all beam sections and lower height without using proper fall protection as required by... -
Page 104: Hoist Brake Oil
See“Lubrication” on page 3. NOTE: Hoist gear lubricants are satisfactory for operation in temperatures from -23° C to 66° C (-10° F to +150° F). For operation outside this range, contact Manitowoc Crane Care for recommendations. Published 10-30-2014 Control # 040-09... -
Page 105: Swing Gearbox And Brake Oil
1400H OPERATOR AND SERVICE MANUAL LUBRICATION Fill Between Marks Gearbox Oil Fill (upper hole) Gearbox FIGURE 4-4 Oil Drain (lower WIRE ROPE LUBRICATION hole) 7756-2 Wire rope is lubricated during manufacture and the lubricant FIGURE 4-3 applied does not last the life of the rope. The wire rope must be lubricated as part of a regularly scheduled maintenance Swing Gearbox and Brake Oil program. - Page 106 LUBRICATION 1400H OPERATOR AND SERVICE MANUAL • dripping Whenever possible, the lubricant should be applied at the top of a bend in the rope, because at that point the strands • pouring are spread by bending and are more easily penetrated. There should be no load on the rope while it is being •...
-
Page 107: Carwell© Rust Inhibitor
Protecting Cranes From Corrosion minimize the harmful effects of corrosion. Manitowoc Crane Group's cranes are manufactured to high Exercise special care and increase the frequency of quality standards, including the type of paint finish cleanings if the crane is operated: demanded by today's industry. -
Page 108: Inspection And Repair
• Prepare the surface prior to applying the finish coat of Please contact Manitowoc Crane Care should you have any paint. questions. • Apply a finish coat paint using accepted blending Areas of Application techniques. - Page 109 1400H OPERATOR AND SERVICE MANUAL LUBRICATION • Boom applications areas are; pivot pins, hose end and • All hardware, clips, pins, hose connections not painted fittings, jib pins and shafts, all bare metal surfaces, will have Carwell applied. headache ball / hook block pins and fasteners. National Crane 4-13 Published 10-30-2014 Control # 040-09...
- Page 110 LUBRICATION 1400H OPERATOR AND SERVICE MANUAL 4-14 Published 10-30-2014 Control # 040-09...
- Page 111 1400H OPERATOR AND SERVICE MANUAL LUBRICATION Item Description O/R Hose Connections Item Description Valve Bank, Hose Connections Boom Nose Pins, Clips Hose Connections All Hardware, Clips, Pins, Hose Connections not painted O/R Pins, Clips Entire underside of unit Pivot Shaft Hook Block/Headache Ball Wire Rope Pins, Clips for Optional Jib...
- Page 112 LUBRICATION 1400H OPERATOR AND SERVICE MANUAL 4-16 Published 10-30-2014 Control # 040-09...
- Page 113 1400H OPERATOR AND SERVICE MANUAL SERVICE SECTION 5 SERVICE SECTION CONTENTS Service and Repair ......5-2 Five Section Boom Assembly .
-
Page 114: Service And Repair
SERVICE 1400H OPERATOR AND SERVICE MANUAL SERVICE AND REPAIR Cleanliness An important item in preserving the long life of the crane The information supplied in this section of the manual is is keeping dirt out of working parts. Enclosed compartments, designed to assist you in service and repair of your National seals, and filters have been provided to keep the supply of Crane. -
Page 115: Fatigue Of Welded Structures
Loctite® types are suitable for all applications.Various types of Loctite® are specified throughout the Service The torque tables are provided by Manitowoc for reference Manual. The following types of Loctite® brand adhesives are when performing maintenance. - Page 116 SERVICE 1400H OPERATOR AND SERVICE MANUAL Use of proper torque values is extremely important. Improper NOTE: If multipliers and/or special tools are used to reach torquing can seriously affect performance and reliability. hard to get at areas, ensure torque readings are accurate.
- Page 117 1400H OPERATOR AND SERVICE MANUAL SERVICE SAE Grade 1 SAE Grade 5 SAE Grade 7 SAE Grade 8 and Grade 2 HHCS HHCS HHCS HHCS Socket Head Socket Head Serrated Flange Capscrew Shoulder Screw Head FIGURE 5-2 Table 5-1: UNC (Coarse) Thread: Torque Values for Zinc-Flake Coated and Untreated Fasteners Bolt Diameter - Inches Torque Values (lb-ft, Maximum/Minimum) SAE Grade...
- Page 118 SERVICE 1400H OPERATOR AND SERVICE MANUAL Table 5-3: Metric Fasteners, Coarse Thread, Zinc-Flake Coating Bolt Diameter - Metric Torque Values (Nm) Class 0,157 0,197 0,236 0,315 0,394 0,472 0,551 0,630 0,709 0,787 0,866 0,945 1,06 1,18 1,18 1,18 21,6 42,4 73,1 1195 1608...
-
Page 119: Weld Studs
1400H OPERATOR AND SERVICE MANUAL SERVICE Table 5-7: UNC (Coarse) Thread: Torque Values for Table 5-8: Metric Coarse Thread: Torque Values for Stainless Steel Fasteners with Oil Lubrication Stainless Steel Fasteners with Oil Lubrication Torque Value Torque Size Value Size lb-in lb-ft #5 (0.125) -
Page 120: Welding Precautions
SERVICE 1400H OPERATOR AND SERVICE MANUAL Welding Precautions • Disconnect truck battery cables (positive and negative) Sensitive truck computer system and crane's RCL computer system components may be damaged by welding • Attach welding ground lead as close as possible to on the truck or crane. -
Page 121: Trouble Diagnosis
1400H OPERATOR AND SERVICE MANUAL SERVICE TROUBLE DIAGNOSIS The following chart lists malfunctions which may occur during equipment operation, followed immediately by possible cause and possible solution. These are not all inclusive but are designed to help isolate the problem and should be checked before calling the factory Service Department. - Page 122 SERVICE 1400H OPERATOR AND SERVICE MANUAL TROUBLE DIAGNOSIS (continued) CONDITION POSSIBLE CAUSE POSSIBLE SOLUTION Turn moves • Loose turntable bearing. • Torque bearing mounting bolts. erratic or • Loose swing gearbox mounting bolts. • Tighten bolts. loosely • Worn gears or bearing. •...
- Page 123 1400H OPERATOR AND SERVICE MANUAL SERVICE TROUBLE DIAGNOSIS (continued) CONDITION POSSIBLE CAUSE POSSIBLE SOLUTION Hoist will not lift • Load too heavy. • Check load and change to Lo-speed/Hi-pull or or hold load applicable multipart reeving. • Hoist or boom overloaded causing RCL •...
- Page 124 SERVICE 1400H OPERATOR AND SERVICE MANUAL Technical Field Service Parts Factory Training Publications Service NOTICE TO USERS OF THIS MANUAL: The most current Schematics available at time of the printing will be found at the back of the Servicing information of this manual. 5-12 Published 10-30-2014 Control # 040-09...
-
Page 125: Rcl Service And Maintenance
1400H OPERATOR AND SERVICE MANUAL SERVICE RCL SERVICE AND MAINTENANCE performed. If the wire on the reel is determined to be faulty, replace the wire. Daily maintenance of the rated capacity limiter consists of Do not, under any circumstances, work at an inspecting: elevated height without using proper fall protection as required by local, state or federal regulations. - Page 126 SERVICE 1400H OPERATOR AND SERVICE MANUAL 16. Test the anti-two-block circuit for proper operation and Lift the rod or conduit and pull it out the back end of the hydraulic circuit cut out. boom about 1 ft (0,3 m). Alternative #2 Install the new anti-two-block wire on the reel.
-
Page 127: Single Stage Cylinder Disassembly And Repair
1400H OPERATOR AND SERVICE MANUAL SERVICE SINGLE STAGE CYLINDER DISASSEMBLY AND REPAIR CYLINDER BARREL THREADED PACKING GLAND CYLINDER Retract cylinder shaft with oil from the hydraulic system 10. Inspect all threaded components for damage to threads. until about 12 in (30 cm) of shaft is extended. The barrel 11. - Page 128 SERVICE 1400H OPERATOR AND SERVICE MANUAL SINGLE STAGE CYLINDER DISASSEMBLY AND REPAIR PRESSURE LINE FROM PORTA- POWER OR HYDRAULIC LINE FROM CRANE CIRCUIT VALVE READ PARAGRAPH 5 & 6 BEFORE PERFORMING THIS STEP SNAP RING WASHER SNAP RING CYLINDER BARREL SHAFT EXTENDED Disconnect shaft end of cylinder from machine.
-
Page 129: Multi-Stage Extend Cylinder Disassembly And Repair
1400H OPERATOR AND SERVICE MANUAL SERVICE MULTI-STAGE EXTEND CYLINDER DISASSEMBLY AND REPAIR 3RD STAGE 2ND STAGE 1ST STAGE Cylinder Disassembly Inspect wear pads on the 3rd stage barrel sheave case assembly. Replace as required. After cylinder has been disassembled from boom, place 10. -
Page 130: Four Section Boom
SERVICE 1400H OPERATOR AND SERVICE MANUAL FOUR SECTION BOOM The boom service and maintenance section of this manual includes both the four and five section boom information. Use appropriate information for your particular boom length. 1/2/3 EXTEND 2/3/4 EXTEND 1ST STAGE BASE 2ND STAGE 3RD STAGE... -
Page 131: Four Section Boom Maintenance
1400H OPERATOR AND SERVICE MANUAL SERVICE FOUR SECTION BOOM MAINTENANCE equalize the extend and retract cable/boom section sequence positioning. Do not, under any circumstances, work at an elevated height without using proper fall protection as Fully retract boom. Do not induce and hold hydraulic required by local, state or federal regulations. -
Page 132: Four Section Boom Service
SERVICE 1400H OPERATOR AND SERVICE MANUAL FOUR SECTION BOOM SERVICE Drape extend cables inside boom and slide cable anchor plate out of the side of the hoist mount if hoist Boom Removal has been removed from boom. Loosen and remove two capscrews, lockwashers and Boom Length Boom Weight CG from pivot point... -
Page 133: Additional Maintenance, Disassembled Boom
1400H OPERATOR AND SERVICE MANUAL SERVICE will allow cable anchor completely 24. Slide fourth section out of second section. Removal of disassembled, backing capscrews out approximately side pads is optional, as the side pads have adequate 0.50 in (12 mm) will allow the anchor assembly to slide clearance for the boom disassembly. -
Page 134: Four Section Boom Assembly
SERVICE 1400H OPERATOR AND SERVICE MANUAL FOUR SECTION BOOM ASSEMBLY retract sheave pins in rear of 3rd section. Coat surfaces of bearings and keeper plates with grease before Note: Do not use Loctite on any cable threaded assembly. ends. Always use the locknut and nut provided. 11. - Page 135 1400H OPERATOR AND SERVICE MANUAL SERVICE i n ( 0 , 8 m m ) off ce n t er i n th e w e a r pa d . Var io u s the cylinder keeper cutouts in the doubler plates on the combinations of rotation of these parts allow the sides of the 2nd and 3rd sections.
- Page 136 SERVICE 1400H OPERATOR AND SERVICE MANUAL the holes in these parts are offset from the center. The 45. Install the threaded end of the 7/16 in (11,11 mm) extend hole are 0.06 in (1,5 mm) off center in the plate and 0.03 cable through hole in center of the hoist attachment bar.
-
Page 137: Five Section Boom
1400H OPERATOR AND SERVICE MANUAL SERVICE FIVE SECTION BOOM 2nd stage boom. The 11213 extend cables attach to the base of the 1st stage boom, are reeved around sheaves at the tip A two-stage, rod fed, double-acting cylinder is attached of the 2nd stage boom and attach to the base of the 3rd to and supports the 1st, 2nd and 3rd stage boom sections. -
Page 138: Five Section Boom Service
SERVICE 1400H OPERATOR AND SERVICE MANUAL FIVE SECTION BOOM SERVICE Remove hook block or downhaul weight, wind up rope on hoist drum and stow wedge socket becket on pegs Boom Removal provided on 1st section. Shut down truck engine. Attach a lifting device to rod end of lift cylinder, remove Boom Length Boom Weight CG from pivot point... -
Page 139: Five Section Boom Maintenance
1400H OPERATOR AND SERVICE MANUAL SERVICE FIVE SECTION BOOM MAINTENANCE Lubrication of the extend cable sheaves located on the boom tip end of the extend cylinder, and the retract cable Do not, under any circumstances, work at an sheaves located on the inside rear of the 2nd and 3rd section elevated height without using proper fall protection as and the extend cable sheave attached to the bottom of the required by local, state or federal regulations. -
Page 140: Five Section Cable Tensioning
SERVICE 1400H OPERATOR AND SERVICE MANUAL FIVE SECTION CABLE TENSIONING Tighten the 5/4/3 retract, 3/4/5 extend, 4/3/2 retract, 2/3/ 4 extend, 3/2/1 retract and 1/2/3 extend cables (in order After boom reassembly or from time to time if interior listed) to remove slack from the cables and to achieve proportioning cables appear loose, cable tensioning may be proper sequencing of bottoming out base of booms. - Page 141 1400H OPERATOR AND SERVICE MANUAL SERVICE d. If the fifth section is bottoming out first, equally cables to 30 lb-ft (40 Nm). Torque the 4/3/2 retract loosen the 5/4/3 retract cables and tighten the 3/4/5 cables to 14 lb-ft (19 Nm). Torque the 2/3/4 extend extend cables.
-
Page 142: Five Section Boom Disassembly
SERVICE 1400H OPERATOR AND SERVICE MANUAL FIVE SECTION BOOM DISASSEMBLY the 3rd-4th-5th assembly out of the 2nd approximately 12 in (30 cm). Suspend the 3rd section off of the lower For reference, front is sheave case end, rear (base) is wear pads. -
Page 143: Additional Maintenance, Disassembled Boom
1400H OPERATOR AND SERVICE MANUAL SERVICE (30 cm). Suspend the 4th section off of the lower wear 5/4/3 retract cables from anchor points in the side of the pads. 5th section, place in suitable area to avoid damage. 20. Remove 4 capscrews which retain the lower front pad 28. -
Page 144: Five Section Boom Assembly
SERVICE 1400H OPERATOR AND SERVICE MANUAL FIVE SECTION BOOM ASSEMBLY Install side wear pads with appropriate shims on front inside of the 4th section boom, Install upper spacer bar Assemble sheaves into 5th section sheavecase. Top and cable guide with wear pad and related hardware on sheave is to be installed to the left hand side of the boom the top of the 4th section. - Page 145 1400H OPERATOR AND SERVICE MANUAL SERVICE 17. Install a nut on the threaded ends of the 5/4/3 retract 27. Pull the 3 button ends thru the extend cylinder sheave cables, to keep the cable ends from pulling thru the case until there is enough slack to install the 2/3/4 anchor as the sections are pushed together.
- Page 146 SERVICE 1400H OPERATOR AND SERVICE MANUAL 1/2/3 EXTEND CABLE 1/2/3 EXTEND SHEAVE PIN TOP VIEW OF 3RD SECTION FIGURE 1 36. Assemble bottom wear pads on 2nd section pad plate, 42. Assemble top rear wear pads with the cam plates to the raise the 3rd-4th-5th and cylinder assembly high enough top of the 3rd section.
-
Page 147: Top/Rear Side Pad Adjustment
1400H OPERATOR AND SERVICE MANUAL SERVICE with appropriate hardware to the inside top of the 1st. Shim according to calibration instructions, or as pads were originally removed and tagged. 51. Slide the 2nd-3rd-4th-5th and cylinder assembly into the 1st section until the extend cylinder butt plate contacts the back plate of the hoist mount. -
Page 148: Four And Five Section Top/Bottom Pad Replacement Assembled Boom
SERVICE 1400H OPERATOR AND SERVICE MANUAL Top Rear Pad Replacement Pad maintenance on the four or five section can be made easier by removal of the hoist and or removal of the hoist mounting bar spanning the end of the 1st section. Additional clearance can be achieved on the four section by loosening the large extend cables and removing the extend cable anchor located in the 2nd section. -
Page 149: Inner Wear Pad Calibration
1400H OPERATOR AND SERVICE MANUAL SERVICE INNER WEAR PAD CALIBRATION INSIDE OUTSIDE CALIPERS CALIPERS INNER SIDE PADS Measure the thickness of the wear pads and record With a pair of inside/outside calipers, measure the inside width of the outer section (W ) at the front and back of the boom and record the smallest measurement. - Page 150 SERVICE 1400H OPERATOR AND SERVICE MANUAL EXAMPLE NOTE: All measurements are in inches (mm). = 12.12 (308) at front 12.06 (306) at back near cylinder = .52 (13) anchor bars THIRD SECTION = .52 (13) = 10.94 (278) at top rear pad location = 11.00 (279) at top forward pad location...
-
Page 151: Jib Installation And Adjustment
1400H OPERATOR AND SERVICE MANUAL SERVICE JIB INSTALLATION AND ADJUSTMENT Using an overhead hoist, lift the jib assembly and align and pin the jib to the boom sheave head. Loosely bolt the two ear assemblies with shims and bars as shown to the side of the first boom section. Note: All 2 PLCS measurements are in inches (mm). - Page 152 SERVICE 1400H OPERATOR AND SERVICE MANUAL adjustment of the stow ears is provided by oversize bolt When the boom is fully retracted, the jib must be holes in the stow ear. Move the ears in or out to achieve bottomed out securely in the ear assemblies. proper alignment.
-
Page 153: Jib Jack Service & Maintenance
1400H OPERATOR AND SERVICE MANUAL SERVICE JIB JACK SERVICE & MAINTENANCE Lay the jack on its side and allow the oil to run out into suitable drain pin. The oil will run slowly because air Important: Use only a good grade hydraulic jack oil, must enter as oil drains out. -
Page 154: Troubleshooting
SERVICE 1400H OPERATOR AND SERVICE MANUAL Troubleshooting Symptom Possible Cause(s) Corrective Action Will not lift load 1. No oil in system 1. Add oil to reservoir tank through oil filler hole 2. Release valve not closed 2. Turn handle clockwise tightly Will lift load only part way Oil level low Add oil to reservoir tank through oil filler hole... -
Page 155: Hydraulic System
1400H OPERATOR AND SERVICE MANUAL SERVICE HYDRAULIC SYSTEM The turn, outrigger and stabilizer functions are controlled by a separate control valve. Oil from the rear section of the The hydraulic system of this machine is an open center pump is routed to the main inlet of the valve. The control type, consisting of a fixed displacement three section high valve contains inlet section relief valves which limit pressure pressure pump which supplies oil to a two inlet main control... -
Page 156: Servicing The Main Control Valve
SERVICE 1400H OPERATOR AND SERVICE MANUAL SERVICING THE MAIN CONTROL VALVE When all valve sections are positioned on the assembly studs, replace stud nuts and tighten evenly in two steps. Disassembly And Reassembly Of Control Initially tighten all studs to 11 lb-ft (15 Nm), and then tighten all studs to 20 lb-ft (27 Nm). -
Page 157: Adjusting The Relief Valve Pressure Settings
1400H OPERATOR AND SERVICE MANUAL SERVICE Adjusting the Relief Valve Pressure Settings Install seal disc, replace with new disc if necessary. Never set pressure above recommendations. The control valves supplied with this crane are equipped with adjustable relief valves. After time of use, it may be Tightening Torques (maximums) necessary to make some adjustment in pressure because of Main Relief Valve ........30 lb-ft (41 Nm) - Page 158 SERVICE 1400H OPERATOR AND SERVICE MANUAL INLET SEAL RETAINER BONNET OUTLET WORK PORTS INLET SECTION MID OUTLET SECTION ASSEMBLY STUDS LINKAGE END OF SPOOL SPOOL SEAL INLET OUTLET O-RINGS BETWEEN SECTION INLET SECTION MAIN RELIEF VALVE 5-46 Published 10-30-2014 Control # 040-09...
-
Page 159: Servicing The Outrigger, Stabilizer And Turn Control Valve
1400H OPERATOR AND SERVICE MANUAL SERVICE SERVICING THE OUTRIGGER, STABILIZER Torque spring spacing screw and capscrews to 50 lb-in (6 Nm maximum. AND TURN CONTROL VALVE Before servicing the control valve, please familiarize Replacing Section Seals yourself with the valve, plumbing components, mounting Remove the tie rods with a 17 mm open wrench or area and environment. -
Page 160: Rotation Gearbox And Brake
SERVICE 1400H OPERATOR AND SERVICE MANUAL ROTATION GEARBOX AND BRAKE 5-48 Published 10-30-2014 Control # 040-09... -
Page 161: Swing Drive Service
1400H OPERATOR AND SERVICE MANUAL SERVICE SWING DRIVE SERVICE NOTE: A port-a-power can be used to assist in the removal of piston by slowly pressurizing the brake release Lubrication and Maintenance port until piston clears the top of housing (15). Remove stator plates (19) and friction discs (20) Manufacturer recommends changing oil after first 50 hours from the brake housing (15). -
Page 162: Assembly Procedure
SERVICE 1400H OPERATOR AND SERVICE MANUAL 10. Remove race (12) from input planet set (13). locknut by bending tabs on lockwasher so that it engages locknut to prevent locknut from backing off. 11. Remove input planet set (13) from gear housing (7) by pulling straight up and out of the housing. -
Page 163: Outrigger Disassembly
1400H OPERATOR AND SERVICE MANUAL SERVICE OUTRIGGER DISASSEMBLY 11. Remove the hoses that route oil to the vertical cylinder at the bulkhead fittings at the rear of the 2nd section. Outrigger wear pads and shims have been calibrated. Remove capscrews clamping the cable anchor together Positioning of all wear pads and shims must be noted for at the rear of the 2nd section. -
Page 164: Outrigger Assembly
SERVICE 1400H OPERATOR AND SERVICE MANUAL OUTRIGGER ASSEMBLY Install bulkhead fittings in anchor plate assembly, attach jack cylinder hoses. Note: Do not use loctite on any threaded cable ends. Always use the jam nuts and or nuts provided. When Assemble proportioning cable button into cable anchor initially assembling threaded ends of cables, thread the and install anchor in 2nd section outrigger. -
Page 165: Outrigger Cable Tensioning
1400H OPERATOR AND SERVICE MANUAL SERVICE OUTRIGGER CABLE TENSIONING 2ND SECTION OUTRIGGER 1ST SECTION OUTRIGGER UPPER CABLE ADJUST LOWER CABLE ADJUST With outriggers assembled and operational, cycle the the base of the 1st section outrigger. This may be outriggers and front stabilizer through full stroke out and viewed through the hole in the main outrigger. -
Page 166: Outrigger Calibration
SERVICE 1400H OPERATOR AND SERVICE MANUAL OUTRIGGER CALIBRATION NOTE: All measurements are in inches (mm) INSIDE OUTSIDE CALIPERS CALIPERS Side Pads With a pair of inside/outside calipers, measure the inside width of the outer section outrigger (W ) at the front pad location and three feet back from the front of the section 2 PLCS TOP and record the smallest measurement. - Page 167 1400H OPERATOR AND SERVICE MANUAL SERVICE EXAMPLE = 8.81 (224) AT FRONT 8.75 (222) AT BACK = 0.38(1,6) 1ST SECTION = 7.75 (197) AT TOP REAR PAD LOCATION = 7.81 (198) AT TOP FORWARD PAD LOCATION = -38 (1,6) = 7.75 (197) AT BOTTOM REAR PAD LOCATION 2ND SECTION 8.75 (222)
-
Page 168: Top And Bottom Pads
SERVICE 1400H OPERATOR AND SERVICE MANUAL Outrigger Calibration (continued) NOTE: All measurements are in inches (mm) INSIDE OUTSIDE CALIPERS CALIPERS Top and Bottom Pads Measure the thickness of the top wear pads that attach to the inner section and record (t With a pair of inside/outside calipers, measure the inside height of the outer section (H ) three feet from the front of... - Page 169 1400H OPERATOR AND SERVICE MANUAL SERVICE EXAMPLE 1ST SECTION = 16.19 (411) = 0.50 (12,7) 2ND SECTION = 14.88 (378) 16.19 (411) –H -14.88 (378) –t -0.50 (12.7) –t -0.50 (12.7) Clearance 0.12 (3.2) Shims -0.19 (4.4) National Crane 5-57 Published 10-30-2014 Control # 040-09...
- Page 170 SERVICE 1400H OPERATOR AND SERVICE MANUAL This Page Blank 5-58 Published 10-30-2014 Control # 040-09...
- Page 171 1400H OPERATOR AND SERVICE MANUAL SPECIFICATIONS SECTION 6 SPECIFICATIONS (DIMENSION SPECIFICATIONS) RETRACTED EXTENDED WET / WT* lb (kg) SERIES LENGTH LENGTH Inches (cm) 1469H 23 ft 60.2 in (153) 22,448 (10 182) 25,631 (11 626) 14100H 10 in 100' 82.7 in (210) 14127H 7 in 127'...
- Page 172 SPECIFICATIONS 1400H OPERATOR AND SERVICE MANUAL Pump Flow Hoist System _________________________________________ 32 gpm (121 lpm) Boom and Telescope System ____________________________ 32 gpm (121 lpm) Turn and Outrigger System ______________________________ 16 gpm (61 lpm) System Pressure Hoist Up and Down ____________________________________ 4000 psi +100/-0 psi (27,6 MPa) Boom Up and Down ___________________________________ 4000 psi +100/-0 psi (27,6 MPa) Telescope Out ________________________________________ 2700 psi +100/-0 psi (18,6 MPa)* Telescope In _________________________________________ 2200 psi +100/-0 psi (15,2 MPa)*...
- Page 173 1400H OPERATOR AND SERVICE MANUAL INSTALLATION SECTION 7 INSTALLATION SECTION CONTENTS Typical Locations / Serial Number Identification. 7-2 Positioning Crane On Truck....7-13 PTO, Pump, Reservoir..... 7-13 Minimum Truck Requirements .
-
Page 174: Typical Locations / Serial Number Identification
INSTALLATION 1400H OPERATOR AND SERVICE MANUAL TYPICAL LOCATIONS / SERIAL NUMBER IDENTIFICATION 1ST SECTION BOOM CYLINDER MID SECTIONS BOOM TURRET SHEAVE SECTION BOOM FRAME STABILIZER Published 10-30-2014 Control # 040-09... -
Page 175: Minimum Truck Requirements
1400H OPERATOR AND SERVICE MANUAL INSTALLATION MINIMUM TRUCK REQUIREMENTS of the after frame (AF). Many frames are available that have the necessary after frame (AF) section modulus Many factors must be considered in the selection of a (S.M.) and resistance to bending moment (RBM) so that proper truck for a 1400H series crane. -
Page 176: Truck Requirements
INSTALLATION 1400H OPERATOR AND SERVICE MANUAL TRUCK REQUIREMENTS Configuration 2 - 14127H This mount requires front stabilizer for full capacity 360° Configuration 1 - 14127H around the truck. Front stabilizer gives the machine a solid This configuration allows full capacity in a 180° working base helping the operator control loads. -
Page 177: Configuration 3 - 14100H
1400H OPERATOR AND SERVICE MANUAL INSTALLATION Configuration 3 - 14100H Configuration 4 - 14100H This configuration allows full capacity in a 180° working This mount requires front stabilizer for full capacity 360° area over the rear of the truck. around the truck. Front stabilizer gives the machine a solid base helping the operator control loads. -
Page 178: Pto Horsepower Requirements
INSTALLATION 1400H OPERATOR AND SERVICE MANUAL PTO HORSEPOWER REQUIREMENTS Pump Rotation It is imperative that the three section hydraulic pump A three pump hydraulic system is furnished with this installed in a 1400H application be the correct pump rotation crane. The unit is equipped with a three section pump that will configuration for the truck drive train/power take off rotation supply 32 gpm (121 lpm) to the hoist, 32 gpm (121 lpm) to the direction. -
Page 179: Hydraulic Pump
1400H OPERATOR AND SERVICE MANUAL INSTALLATION HYDRAULIC PUMP Check all crane functions. Initial Pump Installation Description For initial pump installation, use the following procedure: The hydraulic system pressure is supplied by a gear hydraulic pump mounted on the truck power take off (PTO). The hydraulic pump has integral mounting flanges and can be bolted directly to the PTO. - Page 180 INSTALLATION 1400H OPERATOR AND SERVICE MANUAL damage to the pump or other components in the hydraulic 12. Operate the system under a light load for 5 to 10 system. NOTE: Pay attention to the service brake charge pump on Install pump on PTO following procedures described cranes with the dual accumulating charging valve under “Initial Pump Installation”...
-
Page 181: Truck Frame Strength
1400H OPERATOR AND SERVICE MANUAL INSTALLATION TRUCK FRAME STRENGTH 7 1 0 N m ) R B M a n d 1 8 i n ( 2 9 5 c m ) S . M . t h r o u g h suspension to rear stabilizers on each truck frame rail. -
Page 182: Section Modulus Tables
INSTALLATION 1400H OPERATOR AND SERVICE MANUAL Section Modulus Tables the added strength provided by the angle. Add this to the section modulus of the channel obtained from Table A. The following tables will determine the section modulus of the truck frame. Always measure the truck frame and Fish Plate Reinforcement (Table C). - Page 183 1400H OPERATOR AND SERVICE MANUAL INSTALLATION TABLE B Section Modulus in THICKNESS 3/16 in. (4,76 mm) THICKNESS 1/4 in. (6,35 mm) W in. (mm) W in. (mm) 2¾ (70) 3¼ (83) 3¾ (95) 4¼ (108) 2¾ (70) 3¼ (83) 3¾ (95) 4¼...
- Page 184 INSTALLATION 1400H OPERATOR AND SERVICE MANUAL TABLE D Section Modulus in THICKNESS 3/16 in. (4,76 mm) THICKNESS 1/4 in. (6,35 mm) W in. (mm) W in. (mm) 3 (76) 3½ (89) 4 (102) 4½ (114) 3 (76) 3½ (89) 4 (102) 4½...
-
Page 185: Truck Preparation
1400H OPERATOR AND SERVICE MANUAL INSTALLATION TRUCK PREPARATION If PTO integral mount flanges are to be used, the pump can be mounted directly to the PTO. Direct mount Plan installation completely before any work is done. pumps require lubrication of the spline shaft coupling. Plan the location of the crane for the final front and rear axle See “Service and Maintenance”... -
Page 186: Reinforcing/After Frame Extension
INSTALLATION 1400H OPERATOR AND SERVICE MANUAL If using a drive shaft type of mount, connect PTO drive steel to minimize the amount of reinforcing required. Use shaft to pump and PTO. Drill a 0.31 in (7,87 mm) dia. x Grade 90 weld material for any welding to be done. 0.12 in (3 mm) deep hole on the flat of the hex shaft at Strip the frame of obstructions in the area to be the fixed yoke end of the drive shaft to engage the yoke... - Page 187 1400H OPERATOR AND SERVICE MANUAL INSTALLATION If reinforcing is to be welded on, torch cut hole pattern in reinforcing, clamp in place, install any crossmember reinforcing being careful to clear crane mounting bolts that were previously removed, then drill through anchors.
- Page 188 INSTALLATION 1400H OPERATOR AND SERVICE MANUAL 2 in (51 mm) 5 in 1 in (25 mm) DIAMETER HOLES FOR PLUG WELDS (127 mm) 2 in (51 mm) PLANNED LOCATION OF MOUNTING PLATE. PLUG WELD LOCATIONS CAN BE SHIFTED TO CLEAR PLATE 4 in (102 mm)
- Page 189 1400H OPERATOR AND SERVICE MANUAL INSTALLATION If the frame through the rear suspension doesn't meet as in Figure B. Slide the reinforcing angle up from the minimum specifications for RBM and section modulus bottom, butt it to existing forward reinforcing and weld as shown on “Truck Frame Strength”...
-
Page 190: After Frame Modification
INSTALLATION 1400H OPERATOR AND SERVICE MANUAL AFTER FRAME MODIFICATION Length of after frame (AF) may have to be modified for crane installation. If AF is too long, cut off excess and If additional suspension reinforcing is required, as may remove any crossmembers from back of truck frame. If AF is be the case with a truck frame that tapers down to too short, the frame will have to be lengthened. -
Page 191: Crane Installation
1400H OPERATOR AND SERVICE MANUAL INSTALLATION CRANE INSTALLATION the mount anchor assembly as pilot holes. Install 3/4 in diameter Grade 8 bolts, washers and nuts in mounting Determine installation position for the crane considering plates. the operating area of the crane, space for saddle tanks, With RSOD stabilizers retracted, determine the distance truck frame crossmembers, or anything that might affect from the top of the stabilizer frame cross tube to ground... - Page 192 INSTALLATION 1400H OPERATOR AND SERVICE MANUAL Loosely assemble flex plate and two anchor ears as the two nuts until they are locked. Torque bottom nut to shown. Locate flex plate anchor ears to torsion box and 1280 +/- lb-ft To keep the stud from turning use a wrench RSOD anchor plate as specified and tack in place.
- Page 193 1400H OPERATOR AND SERVICE MANUAL INSTALLATION 17. Route the hoist drain hose through the turret and connect to the hoist. Dead End Live End Live End Dead End 20 × Rope Diameter 12.50 in Minimum CORRECT INCORRECT Terminator Type Wedge Installation 20 ×...
- Page 194 INSTALLATION 1400H OPERATOR AND SERVICE MANUAL end of the cable only. If equipped with optional line 25. After cable is completely wrapped on drum, replace block, omit downhaul weight and assemble as shown in remaining cable keeper bolts on the sheave case. loadline section of parts pages.
-
Page 195: Pin Bearing Inspection And Installation Procedure
1400H OPERATOR AND SERVICE MANUAL INSTALLATION PIN BEARING INSPECTION AND Installation INSTALLATION PROCEDURE Two bearings are to be installed in the boom pivot trunnion located directly below the hoist and the Pin Inspection remaining four bearings are to be installed in the lift cylinder, two at each side of the rod end of the cylinder Remove the protective covering from pins and inspect and two at each side of the butt end of the cylinder. -
Page 196: Counterweighting
INSTALLATION 1400H OPERATOR AND SERVICE MANUAL COUNTERWEIGHTING (overloading) will cause the unit to tip over. These loads are not shaded on the load rating chart. Refer to “Truck Requirements” pages in this section. The This crane is stable to a variable stability factor with the amount of counterweight and its location is dependent outriggers set at mid-span. - Page 197 1400H OPERATOR AND SERVICE MANUAL INSTALLATION CENTER OF BED CWT HEAVY BUMPER HEAVY BUMPER 1100 lb (498 kg) 800 lb (362 kg) 500 lb (227 kg) WEIGHTED AREA TRUCK BED BOTTOM VIEW BED COUNTERWEIGHTING FOR BED COUNTERWEIGHTING FOR 500 lb (230 kg) 1150 lb (520 kg) 40 in 86 in...
- Page 198 INSTALLATION 1400H OPERATOR AND SERVICE MANUAL 8 in (203) 44 in (1118 mm) The method shown above can be used to shift more Example weight to the front of the crane than the previous methods Concrete poured in the bed measures 4 in (10,16 cm) will.
-
Page 199: Anti-Two-Block Load Moment Indicator Installation And Function Verification
1400H OPERATOR AND SERVICE MANUAL INSTALLATION ANTI-TWO-BLOCK LOAD MOMENT light. A mounting plate is provided or the switch and light may be installed in the dash. Install the label decals INDICATOR INSTALLATION AND FUNCTION adjacent to the switch. Refer to illustrated parts section VERIFICATION for item numbers and decal placement. - Page 200 INSTALLATION 1400H OPERATOR AND SERVICE MANUAL sensor so that the system reads the angle to ±0.0° of the After pressing “OK”, the system will request the measured angle. Press “OK” when the sensor is length sensor calibration be saved. Selected “YES” then mechanically set, this...
-
Page 201: Initial Crane Run In Procedure
1400H OPERATOR AND SERVICE MANUAL INSTALLATION INITIAL CRANE RUN IN PROCEDURE After testing is completed, the mounting bolts and all cable clamp bolts should be re-torqued to specifications. With the unit in an open area for testing that will permit Upon completion, overall height of crane vehicle full operation of all its functions, engage the PTO and run combination must be measured and posted inside of cab... -
Page 202: Stability Check
INSTALLATION 1400H OPERATOR AND SERVICE MANUAL STABILITY CHECK Example 1: 14100H without 54 ft Jib Stowed The bare chassis weight, before the crane is mounted, is Boom Length: 100 ft (30,5 m) intended for use only as a guideline in determining the total Loaded Radius: 85 ft (25,9 m) weight required for the unit to be stable with an 85% tipping... - Page 203 1400H OPERATOR AND SERVICE MANUAL INSTALLATION to lift loads around the front of the truck unless the unit is define areas of full stability and areas of reduced equipped with a front stabilizer. capacity because of stability. If the unit is equipped with a jib, the stability test should be repeated.
- Page 204 INSTALLATION 1400H OPERATOR AND SERVICE MANUAL This Page Blank 7-32 Published 10-30-2014 Control # 040-09...
- Page 205 1400H OPERATOR AND SERVICE MANUAL ALPHABETICAL INDEX Accidents ............. 1-2 After Frame Modification .
- Page 206 1400H OPERATOR AND SERVICE MANUAL Outrigger Cable Tensioning ..........5-53 Outrigger Calibration .
Need help?
Do you have a question about the National Crane NC1400H and is the answer not in the manual?
Questions and answers