
Subscribe to Our Youtube Channel
Related Manuals for ElectrIQ EIQMW20LSS


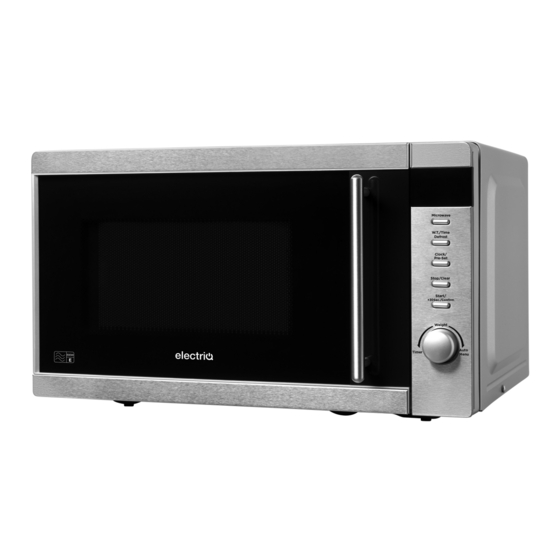
Summary of Contents for ElectrIQ EIQMW20LSS
- Page 1 Microwave Oven INSTRUCTION MANUAL Model:EIQMW20LSS Read these instructions carefully before using your microwave oven, and keep them safe for future reference.
-
Page 3: Table Of Contents
CONTENTS IMPORTANT SAFETY INFORMATION INSTALLATION INSTRUCTIONS SETTING UP YOUR OVEN OPERATION INSTRUCTIONS CLEANING USE OF SUITABLE UTENSILS TROUBLESHOOTING SPECIFICATIONS ELECTRIQ UK SUPPORT... -
Page 4: Important Safety Information
PRECAUTIONS TO AVOID POSSIBLE EXPOSURE TO EXCESSIVE MICROWAVE ENERGY Do not attempt to operate this oven with the door open since this can result in harmful exposure to microwave energy. It is important not to break or tamper with the safety interlocks. Do not place any object between the oven front face and the door or allow soil or cleaner residue to accumulate on sealing surfaces. - Page 5 • Keep the appliance and its cord out of reach of children less than 8 years. • If the supply cord is damaged, it must be replaced by the manufacturer, its service agent or similarly qualified persons in order to avoid a hazard. •...
- Page 6 • This appliance is intended to be used in household and similar applications such as: o staff kitchen areas in shops, offices and other working environments; o by clients in hotels, motels and other residential type environments; o farm houses; o bed and breakfast type environments.
- Page 7 To Reduce the Risk of Injury to Persons Ensure the unit is correctly earthed. DANGER Electric Shock Hazard - Touching some of the internal components can cause serious personal injury or death. Do not disassemble this appliance. WARNING Electric Shock Hazard - Incorrectly earthed units can result in electric shock.
- Page 8 Installation and connection 1. This appliance is only intended for domestic use. 2. This oven is intended for counter-top use only, it is not designed for use inside a cupboard. 3. Please observe the special installation instructions. 4. The appliance is fitted with a plug and must only be connected to a properly installed earthed socket.
-
Page 9: Installation Instructions
INSTALLATION INSTRUCTIONS Please Note - Electrical Connection The oven is fitted with a plug and must only be connected to a properly installed earthed socket. The socket must only be installed and the connecting cable must only be replaced by a qualified electrician, and in accordance with the appropriate regulations. -
Page 10: Setting Up Your Oven
SETTING UP YOUR OVEN Remove the oven and all materials from the carton and oven cavity. Your oven comes with the following accessories: Control Panel Observation Window Turntable Shaft Door Assembly Turntable Ring Assembly Safety Interlock System Glass Tray Instruction Manual Turntable Installation •... -
Page 11: Operation Instructions
OPERATION INSTRUCTIONS This microwave oven uses modern electronic controls to adjust cooking parameters in order to meet your needs for a better cooking experience. 1. Set the Clock When the microwave oven is powered on, the display will show "0:00", and the buzzer will bleep once. - Page 12 Microwave Power Chart Microwave Power Display P100 3. Defrost By Weight Press the "W.T./TIME DEFROST" button once, the screen will display "dEF1". Turn to select the food weight. The range can be between 100-2000g. Press the "START/+30SEC./CONFIRM" button to start defrosting. 4.
- Page 13 Press "START/+30SEC./CONFIRM" to start cooking. 6. Pre-set Function Ensure the clock is set correctly Input the cooking program. A maximum of 2 stages can be set. Defrosting should not be set in the preset function . Example: if you want to cook with 80% microwave power for 7 minutes.
- Page 14 Menu Weight Display Power A-1 AUTO 200g 100% REHEAT 400g 600g A-2 VEGETABLE 200g 100% 300g 400g 250g FISH 350g 450g 250g 100% MEAT 350g 450g 50g (with water 450g) PASTA 1 0g (with water 800g) 200g 100% POTATO 400g 600g 200g 100%...
- Page 15 9. Child Lock Lock: In standby, hold "STOP/CLEAR" for 3 seconds, there will be a long "beep" denoting entering the child-lock state and screen will display Unlock: In locked state, hold "STOP/CLEAR" for 3 seconds, there will be a long "beep" denoting that the lock is released. Check current settings While cooking, press "MICROWAVE"...
-
Page 16: Cleaning
CLEANING Be sure to disconnect the appliance from the power supply before commencing cleaning Clean the cavity of the oven with a slightly damp cloth. The accessories can be removed from the oven and cleaned in a bowl of soapy water. The door frame and seal and neighbouring parts must be cleaned carefully with a damp cloth when they become dirty. - Page 17 Materials you can use in microwave oven Utensils Remarks Browning dish Follow manufacturer’s instructions. The bottom of browning dish must be at least 3/16 inch (5mm) above the turntable. Incorrect usage may cause the turntable to break. Dinnerware Microwave-safe only. Follow manufacturer's instructions. Do not use cracked or chipped dishes.
-
Page 18: Troubleshooting
TROUBLESHOOTING Normal Behaviour Microwave interfering Radio and TV reception may be interfered with TV reception when when microwave is operating. It is similar running to interference from other small electric appliances such as electric fans and is normal. Dim Oven light In low power microwave cooking, the oven light may become dim. -
Page 19: Specifications
NOT dispose of this product with household waste. Please send this product to WEEE collecting points where available. ElectrIQ UK Support www.ElectrIQ.co.uk/support Office hours: 9AM - 5PM Monday to Friday www.ElectrIQ.co.uk...
Need help?
Do you have a question about the EIQMW20LSS and is the answer not in the manual?
Questions and answers