
Related Manuals for A.MENARINI GlucoMen READY


Summary of Contents for A.MENARINI GlucoMen READY
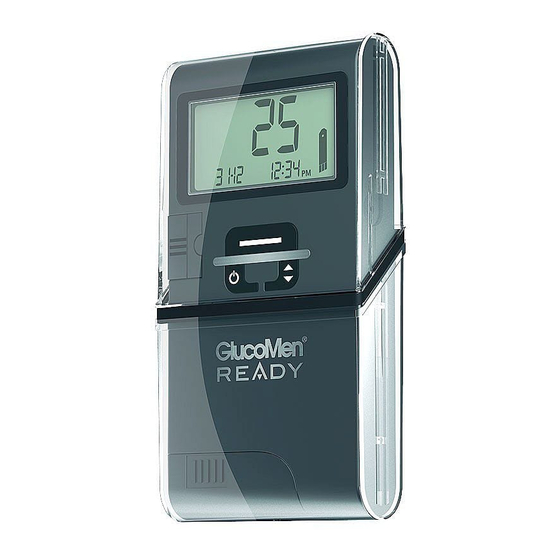
- Page 1 ready steady test do it yourself in a few steps illustrated Guide to GlucoMen ready ®...
- Page 2 ready steady test front view rear view TOP COVER BATTERY HOUSING (removable) (removable lid) LCD DISPLAY DATA OUTPUT PORT LANCET HOLDER (removable) BOTTOm COVER ON/OFF BUTTON REmOVAL LEVER TRIGGER BUTTON (to change cartridge) ARROw BUTTON TOP COVER REmOVAL LEVER TEST STRIP SLOT (to change battery) CARTRIDGE CONTAINER BOTTOm COVER...
- Page 3 ready steady test glucomen reADY features all you ® need to perform your own blood glucose test at any moment: lANcet HolDer The lancet holder is glucometer housed inside the meter. 25 teSt StrIPS The strips are integrated into the meter and automatically come out when activated.
-
Page 4: Table Of Contents
summary CHECK THE TIME INSERT A AND DATE NEW lANCET SETTING-UP THE METER WHAT’S INSIDE INSERT THE TEST THE BOX STRIPS CARTRIDGE COllECT A SWITCH OFF BlOOD SAMPlE THE METER PERFORMING A BlOOD GlUCOSE TEST PREPARE A PERFORM BlOOD GlUCOSE THE TEST TEST CHECK... -
Page 5: Setting-Up The Meter
ready steady test SETTING-UP THE METER Follow these simple instructions to set-up GlucoMen READY. ®... - Page 6 WHAT'S INSIDE THE BOX The GlucoMen READY box contains: A glucomen reADY meter ® A 25 glucomen reADY Sensor ® test strips cartridge A plastic bag containing 10 glucomen reADY lancet ® Plus all the technical and supporting documentation that you need to oper-...
- Page 7 CHECK THE TIME AND DATE CHANGE THE TIME AND DATE CHECK THAT THE TIME AND DATE ARE CORRECT Press and hold the ON/OFF button for 3 seconds: the word “SET” will appear on the screen. Before starting, Press the ON/OFF button again, briefly: the year make sure that the starts blinking.
- Page 8 INSERT THE TEST STRIPS CARTRIDGE Before starting to use the meter, insert the test strips cartridge following the Push the left white removal simple instructions below. lever downwards (you’ll see a downwards pointing arrow next to the white lever). REMOVE THE BOTTOM COVER NOTE Hold glucomen reADY facing the back of...
- Page 9 INSERT THE CARTRIDGE Take the cartridge out of the aluminium foil bag. Hold the meter facing the screen and remove the lid of the cartridge container by sliding it leftwards, then downwards. NOTE THE CARTRIDGE HAS A 30 DAYS SHELF-LIFE AFTER OPENING. Insert the cartridge fol- lowing the direction indica- ted by the small arrows, as...
- Page 10 PUT THE BOTTOM COVER BACK INTO PlACE Holding the meter with the screen up, bring the bot- Slide the cover upwards until you tom cover close to the meter with its longest edge hear a “click”. positioned at the back, as shown in the figure below. CLICK! the cartridge has been inserted.
- Page 11 INSERT A NEW LANCET FOR THE NEXT REPlACEMENTS to insert a new lancet, OF THE LANCET, WHEN YOU’RE follow the instructions below. BETTER ACQUAINTED WITH THE METER, WE SUGGEST SlIDING THE BOTTOM COVER DOWN (INSTEAD OF REMOVING IT COMPLETELY) UNTIL IT IS POSSIBLE TO EXTRACT REMOVE THE BOTTOM COVER THE LANCET HOLDER (AS IN THE FIGURE OPPOSITE).
- Page 12 INSERT A lANCET FOR THE NEXT REPLACEMENTS, PUll OUT THE USED lANCET FROM THE REAR OF THE LANCET HOLDER. Take a lancet from the plastic bag included in the AS AN ALTERNATIVE, YOU CAN PUSH THE glucomen reADY box. ® USED lANCET AT THE FRONT OF THE LANCET HOLDER USING THE FINER END OF THE NEW LANCET.
- Page 13 PUT THE lANCET HOlDER Remember to remove BACK INTO PlACE the blue cap of the lancet by rotating it and sliding it off. Put the lancet holder back into its housing. When the lancet holder is correctly installed you will hear a “click”. PUT THE BOTTOM COVER BACK INTO PlACE Put the bottom cover...
- Page 14 ready steady You are now finished with the system set up. GlucoMen® READY is now ready to be used! test...
-
Page 15: Performing A
ready steady test PERFORMING A BlOOD GlUCOSE TEST Follow the steps illustrated in this section to perForm Your First Blood glucose test with GlucoMen READY. ®... -
Page 16: Prepare A Blood Glucose Test
PREPARE A BLOOD GLUCOSE TEST READY THE lANCET AND TEST STRIP Slide the bottom cover down until your hear a “click”: the test strip comes out and the lancet is primed with a single move! NOTE SLIDE THE BOTTOM COVER All THE WAY DOWN TO READY THE SPRING AND THE lANCET. - Page 17 COLLECT A BLOOD SAMPLE PERFORM THE TEST Place the blood sample in contact When the blinking drop icon appears on the dis- with the strip and… you’re done! play, press your fingertip against the lancet holder The result will appear in 5 seconds. and press the trigger button to activate the lancet.
- Page 18 simple, discreet, SWITCH OFF THE METER always ready! Remove the used strip and close the covers: the meter will automatically switch off.
- Page 19 ready steady test OTHER FUNCTIONS GlucoMen READY Features the ® Following additional Functions.
-
Page 20: Check Function
MARK FUNCTION glucomen reADY allows you to mark a test, ® e.g. before or after a meal. Before performing the test, when the blinking drop icon appears on the screen, press and hold OTHER FUNCTIONS the ON/OFF button for 3 seconds until the MARK icon appears, as illustrated in the figure below. - Page 21 AVERAGE (14 DAYS) CHECK FUNCTION glucomen reADY allows you to exclude the last test re- glucomen reADY allows you to visualise the ® ® sult from the average of results (e.g. when performing a average of the tests performed during the control solution test) by using the CHECK function.
-
Page 22: Memory
memory The screen will show the number of remaining glucomen reADY can recall up to 500 re- ® strips for 2 seconds, then the average of the sults filed in its memory (with the time and tests performed during the last 14 days will date of each test). - Page 23 The screen will show the number of remaining Press the arrow button to visualise filed test results. strips for 2 seconds, then the average of the tests Going through the list, you will see that the MARK icon tags performed during the last 14 days will appear, as the “marked”...
-
Page 24: Display Backlight
sound display backlight When visualising the blood glucose test result, the screen of the meter illuminates. glucomen readY features a beeping sound. ® The default setting is ON. The sound default setting is ON. To deactivate this function, follow the instructions To cut-off sound, follow the instructions below. - Page 25 additional notes When the test strips cartridge is removed, the test strips counter is reset to the default value: 25 (10 with the test strips cartridge inside the box). Do not try to re-insert a test strip that already came out of the dedicated slot. Do not try to push a used lancet inside the meter.
- Page 26 personal notes...
- Page 27 TO LEARN MORE ABOUT Glucomen ready ® OR visiT www.xxxxxxxxxxx.xx cALL Toll number xxx-xxxxxxx...
Need help?
Do you have a question about the GlucoMen READY and is the answer not in the manual?
Questions and answers