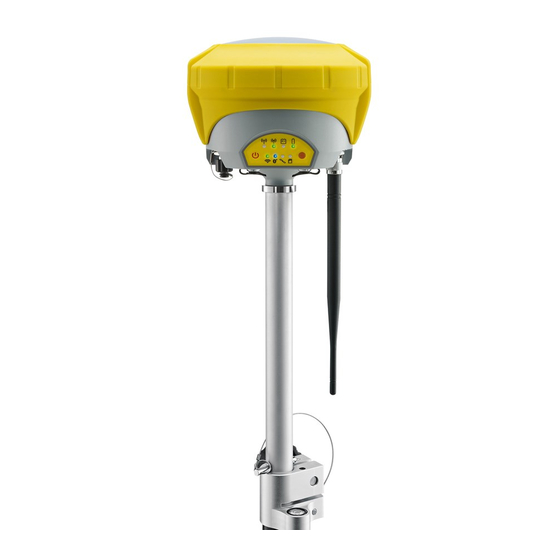
GeoMax Zenith35 Series How-To Manual
Hide thumbs
Also See for Zenith35 Series:
- Quick manual (156 pages) ,
- User manual (34 pages) ,
- First steps (21 pages)
Summary of Contents for GeoMax Zenith35 Series
- Page 1 GNSS Zenith35 Series How To Guide Version 1.00 English - 1 - Zenith35 GNSS Series How To Guide © 2015 GeoMax AG, Widnau Switzerland...
-
Page 2: Table Of Contents
Multiple GSM Rover Connection (+10) ..........13 2.2.2.1. Setting up The Base for Simultaneous Access (+10) ......13 2.2.2.2. Setting up The Rover (+10) ..............15 - 2 - Zenith35 GNSS Series How To Guide © 2015 GeoMax AG, Widnau Switzerland... -
Page 3: Antenna Management
Zenith10/20 and Zentih25 antennas. This is important when the GeoMax Zenith35 sensor is used as a base with RTCM network correction messages. This guide will explain how to add the Zenith35 antenna calibration values on the rover side. -
Page 4: Zenith35 Base, Zenith35 Rover
GeoMax Assistant Zenith25 (Pro). Please follow these steps: 1. Connect the Zenith25(Pro) to your PC and open the GeoMax Assistant Zenith25 (Pro). 2. Press Antenna management from the menu, and 3. un-tick the Automatic detection of base antenna option: 4. - Page 5 5. Define the GeoMax Zenith35 antenna by it’s IGS name: GMXZENITH35. Add the L1 and L2 PCO values in meters, as shown below: 6. Press Add, the Add antenna window will disappear and the antenna will be available in the IGS name of base antenna list in the previous window.
- Page 6 7. Press Apply or select Automatic detection of base antenna. In both cases the base antenna Zenith35 will be detected. - 6 - Zenith35 GNSS Series How To Guide © 2015 GeoMax AG, Widnau Switzerland...
-
Page 7: Zenith35 Base, Zenith10/20 Rover
Zenith10/20 utilizes the NGS calibration files, which is based on the National Geodetic Survey Calibration file. To load a calibration file on the unit, please do the following: Connect the Zenith10/20 sensor to the PC and open the GeoMax Assistant. You will be prompted with the following message:... - Page 8 4. Find the sensor on your PC and open the ”antenna” folder: 5. In the ”antenna” folder you will find the absolute calibration file loaded: ngs08.003. - 8 - Zenith35 GNSS Series How To Guide © 2015 GeoMax AG, Widnau Switzerland...
- Page 9 6. Due to the Zenith10/20 fw V2.12 not being updated with the GeoMax Zenith35 antenna as default, the following antenna information is missing from the ngs08.003 file. 7. Please download the latest calibration file from the partner area (http://geomax- positioning.com/downloads.htm?cid=15079), which contains the Zenith35 calibration values.
-
Page 10: Dynamic Dns
Number) together with a range of open ports. Normally a SIM card with fixed IP address supports this kind of setup. If you are not sure, please contact your provider and ask for the current status of your SIM card. - 10 - Zenith35 GNSS Series How To Guide © 2015 GeoMax AG, Widnau Switzerland... -
Page 11: Use Cases
In order to be able to access, configure or check the Zenith35 with an internet connection from any web-capable device, the DynDNS functionality has to be activated and be configured accordingly with the GeoMax Z35WebManager. Steps 1-13 describe how to enable the DynDNS functionality in the Zenith35:... - Page 12 Myzenith35.net in the example below. Once the host name is entered in the web browser, an Authentication is required to start the GeoMax Z35WebManager. After the username and password are entered, the user is able to configure, monitor or check the Zenith35 base sensor.
-
Page 13: Multiple Gsm Rover Connection (+10)
In order to allow simultaneous access of several rovers to one single Zenith35 base sensor, the DynDNS functionality has to be activated and be configured accordingly with the GeoMax Z35WebManager in the base receiver. Steps 1-13 describe how to enable and configure the DynDNS functionality in the... - Page 14 Now your Zenith35 base is setup and ready to be accessed simultaneously by up to 10 (depending on the selected Number of simultaneous users) rovers. - 14 - Zenith35 GNSS Series How To Guide © 2015 GeoMax AG, Widnau Switzerland...
-
Page 15: Setting Up The Rover (+10)
10) Click Connect to connect your zenith35 rover to the base station After a successful connection to the Zenith35 base receiver, your rover should receive RTK correction data. - 15 - Zenith35 GNSS Series How To Guide © 2015 GeoMax AG, Widnau Switzerland...


Need help?
Do you have a question about the Zenith35 Series and is the answer not in the manual?
Questions and answers