Table of Contents
Advertisement
Quick Links
Advertisement
Table of Contents

Related Manuals for Anviz Secu365


Summary of Contents for Anviz Secu365
- Page 1 Cloud Based Smart Security Platform...
-
Page 2: Table Of Contents
2.2 Log-in Web server •••••••••••••••••••••••••••••••••••••••••••••••••••••••••••••••••••••••••••••••••• 5 2.3 Secu365 Dashboard •••••••••••••••••••••••••••••••••••••••••••••••••••••••••••••••••••••••••••••• 8 2.4 Secu365 Settings •••••••••••••••••••••••••••••••••••••••••••••••••••••••••••••••••••••••••••••••••• 20 3. Secu365 Mobile APP User Guide •••••••• 24 3.1 APP Account Register ••••••••••••••••••••••••••••••••••••••••••••••••••••••••••••••••••••••••• 24 3.2 Start Use ••••••••••••••••••••••••••••••••••••••••••••••••••••••••••••••••••••••••••••••••••••••••••••••••• 25 3.3 APP Interface ••••••••••••••••••••••••••••••••••••••••••••••••••••••••••••••••••••••••••••••••••••••••• 27 3.4 APP system setup •••••••••••••••••••••••••••••••••••••••••••••••••••••••••••••••••••••••••••••••... -
Page 3: Hardware
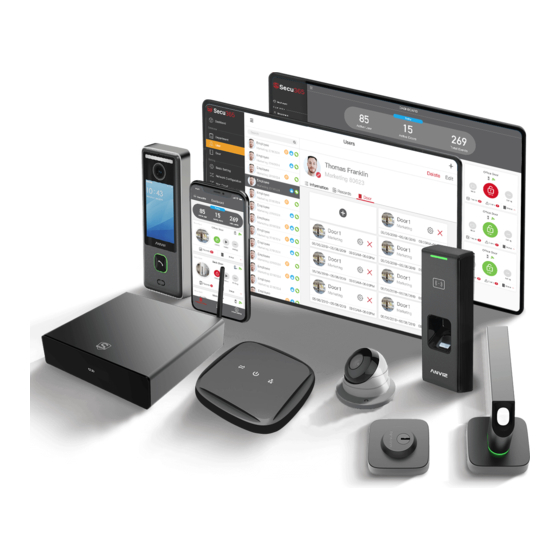
Secu365 User Manual Secu365 is a system providing intelligent security management which focuses on residential applications and SME users. Based on the concept of HAAS (Hard as a server), and the integration of the cloud system, you are able to receive the security information anytime and any where. -
Page 4: Control Center Edge Server
4/8/16 CH access control and Memory 1,000,000 records Support cctv camera input Display OLED display 4 CH • 1.3 OLED display message Wired network IP address Wired network IP address Wired network Time & Date Wireless AP mode Secu365 User Manual... -
Page 5: System Architecture
• 1.4 System Architecture • 1.5 Download Secu365 Mobile app or use network connection Secu365 User Manual... -
Page 6: Edge Server Connection And Setting
When you turn on the Edge Server at the first time, it will show the default setting of the Edge Server wireless AP function (Default SSID: Secu365), and the OLED display will show the IP address. User can log-in the web server to set up the system through Edge Server IP address or Edge Server Wireless. - Page 7 (Contact the system manager for further questions), Then click next step. System will detect Edge Server network connection automatically, make sure the system can connect the internet. Secu365 User Manual...
- Page 8 Starting the cloud service by scanning the QR code. (Refer to Secu APP instruction for details). Secu365 User Manual...
-
Page 9: Secu365 Dashboard
If re-start is required, please log-in to Edge Server Web server. • 2.3 Secu 365 Dashboard Secu365 dashboard shows key data of the system for including (Active User), (Active Spot), (Events), Edge Server IP address, SN number and firmware version. - Page 10 Click on the red icon to upload photos of the users with imaging size no more than 500K. The user image will be displayed in the records. Grant the user's access permission by adding authentication password and RFID card number. Secu365 User Manual...
- Page 11 (In the following chapters, the registration process of fingerprints, passwords and cards will be described.) • 2.3.3 Secu Spot Secu365 is a three-dimensional security solution, so the concept of security spot is enhanced. Security point integrates access control, video, alarm and other comprehensive applications.
- Page 12 Spot image, and this image will be displayed in the daily record. Click ”Next” to choose the device type integrated in. Click “Find nearby access control device” Edge Server will automatically search the physical access control device and display the list. Secu365 User Manual...
- Page 13 Suggestion: For the first time installation, it is recommended to connect device’s internet cable to edge server POE port to quickly add and configure the device. Choose the device in the list and click ”Next” . Secu365 User Manual...
- Page 14 According to the actual network situation, configuring the network IP address of access control devices, it is suggested to set the same network segment as Secu365. Click Next and the device will automatically be added to the system. Go back to “Secu Spot” page after adding the physical access control device.
- Page 15 To complete the addition of Secu Spot and front-end devices (access control devices/cameras/smart locks), users should be assigned to the corresponding security points according to access control rights. Please return to the user interface and select a user for fingerprint registration. Secu365 User Manual...
- Page 16 fingerprints. Click "Fingerprint A" to pop up the fingerprint registration dialog box, and select the fingerprint device for fingerprint registration through the device serial number. Click "Enroll" in the to start registering fingerprints on the device. Secu365 User Manual...
- Page 17 2. Press the same finger on the fingerprint sensor 6 times to complete fingerprint registration. • 2.3.5 User rights to Secu Spot Complete the fingerprint registration and click "Cancel" to return to a single user's detail interface and enter the "Secu Spot" option. Secu365 User Manual...
- Page 18 Click "Select" to set the user's time permission. Click "Select" again to save the time period settings of the designated user, and upload the user information and fingerprint information to the front-end device under the security point. Secu365 User Manual...
- Page 19 When the "User" interface completes the collection and registration of authentication information such as fingerprint, password and card of all the users, batch user rights can be added to the Secu Spot under the "User" option in the "Secu Spot" setting interface. Click “Add” Button Secu365 User Manual...
- Page 20 For the selected user, you can set an user’s time privilege setting, click "Save" to complete the access control settings on the Secu Spot, and upload batch user and fingerprint information to the fingerprint device on the Secu Spot. Secu365 User Manual...
-
Page 21: Secu365 Settings
• 2.4 Secu365 Settings Secu365 setting includes the setup of basic information, network, app, system and administrators. • 2.4.1 Basic Information Basic information: company name setting, Date and time setting: the edge server automatically synchronize time with cloud according to local time zone. You can also manually setup the time and date. - Page 22 • 2.4.2 Network Setting Secu365 setting includes the setup of basic information, network, app, system and administrators. Secu365 supports DHCP IP configuration, manual IP configuration and it also supports WiFi AP mode. LAN: Input effect IP address, ensure Edge Server connect to internet.
- Page 23 Edge Server needs to be managed through mobile app. Edge Server cloud links must be enabled. Click “enable cloud”, scan the 2-D code for Secu365 cloud links. Add the Edge Server device to mobile app. • 2.4.4 System Settings System configuration includes: data cleaning, data backup, data restore, system reset, system initialization and online upgrade functions.
- Page 24 Online Upgrade: Update the device firmware. • 2.4.5 Administrator Settings Administrator Setup Interface displays the Administrator's Operational Log Information. Editing: Editing and modifying administrator account passwords; Delete: Delete the selected administrator account; Add: Add the administrator to the Edge Server system. Secu365 User Manual...
-
Page 25: Secu365 Mobile App User Guide
• 3. Secu365 Mobile APP User Guide Download Secu365 Mobile APP by scanning the 2-d bar code, install and register an account. • 3.1 APP Account Register Open the APP, click “REGISTER” to start registering an account. Secu365 account is registered by email ID, enter email ID and password, and agree to service term. -
Page 26: Start Use
Edge Server and mobile APP must be linked to the cloud in order to be managed properly. Therefore, by default, mobile APP is required to complete the management of Edge Server smoothly by linking to Edge Server's own wireless AP and landing in Edge Server's web server for cloud configuration. Secu365 User Manual... - Page 27 WiFi of mobile phone links to the wireless AP. Edge Server show WiFi AP open Important: Edge Server's wireless AP SSID is : SECU365 Wireless AP can be directly connected without a password. AP will shut down automatically in 10 minutes with no data activities.
-
Page 28: App Interface
Refer to "2.2 Login Webserver" for details. (original Chinese version needed) When finishing the setup of APP, it will lead to the main interface of mobile phone. • 3.3 APP Interface Menu Refresh System Status For the day Secu Spot Status APP system setup Secu365 User Manual... - Page 29 Server: Under current APP account, Edge Server device list, or add Edge Server. Setting: APP Account Management. • 3.3.1 APP Menu APP menu is the same as Edge Server Web server, refer to 2.3~2.4 for the details. Secu365 User Manual...
- Page 30 Live record & event And switch Secu Spot Image Secu Spot Setup Menu Name of Secu Spot: When adding Secu Spot, you can customize the name of Secu Spot. You can use Secu Spot photos as background pictures. Secu365 User Manual...
- Page 31 Real-time record: Click on the real-time record to view the user record of the day at the Secu Spot. You can click on the snapshot of the user picture and the short video of the user operation (12-15 seconds). Secu365 User Manual...
- Page 32 Smart Lock Installation (4XAA) Battery. Please turn on the Bluetooth on mobile phone. For a quick setup, keep the Wifi bridge, Smart Lock and Mobile Device within 10FT. Under Secu Spot - Device, select Smart Lock and click "+" Secu365 User Manual...
- Page 33 System will remind you to turn on Bluetooth on mobile phone. Through Bluetooth, Smart Lock is searched, selected. And automatic go to next step. Secu365 User Manual...
- Page 34 Click next step and wait for the smart lock connection. • 3.3.4 Add user Choose add “User” in the APP menu. Click “+” on the up right hand corner, input the user info, click “Save”, back to “User” page。 Secu365 User Manual...
- Page 35 Select again to add more users, click icon to enroll the user. input (0~6 digit user id) and the card number, choose the device to enroll. Secu365 User Manual...
- Page 36 1 Tap on the smart lock electronic panel and the LED displays "Register FP"; 2 Following the display prompt of number 1 to 6, press the same finger on the fingerprint sensor 6 times to complete the fingerprint registration. Secu365 User Manual...
-
Page 37: App System Setup
• 3.4 APP system setup • 3.4.1 Server From the list all the Edge Server information and choose the one to setup the detailed information. Click icon to modify Edge Server name, click “DELETE” to delete Edge Server in App management. Secu365 User Manual... - Page 38 • 3.4.2 APP Account Management Click “Setting” to choose “Account” to manage APP and APP, you can name the account and edit the password. Secu365 User Manual...
- Page 39 Inspiring Everyday @2019 Anviz Global Inc. All right reserved Due to the consistant improving of the product, this specifications and appearance can be modified without notice. Fot the most up-to-date information, pls vistit www.secu365.com 201910...
Need help?
Do you have a question about the Secu365 and is the answer not in the manual?
Questions and answers