
Subscribe to Our Youtube Channel
Related Manuals for Airwell DDM


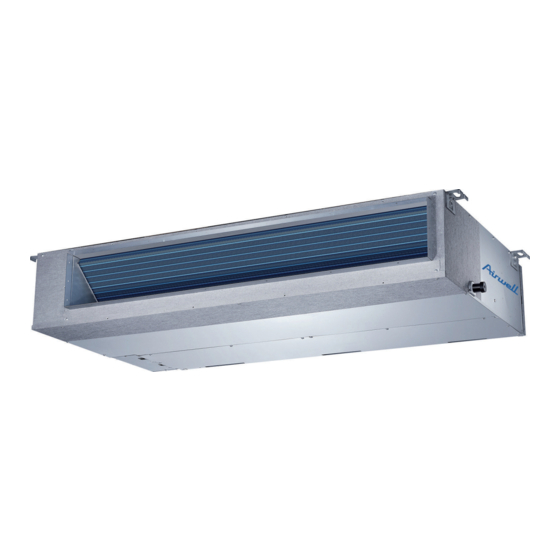
Summary of Contents for Airwell DDM
- Page 1 DDM - TYPE DUCTED INSTALLATION MANUAL INSTALLATION MANUAL ENGLISH INSTALLATIEHANDLEIDING NEDERLANDS MANUEL D'INSTALLATION FRANÇAIS...
- Page 2 This product has been det ermined t o be in compliance wit h t he Low Volt age Direct ive (2014/35/EU), and t he Elect romagnet ic Compat ibilit y Direct ive ( 2014/30/EU) of t he European Union. Correct Disposal of This Product (Waste Electrical &...
-
Page 3: Table Of Contents
CONTENTS 1. PREPARING FOR INSTALLATION ······································································· Safety Percautions ·························································································· Accessories ··································································································· 2. INDOOR UNIT INSTALLATION ············································································ Installation Site Choosing ················································································· Install The Suspension Bolts ············································································· Handing The Indoor Unit ·················································································· Install The Drain Pipe ····················································································· Install The Duct ····························································································· Change The Air Ventilation Direction ·································································... -
Page 4: Preparing For Installation
1. PREPARING FOR INSTALLATION 1.1 SAFETY PRECAUTIONS Installing, starting up, and servicing air-conditioning equipment can be hazardous due to system ressures, electrical components, and equipment location (roofs, elevated structures, etc.). Only trained, qualified installers and service mechanics should install, start-up, and serve this equipment. When working on the equipment, observe precautions in the literature and on tags, stickers, and labels attached to the equipment. -
Page 5: Accessories
1. PREPARING FOR INSTALLATION WARNING Never modify this unit by removing any of the safety guards or bypassing any of the safety interlock switches. In order to avoid a hazard due to inadvertent resetting of the thermal cut-out, this appliance must not be supplied through an external switching device, such as a timer, or connected to a circuit that is regularly switched on and off by the utility. -
Page 6: Indoor Unit Installation
1. PREPARING FOR INSTALLATION The following accessories are related to remote controller. Name of Accessories Q‘ty(pc) Shape Remote Controller To remote control the air conditioner Remote controller holder To hold the remote controller on the wall Tapped screw To fix the remote controller holder For remote controller Battery Wire between display and control board. - Page 7 2. INDOOR UNIT INSTALLATION SPACE REQUIREMENT FOR INDOOR UNIT DDM012 The size of Outline dimension and air outlet opening Unit: mm The size of descensional ventilation opening The size of air return opening Air filter Electric control cabinet Air filter The size of mounted lug Electric control cabinet New air...
- Page 8 2. INDOOR UNIT INSTALLATION SPACE REQUIREMENT FOR INDOOR UNIT(DDM018 ~ 060) The size of outline dimension and air outlet opening Unit: mm The size of air return opening Air filter The size of descensional ventilation opening and mounted lug Air filter Electric control box Size of mounted lug Outline dimension...
-
Page 9: Install The Suspension Bolts
2. INDOOR UNIT INSTALLATION CAUTION It is recommended to install the Y joint before installing the indoor unit When moving the unit during or after unpacking, make sure to lift by holding its hooks. Do not exert any pressure on other parts, especially the refrigerant piping, drain piping and flange parts. 2.2 INSTALL THE SUSPENSION BOLTS 2.2.1 Mark the spots on the ceiling where you want to install the indoor unit. -
Page 10: Install The Drain Pipe
2. INDOOR UNIT INSTALLATION 2.4 INSTALL THE DRAIN PIPE Remove the cover of the drain hose connection port Insert the flexible hose (field supply,I.D.:Φ25) to the drain hose port. Fix it to the indoor unit with pipe clamp (field supply) securely. Install the flexible hose to the PVC water pipe securely with PVC adhesive. -
Page 11: Install The Duct
2. INDOOR UNIT INSTALLATION Unit with Pump Open the cover of water supply intake by turning and pulling the cover. Gradually insert about 2 liters of water into the indoor unit with stow tube. Operate the unit under COOLING mode and check a drain pump pumping (a time lag of 1 minute is allowed before water flowing out depending on the length of the drain pipe). - Page 12 2. INDOOR UNIT INSTALLATION 2.4.4 Static pressure can be re-set by dia switch ENC2 on control board. ENC2 CODE DDM012 DEFAULT SETTING Fan performance curve at different static pressure setting.(cooling mode) DDM012 High Speed Low Speed Air volume(m3/h) Air volume(m3/h) GB-11...
-
Page 13: Change The Air Ventilation Direction
2. INDOOR UNIT INSTALLATION 2.6 CHANGE THE AIR VENTILATION DIRECTION (Alternative: Rear or Bottom) NOTE For standard unit, air intakes from rear side. Air intake direction can be modify at site from rear side to bottom side following the process in below. 1. -
Page 14: Outdoor Unit Installation
3. OUTDOOR UNIT INSTALLATION 3.1 INSTALLATION SITE CHOOSING OUTDOOR UNIT ■ Where it is out of rain or direct sunlight. ■ Where it is well-ventilated and free from obstacles near the air inlet and air outlet. ■ Where does not increase the operating noise or vibration of the outdoor unit. ■... -
Page 15: Space Requirement For Outdoor Unit
3. OUTDOOR UNIT INSTALLATION 3.3 SPACE REQUIREMENT FOR OUTDOOR UNIT Single Unit Installation (Wall or obstacle) Air inlet >30cm Maintain channel Air inlet Fix with bolt >60cm Air outlet unit:cm Parallel connect the front with rear sides. Parallel connect the two units or above unit:cm >200 >50... -
Page 16: Refrigerant Piping Work
4. REFRIGERANT PIPING WORK CAUTION Check if the height difference between indoor unit & outdoor unit and the total length of refrigerant pipe meet system requirement. Refrigerant piping work follows the indoor unit and outdoor unit installation, connect the pipe at the indoor side first, then the outdoor side. -
Page 17: Refrigerant Pipe
4. REFRIGERANT PIPING WORK 4.3 REFRIGERANT PIPE Allowable Max. Height Charge less Additional charge Model Liquid Side Gas Side per meter (R32) pipe length (m) difference (m) length (m) 12 g/m Φ6.35mm Φ9.52mm 12 g/m Φ6.35mm Φ12.7mm 24 g/m Φ9.52mm Φ15.88mm 24 g/m 036/048... -
Page 18: Wiring
5. WIRING CAUTION All the electrical connections must be carried out by qualified installers and all the wirings must be connected according to the wiring diagram. Make ground connection prior to any other electrical connections. All power sources must be turned off before wiring work and do not turn on the power until you have made sure all the wirings have been safety checked. -
Page 19: Independence Power Supply
5. WIRING 5.2 INDEPENDENCE POWER SUPPLY (For QUS030~060) Wiring figure Power supply Power supply Switch/Fuse Switch/Fuse Power Cord Power Cord Outdoor Indoor Ground wiring Unit Unit Ground wiring Signal line (Low voltage) Power supply and connecting wires specification YDFA036 Model Phase 1-Phase Frequency and volt... - Page 20 5. WIRING DDM036 DDM048 DDM048 Model YDFA036 YDFA048 YDFA048 Phase 1-Phase 1-Phase 1-Phase Frequency and volt 220-240V~ 50/60Hz Indoor Rated Current 2.0A 2.0A 2.0A Fuse Rating(Field Supply) H05VV-F; H05VV-F; H05VV-F; Power Cord(Field Supply) 3×1.0mm 3×1.0mm 3×1.0mm 3-Phase 3-Phase Phase 3-Phase Frequency and volt 380-415V 3N~ 50/60Hz Outdoor...
-
Page 21: External Static Pressure Setting
5. WIRING 5.3 External static pressure setting. You can use the unit’s automatic airflow adjustment function to set external static pressure. Automatic airflow adjustment is the volume of blow-off air that has been automatically adjusted to the quantity rated. 1. Make sure the test run is done with a dry coil. If the coil is not dry, run the unit for 2 hours in FAN ONLY mode to dry the coil. -
Page 22: Motor And Water Pump Disassemble
6. MOTOR AND WATER PUMP DISASSEMBLE Take rear intake model for example Motor maintenance Drain pump maintenance Remove the ventilated panel (5 locations) Remove the screws that fix the drain pump Remove the blower housing (4 locations) Plug off the cable for pump power supply and water Take out the motor level switch. -
Page 23: Trial Operation
7. FINAL CHECK AND TRIAL OPERATION 7.3 TRIAL OPERATION Set the air conditioning under the COOLING mode with the remote controller (or manual button) and check the running status of both indoor unit and outdoor unit. In case of any malfunction, resolve it according to chapter “Trouble shooting”... - Page 24 Dit product voldoet aan de richtlijn voor laagspanning (2014/35/EG), en de richtlijn voor elektromagnetische compatibiliteit (2014/30/EG) van de Europese Unie. Correcte afvoer van dit product (afgedankte elektrische en elektronische apparatuur) (Wanneer deze airconditioner wordt gebruikt in Europa, moeten de volgende richtlijnen worden gevolgd) - Wanneer dit symbool wordt weergegeven op het product of in de literatuur, geeft dit aan dat dit elektrische en elektronische afval (aangeduid als WEEE in Richtlijn 2012/19/EG) niet mag worden gemengd met algemeen huishoudelijk afval.
- Page 25 INHOUD 1. DE INSTALLATIE VOORBEREIDEN 1.1 Veiligheidsmaatregelen ..........................1.2 Accessoires ............................... 2. DE BINNENUNIT INSTALLEREN ..................2.1 De installatielocatie bepalen ........................2.2 De ophangbouten plaatsen ........................2.3 De binnenunit ophangen ......................... 2.4 De afvoerbuis installeren ........................2.5 Het kanaal installeren ..........................2.6 De ventilatierichting wijzigen .........................
-
Page 26: Installatie Voorbereiden
1. DE INSTALLATIE VOORBEREIDEN 1.1 VEILIGHEIDSMAATREGELEN Het installeren en opstarten van en het onderhoud plegen aan airconditioningapparatuur kan gevaarlijk zijn als gevolg van systeemdruk, elektrische componenten en de locatie van de apparatuur (daken, verhoogde constructies enz.). Uitsluitend getrainde en gekwalificeerde installateurs en servicemonteurs mogen deze apparatuur installeren, opstarten en onderhouden. Bij het werk aan de apparatuur dient u de veiligheidsinstructies op te volgen die u in de documentatie kunt lezen, en die zichtbaar is op de plaatjes, stickers en labels die op de apparatuur zijn aangebracht. -
Page 27: Accessoires
1. DE INSTALLATIE VOORBEREIDEN WAARSCHUWING Wijzig dit apparaat nooit door een beschermkap te verwijderen of door een vergrendelingsschakelaar te omzeilen. Om te voorkomen dat de thermische beveiliging onopzettelijk wordt gereset, mag dit apparaat niet worden gevoed via een extern schakelapparaat, zoals een timer, of worden aangesloten op een stroomkring die regelmatig door het hulpprogramma wordt aan- en uitgezet. -
Page 28: Binnenunit Installeren
1. DE INSTALLATIE VOORBEREIDEN De volgende accessoires horen bij de afstandsbediening. Benaming accessoires Aantal (st.) Vorm Gebruik Afstandsbediening Om de airconditioner op afstand te bedienen Houder afstandsbediening Om de afstandsbediening aan de wand te hangen Tapschroef Om de houder van de afstandsbediening te bevestigen Batterij Voor de afstandsbediening De draad voor het display (2 m) - Page 29 2. DE BINNENUNIT INSTALLEREN BENODIGDE RUIMTE VOOR DE BINNENUNIT (DDM012) De omtrek en de opening van de luchtuitlaat Eenheid: mm De afmeting van de luchtafvoeropening De afmeting van de naar beneden gerichte ventilatieopening Luchtfilter Luchtfilter Elektriciteitsregelkast De grootte van de gemonteerde kabelschoen Elektriciteitsregelkast Grootte Grootte...
- Page 30 2. DE BINNENUNIT INSTALLEREN BENODIGDE RUIMTE VOOR DE BINNENUNIT (DDM018 ~ 060) De omtrek en de opening van de luchtuitlaat Eenheid: mm De afmeting van de luchtinlaatopening Luchtfilter De afmeting van de naar beneden gerichte ventilatieopnening en de montagepunten. Luchtfilter Elektriciteitsregelkast Grootte Grootte...
-
Page 31: De Ophangbouten Plaatsen
2. DE BINNENUNIT INSTALLEREN VOORZICHTIG Het wordt aanbevolen om eerst het Y-stuk te installeren voordat u de binnenunit installeert. Als u de unit tijdens of na het uitpakken verplaatst, zorg er dan voor dat u hem bij zijn haken optilt. Oefen geen druk uit op andere onderdelen, vooral niet op de koelmiddelleiding, de afvoerleiding en de onderdelen van de flens. -
Page 32: De Afvoerbuis Installeren
2. DE BINNENUNIT INSTALLEREN 2.4. DE AFVOERBUIS INSTALLEREN Verwijder de dop van de aansluitpoort van de afvoerslang Voer de flexibele slang (verkrijgbaar in de handel, binnendiamter: Ø25) in de poort van de afvoerbuis. Zet deze met de buisklem (niet meegeleverd) goed vast op de binnenunit. Sluit de flexibele slang op de PVC waterleidingbuis stevig aan met PVC-kleefmiddel. Wikkel isolatiemateriaal om de afvoerslang heen. Binnenunit Buisklem Flexibele slang Pvc-waterbuis Pvc-kleefmiddel Aansluitpoort afvoerslang (buitendiam.: Ø25) 2.4.1 Aansluiting afvoerbuis Voor unit zonder afvoerpomp Installeer een horizontale afvoerbuis in een hellingsgraad van minstens 1/100 en bevestig deze met een hanger space van 1,0~1,5 m. -
Page 33: Het Kanaal Installeren
2. DE BINNENUNIT INSTALLEREN Unit met pomp Open het vuldeksel van de watertoevoer door aan het deksel te draaien en het open te trekken. Giet geleidelijk ongeveer 2 liter water in de binnenunit met de vulslang. Bedien de unit in de COOLING-modus en controleer of de afvoerpomp pompt (het mag 1 minuut duren voordat er water uit komt stromen, afhankelijk van de lengte van de afvoerleiding). - Page 34 2. DE BINNENUNIT INSTALLEREN 2.5.4 De statische druk kan gereset worden door middel van de ENC2-schakelaar op het controlepaneel. ENC2 CODE DDM012 STANDAARDINSTELLING De ventilatorprestatiecurve bij andere instelling voor statische druk (koelmodus) DDM012 Hoge snelheid Lage snelheid Luchtvolume (m Luchtvolume (m NL-11...
-
Page 35: De Ventilatierichting Wijzigen
2. DE BINNENUNIT INSTALLEREN 2.6 DE VENTILATIERICHTING WIJZIGEN (alternatief: achterkant of onderkant) OPMERKING Bij standaardeenheden vindt de luchtinlaat aan de achterzijde plaats. De richting van de luchtinname kan ter plaatse op de hieronder beschreven wijze worden gewijzigd van de achterkant naar de onderkant. 1. -
Page 36: De Installatielocatie Bepalen
3. DE BUITENUNIT INSTALLEREN 3.1 DE INSTALLATIELOCATIE BEPALEN BUITENUNIT ■ Waar geen regen of direct zonlicht bij kan. ■ Waar het goed geventileerd is en vrij van obstakels in de buurt van de luchtinlaat en de ontluchtingsopening. ■ Waar het geluidsniveau of de trillingen van de buitenunit in bedrijf niet worden versterkt. ■... -
Page 37: Afmetingen Montageplaat Buitenunit
3. DE BUITENUNIT INSTALLEREN 3.3 BENODIGDE RUIMTE VOOR BUITENUNIT Installatie van één unit (Muur of obstakel) Luchtinlaat >30cm Onderhoudskanaal Luchtinlaat Met bout vastzetten >60 cm Luchtuitlaat Sluit de twee units evenwijdig aan elkaar aan zoals hierboven Sluit de voor- en achterkant evenwijdig aan elkaar aan. eenheid:cm eenheid:cm >200... -
Page 38: Koelmiddelleidingen
4. KOELMIDDELLEIDING VOORZICHTIG ■ Controleer of het hoogteverschil tussen de binnenunit en de buitenunit en de totale lengte van de koelmiddelleiding overeenstemmen met de systeemvereisten. ■ De koelmiddelleidingen worden geïnstalleerd nadat de binnenunit en buitenunit zijn geïnstalleerd. Sluit de leiding eerst aan op buitenunit en daarna op de binnenunit. -
Page 39: Koelmiddelleiding
4. KOELMIDDELLEIDING 4.3 KOELMIDDELLEIDING Toegestane Max. hoogteverschil Toevoer minus Extra toevoer per Model Vloeistofzijde Gaszijde buislengte (m) lengte (m) meter (R32) Ø6,35 mm Ø9,52 mm 12 g/m Ø6,35 mm Ø12,7 mm 12 g/m Ø9,52 mm Ø15,88 mm 24 g/m 036/048 Ø9,52 mm Ø15,88 mm 24 g/m... -
Page 40: Bedrading
5. BEDRADING VOORZICHTIG ■ Alle elektrische aansluitingen moeten worden verricht door gekwalificeerde installateurs en alle draden moeten worden aangesloten volgens het bedradingsschema. ■ Voordat u welke andere elektrische aansluitingen uitvoert, dient u eerst te aarden. ■ Alle stroombronnen moeten worden uitgeschakeld voordat er bedradingswerkzaamheden worden uitgevoerd; schakel de stroom niet in voordat is geconstateerd dat alle bedrading veilig is. ■ U dient een hoofdschakelaar en een stroomonderbreker of zekering te installeren; de capaciteit dient meer dan 1,5 keer de maximale stroom in het circuit te bedragen. ■... -
Page 41: Onafhankelijke Voeding
5. BEDRADING 5.2 ONAFHANKELIJKE VOEDING (Voor YDFA036 ~ 060) ■ Bedradingsschema Stroomvoorziening Stroomvoorziening Schakelaar/zekering Schakelaar/zekering Stroomkabel Stroomkabel Buitenunit Binnenunit Aardedraad Aardedraad Signaallijn (laagspanning) ■ Specificatie voeding en aansluitkabels YDFA036 Model Fase 1-Fase Frequentie en spanning 220-240V~ 50/60Hz Nominale stroom 2,0A Binnen Nominale zekering (in de handel verkrijgbaar) - Page 42 5. BEDRADING DDM036 DDM048 DDM060 Model YDFA036 YDFA048 YDFA060 Fase 1-Fase 1-Fase 1-Fase Frequentie en spanning 220-240V~ 50/60Hz Nominale stroom 2,0A 2,0A 2,0A Binnen Nominale zekering (in de handel verkrijgbaar) Stroomkabel H05VV-F; 3 x 1,0 mm H05VV-F; 3 x 1,0 mm H05VV-F; 3 x 1,0 mm (in de handel verkrijgbaar) Fase 3-Fase 3-Fase 3-Fase Frequentie en spanning...
-
Page 43: Instellen Externe Statische Druk
5. BEDRADING 5.3 INSTELLEN EXTERNE STATISCHE DRUK U kunt gebruik maken van de automatische afstellingsfunctie van de luchtstroom om de externe statische druk in te stellen. Automatische afstelling van de luchtstroom betreft de hoeveelheid weggeblazen lucht die automatisch is afgesteld op de nominale hoeveelheid. -
Page 44: Motor En Waterpomp Demonteren
6. DE MOTOR EN WATERPOMP DEMONTEREN Neem model met inname aan achterkant als voorbeeld Motoronderhoud Onderhoud afvoerpomp ■ Verwijder het ventilatiepaneel (5 locaties) ■ Verwijder de schroeven op de afvoerpomp (4 locaties) ■ Verwijder de blazerbehuizing ■ Haal de stroomkabel voor de pomp en de waterpeilschakelaar ■ Neem de motor uit uit het stopcontact. ■ Verwijder de afvoerpomp Motor Blazerbehuizing Afvoerpomp Geventileerde wand 7. LAATSTE CONTROLE EN TESTBEDRIJF 7.1 CHECKLIST VOOR LAATSTE CONTROLE Ter afronding van de installatie dient u voorafgaand aan het testbedrijf de volgende controles uit te voeren. -
Page 45: Testbedrijf
7. LAATSTE CONTROLE EN TESTBEDRIJF 7.3 TESTBEDRIJF Schakel met de afstandsbediening (of met de toets handmatige bediening) de airconditioner in de COOLING-modus en controleer de werking van de binnen- en buitenunit. In geval van storingen kunt u deze verhelpen volgens het hoofdstuk "Problemen oplossen" in de "Servicehandleiding". - Page 46 Ce produit a été conçu en conformité avec la directive "Basse Tension" (2014/35/CE) et la directive sur la compatibilité électromagnétique (2014/30/CE) de l'Union européenne. Élimination appropriée de ce produit (appareils électriques et électroniques usagés) (Lorsque vous utilisez ce climatiseur dans les pays européens, il convient d'appliquer les directives suivantes.) - Le symbole apposé...
- Page 47 TABLE DES MATIÈRES 1. PRÉPARATION DE L'INSTALLATION ................. 1.1 Consignes de sécurité ..........................1.2 Accessoires ............................... 2. INSTALLATION DE L'UNITÉ INTÉRIEURE ................2.1 Choix de l'emplacement d'installation ....................2.2 Installation des boulons de suspension ....................2.3 Suspension de l'unité intérieure ......................2.4 Installation du tuyau d'évacuation ......................
-
Page 48: Préparation De L'installation
1. PRÉPARATION DE L'INSTALLATION 1.1 CONSIGNES DE SÉCURITÉ L'installation, la mise en service et l'entretien des équipements de climatisation peuvent s'avérer dangereux en raison de la pression du système, des composants électriques et de l'emplacement des équipements (toits, structures surélevées, etc.). Seul un installateur ou un technicien qualifié... -
Page 49: Accessoires
1. PRÉPARATION DE L'INSTALLATION AVERTISSEMENT Ne modifiez pas cet appareil en retirant une protection ou en contournant les dispositifs de verrouillage de sécurité. Pour éviter tout risque dû à la réinitialisation accidentelle du coupe-circuit thermique, cet appareil ne doit pas être alimenté... -
Page 50: Installation De L'unité Intérieure
1. PRÉPARATION DE L'INSTALLATION Les accessoires suivants sont associés à la télécommande. Nom de l'accessoire Qté (pcs) Aspect Utilisation Télécommande Commande à distance du climatiseur Support de la télécommande Fixation murale pour la télécommande Vis taraudée Fixation du support de la télécommande Pile Alimentation de la télécommande Fil de raccordement pour l'affichage... - Page 51 2. INSTALLATION DE L'UNITÉ INTÉRIEURE ESPACE REQUIS POUR L'UNITÉ INTÉRIEURE DDM012 Dimensions globales et taille de l'ouverture de sortie d'air Unité : mm Taille de l'ouverture de retour d'air Taille de l'ouverture de ventilation descendante Filtre à air Boîtier de commande Filtre à...
- Page 52 2. INSTALLATION DE L'UNITÉ INTÉRIEURE ESPACE REQUIS POUR L'UNITÉ INTÉRIEURE DDM018 à DDM060 Dimensions globales et taille de l'ouverture de sortie d'air Unité : mm Taille de l'ouverture de retour d'air Filtre à air Taille de l'ouverture de ventilation descendante et de l'accroche installée Filtre à...
-
Page 53: Installation Des Boulons De Suspension
2. INSTALLATION DE L'UNITÉ INTÉRIEURE ATTENTION Il est recommandé d'installer le joint en Y avant l'unité intérieure Lorsque vous manipulez l'appareil en le sortant de son emballage et par la suite, assurez-vous que vous le soulevez en le prenant par ses accroches. N'exercez aucune pression sur les autres parties, en particulier sur les tuyaux de produit frigorigène et d'évacuation, ainsi que sur les brides. -
Page 54: Installation Du Tuyau D'évacuation
2. INSTALLATION DE L'UNITÉ INTÉRIEURE 2.4 INSTALLATION DU TUYAU D'ÉVACUATION Retirez le couvercle du port de raccordement de tuyau de vidange. Insérez le tuyau flexible (à installer sur place, D.I. : Ø25) sur le port du tuyau d'évacuation. Fixez-le fermement à l'unité intérieure avec le collier de serrage (à... -
Page 55: Installation Du Conduit
2. INSTALLATION DE L'UNITÉ INTÉRIEURE Unité avec pompe Ouvrez le couvercle de l'entrée d'alimentation en eau en le tournant et en tirant dessus. Versez progressivement environ 2 litres d'eau dans l'unité intérieure avec le tube latéral. Mettez en marche l'appareil en mode COOLING et testez l'évacuation de la pompe de vidange (il peut y avoir un décalage d'une minute avant que l'eau ne s'écoule, en fonction de la longueur du tuyau d'évacuation). - Page 56 2. INSTALLATION DE L'UNITÉ INTÉRIEURE 2.5.4 La pression statique peut être redéfinie à l'aide du commutateur ENC2 sur le panneau de commande. ENC2 CODE DDM012 PARAMÈTRE PAR DÉFAUT Courbe de performances de ventilation à différents réglages de pression statique (mode refroidissement) DDM012 Grande vitesse Faible vitesse...
-
Page 57: Modification De La Direction De Ventilation
2. INSTALLATION DE L'UNITÉ INTÉRIEURE 2.6 MODIFICATION DE LA DIRECTION DE VENTILATION (alternative : à l'arrière ou au bas de l'appareil) REMARQUE Pour une unité standard, les entrées d'air se situent à l'arrière de l'appareil. La direction de l'entrée d'air peut être modifiée sur site, de l'arrière vers le bas de l'appareil, comme décrit ci-dessous. -
Page 58: Installation De L'unité Extérieure
3. INSTALLATION DE L'UNITÉ EXTÉRIEURE 3.1 CHOIX DE L'EMPLACEMENT D'INSTALLATION UNITÉ EXTÉRIEURE ■ À l'abri de la pluie et de la lumière directe du soleil. ■ Emplacement bien aéré et libre de tout obstacle qui puisse gêner l'entrée et la sortie d'air. ■... -
Page 59: Espace Requis Pour L'unité Extérieure
3. INSTALLATION DE L'UNITÉ EXTÉRIEURE 3.3 ESPACE REQUIS POUR L'UNITÉ EXTÉRIEURE Installation d'une seule unité (Mur ou obstacle) Entrée d'air >30cm Canal à maintenir Entrée d'air Fixer avec un boulon >60 cm Sortie d'air Raccordement parallèle de deux unités ou plus Raccordez les côtés avant et arrière en parallèle. -
Page 60: Travaux De Tuyauterie Pour Le Produit Frigorigène
4. TRAVAUX DE TUYAUTERIE POUR LE PRODUIT FRIGORIGÈNE ATTENTION ■ Vérifiez si la différence de hauteur entre l'unité intérieure et l'unité extérieure et la longueur totale du tuyau de produit frigorigène répondent aux exigences du système. ■ es travaux de tuyauterie pour le produit frigorigène suivent l'installation des unités intérieure et extérieure. Raccordez le tuyau côté... -
Page 61: Conduite De Produit Frigorigène
4. TRAVAUX DE TUYAUTERIE POUR LE PRODUIT FRIGORIGÈNE 4.3 CONDUITE DE PRODUIT FRIGORIGÈNE Côté Côté Longueur de tuyau Différence Longueur sans Charge supplémentaire Modèle liquide autorisée (m) de hauteur max. (m) charge (m) par mètre (R32) Ø6,35 mm Ø9,52 mm 12 g/m Ø6,35 mm Ø12,7 mm... -
Page 62: Câblage
5. CÂBLAGE ATTENTION ■ Tous les raccordements électriques doivent être effectués par des installateurs qualifiés et tous les câbles doivent être connectés selon le schéma de câblage. ■ Effectuez la mise à la terre avant tout autre branchement électrique. ■ Toutes les sources d'alimentation doivent être éteintes avant le travail de câblage. Ne remettez l'alimentation en marche qu'une fois que vous avez effectué... -
Page 63: Alimentation Autonome
5. CÂBLAGE 5.2 ALIMENTATION AUTONOME (pour YDFA036~060) ■ Schéma de câblage Alimentation électrique Alimentation électrique Interrupteur/Fusible Interrupteur/Fusible Cordon d'alimentation Cordon d'alimentation Unité Unité Câblage à la terre extérieure intérieure Câblage à la terre Ligne de signaux (basse tension) ■ Spécifications d'alimentation et de câbles de raccordement Modèle YDFA036 Phase... - Page 64 5. CÂBLAGE DDM036 DDM048 DDM060 Modèle YDFA036 YDFA048 YDFA060 Phase 1 phase 1 phase 1 phase Fréquence et tension 220-240V~ 50/60Hz Courant nominal 2,0A 2,0A 2,0A Intérieur Fusible (à installer sur place) Cordon d'alimentation H05VV-F ; 3x1,0 mm H05VV-F ; 3x1,0 mm H05VV-F ;...
-
Page 65: Réglage De Pression Statique Externe
5. CÂBLAGE 5.3 Réglage de pression statique externe Vous pouvez utiliser la fonction de réglage automatique du flux d'air de l'unité pour régler la pression statique externe. Le réglage automatique du flux d'air correspond au volume d'air de purge qui a été réglé automatiquement à la quantité nominale. 1. -
Page 66: Démontage Du Moteur Et De La Pompeà Eau
6. DÉMONTAGE DU MOTEUR ET DE LA POMPE À EAU Prenez le modèle d'entrée arrière comme exemple Entretien du moteur Entretien de la pompe de vidange ■ Retirez le panneau de ventilation (5 points) ■ Retirez les vis qui fixent la pompe de vidange (4 points) ■... -
Page 67: Test De Fonctionnement
7. VÉRIFICATION FINALE ET TEST DE FONCTIONNEMENT 7.3 TEST DE FONCTIONNEMENT Réglez l'air conditionné sur le mode COOLING avec la télécommande (ou le bouton manuel) et vérifiez l'état de fonctionnement des unités intérieure et extérieure. En cas de dysfonctionnement, corrigez le problème conformément au chapitre relatif au dépannage dans le manuel d'entretien. - Page 69 10, rue du Fort de Saint Cyr, 78180 Montigny le Bretonneux tel : +33 (0)1 76 21 82 95 FROM MONDAY to FRIDAY from 9 am to 12:30 pm and from 2 to 5 pm...
Need help?
Do you have a question about the DDM and is the answer not in the manual?
Questions and answers