Table of Contents
Advertisement
Quick Links
FR :
Un manuel dans votre langue est disponible sur Internet:
IT:
Il manuale nella sua lingua può essere trovato su Internet:
ES:
Puede encontrar un manual en su idioma en Internet:
PT:
Um manual em seu idioma pode ser encontrado na Internet:
PL:
Instrukcję w swoim języku możesz znaleźć na stronie:
SWE:
En handbok på ditt språk finns på Internet:
NL:
Een handleiding in uw taal vindt u op internet:
https://bit.ly/VisionPlus21
www.easypix.info/download-manuals/download/goxtreme_vision_plus
USER MANUAL
(Translation of the original)
Advertisement
Table of Contents

Related Manuals for Easypix GoXtreme Vision+


Summary of Contents for Easypix GoXtreme Vision+
- Page 1 Puede encontrar un manual en su idioma en Internet: Um manual em seu idioma pode ser encontrado na Internet: Instrukcję w swoim języku możesz znaleźć na stronie: SWE: En handbok på ditt språk finns på Internet: Een handleiding in uw taal vindt u op internet: https://bit.ly/VisionPlus21 www.easypix.info/download-manuals/download/goxtreme_vision_plus...
-
Page 2: Table Of Contents
Table of contents General information ..................3 Explanation of symbols ................... 3 Product description ..................4 Intended use ....................4 Restrictions ..................... 4 Safety Instructions ..................5 Operating environment .................. 6 Camera description ..................7 First use ......................8 Step 1: Insert and charge the battery ............. 8 Step 2: Turn on/off the camera ............... - Page 3 Easypix is not responsible or liable for the misuse of the information contained herein. If you have suggestions for improvement or changes or if you have found errors in this publication, please let us know.
-
Page 4: General Information
General information Please read this manual and its safety instructions before using this product. Follow all instructions. This will prevent hazards that could result in property damage and/or serious injury. The product may only be used by persons who have fully read and understood the contents of this user manual. -
Page 5: Product Description
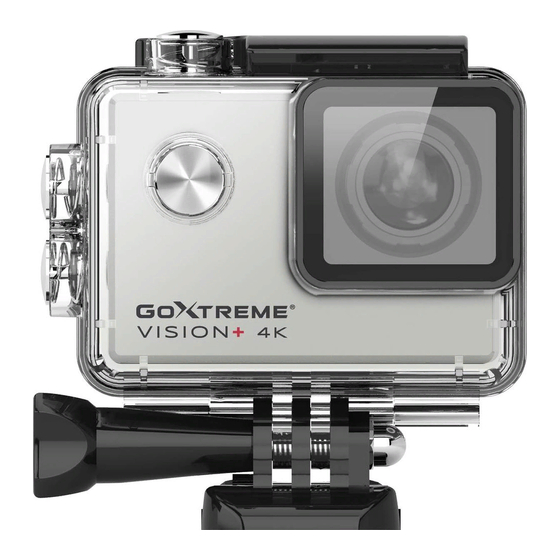
Product description GoXtreme Vision+ is a 4K camera. The camera records videos and photos with an ultra-wide angle of 170°. The 2"/5cm touch screen allows you to operate the camera easily and intuitively. It is supplied with a housing that is waterproof up to 30m, as well as a wide range of additional brackets and accessories such as the wrist worn remote control. -
Page 6: Safety Instructions
WARNING The product is not waterproof. It should only be immersed under water when securely enclosed in the supplied housing. • Before using the product in water, make sure that all covers and latches on the camera and underwater housing are securely closed and sealed. -
Page 7: Operating Environment
strong magnetic fields or radio waves to prevent them from damaging the product or affecting the sound and picture quality. • In the unlikely event of overheating, smoke or unpleasant odours coming from the unit, disconnect it immediately from the charging cable and remove the battery to avoid fire. -
Page 8: Camera Description
Camera description 1. Recording / OK Button 2. Power / Mode Button 3. WiFi / Up Button 4. Down Button 5. Speaker 6. WiFi indicator 7. USB 8. MicroSD slot 9. HDMI 10. Touch screen 11. Battery compartment... -
Page 9: First Use
First use NOTE! To ensure optimum performance from your camera, please follow the steps below when using the camera for the first time: Step 1: Insert and charge the battery Before using the product for the first time, make sure that it is fully charged. -
Page 10: Step 2: Turn On/Off The Camera
Step 2: Turn on/off the camera • Press and hold the Power button for about 3 seconds to turn on the camera. • To turn off the camera, press and hold the Power button again for about 3 seconds. Step 3: Touch screen The camera's screen is a touch screen - so you can operate the camera conveniently by touching the screen. -
Page 11: Step 4: Setting The Language
Step 4: Setting the language By default, the camera is set to English. To select a different language: 1. Click on the "Settings" icon on the screen and tap the "Settings" icon again on the following screen to enter the camera settings options. -
Page 12: Step 5: Insert And Format The Microsd Card
Step 5: Insert and format the MicroSD card NOTE! • Please make sure that your memory card is formatted in the camera before using the card for the first time. • For best results, we recommend the use of high-quality Class 10 MicroSD cards with U3 High Speed or higher. -
Page 13: Step 6: Set Date And Time
Step 6: Set date and time 1. Click on the "Settings" icon on the screen and select "Settings" again. 2. In the settings menu, you can navigate to the sub-items "Time Set" and "Date Set" using the arrow keys or by scrolling with your finger. -
Page 14: Step 8: Changing The Video/Photo Settings
Step 8: Changing the video/photo settings Video settings are available when in video mode. Photo settings are available when in Photo mode. 1. When the camera is switched on, it is in video mode by default. Press the Mode button or swipe the screen to switch to Photo mode. -
Page 15: Camera Settings
Camera settings To change operational settings of the camera, enter the General settings menu. General settings IMAGE ROTATION: If you need to mount your camera upside down, activate image rotation to ensure that videos are recorded with the right orientation. WI-FI: Tap this button to enable the WiFi function. - Page 16 POWER FREQUENCY: Select the power frequency that matches the electricity supply in your country. An incorrect setting can cause your videos to flicker when recorded under artificial or fluorescent light. LED INDICATOR: Switches the blue LED display on or off. When this option is enabled, the LED indicator lights up when the camera is turned on and flashes to confirm that video recording is in progress.
- Page 17 FORMAT: To ensure maximum compatibility between memory card and camera, the memory card should always be formatted in the camera before first use. Touch FORMAT to perform the formatting operation. WARNING: Formatting will delete all files stored on the card. Ensure that all important files are backed up before formatting.
-
Page 18: Video And Photo Functions
Video and photo functions Wipe UP on the screen and select between the different functions: Close Select a function VIDEO: Press the OK/Record button to start recording. The video icon on the screen turns red to indicate that the camera is recording. - Page 19 LOOP: When Loop Recording is enabled, the camera records a video for the selected period of time. After this time, the camera starts recording a new file for the same amount of time. Each time a new recording is started, the last recording is automatically overwritten.
-
Page 20: Shortcuts
BURST: The Burst Photo function allows you to take multiple photos in rapid succession with a single press of the shutter button. Press the “Settings” icon to select the number of photos per second. TIMER: When the self-timer (timer) is activated, the camera automatically takes a picture after a specified time delay. -
Page 21: Playback Mode
Playback mode Tap the playback icon in either photo or video mode to enter playback mode. • The counter at the top of the screen shows the total number of files available. • Tap the left (<) and right (>) icons to navigate through the various files. -
Page 22: Remote Control
Remote control Using the supplied remote control: You can start a video recording or take a photo using the remote control. Press the Record button on the remote control to start recording. Press the key again to stop recording. The remote control is splashproof. NOTE! It is not suitable for use under water. - Page 23 2. Turn on the WiFi function by swiping down on the screen and tapping the WiFi icon. a. The camera network ID and password will be displayed as follows: Wi-Fi ID: GoXtreme Vision_xxxx Wi-Fi PWD: 12345678 b. Now open the WiFi settings on your phone to select the camera WiFi ID from the available wireless networks.
- Page 24 Turn off the WiFi function: Briefly press the UP button to turn off the WiFi. The camera will return to the default home screen • If using your camera and smartphone near a WiFi router regularly used by you, your smartphone will often connect automatically to the router network as a priorty (as your smartphone will have saved the router password) rather than to the camera.
-
Page 25: Technical Specifications
Technical specifications 4K (30 fps) 2.7K (30 fps) Video resolution 1080p (120/60/30 fps) 720p (240/120/60/30 fps) 16M (interpolated) Photo resolution 13M (interpolated) Display 2.0"/5cm touch-screen Sensor 12MP Waterproof housing Waterproof up to 30m Microphone/Loudspeaker Integrated Wide angle 170° slow motion 1080p: 4x, 2x / 720p: 8x, 4x Time-lapse video 0.5s / 1s / 2s / 5s / 10s / 30s / 60s... -
Page 26: Box Contents
• Second cover for the • Helmet mount housing (not waterproof) • Frame Mount • Remote control • Battery • Orientation adaptors • USB cable • Tripod adapter • Manual EN/DE Operating instructions in other languages are available for download at https://bit.ly/VisionPlus21 or www.easypix.info/download-manuals/download/goxtreme_vision_plus... -
Page 27: Disposal
Devices marked with this symbol must not NOTE! be disposed of with household waste! You are legally obliged to dispose of old appliances as well as batteries and accumulators separately from household waste. Information on collection points that accept used devices/batteries free of charge is available from your local authority or town council. -
Page 28: Declaration Of Conformity
- Dispose of used batteries according to local regulations. - Before disposing of the device, remove the battery and dispose of it separately. Declaration of conformity The EC declaration of conformity for the product GoXtreme Vision+ can be downloaded online: www.easypix.info/download/pdf/ doc_goxtreme_vision_plus.pdf...
Need help?
Do you have a question about the GoXtreme Vision+ and is the answer not in the manual?
Questions and answers