
Related Manuals for SUPAIR STRIKE 2


Summary of Contents for SUPAIR STRIKE 2
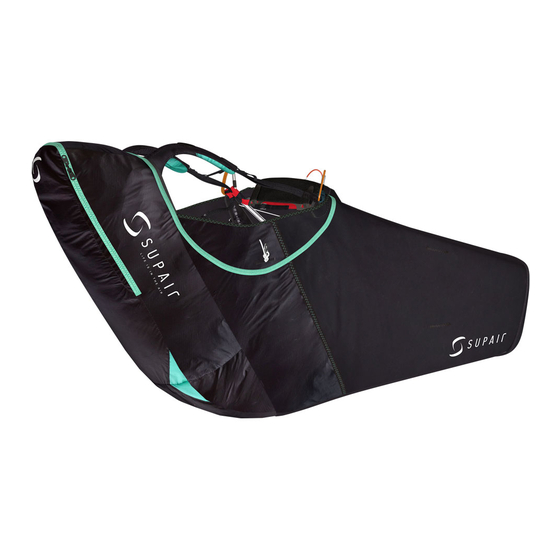
- Page 1 STRIKE 2 SUPAIR SAS PARC ALTAÏS 34 RUE ADRASTÉE 74650 ANNECY CHAVANOD User’s manual FRANCE RCS 387956790 Revision index : V1 08/02/2021...
- Page 2 Harness User’s manual | STRIKE 2 hank you for choosing the STRIKE 2. We are glad to be able to share our common paragliding passion with you. SUPAIR has been designing, producing and selling free flying equipment since 1984. By choosing a SUPAIR product you benefit from almost thirty years of expertise, inno- vation and listening.
-
Page 3: Table Of Contents
Harness User’s manual | STRIKE 2 LIST OF CONTENTS Introduction Flight phases Technical specifications Pre-Flight check Size choice Take-off Nomenclature In flight Harness Overview Speed-bar use Accessories assembly Landing Carabiners Using the reserve parachute Towing Removable comfort plate Seat plate... -
Page 4: Introduction
Welcome to the world of paragliding according to SUPAIR, a world of shared passion. The STRIKE 2 harness is the ideal harness to enter the world of light and performance! Designed on the basis of the Strike X-Alps, it is intended for hike and fly and cross-country pilots. It is therefore intended for experienced pilots who are fully trained in the practice of paragliding. -
Page 5: Technical Specifications
Harness User’s manual | STRIKE 2 TECHNICAL SPECIFICATIONS Back lenght Backrest tilt adjustment Seat length Seat width Carabiners height Carabiners distance Speedbag lenght Taille de la sellette Pilot size (cm) 155-170 165 -185 175 -195 185 -205 Pilot weight (mini - maxi) (kg) -
Page 6: Size Choice
“lying flat” flying position, we advise you to try out the harness under a hanging device at one of our retailers in order to choose the correct size. For a complete list of our retailers, please click here : www.supair.com Size... -
Page 7: Nomenclature
Harness User’s manual | STRIKE 2 NOMENCLATURE Harness Carabiners Grivel Plume Reserve parachute handle Plateau pied carbone speedbag Bump STK2 Carbon seat plate Speedbar 2B speedbag light Solo DYNEEMA risers Comfort back plate Options TREK LIGHT BACKPACK ( Ref : SACTREKLIGHT ) -
Page 8: Harness Overview
Harness User’s manual | STRIKE 2 HARNESS OVERVIEW Chest strap Chest strap adjustment Backrest angle adjustment Shoulder strap adjustment Lumbar adjustment Reserve parachute pocket Reserve parachute handle Paragliding main hooking points Reserve parachute hooking points Pulleys For speedsystem Bump Small storage pocket... -
Page 9: Accessories Assembly
3 harness riser connection. The Strike 2 was designed to also be flown with dyneema connectors (ref: MAILCONNECT). This lightens the material and makes the leg The removable comfort plate can be removed for sportier use. The har- straps fixed as for the X-Alps harness. -
Page 10: Seat Plate
ACCESSORIES ASSEMBLY Seat plate The STRIKE 2 harness can be used with or without a seat plate. Flying with the seat plate gives a stiffer seat and cleaner load transfers. The harness therefore gives more information and is more precise. The seat plate also contributes to a more comfortable seat, without lateral compression. -
Page 11: Bumpair
Harness User’s manual | STRIKE 2 ACCESSORIES ASSEMBLY The STRIKE 2 harness can be used with a BUMPAIR or an inflatable protection. Bumpair Inflatable protection : BUMP STK 2 : Protection gonflable Strike 2 Compatibles Bumpair Compatibles protections Réf. : PROBUMPSTK2 Réf. - Page 12 Harness User’s manual | STRIKE 2 ACCESSORIES ASSEMBLY Inflatable protection Passage of the inflatable protection pipe The hole for the passage of the pipe is located on the top of the pocket of the Bump. SUPAIR | STRIKE 2 | page 12...
-
Page 13: Speed Bar
Harness User’s manual | STRIKE 2 ACCESSORIES ASSEMBLY Speed-bar system Compatible speed-bar : 2B Light Speedbag : ACCEL2BLIGHTSPBG Speedbar assembly : Regarding either side of the harness: : Pass the elastic bands through the triangles of the lower foot plate and tie a maintenance knot. -
Page 14: Installing The Reserve Parachute
Harness User’s manual | STRIKE 2 INSTALLING THE RESERVE PARACHUTE Thank you for reading the following carefully ! We recommend for the initial rescue parachute assembly and installation to be made by a qualified professional. Reserve parachute folding and installation inside the harness must conform to the specific guidelines found in this manual. - Page 15 Harness User’s manual | STRIKE 2 INSTALLING THE RESERVE PARACHUTE Riser/Harness connection >> Access to the reserve parachute connection points. First, open the riser guiding sleeve all the way from top to bottom to access the reserve parachute connec- tion loops. Once the riser guiding sleeve is fully opened, the zipper tab must be located on the same side of the reserve parachute pocket.
- Page 16 Harness User’s manual | STRIKE 2 INSTALLING THE RESERVE PARACHUTE Place the risers inside the sleeve The harness is delivered with solo dyneema risers. The risers sleeve is designed to work only with this model. Place the risers inside their guiding/protec- - Use the Zip to close the sleeve until the left tive sleeve connected alongside the harness.
- Page 17 Harness User’s manual | STRIKE 2 INSTALLING THE RESERVE PARACHUTE Reserve parachute/risers One (1) square 7mm Maillon Rapide® will be needed + two (2) flexible toric rings. - Open the 7mm square - Push the two riser ends - Give a second twist to Maillon Rapide®...
-
Page 18: Installing The Reserve Parachute In The Container
Harness User’s manual | STRIKE 2 INSTALLING THE RESERVE PARACHUTE Installing the reserve parachute in its container Thank you for reading the following carefully ! We re- commend for the initial rescue parachute assembly and installation to be made by a qualified professional. - Page 19 Harness User’s manual | STRIKE 2 INSTALLING THE RESERVE PARACHUTE Installing the reserve parachute in its container loop 1 gommet 1 Using the rod, pass the loop #1 through the gommet #1 Pass the folding rod through the loop number #1...
- Page 20 Harness User’s manual | STRIKE 2 INSTALLING THE RESERVE PARACHUTE Installing the reserve parachute in its container gommet 2 loop 1 hole 1 - Pass the first rod through hole #1 and then throught loop #1 to lock it Using the rod, pass the loop #1 through the gommet #2...
- Page 21 Harness User’s manual | STRIKE 2 INSTALLING THE RESERVE PARACHUTE Installing the reserve parachute in its container gommet 3 then 4 loop 2 loop 2 Using the rod, pass the loop #1 through the gommet #3 then #4 Pass the folding rod through the loop number #2...
- Page 22 Harness User’s manual | STRIKE 2 INSTALLING THE RESERVE PARACHUTE Installing the reserve parachute in its container loop 2 hole 2 - Pass the second rod through hole #2 and then throught loop #2 Insert the rod in their respective sleeve...
- Page 23 Harness User’s manual | STRIKE 2 INSTALLING THE RESERVE PARACHUTE Locking the reserve parachute handle Mandatory extraction test procedure Check the completed installation during a hang-test. Have the installation checked by a professional outfit. As the volume of the folded parachute may vary, check the proper functioning of the parachute pocket during an extraction test.
- Page 24 Harness User’s manual | STRIKE 2 PACKING AND TIPS Back pocket storage Instrument security fasteners Pipe outlet Inflatable bump Small storage pocket side with accessory safety fastener Outlet for pee tube SUPAIR | STRIKE 2 | page 24...
-
Page 25: The Various Adjustments
Harness User’s manual | STRIKE 2 ADJUSTING THE HARNESS Adjusting the harness prior each takeoff is vital. The various adjustments. Adjusting the chest strap Adjusting the backrest Adjusting the shoulder straps Backrest angle adjustment SUPAIR | STRIKE 2 | page 25... - Page 26 Harness User’s manual | STRIKE 2 ADJUSTING THE HARNESS Adjusting the harness Without strap tension, first adjust the backrest incline at the desired angle. - Tightening will bring the backrest at a more vertical angle loosen tighten - Loosening the backrest will tilt the back support rearward.
- Page 27 Harness User’s manual | STRIKE 2 ADJUSTING THE HARNESS Speedbag adjustments Speedbag lenght Your legs must be stretched, wedge yourself well at the bottom of the harness. Heel strap Tiptoe strap 2 attachment points Loosen the straps Adjust the heel strap If the adjustment is too long or too short, move the attachment points.
- Page 28 Harness User’s manual | STRIKE 2 CONNECTING THE WING TO THE HARNESS Connection wing - harness Without twisting the risers, connect them to the har- ness attachment loops using the self-locking carabi- ners. Check for the risers to be properly positioned and untwisted.
-
Page 29: Installation In The Harness
Harness User’s manual | STRIKE 2 INSTALLATION IN THE HARNESS Thread the harness straps through the shoulders. Close the chest strap on the left side by passing the strap Close the chest strap on the right side by passing the... - Page 30 Lightness, comfort, ease of use and small size make the STRIKE 2 the ideal harness for hike and fly and for cross country flying in a light version! In the event of turbulence, the harness can be flown...
-
Page 31: Flight Phases
Harness User’s manual | STRIKE 2 FLIGHT PHASES Pre-Flight control • Check that the harness and the carabiners are not damaged.. • Make sure that the reserve parachute safety cables to ride through the closing tabs keeping the reserve rescue pocket flaps closed. -
Page 32: In Flight
Harness User’s manual | STRIKE 2 FLIGHT PHASES In flight Once up in the air, the STRIKE 2 behaviour is stable and instinctive. Please set the distance between the two carabiners according to aerology and to the wing manufacturer’s recommendations. Speedbar use We recommend a cautious speed-bar use due to the increased risk of major partial or full frontal collapses. -
Page 33: Using The Reserve Parachute
Harness User’s manual | STRIKE 2 USING THE RESERVE PARACHUTE Throwing the reserve parachute We strongly advise you to check frequently the location of the reserve parachute handle location. To do this, we recommend that you lower your right hand following the risers. This movement should be done without looking. By doing so, you will maximize your chances of a rapid extraction if something went wrong and throwing the reserve parachute was called for. -
Page 34: Harness Cleaning And Maintenance
• Buckles and carabiners ( functionality, wear and tear ). The threads and fabric used for the manufacturing of the STRIKE 2 were specifically selected for their quality and resilience levels. Howe- ver, in particular instances such as long term UV exposure, abrasion, contact with damaging chemicals, general wear and tear, the harness will need to be inspected at a professional certified repair facility. -
Page 35: Materials
We have minimized our manufacturing footprint by carefully selecting environmentally friendly materials; most of our components are recyclable. If you estimate that your STRIKE 2 has reached the end of it life span, you can separate plastics from metals and recycle them according to your com- munity rules in effect. -
Page 36: Warranty
WARRANTY SUPAIR takes the greatest care in its products design and manufacturing and hence offers a five (5) year limited warranty from the date of purchase against manufacturing defects or flaws occurring during normal use. Any damage or degradation resulting from incorrect or abusive use, abnormal exposure to aggressive factors, including, but not limited to;... -
Page 37: Shock Absorber
Entretien / Maintenance : 30°C If your BUMPAIR is damaged, have it inspected and repaired at a professional qualified facility or contact us at sav@supair.com The test results and the EU declaration of conformity can be found at: www.supair.com SUPAIR... -
Page 38: In Case Of Incident
Harness User’s manual | STRIKE 2 IN CASE OF AN INCIDENT Call for help after an accident Emergency call numbers EUROPE / INDIA Help needed? USA / CANADA CHINA / JAPAN NEPAL IRAN AUSTRALIA NEW ZEALAND Flashlight SOS : SUPAIR... -
Page 39: Service Book
Harness User’s manual | STRIKE 2 SERVICE BOOK This page will help you keep record of your STRIKE 2 scheduled maintenance. Care Care Purchase date Resale Resale Owner’s name : Date Date Name and stamp of the shop : Workshop’s name/ Buyer’s name Workshop’s name/ Buyer’s name... - Page 40 SUPAIR-VLD Parc Altaïs 34 rue Adrastée 74650 Chavanod, Annecy FRANCE info@supair.com +33(0)4 50 45 75 29 RCS 387956790...
Need help?
Do you have a question about the STRIKE 2 and is the answer not in the manual?
Questions and answers