Page 1
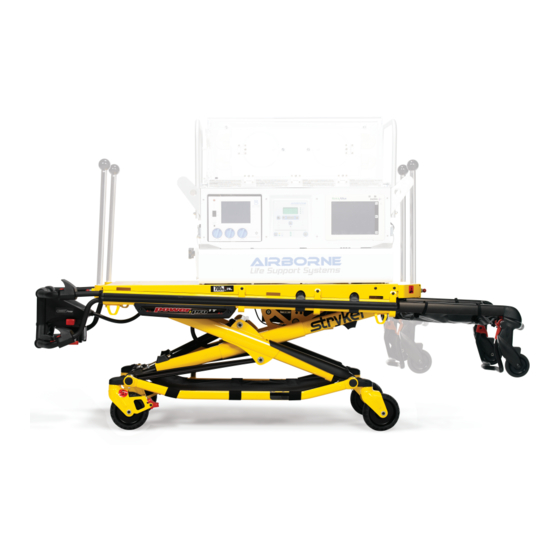
P P o o w w e e r r - - P P R R O O ™ ™ I I T T C C o o t t O O p p e e r r a a t t i i o o n n s s M M a a n n u u a a l l 6516 6516-209-001 Rev D.0 2019/12...
Page 3
Do not transport incubator or product in raised position Transport incubator or product in low position only Catalogue number Lot (batch) code Serial number For US patents see www.stryker.com/patents Manufacturer Date of manufacture Safe working load Medical Equipment Recognized by Underwriters Laboratories LLC With Respect to Electric Shock, Fire, and Mechanical Hazards only in accordance with ANSI/AAMI ES60601-1: 2005 and CAN/CSA-C22.2 No.
Page 4
Alternating current Class II electrical equipment: equipment in which protection against electric shock does not rely on basic insulation only, but in which additional safety precautions such as double insulation or reinforced insulation are provided, there being no provision for protective earthing or reliance upon installation conditions.
Page 5
T T a a b b l l e e o o f f C C o o n n t t e e n n t t s s Symbols ................................1 Warning/Caution/Note Definition ........................3 Summary of safety precautions .......................3 Pinch points ............................6 Introduction ..............................7 Product description ..........................7...
Page 6
Installing the SMRT charger ........................43 Installing the optional mounting bracket ....................43 Installing the charger onto the optional mounting bracket.................44 Powering the charger ...........................45 Disconnecting the charger ........................46 Accessories and parts ..........................47 Cleaning and disinfecting with wipes ......................48 Cleaning ..............................49 Suggested cleaners..........................49 Cleaning the charger ..........................50 Cleaning the battery ..........................50 Preventive maintenance ..........................51...
Page 7
• Always install the cot fastener by qualified personnel only. Improper installation could result in injury to the patient or operator. • Always make sure that all cots meet the installation specifications for the Stryker cot fastener system. • Always position the in-fastener shut-off before you place the cot into service.
Page 8
• Stryker is not responsible for specification changes to the D D r r a a g g e e r r ® (or A A i i r r - - S S h h i i e e l l d d s s ®...
Page 9
• Always avoid excessive water exposure to the S S M M R R T T Pak terminals. • Always refer to the disinfectant’s Material Safety Data Sheet (MSDS) to verify the pH range. Disinfectants with pH levels higher than 10.5 may cause the S S M M R R T T Pak housing material to crack. •...
Page 10
• Do not exceed 1500 psi (130.5 bar) as the maximum water pressure. If you use a hand held wand to wash the product, keep the pressure nozzle at a minimum of 24 in. (61 cm) from the product. • Always use authorized parts to avoid the risk of product damage. •...
Page 11
P P r r o o d d u u c c t t d d e e s s c c r r i i p p t t i i o o n n The Stryker Model 6516 P P o o w w e e r r - - P P R R O O ™ IT cot is a powered incubator transport ambulance cot. The cot consists of a platform, mounted on a wheeled X-frame, that is designed to support and transport a maximum weight of 700 lb (318 kg) in pre-hospital and hospital environments.
Page 12
Up to 91 cm Single adjustable wheel lock/double adjustable Optional wheel lock Hydraulic oil Stryker part number 6500-001-293 Power system Battery 24 VDC NiCd - S S M M R R T T power system Charger 100-240 VAC 1.20 A, 50/60 Hz or 12 VAC 4.16 A - S S M M R R T T power system...
Page 13
The yellow and black color scheme is a proprietary trademark of Stryker Corporation. Stryker hereby declares that this P P o o w w e e r r - - P P R R O O is in compliance with the essential requirements and other relevant provisions of Directive 1999/5/EC.
Page 14
(-20 °C) Relative 1060 hPa 1060 hPa 1060 hPa Atmospheric pressure Specifications are approximate and may vary from unit to unit or as a result of power supply fluctuations. Stryker reserves the right to change specifications without notice. 6516-209-001 Rev D.0...
Page 15
P P r r o o d d u u c c t t i i l l l l u u s s t t r r a a t t i i o o n n - - P P o o w w e e r r - - P P R R O O F F i i g g u u r r e e 2 2 –...
Page 16
Portage, MI 49002 To view your operations or maintenance manual online, see https://techweb.stryker.com/. Have the serial number (A) of your Stryker product available when calling Stryker Customer Service or Technical Support. Include the serial number in all written communication. 6516-209-001 Rev D.0...
Page 17
S S e e r r i i a a l l n n u u m m b b e e r r l l o o c c a a t t i i o o n n - - P P o o w w e e r r - - P P R R O O F F i i g g u u r r e e 4 4 –...
Page 18
Smooth rear edge for product loading • Level floor large enough for the folded product • Stryker cot fastener system • Space to install the vehicle safety hook • In fastener shut-off module installed, if using an antler style cot fastener N N o o t t e e - - Loose items or debris on the vehicle patient compartment floor can interfere with the operation of the vehicle safety hook and product fastener.
Page 19
• Always make sure that all cots meet the installation specifications for the Stryker cot fastener system. N N o o t t e e - - You may need to adjust the rail clamp assembly to compensate for any variation in the cot retaining post position depending on the cot manufacturer and model number.
Page 20
The vehicle safety hook was designed for compatibility and proper operation when loading and unloading the cot from a vehicle that is compliant with Federal Regulation KKK-A-1822. Stryker offers three different types of vehicle safety hooks that are ordered and shipped with your cot. These vehicle safety hook types meet the needs of various emergency vehicle configurations, specifically the length and location of the floor structure support that is located in the rear of the vehicle.
Page 21
6060-036-018 6060-036-017 6092-036-018 F F i i g g u u r r e e 6 6 – – V V e e h h i i c c l l e e s s a a f f e e t t y y h h o o o o k k t t y y p p e e s s V V e e h h i i c c l l e e c c o o n n f f i i g g u u r r a a t t i i o o n n C C A A U U T T I I O O N N •...
Page 22
F F i i g g u u r r e e 7 7 – – D D e e c c k k a a n n d d b b u u m m p p e e r r h h e e i i g g h h t t Deck height (DH) Bumper height Vehicle safety hook...
Page 23
6060-036-018 6060-036-017 6092-036-018 F F i i g g u u r r e e 8 8 – – V V e e h h i i c c l l e e s s a a f f e e t t y y h h o o o o k k p p l l a a c c e e m m e e n n t t Sill Floor structure support P P o o s s i i t t i i o o n n i i n n g g o o f f t t h h e e v v e e h h i i c c l l e e s s a a f f e e t t y y h h o o o o k k , , s s i i d d e e t t o o s s i i d d e e...
Page 24
I I n n s s t t a a l l l l i i n n g g t t h h e e v v e e h h i i c c l l e e s s a a f f e e t t y y h h o o o o k k Before installing the vehicle safety hook, the certified mechanic should plan for the placement of the vehicle safety hook in the rear of the vehicle patient compartment.
Page 25
F F i i g g u u r r e e 9 9 – – S S a a f f e e t t y y b b a a r r s s e e c c u u r r e e d d i i n n t t h h e e v v e e h h i i c c l l e e s s a a f f e e t t y y h h o o o o k k F F i i g g u u r r e e 1 1 0 0 –...
Page 26
O O p p e e r r a a t t i i o o n n S S e e t t t t i i n n g g c c o o t t l l o o a a d d h h e e i i g g h h t t w w i i t t h h j j o o g g f f u u n n c c t t i i o o n n The adjustable cot load height with jog function allows you to preset the height of the load wheels to meet the ambulance deck height up to 36 in.
Page 27
The LED is a solid amber to indicate a battery error. N N o o t t e e • Only use Stryker approved batteries. • If equipped, the powered cot fastener automatically charges the S S M M R R T T Pak battery. Automatic charging occurs when you lock the cot into the powered cot fastener (no cable or connectors required).
Page 28
Always load or unload an occupied cot with a minimum of two trained operators. Two operators must be present when a cot is occupied. Stryker recommends that both operators are at the foot end to reduce the load on each operator. One or two operators can lift from the foot end of the cot.
Page 29
3. Lift each set of wheels over the door sill or obstacle separately. R R a a i i s s i i n n g g o o r r l l o o w w e e r r i i n n g g t t h h e e c c o o t t You can raise or lower an unoccupied cot with one operator.
Page 30
F F i i g g u u r r e e 1 1 3 3 – – C C o o t t c c o o n n t t r r o o l l s s w w i i t t c c h h e e s s R R e e f f e e r r e e n n c c e e N N a a m m e e D D e e s s c c r r i i p p t t i i o o n n...
Page 32
4. Roll the cot to the open door of the vehicle patient compartment. 5. Push the cot forward until the load wheels are on the vehicle patient compartment floor and the cot safety bar passes the vehicle safety hook. 6. Pull the cot back until the cot safety bar connects to the vehicle safety hook for maximum clearance to lift the base. 7.
Page 33
Stryker recommends that both operators are at the foot end to reduce the load on each operator. One or two operators can lift from the foot end of the cot. The higher an operator must lift the cot, the more difficult it may be to hold the weight. The operator must be able to lift the cot high enough for the cot legs to extend when the cot is unloaded.
Page 34
With both operators at the foot end With one operator at the foot end With one operator (when unloading and one operator on the side an unoccupied cot) a. Both operators: Grasp the cot a. Operator 1: Grasp the cot frame a.
Page 35
C C h h a a n n g g i i n n g g l l e e v v e e l l s s R R o o l l l l i i n n g g L L o o a a d d i i n n g g a a n n d d u u n n l l o o a a d d i i n n g g Two operators (O) Two helpers (H)
Page 36
W W A A R R N N I I N N G G • Do not install these incubator adaptors on any other Stryker cot or on any cot from another manufacturer. These incubator adaptors are for use only on the P P o o w w e e r r - - P P R R O O IT cot.
Page 37
W W A A R R N N I I N N G G • Do not install these incubator adaptors on any other Stryker cot or on any cot from another manufacturer. These incubator adaptors are for use only on the P P o o w w e e r r - - P P R R O O IT cot.
Page 38
• Stryker is not responsible for specification changes to the D D r r a a g g e e r r ® (or A A i i r r - - S S h h i i e e l l d d s s ®...
Page 39
W W A A R R N N I I N N G G • Do not install these incubator adaptors on any other Stryker cot or on any cot from another manufacturer. These incubator adaptors are for use only on the P P o o w w e e r r - - P P R R O O IT cot.
Page 40
W W A A R R N N I I N N G G • Do not install the sled receptacle on any other Stryker cot or on any cot from another manufacturer. These sled receptacles are for use only on the P P o o w w e e r r - - P P R R O O IT cot.
Page 41
F F i i g g u u r r e e 2 2 0 0 – – A A i i r r s s l l e e d d i i n n s s t t a a l l l l a a t t i i o o n n S S e e c c u u r r i i n n g g t t h h e e a a i i r r s s l l e e d d t t o o t t h h e e l l i i t t t t e e r r s s u u r r f f a a c c e e Before you secure the airsled to the P P o o w w e e r r - - P P R R O O IT cot, read and understand this manual and the manual that was supplied with the airsled.
Page 42
F F i i g g u u r r e e 2 2 2 2 – – C C o o n n f f i i r r m m t t h h a a t t t t h h e e a a i i r r s s l l e e d d i i s s s s e e c c u u r r e e F F i i g g u u r r e e 2 2 1 1 –...
Page 43
I I n n s s t t a a l l l l i i n n g g t t h h e e o o p p t t i i o o n n a a l l h h e e a a d d e e n n d d s s t t o o r r a a g g e e f f l l a a t t W W A A R R N N I I N N G G - - Do not allow the head end storage flat (if equipped) to interfere with the operation of the retractable head section, safety bar, or vehicle safety hook.
Page 44
R R e e m m o o v v i i n n g g a a S S M M R R T T P P a a k k f f r r o o m m t t h h e e c c o o t t After the S S M M R R T T Pak has been discharged, remove the S S M M R R T T Pak from the P P o o w w e e r r - - P P R R O O cot and replace it with a charged S S M M R R T T Pak.
Page 45
C C h h a a r r g g i i n n g g t t h h e e S S M M R R T T P P a a k k The S S M M R R T T Pak is intended for use with the S S M M R R T T charger only. W W A A R R N N I I N N G G - - Do not insert a cracked or damaged S S M M R R T T Pak into the S S M M R R T T charger.
Page 46
F F i i g g u u r r e e 2 2 6 6 – – C C h h a a r r g g i i n n g g t t h h e e S S M M R R T T P P a a k k C C h h e e c c k k i i n n g g t t h h e e S S M M R R T T P P a a k k p p o o w w e e r r l l e e v v e e l l w w i i t t h h t t h h e e S S M M R R T T c c h h a a r r g g e e r r Use the S S M M R R T T charger LED indicators to check the S S M M R R T T Pak power level.
Page 47
P P o o w w e e r r t t y y p p e e O O p p e e r r a a t t i i o o n n a a l l F F r r e e q q u u e e n n c c y y M M a a x x i i m m u u m m S S t t a a n n d d b b y y c c u u r r r r e e n n t t...
Page 48
F F i i g g u u r r e e 2 2 8 8 – – M M o o u u n n t t i i n n g g b b r r a a c c k k e e t t I I n n s s t t a a l l l l i i n n g g t t h h e e c c h h a a r r g g e e r r o o n n t t o o t t h h e e o o p p t t i i o o n n a a l l m m o o u u n n t t i i n n g g b b r r a a c c k k e e t t To install the S S M M R R T T charger onto the optional mounting bracket (Figure 29): 1.
Page 49
It is a best practice to use a clean, uninterruptible power source. The S S M M R R T T charger continuously illuminates a solid green power LED when it is connected to a power supply. Use only Stryker-approved parts to power the S S M M R R T T charger. 6516-209-001 Rev D.0...
Page 50
F F i i g g u u r r e e 3 3 0 0 – – P P o o w w e e r r i i n n g g t t h h e e c c h h a a r r g g e e r r D D i i s s c c o o n n n n e e c c t t i i n n g g t t h h e e c c h h a a r r g g e e r r C C A A U U T T I I O O N N - - Always grasp and pull the plug, not the cord, when you disconnect the S S M M R R T T charger to avoid the risk of damage to the electrical plug and cord.
Page 51
Storage net, base 6500-160-000 Use only Stryker-approved parts. Other parts may result in increased electromagnetic emissions or decreased electromagnetic immunity of the system. Do not modify parts. Failure to comply may result in injury. N N a a m m e e...
Page 52
For United States only. Confirm availability for your configuration or region. Call Stryker Customer Service: 1-800-327- 0770. Stryker’s preferred wipes (2060-000-001 6'' x 10'' or 2060-000-002 9'' x 12'') include the following active ingredients: • n-Alkyl (60% C14, 30% C16, 5% C12, 5% C18) dimethyl benzyl ammonium chloride - 0.154% •...
Page 53
• Follow the cleaning solution manufacturer’s dilution recommendations exactly. • The preferred method Stryker Medical recommends for power washing the product is with the standard hospital surgical cart washer or hand held wand unit. • Clean the cot once a month.
Page 54
C C l l e e a a n n i i n n g g t t h h e e c c h h a a r r g g e e r r W W A A R R N N I I N N G G •...
Page 55
If you are unsure how to perform these checks, contact your Stryker service technician. If you are in doubt as to what intervals to follow to maintain your product, consult your Stryker service technician.
Page 56
I I t t e e m m I I n n s s p p e e c c t t Head section Safety bar operates. Pull toward the head section to make sure that the safety bar swings and rotates freely and pulls back to the home position Battery S S M M R R T T Pak housing and terminal area for cracks or...
Page 57
I I t t e e m m I I n n s s p p e e c c t t Hydraulic velocity fuse - place a weight of approximately 50 lb (23 kg) on the cot, raise the cot, lift the cot with two operators, pull the manual backup release handle, rapidly set the cot down, and make sure that the cot does not drop Electronic controls...
Page 58
E E M M C C i i n n f f o o r r m m a a t t i i o o n n G G u u i i d d a a n n c c e e a a n n d d m m a a n n u u f f a a c c t t u u r r e e r r ’ ’ s s d d e e c c l l a a r r a a t t i i o o n n - - e e l l e e c c t t r r o o m m a a g g n n e e t t i i c c e e m m i i s s s s i i o o n n s s P P o o w w e e r r - - P P R R O O is intended for use in the electromagnetic environment specified below.
Page 59
R R e e c c o o m m m m e e n n d d e e d d s s e e p p a a r r a a t t i i o o n n s s d d i i s s t t a a n n c c e e s s b b e e t t w w e e e e n n p p o o r r t t a a b b l l e e a a n n d d m m o o b b i i l l e e R R F F c c o o m m m m u u n n i i c c a a t t i i o o n n s s e e q q u u i i p p m m e e n n t t a a n n d d P P o o w w e e r r - - P P R R O O 1 1 5 5 0 0 k k H H z z t t o o 8 8 0 0 M M H H z z 8 8 0 0 M M H H z z t t o o 8 8 0 0 0 0 M M H H z z...
Page 60
G G u u i i d d a a n n c c e e a a n n d d m m a a n n u u f f a a c c t t u u r r e e r r ’ ’ s s d d e e c c l l a a r r a a t t i i o o n n - - e e l l e e c c t t r r o o m m a a g g n n e e t t i i c c i i m m m m u u n n i i t t y y <5% U (95% dip in U ) for...
Page 61
G G u u i i d d a a n n c c e e a a n n d d m m a a n n u u f f a a c c t t u u r r e e r r ’ ’ s s d d e e c c l l a a r r a a t t i i o o n n - - e e l l e e c c t t r r o o m m a a g g n n e e t t i i c c i i m m m m u u n n i i t t y y Portable and mobile RF communications equipment should be used no closer to...
Page 69
6 6 5 5 0 0 0 0 - - 1 1 0 0 1 1 - - 0 0 1 1 0 0 Rev J 6500-101-010 The Rechargeable Battery Recycling Corporation (RBRC) is a non-profit, public service organization that promotes the recycling of portable rechargeable batteries. Batteries must be delivered to a battery collection site.
Page 70
Stryker Medical 3800 E. Centre Avenue Portage, MI 49002 6516-209-001 Rev D.0 2019/12 WCR: AA.5...
Need help?
Do you have a question about the Power-PRO IT Cot and is the answer not in the manual?
Questions and answers