Advertisement
Quick Links
P P o o w w e e r r - - P P R R O O ™ ™ 2 2 C C o o t t
O O p p e e r r a a t t i i o o n n s s / / M M a a i i n n t t e e n n a a n n c c e e M M a a n n u u a a l l
650700000000
650700080301
650700450301
650705550001
650705550002
650705550003
6507-009-001 Rev AB.3
2021-08
EN
Advertisement

Related Manuals for Stryker Power-PRO 2


Summary of Contents for Stryker Power-PRO 2
- Page 1 P P o o w w e e r r - - P P R R O O ™ ™ 2 2 C C o o t t O O p p e e r r a a t t i i o o n n s s / / M M a a i i n n t t e e n n a a n n c c e e M M a a n n u u a a l l 650700000000 650700080301 650700450301...
- Page 3 General warning Caution Warning; crushing of hands Warning; non-ionizing radiation No pushing China RoHS without declarable substances China RoHS with declarable substances Catalogue number Lot (batch) code Serial number For US Patents see www.stryker.com/patents Manufacturer Date of manufacture 6507-009-001 Rev AB.3...
- Page 4 Importer Mass of equipment with safe working load Safe working load Type BF applied part Medical Equipment Classified by Underwriters Laboratories Inc. With Respect to Electric Shock, Fire, and Mechanical Hazards Only in Accordance with ANSI/AAMI ES60601-1:2012 and CAN/ CSA-C22.2 No. 60601-1:14. Direct current Alternating current Class II electrical equipment: equipment in which protection against electric shock does not rely...
- Page 5 Stacking limit by number Battery terminal identification (D - data (SMBus data line), C-clock (SMBus clock line), T- T-Pin or temperature, - negative terminal, + positive terminal) Battery capacity and duration 2800 mAh/71.68 Wh Cot duty cycle: 16.7% <60s >300s U.S.A.
- Page 7 European REACH - Alvarium ..........................13 China RoHS - Alvarium .............................14 Product illustration - Power-PRO 2 .........................15 Product illustration - Alvarium..........................16 Contact information ...............................16 Serial number location - Power-PRO 2 ........................17 Serial number location - Alvarium ...........................17 Setup ..................................18 Installation ................................19 Installing the cot fastener ............................19...
- Page 8 Adjusting restraint straps ............................41 Adding a restraint strap extension ..........................42 Securing the child restraint with the X-restraint package...................42 Hanging equipment from the equipment hook ......................43 Positioning the two-stage IV pole option........................44 Positioning the three-stage IV pole option .......................45 Attaching an oxygen bottle to the oxygen bottle holder option ...................46 Attaching the base storage net option ........................46 Attaching the backrest storage pouch option ......................47 Attaching the head end storage flat option.......................47...
- Page 9 • Always install the cot fastener by qualified personnel only. Improper installation could result in injury to the patient or operator. • Always make sure that all cots meet the installation specifications for the Stryker cot fastener system. • Always adjust the rail clamp assembly to match the cot retaining post position for the cot manufacturer and model number.
- Page 10 • Always center the patient and equipment or accessories. Lock adjustable features and intended lift points before you transport a patient on the product. • Always inspect the product for damage if involved in an ambulance accident. Contact Stryker Customer Service or Technical Support for more information.
- Page 11 • Always use any appropriate personal protective equipment while power washing to avoid inhaling contagion. Power washing equipment may aerate contamination. • Always wear rubber gloves, in addition to personal protective equipment, when cleaning the battery to reduce the risk of injury.
- Page 12 • Do not lubricate the bearings in the X-frame as it will degrade the performance of the cot and may void its warranty. • Changes or modifications to the A A l l v v a a r r i i u u m m Battery Management System, not expressly approved by Stryker, could void the user's authority to operate the equipment.
- Page 13 P P r r o o d d u u c c t t d d e e s s c c r r i i p p t t i i o o n n The Stryker P P o o w w e e r r - - P P R R O O 2 is a powered ambulance cot that consists of a platform, including a mattress, mounted on a wheeled, retractable X-frame that is designed to support and transport a maximum weight of 700 lb (318 kg).
- Page 14 Cot and fastener system: support and transport patients C C o o n n t t r r a a i i n n d d i i c c a a t t i i o o n n s s None known.
- Page 15 Cot is weighed with one battery and without mattress and restraints. Stryker reserves the right to change specifications without notice. The yellow and black color scheme is a proprietary trademark of Stryker Corporation. Labels may be unreadable from a viewing distance greater than 12 inches.
- Page 16 S S u u b b s s t t a a n n c c e e o o f f v v e e r r y y h h i i g g h h c c o o n n c c e e r r n n D D e e s s c c r r i i p p t t i i o o n n N N u u m m b b e e r r ( ( S S V V H H C C ) ) c c h h e e m m i i c c a a l l n n a a m m e e...
- Page 17 H H a a z z a a r r d d o o u u s s s s u u b b s s t t a a n n c c e e s s L L e e a a d d ( ( P P b b ) ) M M e e r r c c u u r r y y C C a a d d m m i i u u m m H H e e x x a a v v a a l l e e n n t t...
- Page 18 AES and TKIP Encryption (TKIP is not supported with WPA2) WPA Personal/Enterprise and WPA2 Personal/Enterprise Authentication 802.1X PEAP-MSCHAP - v2 Cannot accept or upload certificates Client certificates 802.11b/g: 1-54 Mbps 802.11a: 6-54 Mbps Supported data rates 802.11n: MCS0-7 802.11ac: MCS0-9 (compatible) SHA-1 and SHA-2 server side certificate recognition for Hash function compatibility PEAP-MSCHAP - v2...
- Page 19 Specifications are approximate and may vary from product to product or as a result of power supply fluctuations. Hereby, Stryker declares that the radio equipment type short range device is in compliance with Directive 2014/53/EU. The full text of the EU declaration of conformity is available at the following internet address: http://techweb.stryker.com/EMS/ EU%20Declaration%20of%20Conformity/index.html.
- Page 20 C C h h i i n n a a R R o o H H S S - - A A l l v v a a r r i i u u m m H H a a z z a a r r d d o o u u s s s s u u b b s s t t a a n n c c e e s s L L e e a a d d ( ( P P b b ) ) M M e e r r c c u u r r y y C C a a d d m m i i u u m m...
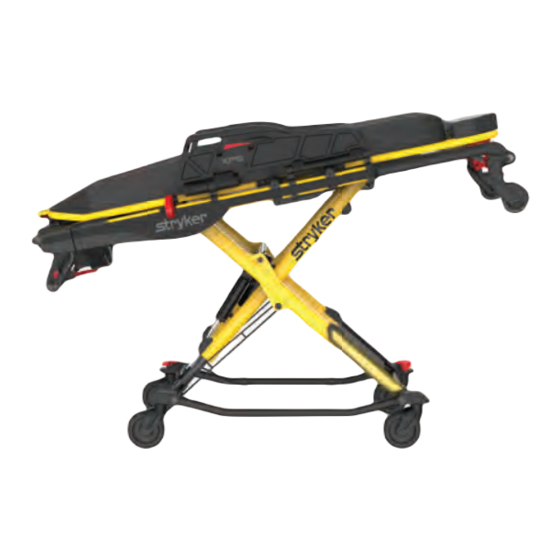
- Page 21 P P r r o o d d u u c c t t i i l l l l u u s s t t r r a a t t i i o o n n - - P P o o w w e e r r - - P P R R O O 2 2 F F i i g g u u r r e e 1 1 –...
- Page 22 Competent authority of the European Member State where the user and/or patient is established. To view your operations or maintenance manual online, see https://techweb.stryker.com/. Have the serial number (A) of your Stryker product available when calling Stryker Customer Service or Technical Support. Include the serial number in all written communication.
- Page 23 S S e e r r i i a a l l n n u u m m b b e e r r l l o o c c a a t t i i o o n n - - P P o o w w e e r r - - P P R R O O 2 2 See below for the cot (A) serial number location.
- Page 24 Smooth rear edge for loading • Level floor large enough for the folded product • Stryker cot fastener system • Space to install the vehicle safety hook • In fastener shut-off module installed, if using an antler style cot fastener N N o o t t e e - - Loose items or debris on the vehicle patient compartment floor can interfere with the operation of the vehicle safety hook and product fastener.
- Page 25 • Always install the cot fastener by qualified personnel only. Improper installation could result in injury to the patient or operator. • Always make sure that all cots meet the installation specifications for the Stryker cot fastener system. • Always adjust the rail clamp assembly to match the cot retaining post position for the cot manufacturer and model number.
- Page 26 The vehicle safety hook was designed for compatibility and proper operation when loading and unloading the cot from a vehicle that is compliant with Federal Regulation KKK-A-1822. Stryker offers three different types of vehicle safety hooks that are ordered and shipped with your cot. These vehicle safety hook types meet the needs of various emergency vehicle configurations, specifically the length and location of the floor structure support that is located in the rear of the vehicle.
- Page 27 6060-036-018 6060-036-017 6092-036-018 F F i i g g u u r r e e 4 4 – – V V e e h h i i c c l l e e s s a a f f e e t t y y h h o o o o k k t t y y p p e e s s V V e e h h i i c c l l e e c c o o n n f f i i g g u u r r a a t t i i o o n n W W A A R R N N I I N N G G •...
- Page 28 F F i i g g u u r r e e 5 5 – – D D e e c c k k a a n n d d b b u u m m p p e e r r h h e e i i g g h h t t Deck height (DH) Bumper height Vehicle safety hook...
- Page 29 6060-036-018 6060-036-017 6092-036-018 F F i i g g u u r r e e 6 6 – – V V e e h h i i c c l l e e s s a a f f e e t t y y h h o o o o k k p p l l a a c c e e m m e e n n t t Sill Floor structure support P P o o s s i i t t i i o o n n i i n n g g o o f f t t h h e e v v e e h h i i c c l l e e s s a a f f e e t t y y h h o o o o k k , , s s i i d d e e t t o o s s i i d d e e...
- Page 30 I I n n s s t t a a l l l l i i n n g g t t h h e e v v e e h h i i c c l l e e s s a a f f e e t t y y h h o o o o k k Before vehicle safety hook installation, the certified mechanic should plan for the placement of the vehicle safety hook in the rear of the vehicle patient compartment.
- Page 31 F F i i g g u u r r e e 7 7 – – S S a a f f e e t t y y b b a a r r s s e e c c u u r r e e d d i i n n t t h h e e v v e e h h i i c c l l e e s s a a f f e e t t y y h h o o o o k k F F i i g g u u r r e e 8 8 –...
- Page 32 • Do not attempt to operate the cot when loaded into a cot fastener. • Always inspect the product for damage if involved in an ambulance accident. Contact Stryker Customer Service or Technical Support for more information.
- Page 33 See Troubleshooting in the Maintenance Manual N N o o t t e e • Use only Stryker approved batteries. • Lock the cot into the powered cot fastener to automatically charge the battery. There are no cables or connectors required to charge.
- Page 34 • Do not leave a patient unattended. Hold the product while a patient is on the product. • Do not apply a wheel lock when a patient is on the product or when you move the product to avoid the risk of a cot tip or injury.
- Page 35 R R e e f f e e r r e e n n c c e e N N a a m m e e D D e e s s c c r r i i p p t t i i o o n n Release or transport height Press to unlock the cot (this function operates only when within range of a...
- Page 36 To release a wheel lock or S S t t e e e e r r - - L L o o c c k k (C), press down on the top of the pedal with your foot or lift up on the pedal with your toe.
- Page 37 Stryker recommends that both operators are at the foot end to reduce the load on each operator. One or two operators can lift from the foot end of the cot. The operator must be able to lift the cot high enough for the cot legs to extend when the cot is unloaded.
- Page 38 N N o o t t e e • You can load an unoccupied cot into a vehicle with one operator using the powered method. • For information about using your cot with P P o o w w e e r r - - L L O O A A D D , see the P P o o w w e e r r - - L L O O A A D D Operations Manual. To load a cot into a vehicle with an antler style cot fastener: 1.
- Page 39 U U n n l l o o a a d d i i n n g g t t h h e e c c o o t t f f r r o o m m a a v v e e h h i i c c l l e e Always unload an occupied cot with a minimum of two trained operators.
- Page 40 With both operators at the foot end With one operator at the foot end With one operator (when unloading and one operator on the side an unoccupied cot) a. Both operators: Grasp the cot a. Operator 1: Grasp the cot frame a.
- Page 41 C C h h a a n n g g i i n n g g l l e e v v e e l l s s R R o o l l l l i i n n g g L L o o a a d d i i n n g g a a n n d d u u n n l l o o a a d d i i n n g g Two operators (O) Two helpers (H)
- Page 42 • Do not use the siderails as a push/pull device or to steer the product. Siderails (XPS option) attach to the cot and are always available for your use. The siderails (XPS option) adjust according to patient size and lock into seven positions. The siderails also adjust to fit through standard doorways or elevators. To raise the siderails, lift up on the siderail until locked into the desired position.
- Page 43 F F i i g g u u r r e e 1 1 7 7 – – E E x x t t e e n n d d e e d d F F i i g g u u r r e e 1 1 8 8 – – M M i i d d F F i i g g u u r r e e 1 1 9 9 –...
- Page 44 F F i i g g u u r r e e 2 2 0 0 – – G G a a t t c c h h S S e e c c u u r r i i n n g g t t h h e e p p a a t t i i e e n n t t w w i i t t h h t t h h e e r r e e s s t t r r a a i i n n t t s s t t r r a a p p s s Secure restraint straps to the cot in the required attachment locations: shoulders, waist, thighs, and ankles.
- Page 45 F F i i g g u u r r e e 2 2 1 1 – – R R e e s s t t r r a a i i n n t t s s t t r r a a p p a a t t t t a a c c h h m m e e n n t t l l o o c c a a t t i i o o n n s s A A t t t t a a c c h h i i n n g g t t h h e e s s h h o o u u l l d d e e r r r r e e s s t t r r a a i i n n t t s s To attach the X-restraint shoulder restraints (Figure 22): 1.
- Page 46 F F i i g g u u r r e e 2 2 2 2 – – A A t t t t a a c c h h i i n n g g t t h h e e s s h h o o u u l l d d r r e e s s t t r r a a i i n n t t s s F F i i g g u u r r e e 2 2 3 3 –...
- Page 47 F F i i g g u u r r e e 2 2 5 5 – – T T h h i i g g h h r r e e s s t t r r a a i i n n t t l l o o c c a a t t i i o o n n A A t t t t a a c c h h i i n n g g t t h h e e a a n n k k l l e e r r e e s s t t r r a a i i n n t t s s To attach the X-restraint ankle restraints: 1.
- Page 48 A A d d d d i i n n g g a a r r e e s s t t r r a a i i n n t t s s t t r r a a p p e e x x t t e e n n s s i i o o n n Add a restraint strap extension (6082-160-050) for extra length when you buckle the lap belt around larger patients.
- Page 49 F F i i g g u u r r e e 3 3 0 0 – – A A t t t t a a c c h h t t o o t t h h e e f f o o o o t t e e n n d d e e x x t t e e n n s s i i o o n n t t u u b b e e 10.
- Page 50 F F i i g g u u r r e e 3 3 3 3 – – E E q q u u i i p p m m e e n n t t h h o o o o k k P P o o s s i i t t i i o o n n i i n n g g t t h h e e t t w w o o - - s s t t a a g g e e I I V V p p o o l l e e o o p p t t i i o o n n C C A A U U T T I I O O N N - - Do not load the IV pole above the safe working load of 25 lb (11.3 kg).
- Page 51 F F i i g g u u r r e e 3 3 4 4 – – T T w w o o - - s s t t a a g g e e I I V V p p o o l l e e P P o o s s i i t t i i o o n n i i n n g g t t h h e e t t h h r r e e e e - - s s t t a a g g e e I I V V p p o o l l e e o o p p t t i i o o n n C C A A U U T T I I O O N N - - Do not load the IV pole above the safe working load of 25 lb (11.3 kg).
- Page 52 F F i i g g u u r r e e 3 3 5 5 – – I I V V p p o o l l e e r r a a i i s s e e d d p p o o s s i i t t i i o o n n A A t t t t a a c c h h i i n n g g a a n n o o x x y y g g e e n n b b o o t t t t l l e e t t o o t t h h e e o o x x y y g g e e n n b b o o t t t t l l e e h h o o l l d d e e r r o o p p t t i i o o n n C C A A U U T T I I O O N N •...
- Page 53 A A t t t t a a c c h h i i n n g g t t h h e e b b a a c c k k r r e e s s t t s s t t o o r r a a g g e e p p o o u u c c h h o o p p t t i i o o n n C C A A U U T T I I O O N N •...
- Page 54 • Gatch bolster mattress (6506-003-130) - use with the expandable patient surface (XPS) option To attach the mattress to the cot: 1. Align the V V e e l l c c r r o o ® on the back of the mattress with the V V e e l l c c r r o o ® on the cot litter. 2.
- Page 55 F F i i g g u u r r e e 3 3 7 7 – – B B a a t t t t e e r r y y r r e e l l e e a a s s e e b b u u t t t t o o n n S S t t o o r r i i n n g g t t h h e e b b a a t t t t e e r r y y For the longevity, performance, and safety of this equipment, use the original packaging materials when you store or transport this equipment.
- Page 56 F F i i g g u u r r e e 3 3 8 8 – – C C h h a a r r g g i i n n g g t t h h e e b b a a t t t t e e r r y y E E l l e e c c t t r r i i c c a a l l p p o o w w e e r r r r e e q q u u i i r r e e m m e e n n t t s s For reliable and effective operation, reference the following electrical power requirements when you configure the electrical power source for the charger.
- Page 57 F F i i g g u u r r e e 3 3 9 9 – – M M o o u u n n t t i i n n g g P P l l a a t t e e b.
- Page 58 3. Insert the power cord into the exposed charger port. 4. Insert the other end of the charger power cord into a clean, uninterruptible power source. N N o o t t e e - - Use only Stryker approved parts to power the charger. 6507-009-001 Rev AB.3...
- Page 59 D D i i s s c c o o n n n n e e c c t t i i n n g g t t h h e e c c h h a a r r g g e e r r C C A A U U T T I I O O N N - - Always grasp and pull the plug, not the cord, when you disconnect the charger to avoid the risk of damage to the electrical plug and cord.
- Page 60 Wheel lock option, four 650709990010 Use only Stryker-approved parts. Other parts may result in increased electromagnetic emissions or decreased electromagnetic immunity of the system. Do not modify parts. Failure to comply may result in injury. N N a a m m e e...
- Page 61 N N a a m m e e N N u u m m b b e e r r Power cord, Argentina 650700450212 Power cord, Australia 650700450105 Power cord, Brazil 650700450109 Power cord, China 650700450108 Power cord, Europe 650700450103 Power cord, Israel 650700450210 Power cord, Japan...
- Page 62 For United States only. Confirm availability for your configuration or region. Call Stryker Customer Service: 1-800-327- 0770. Stryker’s preferred wipes (2060-000-001 6'' x 10'' or 2060-000-002 9'' x 12'') include the following active ingredients: • n-Alkyl (60% C14, 30% C16, 5% C12, 5% C18) dimethyl benzyl ammonium chloride - 0.154% •...
- Page 63 1. Remove the mattress and battery from the product. 2. Follow the disinfectant solution manufacturer’s dilution recommendations exactly. 3. Stryker recommends the standard hospital cart washer for power washing. 4. Allow the product to air dry. 5. Check functionality before you return the product to service.
- Page 64 D D i i s s i i n n f f e e c c t t i i n n g g t t h h e e p p r r o o d d u u c c t t In general, when used in concentrations recommended by the manufacturer, either phenolic type or quaternary (excluding V V i i r r e e x x ®...
- Page 65 C C l l e e a a n n i i n n g g t t h h e e c c h h a a r r g g e e r r W W A A R R N N I I N N G G •...
- Page 66 If you are unsure how to perform these checks, contact your Stryker service technician. If you are in doubt as to what intervals to follow to maintain your product, consult your Stryker service technician.
- Page 67 I I t t e e m m I I n n s s p p e e c c t t Battery Housing and terminal area for cracks or damage before first and every use Charger For cuts in the cord, bent pins or contacts, or cracks in the housing before first and every use E E v v e e r r y y t t h h r r e e e e m m o o n n t t h h s s o o r r s s i i x x h h o o u u r r s s Inspect these items every three months or six hours, whichever comes first.
- Page 68 E E v v e e r r y y s s i i x x m m o o n n t t h h s s o o r r 1 1 2 2 h h o o u u r r s s Inspect these items every six months or 12 hours, whichever comes first.
- Page 69 I I t t e e m m I I n n s s p p e e c c t t Manual back-up release handle Returns to the stowed position Litter All welds are intact, not cracked, or broken Warning labels present and legible Base All welds are intact, not cracked, or broken...
- Page 70 W W i i r r e e l l e e s s s s n n o o t t i i f f i i c c a a t t i i o o n n s s For product equipped with optional wireless communication technology, these statements apply to the countries as indicated: C C o o u u n n t t r r y y...
- Page 71 E E M M C C i i n n f f o o r r m m a a t t i i o o n n W W A A R R N N I I N N G G •...
- Page 72 G G u u i i d d a a n n c c e e a a n n d d m m a a n n u u f f a a c c t t u u r r e e r r ’ ’ s s d d e e c c l l a a r r a a t t i i o o n n - - e e l l e e c c t t r r o o m m a a g g n n e e t t i i c c i i m m m m u u n n i i t t y y Portable and mobile RF communications equipment should follow the guidance...
- Page 73 R R e e c c o o m m m m e e n n d d e e d d s s e e p p a a r r a a t t i i o o n n d d i i s s t t a a n n c c e e s s b b e e t t w w e e e e n n p p o o r r t t a a b b l l e e a a n n d d m m o o b b i i l l e e R R F F c c o o m m m m u u n n i i c c a a t t i i o o n n s s e e q q u u i i p p m m e e n n t t a a n n d d P P o o w w e e r r - - P P R R O O 2 2 M M i i n n i i m m u u m m s s e e p p a a r r a a t t i i o o n n M M a a x x i i m m u u m m p p o o w w e e r r...
- Page 74 C C A A U U T T I I O O N N - - Changes or modifications to the A A l l v v a a r r i i u u m m Battery Management System,...
- Page 76 Stryker Medical 3800 E. Centre Avenue Portage, MI 49002 6507-009-001 Rev AB.3 2021-08 WCR: AD.16...
Need help?
Do you have a question about the Power-PRO 2 and is the answer not in the manual?
Questions and answers