Table of Contents
Advertisement
Quick Links
WIRELESS IR
LABEL PRINTER
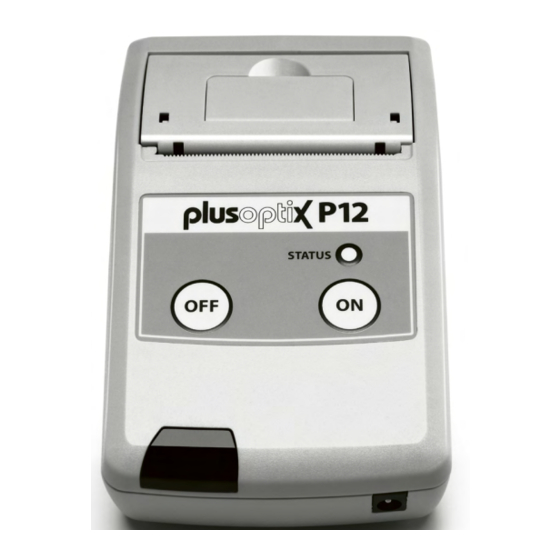
PLUSOPTIX P12
User Manual
Compatible with:
Binocular Autorefractor
plusoptiX A12C
plusoptiX A12R
plusoptiX A16
Vision Screener
plusoptiX S12C
plusoptiX S12R
plusoptiX S16
V I S I T : P L U S O P T I X . C O M
APPLICATION
The "plusoptiX P12" is a wireless, battery-operated thermal
printer with infrared (IR) interface.
PAPER
COMPARTMENT
COVER
OFF BUTTON
IR RECEIVER
After switching on, the status lamp flashes
green and the printer is ready for operation.
If it does not flash, the rechargeable batteries
need charging (see sections "INSERTING THE
BATTERIES" and "CHARGING THE BATTERIES").
If the status lamp flashes red, the paper
compartment is not properly closed or a new
roll of paper has to be inserted.
If the blue control lamp in the infrared receiver
is illuminated, data is being received by the
Plusoptix device.
If the red control lamp is illuminated, the
rechargeable batteries are charging properly.
ITEMS INCLUDED
The "plusoptiX P12" comes with four rechargeable Nickel Metal
Hydride (NiMH/AA HR6) batteries and a roll of self-adhesive
labels (72 labels per roll). The labels can be ordered at your
authorized Plusoptix dealer or via the contact form "Reordering
labels" on plusoptix.com.
Attention: A power supply is NOT included. To
charge the rechargeable batteries, only use the
power supply GSM36P12-P1J supplied with your
Plusoptix device.
INSERTING THE BATTERIES
PAPER
COMPARTMENT
UNLOCKING LEVER
STATUS LED
ON BUTTON
12V DC INPUT
Remove the battery compartment cover using a small coin.
Please insert the batteries as instructed. If one or more are
inserted incorrectly, the printer will not switch on.
Close the battery compartment cover.
CHARGING THE BATTERIES
Connect the medical power supply with the power cable to
the power outlet and look for the green light. Now connect
the medical power supply to the 12 V DC input of the printer.
The inserted batteries are now charged. During the charging
process, the red control lamp in the infrared receiver is on.
The maximum charging time of the supplied batteries is
4.5 hours.
C A L L : + 4 9 - 9 1 1 - 5 9 8 3 9 9 - 1 0
Attention: If you insert batteries other than those
supplied, you should only use rechargeable Nickel
Metal Hydride NiMH/AA HR6 batteries with a capacity
of 1,900 - 2,100 mAh and a quick-charge rate of a
minimum of 1 A. These batteries can be ordered
at your authorized Plusoptix dealer.
TYPE LABEL
BATTERY
COMPARTMENT
Attention: A power supply is NOT included.
To charge the rechargeable batteries, only use
the power supply GSM36P12-P1J supplied with
your Plusoptix device.
Advertisement
Table of Contents

Related Manuals for PLUSOPTIX P12


Summary of Contents for PLUSOPTIX P12
- Page 1 GSM36P12-P1J supplied with Compatible with: your Plusoptix device. The “plusoptiX P12” comes with four rechargeable Nickel Metal Hydride (NiMH/AA HR6) batteries and a roll of self-adhesive Connect the medical power supply with the power cable to Binocular Autorefractor labels (72 labels per roll).
- Page 2 Please note, once you return 159.6 x 89.6 x 45.6 mm to the home screen with the “plusoptiX 12R”, the label Dimensions (6.28 x 3.53 x 1.8 in) can no longer be printed. In the “plusoptiX 12C” and Dimensions “plusoptiX 16”, the label can be printed again after...
Need help?
Do you have a question about the P12 and is the answer not in the manual?
Questions and answers