Interacoustics Sera Quick Manual
Cart assembly
Hide thumbs
Also See for Sera:
- Instructions for use manual (85 pages) ,
- Additional information (50 pages) ,
- Quick manual (2 pages)
Advertisement
Quick Guide
TM
Sera
Cart Assembly
About this quick guide
This quick guide provides instructions about how to place and attach the Sera
Follow the cart manufacturer's instructions to assemble the cart prior to installing the Sera
Installing the cradle
1. Set the cradle on the cart with the front under the fall prevention plate.
Pass the cradle power supply cable through the pass-through hole and
2.
connect it to the port on the back of the cradle.
Attach the stabilizer plate over the cradle's metal bar and fasten with screws.
3.
4.
Plug the power supply into a power strip
cable clips and tie wraps to create a neat appearance and prevent rolling
over the cords during transport.
Installing the cables
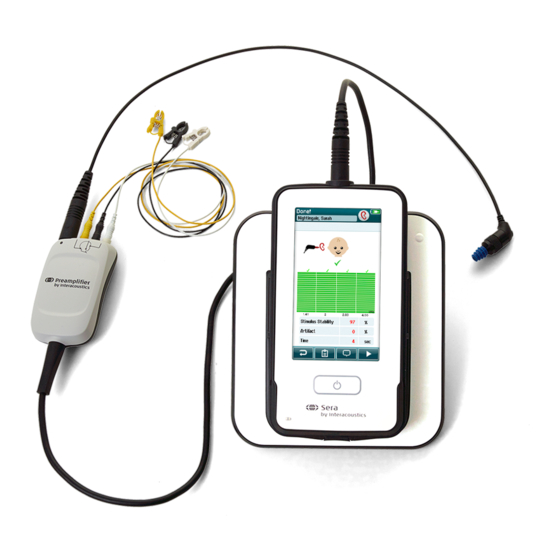
1. For storage/transport, place the preamplifier, electrode cables and
transducers as shown.
2. For storage/transport, place the probe as shown.
3. For storage/transport, set the plug of power strip into the edge pocket as
shown securing any hanging cables in attached bin to prevent rolling over
the cord.
1
The power strip is not included with the cart. The customer must supply an appropriate power strip that meets local
standards and has at least 2 outlets that can accommodate the plugs of the printer and cradle
D-0122934-A – 2019/02
1
securing the cables with the post
TM
and accessories on the cart.
TM
and accessories.
.
Page 1 of 2
Advertisement
Table of Contents

Related Manuals for Interacoustics Sera


Summary of Contents for Interacoustics Sera
- Page 1 About this quick guide This quick guide provides instructions about how to place and attach the Sera and accessories on the cart. Follow the cart manufacturer’s instructions to assemble the cart prior to installing the Sera and accessories. Installing the cradle 1.
- Page 2 Installing the printer 1. Attach custom plate with the pictured 5/16-18 screws to the printer. 2. Insert the printer with the custom plate attached into the recess and fasten with the knob. 3. Pass the printer power supply cable through the pass-through hole behind the printer and connect it to the charger port on the right side of the printer.
Need help?
Do you have a question about the Sera and is the answer not in the manual?
Questions and answers