Table of Contents
Advertisement
Quick Links
Advertisement
Table of Contents

Related Manuals for turck TBEN-LF Series


Summary of Contents for turck TBEN-LF Series
- Page 1 TBEN-LF EtherNet/IP Configuration Guide 0719A...
- Page 2 — This page intentionally left blank —...
-
Page 3: Table Of Contents
2.3.3 PGM mode (500) 2.3.4 PGM-DHCP mode (600) 2.3.5 Factory Reset mode (900) 2.3.6 Restore IP Address (000) TURCK Service Tool (TST) 2.4.1 Search (F5) 2.4.2 DHCP Server (F6) TBEN-LF Quick View Installation instruction and pinout 3.1.1 Dimensions and connector assignment 3.1.2... -
Page 4: General Information
1 General Information 1.1 About these instructions The following configuration guide describes the setup, functions, and use of the TBEN-LF stations. It helps you to plan, design, and implement the system for its intended purpose. Note*: Please read this manual carefully before using the system. This will prevent the risk of personal injury or damage to property or equipment. -
Page 5: Contents
1.5 Technical support For additional support, email inquiries to appsupport@turck.com, or call Application Support at 763-553-7300, Monday-Friday 8AM-5PM CST. -
Page 6: Getting Started
Configuration options with Rockwell and Omron PLCs NOTE The device data sheet and technical information is available for download at www.turck.us 2.2 Factory default IP address The TBEN-LF default rotary switches are set at 000 with default IP address of: ◼... -
Page 7: Static Rotary Mode
When rotary switches are set to 500 while device is powered, the current IP address, Netmask and Gateway addresses are saved into the EEPROM. The IP address is programmable and may be changes using TURCK Service Tool. The setup procedure – from any switch position set switches to 500 and then cycle the power. -
Page 8: Restore Ip Address (000)
Set switches to either static position or 300/400/500/600 mode ➢ Cycle the power. 2.4 TURCK Service Tool (TST) The TURCK Service Tool can be downloaded from the TURCK Web site: ➢ Enter “TURCK Service Tool” in the search field ➢... -
Page 9: Search (F5)
It scans for existing devices (F5). All devices are found by using DCP (PROFINET Standard) and IBTP (TURCK Service Protocol) protocols. The IBTP protocol provides extended information such as FW version and operating mode improved scanning are read out of TURCK devices and displayed. - Page 10 Figure 2.6 – Initialize DHCP server ➢ Highlight the device with 0.0.0.0 IP address Figure 2.7 – Device DHCP client active view ➢ Click Change (F2); A “Change device configuration” pop-up page appears ➢ Assign IP address and click at Set in device button...
- Page 11 Figure 2.8 – Set IP Configuration ➢ Click at Stop DHCP (F6) button Figure 2.9 – Stop DHCP server...
-
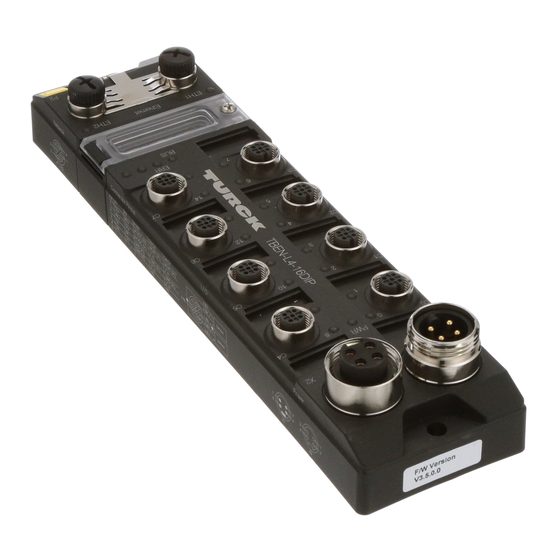
Page 12: Tben-Lf Quick View
3 TBEN-LF Quick View 3.1 Installation instruction and pinout The summary of the device installation guidance, connector’s assignment, power distribution and grounding requirements are as follows. 3.1.1 Dimensions and connector assignment Figure 3.1 – Connector assignment 3.1.2 Ethernet P1 and P2 connectors pin assignment Figure 3.2 –... -
Page 13: Discrete Io Connector Pin Assignment
3.1.3 Discrete IO connector pin assignment ➢ Discrete inputs Connect digital sensors to the device according to the pin assignment. Figure 3.3 – Discrete input wiring diagram ➢ Discrete outputs Connect digital actuators to the device according to the pin assignment. Figure 3.4 –... -
Page 14: Power Connector Pin Assignment And Distribution
➢ Discrete combined IO Connect digital combined IO to the device according to the pin assignment Figure 3.5 – Discrete combined IO wiring diagram 3.1.4 Power connector pin assignment and distribution ➢ Connect power to the device according to the pin assignment Figure 3.6 –... -
Page 15: Leds
3.1.5 LEDs Figure 3.8 – LED assignment Color Status Meaning Remedy V1 missing or < 18 VDC Check V1 green V1 and V2 OK blinking V2 missing or < 18 VDC Check V2 Link established, 100Mbps green blinking Ethernet traffic, 100Mbps ETHx Link established, 10Mbps yellow... - Page 16 TBEN-LF-16DIP LED Status I/O Color Status Meaning Remedy Input active green LED 0…15 Input off red blinking Overcurrent at input Check short condition TBEN-LF-16DOP LED Status I/O Color Status Meaning Remedy Output active green LED 0…15 Output off red blinking Overcurrent at output Check short condition TBEN-LF-16DXP LED Status I/O...
-
Page 17: Io Data Maps
3.2 IO data maps ◼ TBEN-LF-16DIP ◼ TBEN-LF-16DOP ◼ TBEN-LF-8DIP-8DOP ◼ TBEN-LF-16DXP... - Page 18 IO Map key: Device status word Meaning DIAG Module Diagnostics Available Undervoltage Field Supply V2 <18V Undervoltage Field Supply V1 <18V Modulebus Communication Lost Modulebus Configuration Error ETH1 Ethernet Port 1 Errors ETH2 Ethernet Port 2 Errors Force Mode Enabled Device scheduled diagnostics Internal slot 0 Diagnostics active...
-
Page 19: Generic Device Configuration
3.3 Generic device configuration The TBEN-LF is configured with the Rockwell PLCs using “ETHERNET MODULE – Generic Ethernet Module” profile: TBEN-LF configuration requirements: ◼ Catalog Number: Generic Ethernet Module Data – INT ◼ Comm.Format: ◼ Select “Connection Parameters” listed for specific device as follows: Figure 11: TBEN-LF connection summary Figure 12: New Module page... -
Page 20: Tben-Lf-16Dip
3.3.1 TBEN-LF-16DIP Figure 13: TBEN-LF-16DIP configuration page 3.3.2 TBEN-LF-16DOP Figure 14: TBEN-LF-16DOP configuration page... -
Page 21: Tben-Lf-16Dxp
3.3.3 TBEN-LF-16DXP Figure 15: TBEN-LF-16DXP configuration page 3.3.4 TBEN-LF-8DIP-8DOP Figure 16: TBEN-LF-8DIP-8DOP general page... -
Page 22: Ethernet/Ip Class Objects
4 EtherNet/IP Class Objects The TBEN-LF supports following CIP objects: CIP Object Classes Class Code Object type 01 (0x01) Identity Object 04 (0x04) Assembly Object 06 (0x06) Connection Manager 71 (0x47) DLR Object 72 (0x48) QoS Object 245 (0xF5) TCP/IP Interface Object 246 (0xF6) Ethernet Link Object Figure 4.1 –... -
Page 23: Ethernet/Ip Standard Objects
4.1 EtherNet/IP Standard Objects Class code: 01 (0x01) Identity Object Instance 1 (0x01) Attributes Attribute Access Name Data type Value 1 (01h) Vendor UINT (0x0030) 2 (02h) Product Type UINT (0x000C) 3 (03h) Product Code UINT Device specific code 4 (04h) Revision major USINT Revision minor... - Page 24 Class code: 06 (0x06) Connection Manager Attribute Access Name Data type Value Supported services Class Instance Service name Service code 84 (0x54) FWD_OPEN_CMD 78 (0x4E) FWD_CLOSE_CMD Figure 4.7 – Connection Manager Object Class code: 71 (0x47) DLR Object Class attributes Attribute Access Name...
- Page 25 TCP/IP Object Class code: 245 (0xF5) Class attributes Attribute Access Name Data type Value 1 (01h) Revision UINT 2 (02h) Max instance UINT 3 (03h) No. of instances UINT Instance 1 attributes Attribute Access Name Data type Value 1 (0x01) Status DWORD 2 (0x02)
- Page 26 Ethernet Link Object Class code: 246 (0xF6) Class attributes Attribute Access Name Data type Value 1 (0x01) Revision UINT 2 (0x02) Max instance UINT 3 (0x03) No. of instances UINT Instance 1, 2, 3, attributes Attribute Access Name Data type Value 1 (0x01) Interface speed...
-
Page 27: Ethernet/Ip Vendor Specific Objects
4.2 EtherNet/IP Vendor Specific Objects Gateway Object Class code: 100 (0x64) Instance 2 attributes Attribute Access Name Data type Value 109 (0x6D) GW Status Word WORD Structure of: 115 (0x73) Get/Set On Connection timeout USINT 0: Switch IO Faulted 1: Switch IO OFF 2: Switch IO Hold Get/Set 0 = no;... - Page 28 Digital In/Out – Output 119 (77h) DWORD 0 - "Channel 0", overcurrent 1 - "Channel 1", 2 - "Channel 2", 3 - "Channel 3", 4 - "Channel 4", 5 - "Channel 5", 6 - "Channel 6", 7 - "Channel 7", 8 - "Channel 8", 9 - "Channel 9", 10 - "Channel 10",...
- Page 29 11 - "Channel 11", 12 - "Channel 12", 13 - "Channel 13", 14 - "Channel 14", 15 - "Channel 15", 16-31 – reserved, Digital In/Out 0 – Pulse stretch 149 (95h) Get / Set USINT 0-255 Digital In/Out 1 – Pulse stretch 150 (96h) Get / Set USINT...
- Page 30 NOTE Pulse stretch is a trigger to an internal TOF timer. The timer stretches an input discrete single In 10msec increments. The time base is 10msec. Example: 0 = timer disabled (default value) 1 = 10 msec delay 10 = 100 msec delay ATTENTION! DXP object attributes cannot be SET while PLC –...
- Page 31 For Application Assistance or for the location of your nearest TURCK distributor, call: 1-800-544-7769 Specifications in this manual are subject to change without notice. TURCK also reserves the right to make modifications and makes no guarantee of the accuracy of the information contained herein.
Need help?
Do you have a question about the TBEN-LF Series and is the answer not in the manual?
Questions and answers