
Related Manuals for Nexen TL20A-E


Summary of Contents for Nexen TL20A-E
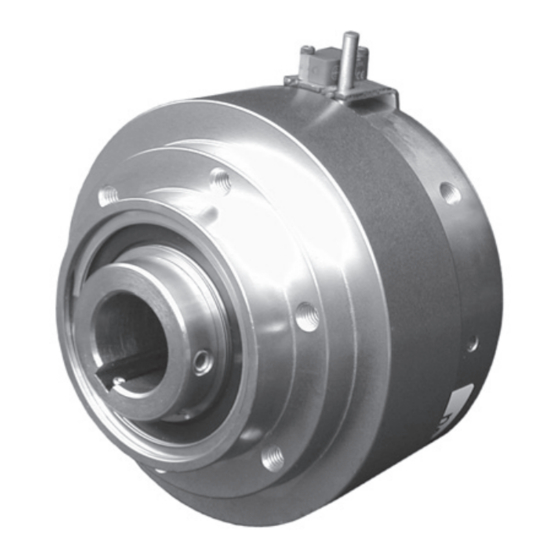
- Page 1 Enclosed Torque Limiter Models TL20A-E, TL30A-E, TL40A-E, TL50A-E, TL60A-E, TL20A-E/2, TL30A-E/2, TL40A-E/2, TL50A-E/2, TL60A-E/2 FORM NO. L-21174-E-1209...
- Page 2 In accordance with Nexen’s established policy of constant product improvement, the specifications contained in this manual are subject to change without notice. Technical data listed in this manual are based on the latest information available at the time of printing and are also subject to change without notice.
-
Page 3: Table Of Contents
TABLE OF CONTENTS General Specifications ------------------------------------------------------------------------------------------------------------------------4 General Safety Precautions -----------------------------------------------------------------------------------------------------------------4 Introduction ----------------------------------------------------------------------------------------------------------------------------------------5 Installation ----------------------------------------------------------------------------------------------------------------------------------------- 5 Lubrication -----------------------------------------------------------------------------------------------------------------------------------------7 Air Connections ---------------------------------------------------------------------------------------------------------------------------------8 Electrical Connections -------------------------------------------------------------------------------------------------------------------------8 Adjustments ---------------------------------------------------------------------------------------------------------------------------------------9 Operation -------------------------------------------------------------------------------------------------------------------------------------------9 Troubleshooting -------------------------------------------------------------------------------------------------------------------------------10 Parts Replacement/Repairs --------------------------------------------------------------------------------------------------------------11 Torque Limiter Removal and Disassembly ------------------------------------------------------------------------------------11 Cylinder Piston Ball Bearing and O-ring Seals ------------------------------------------------------------------------------12 Drive Flange Bearings ----------------------------------------------------------------------------------------------------------------13 Torque Limiter Reassembly ---------------------------------------------------------------------------------------------------------14 Parts List -----------------------------------------------------------------------------------------------------------------------------------------15... -
Page 4: General Specifications
Some Torque Limiters can exceed Ensure proper guarding of the Torque 100 lbs. Use lifting aids and Limiter is used. Nexen recommends the machine builder design guarding proper lifting techniques when in compliance with OSHA CFR 1910 installing, removing, or placing in "Occupational Safety and Health... -
Page 5: Introduction
The totally enclosed construction of Nexen’s Enclosed Torque Limiter allows for usage in wet or humid conditions and is acceptable for use in USDA approved meat and poultry plants. - Page 6 Set Screws 1. Using customer supplied cap screws, fasten sheave (Item 18) or sprocket to the Torque Limiter. NOTE: Nexen recommends using Loctite 242 ® equivalent thread locking compound on Pilot Mounting holes. 2. Insert a customer supplied key into the shaft keyway.
-
Page 7: Lubrication
NOTE Nexen pneumatically actuated devices require clean, pressure regulated air for maximum performance and life. All seals in Nexen pneumatically operated devices are lubricated for life, and do not require additional lubrication. However, some customers prefer to use an air line lubricator, which injects oil into the pressurized air, forcing an oil mist into the air chamber. -
Page 8: Air Connections
All Nexen pneumatically actuated devices require clean NOTE and dry air, which meet or exceeds ISO 8573.1:2001 For quick response, Nexen recommends a quick exhaust Class 4.4.3 quality. valve and short air lines between the Control Valves and the unit. Align the air inlet ports to a down position to... -
Page 9: Adjustments
PROXIMITY SENSOR Align target on Proximity sensor with pin. NOTE: The Nexen Torque Limiter is equipped with a M03-.5 Screws Sensor proximity sensor to detect torque overloads. It is impor- tant that the sensor be positioned so the dowel pin just moves into the sensor's field of view when the Torque Limiter is engaged. -
Page 10: Troubleshooting
Drive Flange components are identical between models other Dowel Pin Assembly) than the rotary seal and components it comes in contact with. The TL20A-E continues to use the Proximity Old rotary seal style and location. Ball Ball Seat Sensor... -
Page 11: Parts Replacement/Repairs
6. Remove the Rotary Seal (Item 15) from the Drive Flange Assembly. NOTE: Rotary seal style/location has changed (except for in TL20A-E models). If Torque Limiter has old rotary seal design, seal is located in the Cylinder/Piston Assembly (Items 8 & 9). Refer to Table 6 and Figure 6 to determine what style rotary seal is used on your product. -
Page 12: Cylinder Piston Ball Bearing And O-Ring Seals
CYLINDER/PISTON BALL BEARING AND O-RING SEALS Refer to Figures 9 - 11. 1. Remove the old Compression Springs (Item 17) and Spring Stiffener Pins (Item 16) from the Drive Ring (Item 10). 2. Separate the Piston (Item 8) from the Cylinder (Item 3. -
Page 13: Drive Flange Bearings
CYLINDER/PISTON BALL BEARING AND O-RING SEALS (continued) 13. Supporting the inner race of the new Ball Bearing (Item 22), press the Drive Ring (Item 10) into the Cylinder PRESSURE (Item 9) and new Ball Bearing. SIDE 14. Clean the O-rings and Back-Up Ring Seal grooves. O-RING BACK UP 15. -
Page 14: Torque Limiter Reassembly
(Item 6) Press NOTE: Rotary seal style/location has changed (except Cylinder/Piston for in TL20A-E models). Refer to Table 6 and Figure 6 to Assembly determine what style rotary seal is used on your product. All other procedures are identical between models. -
Page 15: Parts List
** Drive Flange Assembly (Item 19) includes: Drive Flange, Machine Screws, Ball Seat, and Balls. *** Rotary seal styles have changed in all products except TL20A-E models. Refer to PARTS REPLACEMENT to determine rotary seal style. ® NEVER-SEEZ is a registered trademark of Bostik Findley. ®Loctite is a registered trademark of Henkel Loctite Corporation. -
Page 16: Ordering Replacement Parts
ORDERING REPLACEMENT PARTS The item or balloon number for all Nexen products is used for part identification on all product parts lists, product price lists, unit assembly drawings, bills of materials, and instruction manuals. When ordering replacement parts, specify model designation, item number, part description, and quantity. Purchase replacement parts through your local Nexen Distributor. -
Page 17: Repair Kits
REPAIR KITS TABLE 9 TABLE 8 n i r n i r ) l l ) l l n i r f f i t n i r l l a n i r l l a n i r FORM NO. -
Page 18: Warranty
Warranties Nexen warrants that the Products will (a) be free from any defects in material or workmanship for a period of 12 months from the date of shipment, and (b) will meet and perform in accordance with the specifications in any engineering drawing specifically for the Product that is in Nexen’s current product catalogue, or that is accessible at the Nexen website, or that is...
Need help?
Do you have a question about the TL20A-E and is the answer not in the manual?
Questions and answers