
Related Manuals for Siemens HM633GB.1


Summary of Contents for Siemens HM633GB.1
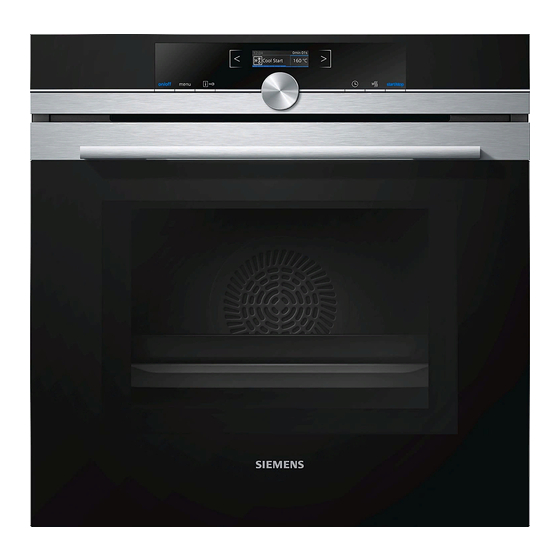
- Page 1 Oven HM633GB.1 User manual and installation instructions Register your product on My Siemens and discover exclusive ser- vices and offers. siemens-home.bsh-group.com/welcome The future moving in. Siemens Home Appliances...
-
Page 2: Table Of Contents
en Safety ¡ Keep the instruction manual and the Table of contents product information safe for future refer- ence or for the next owner. ¡ Do not connect the appliance if it has been USER MANUAL damaged in transit. Safety .............. 2 1.2 Intended use Preventing material damage ....... -
Page 3: Safety
Safety en 1.4 Safe use Hot steam may escape when you open the appliance door. Steam may not be visible, de- Always place accessories in the cooking com- pending on the temperature. partment the right way round. ▶ Open the appliance door carefully. → "Accessories", Page 11 ▶... - Page 4 en Safety ▶ Never pull on the power cord to unplug the ▶ Never set the microwave power too high or appliance. Always unplug the appliance at the cooking time too long. Follow the in- the mains. structions provided in this user manual. ▶...
- Page 5 Safety en tions in the handles and lid. These perfora- At the highest settings in microwave only tions conceal a cavity below. If moisture pen- mode, the drying function will automatically etrates this cavity, it could cause the cook- switch on an additional heating element to ware to crack.
-
Page 6: Preventing Material Damage
en Preventing material damage 2 Preventing material damage 2.1 General Sitting or placing objects on the appliance door may damage it. ATTENTION! Do not place or hang objects on the appliance door. ▶ Objects on the cooking compartment floor at over Do not place cookware or accessories on the appli- ▶... -
Page 7: Environmental Protection And Saving En- Ergy
Environmental protection and saving energy en 3 Environmental protection and saving energy 3.1 Disposing of packaging The packaging materials are environmentally compat- ible and can be recycled. Sort the individual components by type and dispose ▶ of them separately. 3.2 Saving energy If you follow these instructions, your appliance will use less power. -
Page 8: Familiarising Yourself With Your Appliance
en Familiarising yourself with your appliance 4 Familiarising yourself with your appliance 4.1 Control panel Buttons The buttons on the left- and right-hand side of You can use the control panel to configure all functions the control panel have a pressure point. Press of your appliance and to obtain information about the a button to execute its function. - Page 9 Familiarising yourself with your appliance en Progress line 4.5 Cooking compartment The line is shown in the display below the highlighted The functions in the cooking compartment make your value. appliance easier to use. The progress line shows you how much the appliance Shelf supports has already heated up.
-
Page 10: Operating Modes
en Operating modes Appliance door In microwave mode, when you close the appliance door, you have to press to continue. If you open the appliance door during operation, the operation stops. When you close the appliance door, the operation continues automatically. 5 ... - Page 11 Accessories en Symbol Types of heating Temperature What it's used for and how it works range Possible additional options Grill, large area Grill settings: Grill flat items such as steak and sausages, or make toast. Grat- 1 = low inate food. 2 = medium The entire area below the grill element becomes hot.
-
Page 12: Accessories
You will find a comprehensive range of products for your appliance in our brochures and online: www.siemens-home.bsh-group.com Accessories vary from one appliance to another. When purchasing accessories, always quote the exact product number (E no.) of your appliance. -
Page 13: Basic Operation
‒ ATTENTION! a The Siemens logo appears in the display. A type of If there is water on the cooking compartment floor heating and a temperature are then displayed. when operating the appliance, this will damage the enamel. -
Page 14: Rapid Heating
en Rapid heating When the food is ready, press to switch the 8.5 Setting an operating mode appliance off. Requirement: The appliance must be switched on. Tip: The most suitable type of heating for your food Press . can be found in the type of heating description. The operating modes menu opens. - Page 15 Time-setting options en 10 Time-setting options Your appliance has different time-setting options, with 10.3 Setting the cooking time which you can control its operation. You can set a cooking time for operation of up to 23 hours 59 minutes. 10.1 Overview of the time-setting options Requirement: The type of heating and a temperature You can set a cooking time and an operation end time or setting have been set.
-
Page 16: Microwave
en Microwave To set a later end time, turn the rotary selector. Changing the end time Press to start the operation. The set end time can only be changed when the oven is in standby mode. a The symbol and the time at which the operation will be finished appear in the status bar. - Page 17 Microwave en tional heating element to heat the cooking compart- Cookware and ac- Information ment. cessories Never touch the inside surfaces of the cooking com- ▶ Accessories sup- The supplied accessory is suit- partment or the heating elements while they are hot. plied: able for MicroCombi.
- Page 18 en Dishes The possible types of heating are: a The appliance starts to heat and the time starts to ¡ 4D hot air count down. ¡ Top/bottom heating a When the cooking time has elapsed, a signal ¡ Circulated air grilling sounds and the duration is at 0:00 on the display. ¡...
-
Page 19: Dishes
Childproof lock en ¡ Chicken pieces a The appliance starts to heat and the time starts to ¡ Meat loaf made from fresh mince count down. The heating line does not appear. ¡ Steaming fish fillet a Once the dish is ready, a signal sounds. The appli- ¡... -
Page 20: Sabbath Mode
en Sabbath mode 14 Sabbath mode You can set a cooking time of up to 74 hours using Use the rotary selector to set the Sabbath mode Sabbath mode. You can use top/bottom heating to type of heating . keep food warm between 85 °C and 140 °C during Press ... -
Page 21: Cleaning And Servicing
Cleaning and servicing en Press to select "Discard". a All your changes are discarded and not saved. 16 Cleaning and servicing Do not use cleaning products with a high alcohol To keep your appliance working efficiently for a long ▶ content. time, it is important to clean and maintain it carefully. - Page 22 en Cleaning and servicing Cooking compartment Area Suitable cleaning agents Information Enamel surfaces ¡ Hot soapy water Soak any heavily soiled areas and use a brush or steel wool. ¡ Vinegar water Leave the appliance door open to dry the cooking compartment after cleaning it.
-
Page 23: Drying
Cleaning assistance en Note: Reddish marks may appear on the self-clean- Attach the shelf supports. ing surfaces. This is residue from food. These spots → "Rails", Page 25 are not harmful and are not rust. These marks do not impair the cleaning ability of the self-cleaning surfaces. - Page 24 en Appliance door Press to start the drying function. A message appears in the display. ‒ Press to silence the audible signal before ‒ a The appliance starts to dry and the duration counts it is due to end. down. Press to switch the appliance off.
- Page 25 Rails en Push the front pane to the appliance until the left- Screw both screws back in on the left and right of and right-hand hook is opposite the support . the appliance door. Put the door cover in position and push down on it until you hear it click into place.
-
Page 26: Troubleshooting
en Troubleshooting Hook the rear retainers with the hook into the top ¡ The rails fit both the left- and right-hand sides. hole and push them into the bottom hole . Hook the rear shelf support into the retainers at the top and bottom and pull it forwards ... - Page 27 Next time, set lower or higher values. ▶ Tip: A lot of information about the food preparation and corresponding set- ting values can be found on our website www.siemens-home.bsh-group.com . 22 Disposal Find out here how to dispose of old appliances cor- This appliance is labelled in accord- rectly.
-
Page 28: How It Works
en Customer Service 23 Customer Service If you have any queries on use, are unable to rectify 23.1 Product number (E-Nr.) and production faults on the appliance yourself or if your appliance number (FD) needs to be repaired, contact Customer Service. You can find the product number (E-Nr.) and the pro- Detailed information on the warranty period and terms duction number (FD) on the appliance's rating plate. - Page 29 How it works en ¡ Turn roasting joints, grilled items or whole fish after Notes approx. ½ to ⅔ of the specified time. ¡ The grill element switches on and off continuously. This is normal. The grill setting that you use determ- Roasting on the wire rack ines how frequently this occurs.
- Page 30 en How it works 24.7 List of foods Recommended settings for a variety of foods, sorted into food categories. Recommended settings for various types of food Food Accessory/cook- Shelf pos- Heating Temperature in Microwave Cooking ware ition function °C power setting time in → Page 10 in W mins...
- Page 31 How it works en Food Accessory/cook- Shelf pos- Heating Temperature in Microwave Cooking ware ition function °C power setting time in → Page 10 in W mins Pizza, fresh, thin-crust, on Pizza tray 220 - 230 20 - 30 a pizza tray Quiche Tart dish or tin 190–210 30–40...
- Page 32 en How it works Food Accessory/cook- Shelf pos- Heating Temperature in Microwave Cooking ware ition function °C power setting time in → Page 10 in W mins Vegetables, fresh, 250 g Covered cookware 6 - 10 Baked potatoes, halved, Universal pan 200 - 220 15 - 20 1 kg Peeled boiled potatoes,...
- Page 33 How it works en ¡ Use heat-resistant, microwave-safe cookware. 24.8 Special cooking methods and other ¡ The recommended settings are for freezer-temperat- applications ure food (-18 °C). Information and recommended settings for special ¡ Defrosting works best if you divide it into more than cooking methods and other applications, e.g.
- Page 34 en How it works surface. Even if the container only vibrates a little, the ATTENTION! hot liquid may suddenly boil over and spatter. Metal touching the wall of the cooking compartment Always place a spoon in the container when heating ▶ will cause sparks, which may damage the appliance or liquids.
- Page 35 How it works en ¡ Please take note of the information on preheating in Baking tray: Shelf position 1 the recommended settings tables. These setting val- – Baking tins/dishes on the wire rack: ues assume that the rapid heat-up function is not First wire rack: Shelf position 3 being used.
-
Page 36: 25.1 General Installation Instructions
en Installation instructions Microwave cooking ¡ If you use the wire rack, slide it into the cooking ¡ To test the microwave mode on its own, switch off compartment with the Microwave imprint facing the the drying function in the basic settings. → Page 20 appliance door and the bump pointing downwards. - Page 37 Installation instructions en ¡ Fitted units must be heat-resistant up to 25.2 Appliance dimensions 95 °C, and adjacent unit fronts up to You will find the dimensions of the appliance here 70 °C. ¡ Do not install the appliance behind a decor- ative door or the door of a kitchen unit. There is a risk of overheating.
- Page 38 en Installation instructions 25.4 Installation underneath a hob If the appliance is installed under a hob, the following minimum dimensions must be adhered to (including substructure, if applicable). The minimum worktop thickness a is based on the required minimum clearance . Hob type a raised in mm a flush in mm...
- Page 39 Installation instructions en An all-pole isolating switch must be integrated into the 25.6 Corner installation permanent electrical installation according to the install- Observe the installation dimensions and the installation ation regulations. instructions when installing in a corner. Identify the phase and neutral conductors in the socket.
- Page 40 Valid within Great Britain: Imported to Great Britain by BSH Home Appliances Ltd. Grand Union House Old Wolverton Road Wolverton, Milton Keynes MK12 5PT United Kingdom Manufactured by BSH Hausgeräte GmbH under the trademark licence of Siemens AG *9001614842* 9001614842 (010412)
Need help?
Do you have a question about the HM633GB.1 and is the answer not in the manual?
Questions and answers