
Related Manuals for Siemens HM633GN 1 Series


Summary of Contents for Siemens HM633GN 1 Series
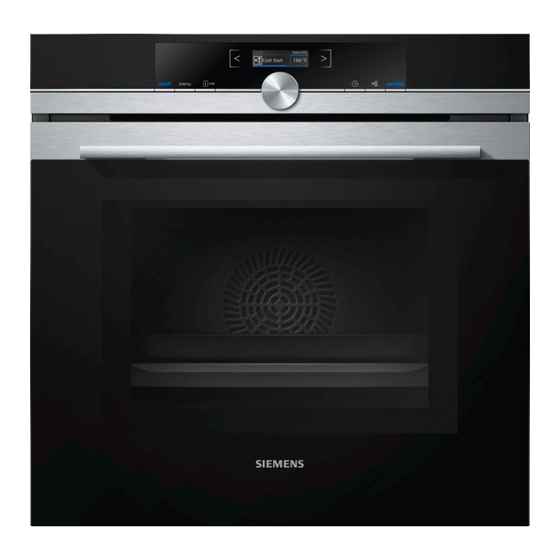
- Page 1 Oven HM633GN.1 User manual and installation instructions Register your product on My Siemens and discover exclusive ser- vices and offers. siemens-home.bsh-group.com/welcome The future moving in. Siemens Home Appliances...
-
Page 2: Table Of Contents
en Safety ¡ Keep the instruction manual and the Table of contents product information safe for future refer- ence or for the next owner. ¡ Do not connect the appliance if it has been USER MANUAL damaged in transit. Safety .............. 2 1.2 Intended use Preventing material damage ....... -
Page 3: Safety
Safety en Hot steam may escape when you open the 1.4 Safe use appliance door. Steam may not be visible, de- Always place accessories in the cooking com- pending on the temperature. partment the right way round. ▶ Open the appliance door carefully. → "Accessories", Page 11 ▶... - Page 4 en Safety If the appliance or the power cord is dam- Food and its packaging and containers may aged, this is dangerous. catch fire. ▶ Never operate a damaged appliance. ▶ Never heat food in heat-retaining pack- ▶ Never pull on the power cord to unplug the aging.
- Page 5 Safety en Airtight packaging may burst when food is WARNING ‒ Risk of injury! heated. Unsuitable cookware may crack. Porcelain or ▶ Always follow the instructions on the pack- ceramic cookware can have small perfora- aging. tions in the handles and lid. These perfora- ▶...
-
Page 6: Preventing Material Damage
en Preventing material damage 2 Preventing material damage Sitting or placing objects on the appliance door may 2.1 General damage it. ATTENTION! Do not place or hang objects on the appliance door. ▶ Objects on the cooking compartment floor at over Do not place cookware or accessories on the appli- ▶... -
Page 7: Environmental Protection And Saving En- Ergy
Environmental protection and saving energy en 3 Environmental protection and saving energy 3.1 Disposing of packaging The packaging materials are environmentally compat- ible and can be recycled. Sort the individual components by type and dispose ▶ of them separately. 3.2 Saving energy If you follow these instructions, your appliance will use less power. -
Page 8: Familiarising Yourself With Your Appliance
en Familiarising yourself with your appliance 4 Familiarising yourself with your appliance 4.1 Control panel Buttons The buttons on the left- and right-hand side of You can use the control panel to configure all functions the control panel have a pressure point. Press of your appliance and to obtain information about the a button to execute its function. - Page 9 Familiarising yourself with your appliance en The progress line shows you how much the appliance You can remove the rails, e.g. for cleaning. has already heated up. The line is filled from left to → "Rails", Page 25 right. The heating line does not appear when using the mi- crowave.
-
Page 10: Operating Modes
en Operating modes 5 Operating modes This is where you can find an overview of your appli- Operating ance's operating modes and main functions. mode Press to open the menu. Microwave Cook, heat or defrost quicker with the microwave. Operating → "Microwave", Page 16 mode Microwave To reduce the cooking time, switch on... -
Page 11: Accessories
Accessories en Symbol Types of heating Temperature What it's used for and how it works range Possible additional options CoolStart function 30–275 °C For quickly preparing frozen products at position 3. The temper- ature depends on the manufacturer's instructions. Use the highest temperature specified on the packaging. The cooking time is as specified, or shorter. - Page 12 Turn the accessories so that the notch is at the www.siemens-home.bsh-group.com rear and is facing downwards. Accessories vary from one appliance to another. When Insert the accessory between the two guide rods for purchasing accessories, always quote the exact a shelf position.
-
Page 13: Basic Operation
‒ ATTENTION! a The Siemens logo appears in the display. A type of If there is water on the cooking compartment floor heating and a temperature are then displayed. when operating the appliance at temperatures above 120 °C, this will damage the enamel. -
Page 14: Rapid Heating
en Rapid heating Tip: The most suitable type of heating for your food 8.5 Setting an operating mode can be found in the type of heating description. Requirement: The appliance must be switched on. Note: You can also set a cooking time and an opera- Press ... - Page 15 Time-setting options en 10 Time-setting options Your appliance has different time-setting options, with 10.3 Setting the cooking time which you can control its operation. You can set a cooking time for operation of up to 23 hours 59 minutes. 10.1 Overview of the time-setting Requirement: The type of heating and a temperature options or setting have been set.
-
Page 16: Microwave
en Microwave To set a later end time, turn the rotary selector. Changing the end time Press to start the operation. The set end time can only be changed when the oven a The symbol and the time at which the operation is in standby mode. - Page 17 Microwave en You can switch off this drying function in the basic Cookware and ac- Information settings. cessories → "Basic settings", Page 20 Metal cookware and Metal can be used with Micro- bakeware Combi. WARNING ‒ Risk of burns! Note: Metal must be kept at At the highest settings in microwave only mode, the least 2 cm from the cooking drying function will automatically switch on an addi- compartment walls and the in-...
- Page 18 en Dishes Use the rotary selector to set the cooking time. 11.3 Microwave combination Press to start the operation. To reduce the cooking time, you can use certain types a The appliance starts to heat and the time starts to of heating in combination with the microwave. count down.
-
Page 19: Dishes
Childproof lock en For some dishes, you can also delay the end 12.3 Overview of the dishes ‒ time. You can see which individual dishes are available to → "Setting the end time", Page 15 you here. Press to start the operation. Meals a The appliance starts to heat and the time starts to ¡... -
Page 20: Sabbath Mode
en Sabbath mode 14 Sabbath mode You can set a cooking time of up to 74 hours using Press . Sabbath mode. You can use top/bottom heating to The temperature is preset to 85 °C. keep food warm between 85 °C and 140 °C during Use the rotary selector to set the desired temperat- this time without having to switch the appliance on or ure. -
Page 21: Cleaning And Servicing
Cleaning and servicing en Select the desired change using or . Discarding changes to the basic settings Note: Your changes to the basic settings will be re- Press . tained even after a power failure. Press to select "Discard". a All your changes are discarded and not saved. 16 ... -
Page 22: Rails
en Cleaning and servicing Cooking compartment Area Suitable cleaning agents Information Enamel surfaces ¡ Hot soapy water Soak any heavily soiled areas and use a brush or steel wool. ¡ Vinegar water Leave the appliance door open to dry the cooking compartment after cleaning it. - Page 23 Cleaning assistance en – From the glass cover on the oven light Note: Marks may appear on the self-cleaning sur- This prevents stains that cannot be removed. faces. Residues of sugar and egg white in the food Remove any objects from the cooking compartment. are not removed and stick to the surfaces.
- Page 24 en Appliance door Setting the drying function The cooking time is set to 10:00 min and the tem- perature to 150 °C and cannot be changed. Allow the appliance to cool down. Press to start the drying function. Remove coarse dirt from the cooking compartment a The appliance starts to dry and the duration counts and wipe away moisture from the cooking compart- down.
- Page 25 Rails en Push the front pane to the appliance until the left- Screw both screws back in on the left and right of and right-hand hook is opposite the support . the appliance door. Put the door cover in position and push down on it until you hear it click into place.
-
Page 26: Troubleshooting
en Troubleshooting Hook the rear retainers with the hook into the top ¡ For both pull-out rails, ensure that you can pull them hole and push them into the bottom hole . forwards and out. Hook the rear shelf support into the retainers at the top and bottom and pull it forwards ... - Page 27 Next time, set lower or higher values. ▶ Tip: A lot of information about the food preparation and corresponding setting values can be found on our website www.siemens-home.bsh-group.com . 22 Disposal Find out here how to dispose of old appliances cor- This appliance is labelled in accord- rectly.
-
Page 28: How It Works
en Customer Service 23 Customer Service If you have any queries on use, are unable to rectify This product contains light sources from energy effi- faults on the appliance yourself or if your appliance ciency class G. These light sources are available as a needs to be repaired, contact Customer Service. - Page 29 How it works en Use the 4D hot air heating function. Grilling Notes Grill food if you want it to be crispy. ¡ Items that are placed in the appliance on baking ¡ When grilling several food items, choose pieces that trays or in baking tins/dishes at the same time will are of a similar weight and thickness.
- Page 30 en How it works ¡ If you are warming or cooking the ready meal in 24.6 Cooking ready meals cookware, make sure that the cookware is heat-res- ¡ Take ready meals out of the packaging. istant. 24.7 List of foods Recommended settings for a variety of foods, sorted into food categories. Recommended settings for various types of food Food Accessory/cook-...
- Page 31 How it works en Food Accessory/cook- Shelf pos- Heating Temperature in Microwave Cooking ware ition function °C power setting time in → Page 10 in W mins Pizza, fresh, on a baking Baking tray 200 - 220 25 - 35 tray Pizza, fresh, on a baking Universal pan 180 - 200 35 - 45...
- Page 32 en How it works Food Accessory/cook- Shelf pos- Heating Temperature in Microwave Cooking ware ition function °C power setting time in → Page 10 in W mins Meat loaf, 1 kg, + 20 ml Uncovered cook- 170 - 190 30 - 40 water ware Fish, grilled, whole, Wire rack 170–190 20–30...
- Page 33 How it works en Food Accessory/cook- Shelf pos- Heating Temperature in Microwave Cooking ware ition function °C power setting time in → Page 10 in W mins Fruit compote, 500 g Covered cookware 1. 1 9 - 12 2. 1 Microwave popcorn, 1 x Uncovered cook- 4 - 6 100 g bag...
- Page 34 en How it works ¡ After warming up the food, leave it to rest for WARNING ‒ Risk of scalding! 1-2 minutes. There is a possibility of delayed boiling when a liquid is ¡ The food transfers heat to the cookware. The cook- heated. This means that the liquid reaches boiling tem- ware can become very hot.
- Page 35 How it works en 24.9 Test dishes The information in this section is provided for test institutes to facilitate testing of the appliance in accordance with EN 60350-1:2013 or IEC 60350-1:2011 and EN 60705:2012 or IEC 60705:2010. Baking ¡ The setting values apply to food that is placed into a Baking tray: Shelf position 1 cold cooking compartment.
-
Page 36: 25.1 General Installation Instructions
en Installation instructions Recommended settings for grilling Food Accessory/cookware Shelf posi- Heating Temperature in °C/ Cooking time tion function grill setting in mins → Page 10 Toasting bread Wire rack 3–5 Do not preheat the appliance. Microwave cooking ¡ If you use the wire rack, slide it into the cooking ¡... - Page 37 Installation instructions en ¡ The safe operation of this appliance can WARNING ‒ Risk of fire! only be guaranteed if it has been installed It is dangerous to use an extended power to a professional standard in accordance cord and non-approved adapters. with these installation instructions. The in- ▶...
- Page 38 en Installation instructions 25.4 Installation underneath a hob If the appliance is installed under a hob, the following The minimum worktop thickness a is based on the minimum dimensions must be adhered to (including required minimum clearance . substructure, if applicable). Hob type a raised in mm a flush in mm...
- Page 39 Installation instructions en Electrically connecting an appliance without a 25.6 Corner installation protective contact plug Observe the installation dimensions and the installation Note: Only a licensed professional may connect the ap- instructions when installing in a corner. pliance. Damage caused by incorrect connection is not covered under the warranty.
- Page 40 en Installation instructions For handleless kitchens with vertical bar handle strips: Attach a suitable filling piece in order to cover ‒ any sharp edges and to guarantee a safe install- ation. Pre-drill aluminium profiles to establish a screw ‒ connection . Secure the appliance using a suitable screw ...
- Page 44 Valid within Great Britain: Imported to Great Britain by BSH Home Appliances Ltd. Grand Union House Old Wolverton Road Wolverton, Milton Keynes MK12 5PT United Kingdom Manufactured by BSH Hausgeräte GmbH under the trademark licence of Siemens AG *9001614848* 9001614848 (010917)
Need help?
Do you have a question about the HM633GN 1 Series and is the answer not in the manual?
Questions and answers