Advertisement
Quick Links
Advertisement

Subscribe to Our Youtube Channel
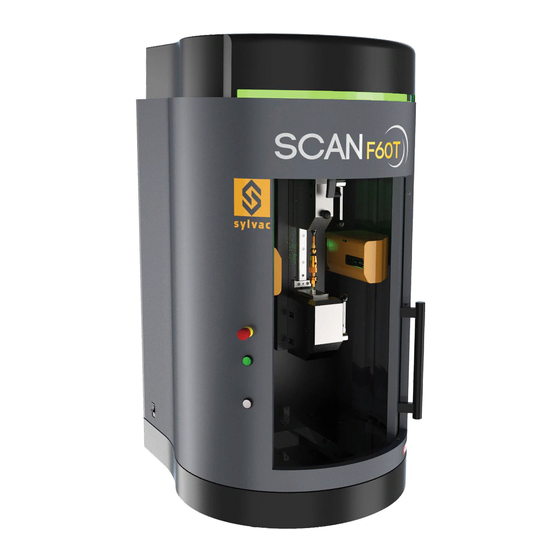
Summary of Contents for Sylvac SCAN F60
- Page 1 Quickstart SYLVAC-SCAN F60 & F60T Optical measuring machines...
- Page 2 QUICKSTART 1. UNPACKING AND INSTALLATION OF THE MACHINE 1.1 Unpacking the machine Remove the 4 red parts before starting the ma- Unpack the machine and remove all of its safety attachments in the chine up or risk causing order shown below (Figure 1 - open the side and rear clasps to serious damage! access the inside of the machine).
- Page 3 The machine should be installed on a flat surface, capable of supporting its weight (230 kg). The SYLVAC-SCAN F60(T) must be lifted using the loops provided for this purpose and a strap lifting device. Ensure that general and local accident prevention regulations are complied with. (Figure 2) Figure 2 1.3.
- Page 4 QUICKSTART 2. PROCEDURE FOR LEVELLING THE MACHINE 2.1. Locating the spirit level and the machine feet Level the machine using the spirit level incorporated into the headstock as a reference. To access it, slide off the cover (Figure 3): Level Ok Level Ok Level not Ok Figure 3...
- Page 5 4) Then check the spirit level one last time. If it is in the correct position, you have finished. Note : Note: If installing the machine on a Sylvac bench, first level the bench using an external spirit level (not integrated) and then adjust the machine using its own feet.
-
Page 6: Safety Advice
QUICKSTART 3. SAFETY ADVICE Sylvac machines have been developed with state of the art technology. However, it is important to understand and comply with a few safety rules. Read the manual carefully. Only use the machine in the manner described. - Page 7 QUICKSTART 4. OVERVIEW AND CONFIGURATION A - Tailstock: supports the upper part of the calliper, can be moved manually along the calliper according to the size of the piece. B - Piece to be measured: for the user to affix the piece to be measured between the stocks. C - Headstock: supports the bottom part of the calliper, can rotate if necessary.
- Page 8 1 - Turn on the machine using the ON/OFF button 2 - Start up the computer 3 - Launch the Sylvac-Reflex Scan+ software by clicking on the icon 4 - The below window will be displayed on your screen. Log in as a supervisor using the password “123”.
-
Page 9: Maintenance And Servicing
6. MAINTENANCE AND SERVICING The maintenance and servicing of the machines must be performed by people trained and qualified by Sylvac SA or its official agents. During servicing or maintenance, switch off the machine completely using the main ON/OFF switch (I). Otherwise, activate the “Service mode”... - Page 10 QUICKSTART 7 PACKING UP THE MACHINE 7.1 Secure the moving parts Connect the machine to the computer. In the Sylvac-Reflex Scan+ software, select the “Service” tab, then “Plugins” and the “Parkem Controller” diagnostics button (Figure 9). Figure 9 The machine will move into the correct position (approx. 390 mm). When it is in the correct position, a warning message will tell you to fit the correct accessory to hold the tailstock in place.
- Page 11 QUICKSTART Figure 10 7.3. Disconnect the machine from the PC Figure 11. Figure 11...
- Page 12 QUICKSTART 7.4 Palletisation Place the machine on the pallet (only one position possible, figure 12). Appropriate lifting systems, see point 1.2. If possible, wrap the machine in order to protect it from moisture (plastic film, clima foil, etc.). 7.5. Strapping Strap the machine to the pallet (figure 13).
- Page 13 QUICKSTART 7.6. Attaching other parts and accessories Attach the various accessories to the pallet. (Figure 14). 7.7. Fitting the box and attachments Put the box over the machine and its accessories and strap it. (Figure 15). Figure 14 Figure 15...
- Page 14 Calibration certificate Because we make our Sylvac instruments in batches, you may find that the date on your calibration certificate is not cur- rent. Please be assured that your instruments are certified at point of production and then held in stock in our wa-rehouse in accordance with our Quality Management System ISO 9001.
- Page 15 QUICKSTART 10. NOTES...
- Page 16 Changes without prior notice Sous réserve de toute modification Änderungen vorbehalten Edition : 2018.01 / 681.102.01-110...


Need help?
Do you have a question about the SCAN F60 and is the answer not in the manual?
Questions and answers