Advertisement
Quick Links
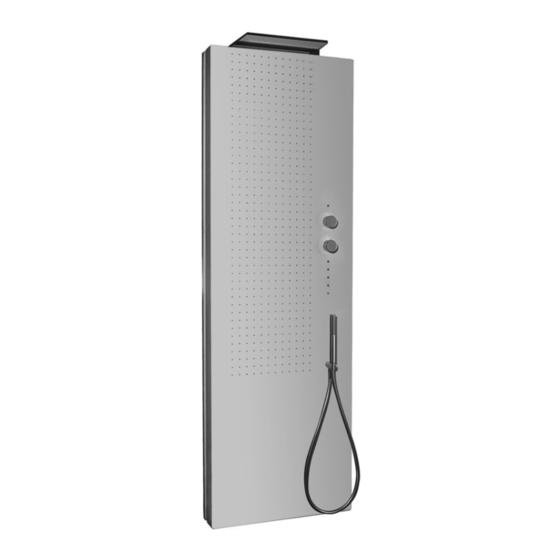
ACQUAPURA SELF STANDING
art. 6580
parte incasso, built-in pieces, parties à encastrer,
Up-Teil zu Einhebelwannen, parte empotrable
art. 651102 parte esterna, external pieces, parties externes,
Up-Teil Einhebelwannen, parte externa
art. 651602 parte esterna, external pieces, parties externes,
Up-Teil Einhebelwannen, parte externa
Istruzioni
Instructions
Instructions de montage
Bedienungsanleitung
Instrucciones
Advertisement

Subscribe to Our Youtube Channel
Related Manuals for Fantini Rubinetti Acquapura 6580


Summary of Contents for Fantini Rubinetti Acquapura 6580
- Page 1 ACQUAPURA SELF STANDING Istruzioni Instructions Instructions de montage Bedienungsanleitung Instrucciones art. 6580 parte incasso, built-in pieces, parties à encastrer, Up-Teil zu Einhebelwannen, parte empotrable art. 651102 parte esterna, external pieces, parties externes, Up-Teil Einhebelwannen, parte externa art. 651602 parte esterna, external pieces, parties externes, Up-Teil Einhebelwannen, parte externa...
- Page 2 •Piano d’appoggio piatto doccia •Resting plane of shower base •Plan d’appui plateau douche •Duschteller-Trittfläche •Plano de apoyo del plato de la ducha...
- Page 3 -Schema caduta acqua ugelli frontali e cascata -Diagram of water output from front nozzles and waterfall -Schéma de la sortie de l’eau des tuyères antérieures cascade -Zeichnung des Wasserfalls der vordern Düsen Kaskade -Esquema de la caída de agua de los de chorros frontales e cascada Il test è...
- Page 4 Art. 651102 Art. 651602...
- Page 5 Art. 6580 Parte incasso, built-in pieces, parties à encastrer, Up-Teil zu Einhebelwannen, parte empotrable...
- Page 6 Orientare la base in modo che il triangolo (A) sia rivolto verso il fronte del pannello doccia. Direct the base so that the triangle (A) is pointing toward the shower panel front. Orienter la base afin que le triangle (A) soit pointé vers le panneau de la douche. Die Basis so stellen, dass das Dreieck (A) zur Vorderseite des Duschpaneels gerichtet ist.
- Page 7 Far fuoriuscire i tubi dell'acqua (A-B) per 60 cm. e la guaina dei cavi elettrici (C) come rappresentato in figura. Diametro massimo della guaina: 32 mm Let the water hoses (A-B) and the electric cable (C) sheath protrude for 60 cm, where the power cables pass. Maximum diameter of the sheath: 32 mm Faire sortir des tuyaux (A-B) et la gaine des câbles électriques (C) de 60 cm.
- Page 8 Dopo aver completato l'applicazione del massetto rimuovere la dima (A) e le protezioni (B) dai 4 tiranti. After completion of the application of the floor screed remove the template (A) and the protective coverings (B) from the 4 anchors. Après avoir terminé l'application de la chape, enlever le gabarit (A) et les protections (B) des 4 tirants.
- Page 9 Applicare il pavimento andando in battuta sul carter. Tagliare i tubi dell'ac- qua in modo che sporgano 30 cm. rispetto al pavimento. Apply the floor, going in contact with the housing. Cut the water hoses so that they protrude 30 cm. compared to the floor. Appliquer le pavement à...
- Page 10 Rimuovere la staffa a "L" dalla dima precedentemente utilizzata e vedere la sequenza 1A. Remove the clamp “L” from the template used before and follow the sequence 1A. Enlever le support à "L" du gabarit utilisé en précédence et voir la séquence 1A.
- Page 11 Alzare la colonna e inserire i tiranti nei fori posti nella parte inferiore della colonna. Ricordarsi di fare passare flessibili e guaina nei fori corrispondenti. Per svolgere questa operazione è necessario che ci siano tre operatori, due sui fianchi che alzano il pannello utilizzando la maniglia (A) e una terza persona che mantiene il pannello in equilibrio.
- Page 12 36 mm. 36 mm. Avvitare i restanti 4 dadi M24 (A) sui tiranti portandoli in battuta senza serrarli. Appoggiare la bolla sulla parte inferiore della colonna (fig. 3), e successivamente sulla parte frontale della doccia (fig. 4 pagina suc- cessiva). Tramite due chiavi agire sia sui dadi superiori che inferiori e mettere in bolla il pannello doccia. ATTENZIONE: il perfetto serraggio garantisce la tenuta meccanica del prodotto.
- Page 14 Specifiche cavo alimentazione: Specifiche cavo lampada: Cavo tripolare: Blu + Marrone + Giallo-Verde Tipo H05VV-F Cavo bipolare: Blu + Marrone Tipo H05VV-F Sezione esterna massima cavo: 8 mm. Sezione esterna massima cavo: 8 mm. sezione minima dei conduttori del cavo di alimentazione: Lunghezza spellatura guaina esterna: <...
-
Page 15: Technical Characteristics
L’installazione deve essere eseguita solo da personale qualificato in conformità con tutte le disposizioni contenute nella norma CEI 64-8 (IEC 364-1). E’ fatto obbligo di istallare sempre sulla linea di alimentazione, a monte dell’apparecchiatura, un dispositivo che consenta la disconnes- sone completa nelle condizioni della categoria di sovratensione III. -
Page 16: Technische Daten
Die Installation darf ausschließlich von Fachpersonal und in Übereinstimmung mit allen in der Norm IEC 64-8 (IEC 364-1) enthaltenen Vorschriften erfolgen. Auf der Versorgungsleitung vor dem Gerät ist stets eine Vorrichtung einzubauen, die bei Vorliegen der Überspannungskategorie 3 die komplette Trennung ermöglicht. Beispiel: Allpolschalter (d>... - Page 17 Nodo equipotenziale Equipotential node Noeud équipotentiel Aeqipotenzialer Punkt Nodo equipotencial Alimentazione Alimentazione Led Power LED input Puissance Alimentation LED Zufuhr LED Zufuhr Potencia Alimentación LED...
- Page 18 COLLEGAMENTI ELETTRICI - ELECTRIC CONNECTIONS - CONNEXIONS ÉLECTRIQUES ELEKTRISCHE ANSCHLÜSSE - CONEXIONES ELÉCTRICAS Interruttore quadro elettrico (vedere note installazione) Electrical switchboard (see installation information) Interrupteur tableau électrique (voir notes pour l’installation) Schalter Bedien-Panel (anmerkungen zur installation) Interruptor del cuadro eléctrico (ver notas instalación) Interruttore lampada locale bagno Bathroom lamp switch Interrupteur lampe local salle de bains...
- Page 19 COLLEGAMENTI ELETTRICI - ELECTRIC CONNECTIONS - CONNEXIONS ÉLECTRIQUES ELEKTRISCHE ANSCHLÜSSE - CONEXIONES ELÉCTRICAS Interruttore quadro elettrico (vedere note installazione) Electrical switchboard (see installation information) Interrupteur tableau électrique (voir notes pour l’installation) Schalter Bedien-Panel (anmerkungen zur installation) Interruptor del cuadro eléctrico (ver notas instalación) Interruttore Switch Interrupteur...
- Page 20 29 mm. Effettuare il collegamento idraulico collegando i flessibili già presenti all'interno della doccia alla rete idrica. Make the hydraulic connection by connecting the hoses already in the shower to the water network. Faire la connexion hydrauliques, en liant les tuyaux flexibles déjà dans la douche au réseau de l'eau. Die Wasserverbindung machen, indem die Rohre, die schon in der Dusche vorhanden sind, an das Wassernetz angeschlossen werden.
- Page 21 Alzare il pannello posteriore e far corrispondere i fermi (A) alle asole (B) del pannello anteriore quindi traslare verso il basso il pannello posteriore (C). Se si utlizza la versione PANNELLO CON SPECCHIO, maneggiare con cura per evitare rotture e scheggiature. Il peso del pannello con specchio è di Kg. 50 Lift the rear panel and put the stoppers (A) in correspondence with the slots (B) of the front panel, then move the rear panel downwards (C).
- Page 22 Inserire le 3 viti e le rispettive rondelle nei fori ubicati sul bordo superiore del pannello ed avvitarle alla struttura. Insert the 3 screws into the holes located on the upper edge of the panel and screwed them to the frame. Insérer les 3 vis dans les trous situés sur le bord supérieur du panneau et les visser sur le cadre.
- Page 23 O-RING...
- Page 25 LED RADIATION - DO NOT FIX THE LIGHT SHAFT - CLASS 2 LED DEVICE RADIATION LED - NE PAS FIXER LE FAISCEAU - APPAREIL LED DE CLASSE 2 LED STRAHLUNG - NICHT IN DEN STRAHL BLICKEN - LED GERAT DER KLASSE 2 RADIACIÓN LED - NO FIJAR EL HAZ - APARATO LED DE CLASE 2 LUCE LED NON FISSARE IL FASCIO...
- Page 26 Art. 90000370 •Sostituzione cartuccia •Cartrige replacement •Remplacement de la cartouche •Auswechseln der Kartusche •Sustitucion del cartucho 2,5 mm. 30 mm. •Rimontare seguendo il procedimento inverso (5-4-3-2-1) •Replace following the instructions in reverse order (5-4-3-2-1) •Re-installer au contraire du procédé (5-4-3-2-1) •Die umgekehrte Vorgehensweise folgen um die Teil wieder zu installieren (5-4-3-2-1) •Colocar según el procedimiento inverso (5-4-3-2-1)
- Page 27 •Effettuare la regolazione come indicato in figura •Carry out the regulation as stated in the picture •Effectuer la régulation comme indiqué sur l’image •Die Regulierung wie in der Abbildung •Efectuar la regulación come se indica en la figura •Rimontare seguendo il procedimento inverso (3-2-1) •Replace following the instructions in reverse order (3-2-1)
- Page 28 Art. 90009493 •Sostituzione vitone •Bolt replacement •Remplacement de la tête •Oberteilsersetzung •Sustitucion rosca de extrusion 2,5 mm. 17 mm.
- Page 29 •Rimontare seguendo il procedimento inverso (5-4-3) •Replace following the instructions in reverse order (5-4-3) •Re-installer au contraire du procédé (5-4-3) •Die umgekehrte Vorgehensweise folgen um die Teil wieder zu installieren (5-4-3) •Colocar según el procedimiento inverso (5-4-3) •Assicurarsi che il vitone sia in posizione di chiusura prima di montare la maniglia •Ensure that the knob is in the closed position before assembling the handle.
- Page 30 Art. 90009493 All'interno del pannello doccia ci sono due filtri ubicati nelle posizioni indicate nella figura 3. Inside the shower panel, two filters are located in the positions indicated in Figure 3. À l'intérieur du panneau de la douche se trouvent deux filtres situés dans les positions indiquées dans la figure 3. An der Innenseite des Duschpaneels befinden sich zwei Filter, wie in Abb.
- Page 31 Alzare il pannello posteriore (A) ed estrarre i fermi (B) dalle asole (C) del pannello anteriore. Se si utlizza la versione PANNELLO CON SPECCHIO, maneggiare con cura per evitare rotture e scheggiature. Il peso del pannello con specchio è di Kg. 50 Lift the rear panel (A) and remove the stoppers (B) from the slots (C) of the front panel.
- Page 32 •Svitare il dado (A) con una chiave da 38 mm, e con una chiave da 32 mm. non far ruotare il controdado (B). • Unscrew the nut (A) with a 38 mm-wrench and with a 32 mm-wrench hold the counter-nut (B) so that it does not 38 mm turn.
- Page 33 •Svitare il dado (A) con una chiave da 38 mm, e con una chiave da 32 mm. non far ruotare il controdado (B). • Unscrew the nut (A) with a 38 mm-wrench and with a 32 32 mm mm-wrench hold the counter-nut (B) so that it does not turn.
- Page 34 I tasti retroilluminati vengono attivati/disattivati a pressione. Tali tasti servono ad impostare la fuoriuscita dell’acqua. Quando il tasto viene premuto si attiva e segnala il suo stato aumentando e mantenendo più alta l’intensità luminosa. Le attivazioni sono divise in tre sezioni, ogni sezione esclude le altre, provocandone lo spegnimento: Tasto bianco: Attiva la doccetta e spegne (se attivati) i getti frontali e la cascata;...
- Page 35 Die hintergrundbeleuchteten Tasten werden durch Druckausübung aktiviert / deaktiviert. Sie dienen zur Einstellung des Wasseraustritts. Díe Taste wird beim Drücken aktiviert und signalisiert ihren Ist-Zustand durch die Erhöhung und den anschließenden Erhalt ihrer Leuch- tintensität. Die Aktivierungen sind in drei Abschnitte unterteilt. Jeder Abschnitt schließt jeweils die anderen aus und bewirkt somit deren Ausschal- tung: Weiße Taste: Aktiviert die Handbrause und schaltet (sofern sie aktiviert sind) die frontal austretenden Wasserstrahle und den Wasserfall Grüne Tasten: Aktivieren / Deaktivieren die zugehörigen frontal austretenden Wasserstrahle und schalten (sofern sie aktiviert sind) den...
- Page 39 •Con uno o più settori attivati, premendo sul tasto della cascata o della doccetta, automaticamente i settori utilizzati vengo disabilitati. Il pannello doccia è stato progettato in modo che l’acqua all’interno dell’impianto venga completamente scaricata per evitare formazione di batteri; quindi sono state adottate le due seguenti soluzioni: -spegnendo uno dei 4 settori, è...
- Page 41 Dati tecnici Technische Daten PRESSIONE MINIMA DINAMIC..........0,25 Mpa; 2,5 BAR MINIMUM DRUCK DYNAMISCHE........0,25 Mpa; 2,5 BAR PRESSIONE MASSIMA...............0,7 Mpa; 7 BAR HÖCHSTE DRUCK..............0,7 Mpa; 7 BAR PRESSIONE DI ESERCIZIO CONSIGLIATA....0,3 Mpa-0,5 Mpa; 3-5 BAR EMPFEHLENER DRUCK.........0,3 Mpa-0,5 Mpa; 3-5 BAR TEMPERATURA MASSIMA................60°C HÖCHSTE WASSER TEMPERATUR.............60°C TEMPERATURA ACQUA CALDA CONSIGLIATA.....min 55°C max 60°C...
- Page 42 ALIMENTAZIONE: VERSORGUNG: Tensione:230 Vac Frequenza: 50Hz Spannung: 230 Vac Frequenz: 50Hz Potenza: 75W SELV. Leistung: 75W SELV. PROTEZIONE: SCHUTZ: Fusibile su primario (F1) 250V, T1,6A Sicherung auf dem Primärstrom (F1) 250V, T1,6A CAVO ALIMENTAZIONE NETZKABEL: Cavo tripolare: Blu + Marrone + Giallo-Verde Tipo H05VV-F Dreipolkabel: Blau + Braun + Gelb+Grün.
-
Page 43: Cura Del Prodotto
CURA DEL PRODOTTO PFLEGE HINWEISE UNSERER ARTIKEL In dotazione alla doccia Acquapura viene for- Zur Ausstattung der Dusche Acquapura gehören nito un panno e un prodotto di pulizia idoneo. ein Tuch und ein geeignetes Mittel zur Reinigung. Tali prodotti sono disponibili e ordinabili presso Diese Produkte sind lieferbar und können bei der la ditta Fantini S.p.A Firma Fantini S.p.A. - Page 44 Australian Standard Installation Products shall be installed in accordance with AS/NZS 3500 series of standards. Installer shall ensure that the flow controlled aerator is tightened to prevent removal by hand FRATELLI FANTINI S.p.A. 28010 Pella (NO) - Via M. Buonarroti, 4 Telefono + 39 0322.918411 r.a.
Need help?
Do you have a question about the Acquapura 6580 and is the answer not in the manual?
Questions and answers