
Related Manuals for Seeley MaglQtouch


Summary of Contents for Seeley MaglQtouch
- Page 1 INSTALLATION AND OWNER MANUAL MaglQtouch WIRELESS Smart Controller Original English Instructions...
-
Page 3: Table Of Contents
COMMISSIONING Connecting the Receiver Pairing KIT CONTENTS MagIQtouch Wireless Smart Controller Item A Item Qty Description MaglQtouch Wireless Smart Controller MagIQtouch Wireless Receiver AA Batteries Install & Operation Manual Screw PAN PHIL 6AB*1” ZP ItemB Wall Plug Yellow 5mm Item C... -
Page 4: Responsibilities
ASSESSMENT been given supervision or instruction concerning use of the appliance by Seeley International provides the a person responsible for their safety. following information as a guide to Children should be supervised to contractors and employees to assist... -
Page 5: Fcc Compliance
SAFETY FCC COMPLIANCE STATEMENT This device complies with Part 15 of the FCC Rules. Operation is subject to the following two conditions: (1) This device may not cause harmful interference, and (2) this device must accept any interference received, including interference that may cause undesired operation. NOTE: This equipment has been If this equipment does cause tested and found to comply with the... -
Page 6: Mounting The Magiqtouch
MOUNTING THE MAGIQTOUCH WIRELESS SMART CONTROLLER LOCATION The MagIQtouch Wireless Smart Controller should be placed approximately 1.5 metres/5’ above the floor, in the most used room of the home. Placement is critical for correct functioning of the temperature sensing thermostat inside the Controller. The following must be taken into consideration: •... -
Page 7: Mounting The Controller
MOUNTING THE MAGIQTOUCH WIRELESS SMART CONTROLLER MOUNTING THE CONTROLLER Remove the mounting bracket from the rear of the MagIQtouch Controller. Step 1 ILL1584-A Step 2 ILL1585-A Step 3 ILL1586-B MagIQtouch Controller INSTALLATION MANUAL | 4... - Page 8 MOUNTING THE MAGIQTOUCH WIRELESS SMART CONTROLLER Step 4 Using the bracket as a template, mark the centre points for the screw and cable access holes. ILL1587-A...
- Page 9 MOUNTING THE MAGIQTOUCH WIRELESS SMART CONTROLLER Step 5 Insert wall plugs into holes. Align and screw the bracket into position using the supplied screws. ILL2937-A ILL2938-A Alternatively, a standard stud mounting bracket (used for wall plates) can be used with plasterboard walls. MagIQtouch Controller INSTALLATION MANUAL | 6...
-
Page 10: Mounting The Magiqtouch Wireless Receiver
MOUNTING THE MAGIQTOUCH WIRELESS RECEIVER We recommend installation of the wireless receiver (Antenna) inside the ceiling space, as far away from heating/cooling appliances and ductwork as possible and also as close as practical to the area of the building the remote controller will be used the most. -
Page 11: Heater With Zones
MOUNTING THE MAGIQTOUCH WIRELESS RECEIVER HEATER WITH ZONES - INSTALLATION ILL2854-A MagIQtouch Controller INSTALLATION MANUAL | 8... -
Page 12: Cooler Installation
MOUNTING THE MAGIQTOUCH WIRELESS RECEIVER COOLER INSTALLATION ILL2855-A MOUNTING THE WIRELESS RECEIVER For most installations, mounting the receiver as shown (Fig 1) will provide satisfactory performance. ILL665-D Using the communication cable supplied, connect it to the RJ socket as shown ILL670-E Metal Roofing Wood or Metal Beam... - Page 13 MOUNTING THE MAGIQTOUCH WIRELESS RECEIVER For installations where the roof is framed with steel, resting the wireless receiver between joists and keeping the antenna as far away as possible and perpendicular (at right angles) to joists will give the best results. (Fig. 3) ILL666-E 1 = Hold the receiver flat onto the ceiling beam 2 = Fix the screw through the tab...
-
Page 14: Commissioning
COMMISSIONING • Factors that may influence performance are: • Shielding from metal in the attic laying between the wireless receiver and the wireless smart controller. • Reflections from metal around the wireless receiver. • Interference from nearby transmitters (e.g. mobile phone, AM radio, Television, RF security systems) CONNECTING THE WIRELESS RECEIVER Please refer to the installation manual of the heating or cooling appliances... - Page 15 COMMISSIONING Step 3 Within 8 minutes of cycling the power, press the home button on the Wireless Smart Controller to activate it. ILL1521-C Step 4 Follow the on screen instructions to pair the wall control. ILL2857-B ILL2858-A MagIQtouch Controller INSTALLATION MANUAL | 12...
-
Page 16: Pairing Additional Controller
COMMISSIONING Step 5 When the Wireless wall controller is paired the installation wizard will appear. The Installation wizard will step you through the complete process. ILL1610-B To complete the commissioning please refer to the ‘MagIQtouch Controller - Installation manual supplied with this kit. PAIRING ADDITIONAL WIRELESS CONTROLLER The wireless receiver can communicate with 2x Wireless Smart Controllers within the system. - Page 17 COMMISSIONING Step 2 Cycle the power to the installation. This will make the Wireless receiver discoverable for a maxmium of 8 minutes to the Wireless smart controller. Step 3 Select ‘Additional Controller’ to pair the second Wireless controller. ILL2859-B ILL2860-A ILL2861-A The additional wireless smart controller is now ready to use.
-
Page 18: Wireless Connection Maintenance
WIRELESS CONNECTION MAINTENANCE Should the wireless communications require updates or modifications in the system, these can be accessed in the SERVICE section of the Wireless Smart controllers as follows; Step 1 ILL1613-D Step 2 ILL1623-D 15 |... - Page 19 WIRELESS CONNECTION MAINTENANCE Step 3 ILL2862-A Step 4 Refer to MagIQtouch Wall control install manual for code. ILL1625-A MagIQtouch Controller INSTALLATION MANUAL | 16...
- Page 20 WIRELESS CONNECTION MAINTENANCE ILL2863-A ABOUT WIRELESS RECEIVER Detailed RF signal strength (RSSI) and battery voltage (mV) information is displayed here. CHECK/MODIFY WIRELESS CONFIGURATION All known Wireless smart devices connected to the system will be shown. If devices are missing the wireless receiver can re-scan for wireless devices from this configuration screen to maintain the system.
-
Page 21: Wireless Rf Signal Range
WIRELESS CONNECTION MAINTENANCE WIRELESS RF SIGNAL RANGE It is recommended to check the RF range of the wireless smart controller during commissioning to know the best positions / environments to maintain normal operation of the system & controller. To check signal strength or range of the wireless smart controller it can be accessed as follows;... -
Page 22: Controller Or System Reset
CONTROLLER OR SYSTEM RESET It is possible to reset the whole system (including all connected components) or the MagIQtouch Controller only. Use a pin or paperclip to press and hold the reset button located at the back. ILL1596-C This will cause the following screen to appear: ILL1632-A Note! RESET WALL CONTROLLER ONLY This option should only be selected if the wall controller connected was... -
Page 23: Controllers Connected
CONTROLLER OR SYSTEM RESET SYSTEM RESET WHEN 2X WIRELESS WALL CONTROLLERS ARE CONNECTED Recommended sequence to reset the whole system when 2x wireless wall controllers are installed. Step 1 Go to 1x “active” wireless wall controller ILL1613-D Step 2 ILL1623-D Step 3 ILL2862-A MagIQtouch Controller INSTALLATION MANUAL | 20... - Page 24 CONTROLLER OR SYSTEM RESET SYSTEM RESET WHEN 2X WIRELESS WALL CONTROLLERS ARE CONNECTED Step 4 ILL3037-A Step 5 When the screen shot below is displayed, go to the 2nd wireless wall controller ILL2857-A Step 6 Activate the 2nd wireless wall controller ILL2879-A 21 |...
- Page 25 CONTROLLER OR SYSTEM RESET SYSTEM RESET WHEN 2X WIRELESS WALL CONTROLLERS ARE CONNECTED Step 7 ILL3038-A Step 8 ILL3039-A Step 9 Pair controller and the Installation Wizard will begin. ILL2857-A MagIQtouch Controller INSTALLATION MANUAL | 22...
-
Page 26: Support
SUPPORT Symptom Cause Action The MagIQtouch Batteries not fitted Remove battery cover and fit 4x AA Wireless Smart batteries Controller has no Batteries not fitted Ensure batteries are orientated as shown display correctly inside battery cavity Batterries are low Replace 4x AA batteries Controller in sleep Press the Home button to the right of the mode... - Page 27 SUPPORT Symptom Cause Action The screen on the The Smart controller Press Home Button Wireless Smart conserves the battery Controller goes life by putting the blank after a while controller in a sleep mode The screen on The Smart controller To check the status of the system press the wireless conserves the battery...
-
Page 28: User Guide
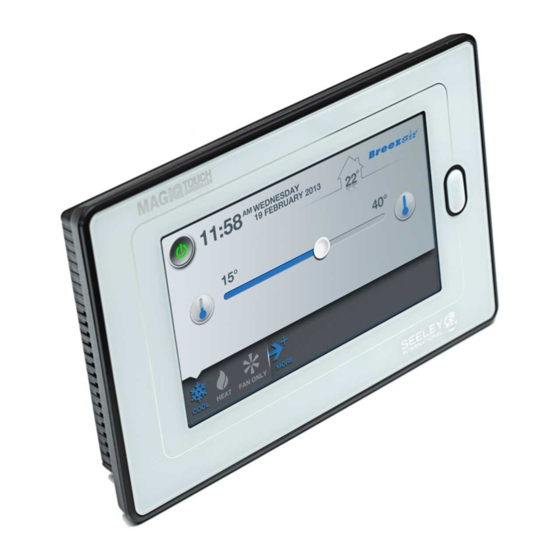
USER GUIDE 25 |... - Page 29 USER GUIDE ILL1582-C Hello and congratulations on purchasing a MagIQtouch Wireless Smart Controller for your home! The MagIQtouch Wireless Smart Controller is a versatile and intelligent Controller that can be used with a range of compatible products. This manual is a supplement to the MagIQtouch Controller Owners Manual supplied with this Wireless controller.
-
Page 30: General Tips
GENERAL TIPS • Mount the MagIQtouch Wireless Smart Controller in a room you want climate controlled. Ideally it should be positioned 1.5m (5’) from the floor and away from any other heating or cooling sources. • Ensure the MagIQtouch Wireless Smart Controller is not exposed to direct sunlight as this will impact the temperature reading. -
Page 31: Quick Start
QUICK START Here’s a brief visual guide to get you started quickly! Turning on the MagIQtouch Wireless Smart Controller. STEP 1 Activate screen. ILL1521-C ILL1522-C MagIQtouch Controller INSTALLATION MANUAL | 28... -
Page 32: Sleep Mode
SLEEP MODE If the Wireless controller is not touched for a period of time, it will go to a sleep mode where the screen will go blank. Simply push the “home” button to view the display. ILL2875-A 29 |... -
Page 33: Wireless Range
WIRELESS RANGE It is recommended for optimum performance to operate your Wireless Smart Controller within 30m of the appliance. ILL2876-A MagIQtouch Controller INSTALLATION MANUAL | 30... - Page 34 WIRELESS RANGE To check the signal strength of your Wireless Smart Controller, follow these steps. Step 1 Press “SETTINGS” ILL1613-D Step 2 Press “RF SIGNAL STRENGTH” ILL2914-A Step 3 RF Signal Strength display appears ILL2761-A 31 |...
- Page 35 WIRELESS RANGE As you move the wireless controller around your home it will be quite normal for the RF signal strength to change. If the wireless control is out of range the following message will be displayed. ILL2878-A MagIQtouch Controller INSTALLATION MANUAL | 32...
-
Page 36: Additional Controller
ADDITIONAL WIRELESS SMART CONTROLLER If you have an additional Wireless Smart Controller installed in your system both controllers have the same operation and features. The last controller used is the active controller Wireless Controller No. 1 “ACTIVE” ILL1544-D Wireless Controller No. 2 “INACTIVE”... - Page 37 ADDITIONAL WIRELESS SMART CONTROLLER To activate an ‘INACTIVE’ wall control press ‘ACTIVATE’ ILL1544-C The “Activate” button is displayed on the Inactive controller. ILL1544-D MagIQtouch Controller INSTALLATION MANUAL | 34...
-
Page 38: Trouble Shooting
TROUBLE SHOOTING Your MagIQtouch Controller may prompt you to call a service agent to resolve a service issue. If your Controller has only recently been installed, we recommend you call your local Dealer for support first. Otherwise, call the Service number on the back of this manual. Symptom Cause Action... - Page 40 6 WITTON ROAD, FOUNDERSVIEW SOUTH, MODDERFONTEIN 1609, GAUTENG, SOUTH AFRICA It is the policy of Seeley International to introduce continual product improvement. Accordingly, specifications are subject to change without notice. Please consult with your dealer to confirm the specifications of the model selected.
Need help?
Do you have a question about the MaglQtouch and is the answer not in the manual?
Questions and answers