Seeley MagIQtouch Installation Manual
Hide thumbs
Also See for MagIQtouch:
- Owner's manual (36 pages) ,
- Installation manual (32 pages) ,
- Original instructions manual (28 pages)
Table of Contents
Advertisement
Advertisement
Table of Contents

Related Manuals for Seeley MagIQtouch


Summary of Contents for Seeley MagIQtouch
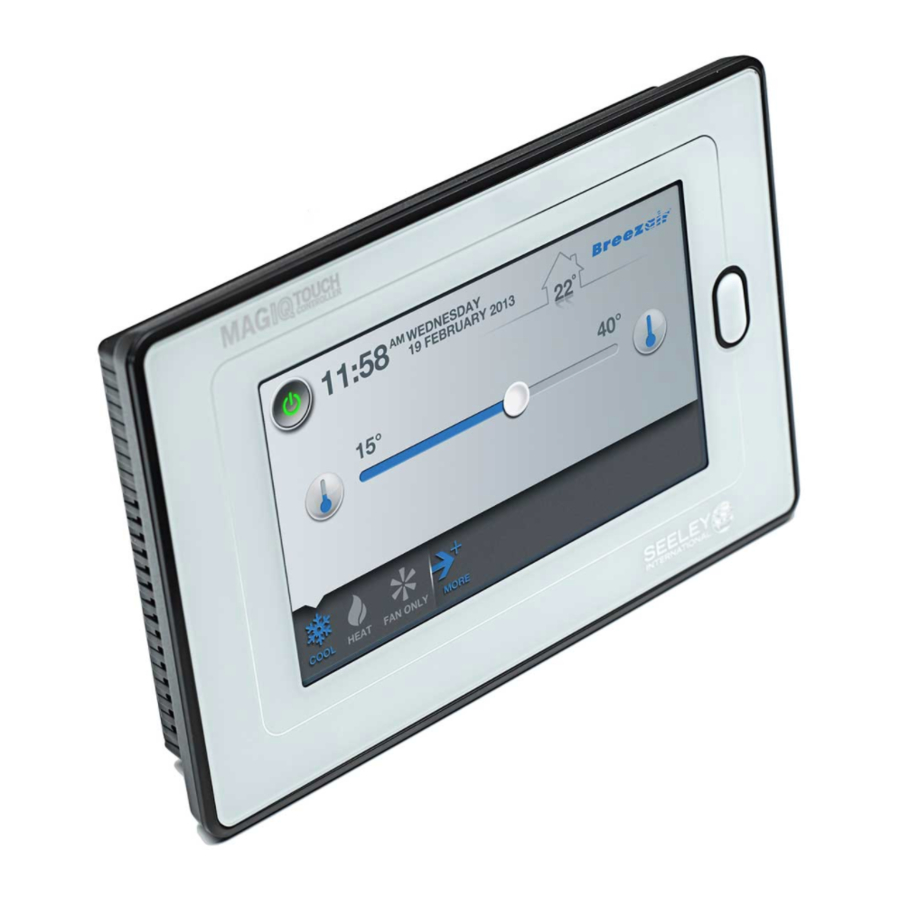
- Page 1 INSTALLATION MANUAL MagIQtouch Controller Original English Instructions...
-
Page 2: Table Of Contents
TABLE OF CONTENTS CABLE LENGTHS MOUNTING THE MAGIQTOUCH CONTROLLER CONNECTING THE MAGIQTOUCH CONTROLLER Single Component Installation (No Zones) Multiple Component Installations OPERATION SCREENS SETTINGS MENU GENERAL MENU COOLER & HEATER MENUS SERVICE MENU CONTROLLER OR SYSTEM RESET MANAGING COMPONENTS Adding Components... -
Page 3: Cable Lengths
CABLE LENGTHS Seeley International cooler or heater ILL1583-C • Cables used for the MagIQtouch Controller are 26AWG, 7/0.16, 6 core flat. • 20m/66’ cable is supplied with each Seeley cooler or heater. • Supplied cables should not be altered. ALWAYS route cables at least 300mm/12" away from regular power cables and high power machines. -
Page 4: Mounting The Magiqtouch Controller
MOUNTING THE MAGIQTOUCH CONTROLLER The MagIQtouch Controller should be placed approximately 1.5 metres/5’ above the floor, in the most used room of the home. Placement is critical for correct functioning of the temperature sensing thermostat inside the Controller. The following points must be taken into consideration: •... - Page 5 MOUNTING THE MAGIQTOUCH CONTROLLER cont Remove the mounting bracket from the rear of the MagIQtouch Controller. STEP 1 ILL1584-A STEP 2 ILL1585-A STEP 3 ILL1586-A MAGIQTOUCH CONTROLLER INSTALLATION MANUAL |...
- Page 6 MOUNTING THE MAGIQTOUCH CONTROLLER cont Using the bracket as a template, mark the centre points for the screw and cable access holes. ILL1587-A Important! The cable hole should be positioned centrally within the rectangular window in the mounting bracket. Ø16mm (5/8") Ø5 - 6mm...
- Page 7 Insert wall plugs into holes. Align and screw the bracket into position using the supplied screws. ILL1589-A ILL1590-A Alternatively, a standard stud mounting bracket (used for wall plates) can be used with plasterboard walls. ILL1591-A MAGIQTOUCH CONTROLLER INSTALLATION MANUAL |...
- Page 8 MOUNTING THE MAGIQTOUCH CONTROLLER cont Draw the cable through the wall cavity to the hole made at the wall bracket. Connect the cable to the wall control and mount the wall control onto its bracket. ILL1592-A Important! Take care not to damage the cable or plug during this process.
- Page 9 Slide and align the wall control over the protruding bracket tabs. Pull the wall control down so the bracket tabs engage and locate with the keyway slots on the rear. STEP 1 ILL1593-A STEP 2 ILL1594-A MAGIQTOUCH CONTROLLER INSTALLATION MANUAL |...
-
Page 10: Connecting The Magiqtouch Controller
SINGLE COMPONENT INSTALLATION (NO ZONES) Ensuring the MagIQtouch Controller is properly connected power up the heater/cooler. ILL1595-A To activate the MagIQtouch Controller screen, press the button to the right. ILL1521-C Note! The following images are examples only of some of the screens that may be displayed in the System Installation Process. - Page 11 (heaters, coolers, zone controllers, air sensors etc). If no component is found, the MagIQtouch Controller will display the error. Check connections and power and RETRY. If successful, the MagIQtouch Controller will display what it has found for confirmation.
-
Page 12: Multiple Component Installations
Note! It is important that evap coolers are connected ONE AT A TIME as prompted by the MagIQtouch Controller. If more than one component of the same device type is connected at the same time... -
Page 13: Operation Screens
OPERATION SCREENS Select primary mode (COOL/HEAT/FAN ONLY): ILL1613-C Turn system on & off: ILL1614-C Adjust temperature: ILL1615-C MAGIQTOUCH CONTROLLER INSTALLATION MANUAL |... - Page 14 OPERATION SCREENS cont Choose between TEMP or SPEED control (Evap coolers only) ILL1617-C Adjust Fan speed and over ride thermostatic “temperature” Control: ILL1616-C ILL2405-A For detailed information on the operation screens refer to the MagIQtouch Controller Owner’s Manual.
-
Page 15: Settings Menu
SERVICE menu containing component and fault information. Note! The Controller only displays the menus and items relevant to the installed system. Tap the heading tabs to navigate through menus. ILL1618-A ILL1619-A Menu items are listed on left side of screen. ILL1620-C MAGIQTOUCH CONTROLLER INSTALLATION MANUAL |... - Page 16 SETTINGS MENU cont Current status on right side of screen. ILL1599-C To change a setting or access menu item, press arrow. ILL1621-C If a menu item is locked to discourage customer access the pin code is 7378. ILL1622-A...
-
Page 17: General Menu
GENERAL MENU The GENERAL menu includes settings or information related to the MagIQtouch Controller, or the system as a whole. Depending on your installation the GENERAL menu may differ from below. ILL1623-C • Time and Date. • Language. • °C / °F (temperature unit). -
Page 18: Cooler & Heater Menus
COOLER & HEATER MENUS The COOLER and HEATER menus include settings or information related to the specific Seeley International cooling or heating products installed within the system. More information about the specific settings of these products is provided in the separate product installation guide. - Page 19 Also, this menu gives access a “Service Operating Screen” that can be used as a troubleshooting tool for each component installed. ILL1627-A Using the “Service Operating Screen” component status can be changed for diagnostic purposes. ILL1628-C MAGIQTOUCH CONTROLLER INSTALLATION MANUAL |...
- Page 20 SERVICE MENU cont Other components of the same type can be accessed by using the scroll left/right buttons. ILL1629-C To access other types of components in system go BACK to main SERVICE screen and select another . ILL1624-C Navigate menu to find “Service Operating Screen”. ILL1631-C...
-
Page 21: Controller Or System Reset
CONTROLLER OR SYSTEM RESET It is possible to reset the whole system (including all connected components) or the MagIQtouch Controller only. Use a pin or paperclip to press and hold the reset button located at the back. ILL1596-B This will cause the following screen to appear:... -
Page 22: Managing Components
MANAGING COMPONENTS ADDING COMPONENTS To add a new component, simply connect it to the system and power up. The Controller will detect that a new component has been added and lead you through the set-up process. Important! New components of the same type are connected and set-up ONE AT A TIME. -
Page 23: Replacing Components
MANAGING COMPONENTS cont REPLACING COMPONENTS When a component is disconnected the MagIQtouch Controller will display a warning message. ILL1634-C When a new replacement component is connected and powered up, the controller will give you options to follow depending on your installation. -
Page 24: Removing Components
PERMANENTLY REMOVING COMPONENTS Disconnect the component from the system. This should cause the MagIQtouch Controller to display a warning message. ILL1638-C The normal screen operation will resume except a fault icon will appear in the lower right hand corner of the task bar. - Page 25 MANAGING COMPONENTS cont REMOVING COMPONENTS CONT. Select REMOVE APPLIANCE ILL2408-A Press DELETE to permanently remove the appliance from the system ILL2409-A MAGIQTOUCH CONTROLLER INSTALLATION MANUAL |...
-
Page 26: Managing The Magiqtouch Controller
Connect the Controller to the system, ensuring all components are powered. Choose the ‘‘HEATING” or “COOLING” or both.. ILL2410-A The MagIQtouch controller scans one type of component at a time. You can skip to next component type if all a particular type have been found. ILL2411-A... -
Page 27: Connecting A Pre-Used Controller
CONTROLLER cont CONNECTING A NEW CONTROLLER TO AN EXISTING SYSTEM cont The MagIQtouch controller displays a summary list of what it found. If correct it can be accepted ready for the controller to operate. ILL1637-C CONNECTING A PRE-USED CONTROLLER Important! Reset any pre-used MagIQtouch controllers before configuring to an existing system. -
Page 28: Fault Routine
FAULT ROUTINE When a component experiences a fault the below screen will be displayed. The operator has three choices. ILL1641-B By pressing “IGNORE” the fault still remains, and a small fault icon will be displayed on the lower right hand side of the screen. By pressing the “attention”... - Page 29 ILL1643-B ILL1644-B For more information on product specific fault codes, please refer to the installation manual provided with the product or contact a local service agent. MAGIQTOUCH CONTROLLER INSTALLATION MANUAL |...
-
Page 30: Slave Controllers
SLAVE CONTROLLERS Multiple MagIQtouch Controllers can be used to control individual zones. In such installations there is always one “master controller” located in a nominated “master zone”. All other controllers become “slave controllers”. In such systems certain principles that apply: •... -
Page 31: Power Outages
DISPLAY” option on in the SETTINGS menu. The Controller is in Review the schedule PROGRAM mode and via the EDIT button on the current time period the PROGRAM home specifies the cooler/ screen. heater be “OFF”. MAGIQTOUCH CONTROLLER INSTALLATION MANUAL |... - Page 32 6 WITTON ROAD, FOUNDERSVIEW SOUTH, MODDERFONTEIN 1609, GAUTENG, SOUTH AFRICA It is the policy of Seeley International to introduce continual product improvement. Accordingly, specifications are subject to change without notice. Please consult with your dealer to confirm the specifications of the model selected.
Need help?
Do you have a question about the MagIQtouch and is the answer not in the manual?
Questions and answers