
Related Manuals for ParaZero SafeAir M-200 Pro


Summary of Contents for ParaZero SafeAir M-200 Pro
- Page 1 SafeAir M-200 Pro INSTALLATION GUIDE For systems equipped with electronic TerminateAir...
-
Page 2: Table Of Contents
OPERATING GUIDELINES ....................20 Preflight ............................. 20 Takeoff .............................. 20 Before Landing ..........................20 After Landing ........................... 20 Replacing the batteries ........................21 DEPLOYMENT ........................22 General ............................22 Repacking the parachute ......................22 SafeAir™ M-200 Pro Installation Guide www.parazero.com... - Page 3 Important Notice ParaZero’s drone safety system is a risk-mitigation system that aims to lower the impact energy in proper use. ParaZero’s drone safety system is not intended to eliminate all damages to people or property and Parazero cannot guarantee this. ParaZero’s drone safety system is a ballistic system that uses a pyrotechnic component. Please note, you must read, comply with and apply all written information in this manual.
-
Page 4: General Information
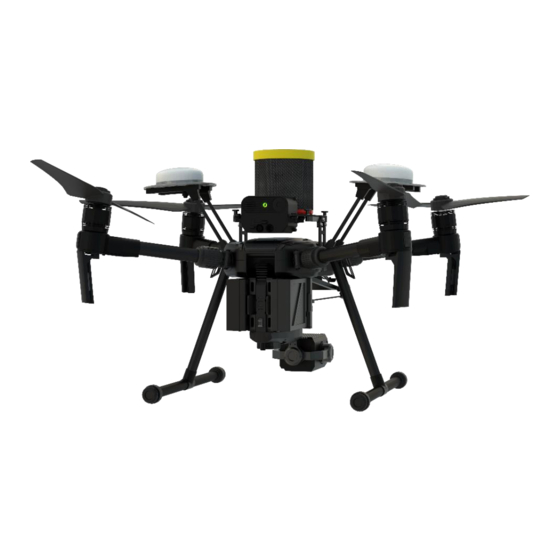
Not to connect the TerminateAir to the SmartAir. The ParaZero SafeAir M-200 Pro is smart-parachute system that deploys autonomously after detecting a critical failure in your drone. The parachute slows the descent rate of your drone and reduces the kinetic energy upon impact. The system incorporates the following main... -
Page 5: Technical Specifications
Vertical speed of descent (hover):* 3.27m/s maximum takeoff weight 6.14Kg Total system weight 800g Temperature Range -25°C to + 55°C Maximum Wind Speed/Flight Speed 55knots Humidity *ISA, at zero wind and stabilized vertical speed. SafeAir™ M-200 Pro Installation Guide www.parazero.com... -
Page 6: Safety Instructions
Do not remove the safety pin until specifically instructed to do so in this guide. This manual explains how the SafeAir M-200 Pro works and how to properly operate the system on the ground and in the air. Be sure to take the time to read this manual carefully in order to increase your safety and the safety of those around you. -
Page 7: Package Contents
Package Contents The SafeAir M-200 Pro package includes the following parts: Table 1 – SafeAir M-200 Pro Package Contents Description The main bracket, including the canister, the SmartAir Pro (SAP) with a safety pin and pyro dummy The electronic TerminateAir M-200 Pro (2 identical parts) -
Page 8: Smartair Connectors Overview
B – External damper holders A – Safety pin B – FTS/UART connector (+optional Vin & PWM) C – USB-C connector D – Parachute connector E – RGB LED F – Inner buzzer Front side SafeAir™ M-200 Pro Installation Guide www.parazero.com... -
Page 9: Installation
Replace the three original M-200 screws with the ParaZero longer screws (six total). On the screws, make sure to place the washer first and then the spring washer above it before inserting the screws into the landing gear joints. -
Page 10: Connecting The Electronic Terminateair
3 for the second battery Use the short black cable to connect between the 2 upper ports of the 2 electronic TerminateAir units. Notice that the white line on the connector should face upwards. SafeAir™ M-200 Pro Installation Guide www.parazero.com... -
Page 11: Connecting The Parachute System To The Legs
Make sure that the rotors may spin freely without any contact with the parachute system Notice For M-210 It is recommended to install the extended GPS module provided. SafeAir™ M-200 Pro Installation Guide www.parazero.com... -
Page 12: Flight Preparations
Use the pyro-dummy connected instead of the parachute cable for the SAP to complete initialization. Warning Please disconnect FTS and Parachute cables from the SmartAir to prevent activation during firmware update process SafeAir™ M-200 Pro Installation Guide www.parazero.com... -
Page 13: Drone Preparations
Turn on the drone’s power. Disable the Upward IR sensor: On your DJI GO app, press the 3 dots icon on the upper right corner of the screen: Select the drone icon: Scroll down Deselect Upward Obstacle Avoidance SafeAir™ M-200 Pro Installation Guide www.parazero.com... -
Page 14: Inserting The Pyro Actuator
Insert the pyro-actuator into the socket in the bottom of the container, make sure you push it all the way in. SafeAir™ M-200 Pro Installation Guide www.parazero.com... -
Page 15: Inserting The Parachute
SAP, towards the front of the drone and place the yellow cap. Make sure the cap is secured and that the parachute is not sticking out of the cap. SafeAir™ M-200 Pro Installation Guide www.parazero.com... -
Page 16: Remote Controller (Optional)
Remote Controller (optional) 6.1 RC System Ports & Switches Lanyard hole Trigger switch Power switch Charging port Belt clip SafeAir™ M-200 Pro Installation Guide www.parazero.com... -
Page 17: Rc System Status And Troubleshooting
Try to manually release the Trigger Magenta flashes Trigger switch problem switch and then turn the RC off and on again 6.3 RC System Specifications Range – 1 km or line sight Battery capacity – 1.5 hours SafeAir™ M-200 Pro Installation Guide www.parazero.com... -
Page 18: System Led Indications
System LED indications Stage Buzzer Indication Required action Alternating System didn’t sync Connect system to Parazero Purple/Teal with app for a long Desktop App to sync logs and time check for updates Solid Orange System battery is not Charging the system is... - Page 19 (*) ParaZero Remote Controller (RC) is an optional add-on and provides manual triggering ability. The LED indication is applicable for RC equipped systems. SafeAir™ M-200 Pro Installation Guide...
-
Page 20: Operating Guidelines
Operating Guidelines 8.1 Preflight Initial Conditions: The safety pin is in. Finalize all the preflight procedures to your drone and payload. The following tasks are in addition to the regular preflight tasks – Ensure that the thumb screws and the mounting legs screws are firmly closed. ... -
Page 21: Replacing The Batteries
Insert the safety pin all the way into position. Remove one battery at a time by grabbing the battery, while pressing the TerminateAir handle. To replace the battery, slide it onto the TerminateAir until an audible click is sound. SafeAir™ M-200 Pro Installation Guide www.parazero.com... -
Page 22: Deployment
Deployment 9.1 General The SafeAir M-200 Pro includes an Autonomous Triggering System (ATS) that identifies most of the known critical failures and triggers the system autonomously. Should an emergency situation occur, the system deploys the parachute, stops the rotors and reduces impact energy upon landing. - Page 23 It is important to keep the structure of the previous folds. Start the folding process from one end and use weights to keep the parachute folded, as you move along the length of the parachute. SafeAir™ M-200 Pro Installation Guide www.parazero.com...
- Page 24 Make sure the cap is secured and that the parachute is not sticking out of the cap. Fly Safely! Should you have questions, contact our support team at – contact@parazero.com Phone – +972-36885252 SafeAir™ M-200 Pro Installation Guide www.parazero.com...
- Page 25 Operate Drones Everywhere, Safely Tel – +972-36885252 30 Dov Hoz Kiryat Ono, Israel 5555626 www.parazero.com...
Need help?
Do you have a question about the SafeAir M-200 Pro and is the answer not in the manual?
Questions and answers