Table of Contents
Advertisement
Quick Links
SAFETY INFORMATION
AbOuT ThIS SupplEMENT
Cannondale Owner's Manual Supplements provide
important model specific safety, maintenance, and technical
information. They are not replacements for your Cannondale
Bicycle Owner's Manual.
This supplement may be one of several for your bike. Be sure
to obtain and read all of them.
If you need a manual or supplement, or have a question
about your bike, please contact your Cannondale Dealer
immediately, or call us at one of the telephone numbers listed
on the back cover of this manual.
You can download Adobe Acrobat PDF versions of any
Cannondale Owner's Manuals or Supplements from our
website:
http://www.cannondale.com/bikes/tech.
•
This manual is not a comprehensive safety or service
manual for your bike.
•
This manual does not include assembly instructions for
your bike.
•
All Cannondale bikes must be completely assembled and
inspected for proper operation by a Cannondale Dealer
before delivery to the owner.
WARNING
This supplement may include procedures beyond the
scope of general mechanical aptitude.
Special tools, skills, and knowledge may be required.
Improper mechanical work increases the risk of an
accident. Any bicycle accident has risk of serious
injury, paralysis or death. To minimize risk we strongly
recommend that owners always have mechanical work
done by an authorized Cannondale retailer.
hEAdShOk SOlO w/dl50 bIcYclE FORk
SupplEMENT
Please consult the Cannondale Solo Bicycle Fork Owner's
Manual Supplement for care and maintenance information
concerning the fork and front wheel removal and installation.
REAR bRAkE ROTOR
WARNING
kEEp YOuR hANdS ANd FINGERS clEAR OF ThE
bRAkE ROTOR ANd chAINcASE!!
chAINcASE hub cAp
NOTIcE
dO NOT RIdE ThIS bIkE WITh ThE chAINcASE hub
cAp REMOvEd. Serious damage to the hub will result.
See page 13.
bIcYclE REpAIR / WORk STANdS
The clamping jaws of a bike stand can generate a crushing
force strong enough to seriously damage your frame.
NOTIcE
Never place your bike in a bike stand by clamping the
frame.
Place your bike in a stand by extending the seat post and
positioning the stand clamp on the extended seat post.
Don't extend beyond the MINIMUM INSERT line marked
on the seat post.
Since a seat post can also be damaged by clamping force,
adjust the stand clamp for the minimum clamping force
needed to secure the bike.
Also, before clamping, clean the post and protect the seat
post finish with a rag.
1
125367.PDF
EN - 02/10
Advertisement
Table of Contents

Subscribe to Our Youtube Channel
Related Manuals for Cannondale ON


Summary of Contents for Cannondale ON
- Page 1 Place your bike in a stand by extending the seat post and accident. Any bicycle accident has risk of serious positioning the stand clamp on the extended seat post. injury, paralysis or death. To minimize risk we strongly Don’t extend beyond the MINIMUM INSERT line marked recommend that owners always have mechanical work on the seat post.
- Page 2 Serial Number For paved roads, gravel or dirt roads that are in good condition, The serial number for this bicycle is printed on a barcoded label on the underside of the bottom bracket. Use this serial and bike paths. number for warranty registration and theft recovery. See your Cannondale Bicycle Owner’s Manual for more information on warranty registration.
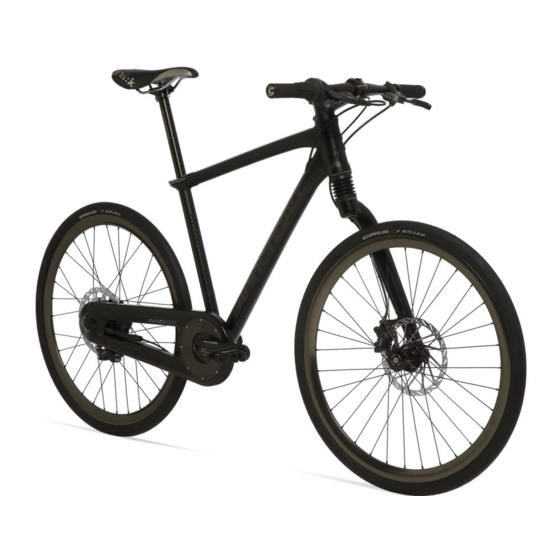
- Page 3 125637.PDF The ON bike is the first production bike inspired by the ON Concept bike shown at Eurobike 2007. The ON makes use of the “System Integrated Chain Case Technology”, where the chain case is a single sided, fully enclosed, structural part of the bike frame. This re- sult in a clean and efficient drive system with 9 speed internal gears and disc brakes.
- Page 4 TIp: Note orientation of crank cover when removing - the hole The right side crank arm is connected to the chain in cover is not central and the cover should be rotated on ring. Both the chain ring and right crank arm will be...
- Page 5 A181/ 4. Insert the eccentric into the BB shell on the drive side. Hold the cable in the BB trough as the eccentric is inserted. 5. Install the left side bearing cup and bearing into the left side of the eccentric.
- Page 6 Shifting set-up of the i-MOTION 9 rear hub is described on page 12. A wheel truing tool is available to Cannondale Dealers so that the wheel may be positioned in a traditional wheel stand. It is necessary to remove the axle hub bolt from the end of the hub shell to insert the tool parts.
- Page 7 1. Place the bike in a work stand with the rear wheel suspended. to the square hub end recess in the hub cap and the 2. If you haven’t already noticed the big NOTICE on the next page, please read it now. mating surfaces of the chaincase. Be care when apply grease, avoid contaminating chaincase bolt holes .
-
Page 8: Cable Routing
Where the cables contact the outside surface of the frame, be sure to affix the clear adhesive frame protection so rubbing does not occur. When it comes to time to reassemble and reconnect this mechanism, be sure to thread the adjuster on all the way 125039 10 mm... -
Page 9: Rear Wheel
125637.PDF REAR WhEEl 3. Engage a freewheel remove/installation tool pARk FR-1 or Shimano Tl-FW30 into the hub axle nut. The following procedures should only be performed by a professional bike mechanic. Loctite® 641™ Retaining Compound is used to bond the hub bearings to the spindle during wheel installation. -
Page 10: Installation
Slots threaded onto the spindle end. You may have to hold 1. Remove any residual Loctite on the innner and outer the axle nut, while slowly rotating the crank arm to Flange bearing lands. -
Page 11: Chain Tension
Prior to checking tension, the chain should be inspected and lubricated which can be accomplished by removing the chain ring binder node in the position indicated. Cannondale seat binder replacement part numbers appear in the graphic above. cover. Chain tension is adjusted by rotating the eccentric assembly with the bottom bracket shell. In the illustration above, the left-crank arm is shown removed above for clarity. -
Page 12: Tightening Torques
GEOMETRY ANd SpEcIFIcATION Correct tightening torque for the fasteners (bolts, screws, nuts) on your bicycle is very important to your safety. Correct tightening torque for the fasteners is also important for the durability and performance of your bicycle. We urge you to have your Cannondale Dealer correctly torque all fasteners using a torque wrench. -
Page 13: Maintenance
SEvERElY INJuREd OR pARAlYZEd. Please ask your Cannondale Dealer to help you develop a complete maintenance program, a program which includes a list of the parts on your bike for YOU to check regularly. Frequent checks are necessary to identify the problems that can lead to an accident.
Need help?
Do you have a question about the ON and is the answer not in the manual?
Questions and answers