Table of Contents
Advertisement
Quick Links
I
I
STL-11104-20_BDAL_L 585 S_148x210mm 2.indd 1
STL-11104-20_BDAL_L 585 S_148x210mm 2.indd 1
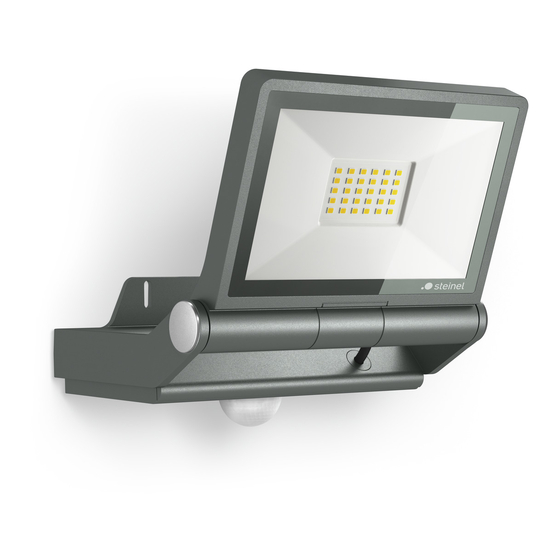
XLED PRO ONE S
XLED PRO ONE Plus S
XLED PRO ONE Max S
XLED PRO ONE
XLED PRO ONE Plus
XLED PRO ONE Max
XLED PRO ONE S
XLED PRO ONE Plus S
XLED PRO ONE Max S
XLED PRO ONE
XLED PRO ONE Plus
XLED PRO ONE Max
GB
DE
GB
FR
NL
IT
ES
DE
PT
GB
SE
FR
DK
NL
FI
IT
NO
ES
GR
PT
TR
SE
HU
DK
CZ
FI
SK
NO
PL
GR
RO
TR
SI
HU
HR
CZ
EE
SK
LT
PL
LV
RO
BG
SI
CN
HR
RU
EE
LT
15.04.20 07:37
LV
BG
CN
RU
15.04.20 07:37
Advertisement
Table of Contents

Related Manuals for STEINEL XLED PRO ONE S


Summary of Contents for STEINEL XLED PRO ONE S
- Page 1 XLED PRO ONE S XLED PRO ONE Plus S XLED PRO ONE Max S XLED PRO ONE XLED PRO ONE Plus XLED PRO ONE Max XLED PRO ONE S XLED PRO ONE Plus S STL-11104-20_BDAL_L 585 S_148x210mm 2.indd 1 15.04.20 07:37...
-
Page 2: Table Of Contents
Index About this document General safety precautions System description Electrical connection Installation Function Remote control accessory Cleaning and maintenance Disposal Manufacturer's warranty Technical specifications Troubleshooting... -
Page 3: About This Document
1. About this document – Under copyright. Reproduction either in whole or in part only with our consent. – Subject to change in the interest of technical progress. Hazard warning! Warning of hazards from electricity! Warning of hazards from water! 2. -
Page 4: System Description
3. System description Proper use XLED PRO ONE S/Plus S/Max S – LED floodlight with infrared motion sensor. – For indoor and outdoor wall mounting – Not suitable for connecting to a dimmer. Operating principle – The integrated infrared sensor detects the heat radiated from moving objects (e.g. - Page 5 Package contents – XLED PRO ONE S – XLED PRO ONE Plus S – XLED PRO ONE Max S 1× 1× 1× 1× 2× 2× 2× 2× 1× 1× – 1 LED floodlight with infrared motion sensor – 1 Allen key –...
- Page 6 Package contents – XLED PRO ONE – XLED PRO ONE Plus – XLED PRO ONE Max 1× 1× 2× 1× 1× 2× 2× 2× – 1 LED floodlight – 1 Allen key – 2 grub screws – 2 screws – 2 wall plugs –...
- Page 7 XLED PRO ONE S product dimensions – XLED PRO ONE S (a) – XLED PRO ONE Plus S (b) – XLED PRO ONE Max S (c) 182 mm (a) 202 mm (b),(c) 229 mm (a) 259 mm (b),(c) – 7 – Index...
- Page 8 XLED PRO ONE product dimensions – XLED PRO ONE (a) – XLED PRO ONE Plus (b) – XLED PRO ONE Max (c) 182 mm (a) 202 mm (b),(c) 229 mm (a) 259 mm (b),(c) – 8 – Index...
- Page 9 XLED PRO ONE S/Plus S/Max S product components LED floodlight head Mounting bracket Control dial Connecting terminal Terminal cover Sensor unit Cover – 9 – Index...
- Page 10 Time setting Twilight setting Basic light level Remote control RC 12 – 10 – Index...
- Page 11 XLED PRO ONE/Plus/Max product components LED floodlight head Mounting bracket Connecting terminal Terminal cover Cover – 11 – Index...
-
Page 12: Electrical Connection
4. Electrical connection XLED PRO ONE S/Plus S/Max S wiring diagrams – 12 – Index... - Page 13 XLED PRO ONE/Plus/Max wiring diagrams The mains power supply lead is a 3-core cable: phase conductor (usually black, brown or grey) neutral conductor (usually blue) protective-earth conductor (green/yellow) The floodlight can also be connected to the power supply downstream of a mains switch if it is ensured that the mains switch is left ON all the time.
-
Page 14: Installation
5. Installation Hazard from electrical power. Touching live parts can result in electrical shock, burns or death. • Switch OFF power and interrupt power supply. • Using a voltage tester, check to make sure that the power supply is disconnected. •... - Page 15 XLED PRO ONE S/Plus S/Max S reach ≤ 10 m – 15 – Index...
- Page 16 Detecting motion across the direction in which a person walks. XLED PRO ONE S/Plus S/Max S Detecting motion in the direction in which a person walks. XLED PRO ONE S/Plus S/Max S – 16 – Index...
- Page 17 Aiming the floodlight • Correctly aim floodlight. – 17 – Index...
- Page 18 Mounting procedure • Check to make sure the power supply is switched OFF. • Mark drill holes. Ø 6 mm • Drill holes (ø 6 mm) and fit wall plugs. – 18 – Index...
- Page 19 • Unscrew cover. • Open cover. – 19 – Index...
- Page 20 • Pull cable through opening. 5.10 • Screw bracket to mounting surface. – 20 – Index...
- Page 21 5.11 • Unscrew terminal cover. • Connect mains power supply lead as shown in the wiring diagram. ➔ "4. Electrical connection" – 21 – Index...
- Page 22 5.12 • Screw terminal cover in place. 5.13 • Close cover. • Screw in retaining screws. – 22 – Index...
- Page 23 5.14 • Aim floodlight head and fix in place with grub screws. 5.15 • Switch ON power supply. • Setting functions. ➔ "6. Function" – 23 – Index...
-
Page 24: Function
6. Function XLED PRO ONE S/Plus S/Max S • Remove screws to open cover. • Make settings. – 24 – Index... - Page 25 Factory settings – Time setting: 5 seconds – Twilight setting: Daylight mode 1,000 lux – Basic light level: OFF Time setting (H) The stay-ON time) can be set to any period from approx. 5 seconds to a maximum of 15 minutes. Every movement detected re-activates the light. Note: After the LED floodlight switches OFF, it takes approx.
- Page 26 Basic light level (J) The basic level of lighting from basic light LEDs provides a low level of illumination. The main light is only switched ON for the preset time in response to movement within the detection zone. The light then switches to the selected basic brightness.
- Page 27 Manual override 2 x OFF/ON 1 x OFF/ON 1) Activate manual override: • Switch OFF and ON twice. The LED floodlight is set to manual override for 4 hours. Then it returns automatically to sensor mode. 2) Deactivate manual override: • Switch OFF and ON once. Light goes out or switches to sensor operation.
- Page 28 Adjusting the detection zone To rule out inadvertent triggering or to target specific areas, the detection zone can be limited or adjusted with the shroud. • Fit the shroud on the sensor. • Fix the shroud in place by closing the cover. –...
-
Page 29: Remote Control Accessory
7. Remote control accessory Remote control RC 12 (EAN 4007841079000) – Makes it easier to install larger-scale lighting systems. The LED floodlights can be set in any chosen way once they have been installed. – Any number of LED floodlights can be controlled via the remote control unit. - Page 30 The RC 12 remote control can be used for selecting and setting the following XLED PRO ONE S/Plus S/Max S functions: Twilight setting: The chosen response threshold can be set from approx. 2 to 2,000 lux. ➔ Twilight setting (I) Daylight mode (depending on ambient light level) Night mode (2 lux)
- Page 31 Install mode (test mode): Install mode has the purpose of checking for proper working order as well for testing the detection zone. Irrespective of light level, the floodlight switches ON for 10 s in response to movement. Movement is signalised by the status LED.
-
Page 32: Cleaning And Maintenance
8. Cleaning and maintenance The tool requires no maintenance. Hazard from electrical power. Contact between water and live parts can result in electrical shock, burns or death. • Only clean tool in a dry state. Risk of damage to property! Using the wrong cleaning product can damage the light. -
Page 33: Disposal
9. Disposal Electrical and electronic equipment, batteries, accessories and packaging must be recycled in an environmentally compatible manner. Do not dispose of batteries or electrical and electronic equipment as domestic waste. The remote control contains a battery of type CR 2032 (lithium manganese dioxide/organic electrolyte). -
Page 34: Manufacturer's Warranty
For this reason, we recommend that you keep your receipt of purchase in a safe place until the warranty period expires. STEINEL shall assume no liability for the costs or risks involved in returning a product. For information on making claims under the terms of the warranty, please go to www.steinel-professional.de/... -
Page 35: Technical Specifications
11. Technical specifications – Dimensions (H × W× D): XLED PRO ONE S: 230 × 229 × 182 mm XLED PRO ONE PLUS S/Max S: 250 × 259 × 202 mm XLED PRO ONE: 206 × 229 × 182 mm XLED PRO ONE PLUS/Max: 226 × 259 × 202 mm – Power supply: 220-240 V, 50/60 Hz – Output/efficiency: XLED PRO ONE S: 118.9 lm/W XLED PRO ONE PLUS S: 135 lm/W... - Page 36 XLED PRO ONE S/PLUS S/Max S: Max. 10 m – Angle of coverage: XLED PRO ONE S/PLUS S/Max S: 240° – Time setting: XLED PRO ONE S/PLUS S/Max S: 8 s - 35 min – Twilight setting: XLED PRO ONE S/PLUS S/Max S: 2-2,000 lux – IP protection rating: IP44/I –...
-
Page 37: Troubleshooting
Additional switching capacity XLED PRO ONE S/PLUS S/Max S: – Incandescent / halogen lamp load: 1,500 W – Fluorescent lamps, electronic ballasts: 430 W – Fluorescent lamps, uncorrected: 500 VA – Fluorescent lamps, series-corrected: 900 VA – Fluorescent lamps, parallel-corrected: 500 VA – Low-voltage halogen lamps: 1,500 VA... - Page 38 Unit does not switch ON. – Wrong twilight setting selected. • Reset twilight setting. – Mains switch OFF. • Turn on mains switch. – Fuse not switched ON or faulty. • Switch ON fuse. • Change faulty fuse. – Rapid movements being suppressed to minimise malfunctioning, or detection zone too small or incorrectly defined.
- Page 39 STEINEL Vertrieb GmbH Dieselstraße 80-84 33442 Herzebrock-Clarholz Tel: +49/5245/448-188 www.steinel.de STEINEL Vertrieb GmbH STEINEL Vertrieb GmbH Dieselstraße 80-84 Dieselstraße 80-84 33442 Herzebrock-Clarholz 33442 Herzebrock-Clarholz Tel: +49/5245/448-188 Tel: +49/5245/448-188 www.steinel.de www.steinel.de Contact www.steinel.de/contact Contact Contact www.steinel.de/contact www.steinel.de/contact...
Need help?
Do you have a question about the XLED PRO ONE S and is the answer not in the manual?
Questions and answers