Advertisement
Quick Links
TROUBLESHOOTING
PROBLEM
SOLUTION
Lamp stays ON all the time
Cover PIR lens with a thick cloth. If the light turns out, check detection area for
at night.
heat or reflective source. If the light stays on, check wiring. Check that the unit
is not set to manual override.
PIR keeps activating for no
Reset unit. Leave for a maximum of 5 minutes. If light activates, check area for
reason/at random
false activation from heat or reflective source.
PIR sensor will not operate
Check that the power is switched ON at the circuit breaker/ internal wall
at all.
switch. Turn OFF the power to the unit and check the wiring connections.
The PIR sensor will not
Check the lamp. If the lamp has failed, replace. Ensure that the lamp is seated
operate at night.
correctly in the lampholder. Note: Unit will not detect through glass.
Unit activates during the day
The level of ambient light in the area may be too bright to allow operation at the
current DUSK setting. At night, adjust the DUSK control slowly clockwise until
the lamp illuminates.
PIR coverage poor/sporadic
Adjust the setting anti-clockwise to lower the light level required for activation.
Detection range varies from
Unit may be poorly located. Check "Before you start" section for tips. PIR
day to day
sensors are influenced by climatic conditions and are more effective in colder
ambient temperatures. You may need to make seasonal adjustments to the
sensor position to ensure trouble-free operation all year round.
PRODUCT COMPLIANCES
AS/NZS 60598.1:2017
AS/NZS 60598.2.1:2014
EN61000.3.3:2013
EN55015.2013
AS/NZS 61347.1:2016
AS/NZS 61058.1:2008
MANUFACTURERS EXTENDED WARRANTY
This product is guaranteed by SIMX Ltd and Ventair Pty Ltd for 3 years from the date of purchase against
faulty materials or workmanship which affects its designed ability to operate. During this period if the
product has a defect of this nature it will be repaired or replaced free of charge by SIMX with the same
item, or a similar one of higher specification.
ON CONDITION THAT:
• The buyer returns it to the seller from whom it was bought, freight paid.
• The product has been bought by the user (ie. a receipt/sales invoice is produced as proof of purchase).
• The product has not been misused or handled carelessly, installed in any way contrary to the
installation instructions, or installed in any unusually exposed or harsh environmental conditions.
This guarantee excludes liability for discolouration and/or delamination of paint or plastic, or any user
serviceable parts. It does not confer any rights other than those expressly set out above and does not
cover any claims for consequential loss or damage.
Our Goods come with guarantees that cannot be excluded under either Australian, or New Zealand,
Consumer Law.
You are entitled to a replacement or refund for a major failure and for compensation for any other
reasonably foreseeable loss or damage. You are also entitled to have the Goods repaired or replaced if
the Goods fail to be of acceptable quality and the failure does not amount to a major failure.
Distributed in New Zealand by Simx Ltd
Ph: +64 9 259 1660 | Technical Support Ph: +64 9 259 1662
e: sales@simx.co.nz | www.simx.co.nz
Specifications are subject to change without notice
AS CISPR15:2017
EN61000.3.2:2014
EN62031.2015
EN62473.2015
and relevant amendments
Distributed in Australia by Ventair Pty Ltd
4 Capital Place, Carrum Downs, 3201 VIC, AUSTRALIA.
Technical Support: 1300 665 926
e: info@ventair.com.au | www.ventair.com.au | www.simx.com.au
PUB1622 2009
INSTALLATION INSTRUCTIONS
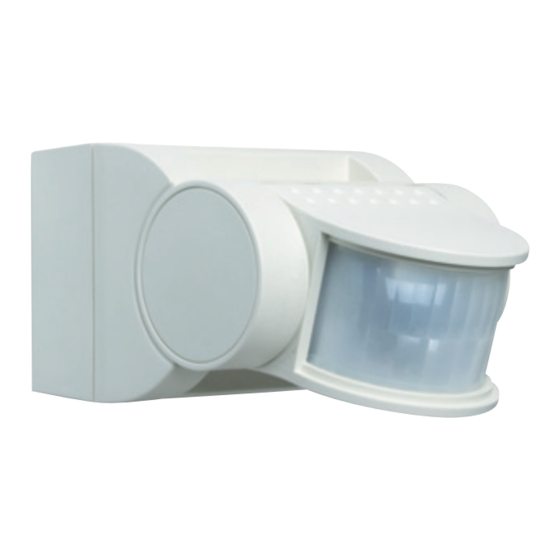
SMART SENSE
SINGLE PIR SENSOR
LHT0119 BLACK / LHT0120 WHITE
Thank you for purchasing the Simx Lighting Smart Sense PIR sensor. This product is suitable for
sheltered exterior locations. It requires a 230V AC power supply to operate and should be installed by a
registered electrician. Please read this manual before installation and retain for future reference.
TECHNICAL SPECIFICATIONS
Power Source
220-240V AC
2000W (4 x 500W tungsten) halogen
Max Rated Load
1000W (10 x 100W GLS) incandescent
(for connected light fittings)
500W fluorescent
110W LED
Detection Range
Up to 12m
Detection Angle
180º
Time On Adjustment
5 secs - 5 mins
Dusk Level Adjustment
Day & night or night only operation
IP44 - surface mounted
IP Rating
IP20 - recess mounted
Safety
Class II
Mounting
Under eaves or wall mount
Construction
UV-stabilised polycarbonate
Warranty
3 years
IMPORTANT
This product is suitable for use only with a supply voltage of 220-240V AC, 50Hz.
All electrical work must be carried out in accordance with local and national electrical codes as
applicable. We strongly recommend that this light fitting is installed by a registered electrician.
Always switch power off prior to installation. A means of mains power isolation must be installed in
the circuit for the purpose of safe access for any internal cleaning, recalibration, or maintenance.
This light fitting is not intended for use by persons (including children) with reduced physical, sensory
or mental capabilities, or lack of experience and knowledge, unless they have been given supervision
or instruction concerning use of the appliance by a person responsible for their safety. Young
children should be supervised to ensure that they do not play with the appliance.
Any changes or modifications made or attempted to this product, without the prior written approval
of the manufacturer, will void any and all stated warranties.
Advertisement

Related Manuals for SImx LHT0119


Summary of Contents for SImx LHT0119
- Page 1 During this period if the Mounting Under eaves or wall mount product has a defect of this nature it will be repaired or replaced free of charge by SIMX with the same Construction UV-stabilised polycarbonate item, or a similar one of higher specification.
- Page 2 BEFORE YOU START WIRING DIAGRAM Fig. 4 Fig. 5 Please read all the instructions prior to installation. Isolating Switch Lens Mask • The Smart Sense PIR sensor should be wired to its own switch. Do not interconnect with other sensor types on the same switch.
Need help?
Do you have a question about the LHT0119 and is the answer not in the manual?
Questions and answers