Table of Contents
Advertisement
Quick Links
Advertisement
Table of Contents

Related Manuals for Insportline PROFI Imperial

Summary of Contents for Insportline PROFI Imperial
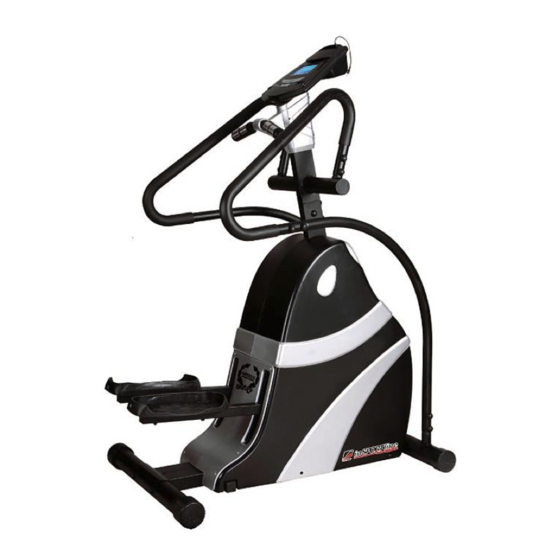
- Page 1 USER MANUAL – EN IN 3881 Stepper inSPORTline PROFI Imperial...
-
Page 2: Table Of Contents
CONTENTS INTRODUCTION ............................. 3 SAFETY PRECAUTIONS ........................3 DIAGRAM ..............................4 PARTS LIST ............................4 ASSEMBLY ............................. 5 Step 1 ..............................5 Step 2 ..............................5 Step 3 ..............................6 Step 4 ..............................6 Step 5 ..............................7 Step 6 ..............................7 Step 7 .............................. -
Page 3: Introduction
INTRODUCTION Thank you for purchasing this product. To use it properly and safely, read the entire manual and observe all warnings and recommendations. SAFETY PRECAUTIONS • WARNING! This product has been designed to offer the maximum safety. Nevertheless, certain precaution should be kept while using it. Read the whole manual before first using and retain it for future reference. -
Page 4: Diagram
DIAGRAM PARTS LIST Name Name Main Frame Cross Pan Head Bolt M4*12 Handlebar Post Nylon Nut M8 T-Handlebar Acorn Nut Ø Handrail (L) Flat Washer Lower Handrail (L) Control wire Ø Handrail (R) Flat Washer Lower Handrail (R) Arc Washer Pedal Arm (L) Pulse Sensor Wire... -
Page 5: Assembly
Pedal Arm (R) 29L/R Pedal (L/R) Front Stabilizer Square Pipe Cap 38*38 Ф60 Round Pipe Cap Rolling cap Ф32 Round Pipe Cap Rear Stabilizer End Cap Adapter Pedal Fixed Plate Hex Head Bolt M8*55 Pulse Sensor Hex Head Bolt M8*15 Console Hex Socket Pan Head Bolt M8*58 37a/b... -
Page 6: Step 3
* Ensure that all bolts and washers are in place and partially threaded in before completely tightening all bolts. Step 3 Feed pulse sensor wires (28) through hole in front of handlebar post (2), and out of the top of the handlebar post. -
Page 7: Step 5
Step 5 Attach the pedal fixed plate (14) and the pedals (29L/R) on the pedal arms (L/R) (8/9) respectively. Align the mounting holes. Secure with 4x hex head bolts (15), 4x flat washers (24) and 4x nylon nuts (22) as shown. Step 6 Fix the bar covers (38a/b) , vertical covers(37a/b) to the T-handlebar (3), handlebar Post (2) respectively and make sure the covers are fixed properly ,then secure the covers (37a/b, 38 a/b) with... -
Page 8: Step 7
Step 7 Connect the extended wire (20) , pulse sensor wire (28) with wires from console (36) respectively, attach the computer (36) carefully onto the bracket and secure in place with the 4x flat washers (26) and 4x cross pan head bolts (21) which are pre-attached to the console. -
Page 9: Console
CONSOLE AUTO ON /OFF: The console will turn on automatically if the exercise machine is in motion or you press one of the buttons ENTER, START/STOP and MODE. If you stop exercising for 256 seconds, console will turn (These operating instructions are for guidance only and the functions marked "*" are alternative, details depend on the exact type of console.) Buttons There are total of 6 buttons including START/STOP, ENTER, MODE, UP, DOWN, and RECOVERY. -
Page 10: Display
Display A. START: Indicates the program selected has started. B. STOP: Indicates the program selected has stopped. And, users are free to change the programs and the value of functions applied. C. PROGRAM: Indicates the programs selected from PROGRAM 1 to PROGRAM 15 (or 17). D. -
Page 11: Operating Range
K. HEART RATE /BODY TYPE: Display value of one function depending on the program. L. LOADING: There are 10 columns of loading bars, and 8 bars in each column. Each column represents 3 minutes workout (without the change of TIME value), and each bar represents 2 levels of load. - Page 12 Please note that only one value of TIME or DISTANCE can be adjusted. Both values do not exist at the same time. For example, the value of DISTANCE is “0.0” while the value of TIME is adjusted to be any number except “00:00”. •...
- Page 13 Program 11 (75% H.R.C.) Program 12 (85% H.R.C.) Program 13 (User setting) Program 14 (User setting) Program 15 (User setting) Program 16 (User setting) Program 17 (Watt control) Body type: According to the% of body fat, body types can be divided into 9 categories: 1.
-
Page 14: Operation Instructions
6. Type – Slim (30% - 34%) 7. Type – Slightly obese (35% - 39%) 8. Type – Obese (40% - 44%) 9. Type – Morbid obese (45% - 50%) BMR: Basal Metabolism Ratio Your baseline metabolic rate (BMR) shows the number of calories your body needs to function normally. -
Page 15: Preset Programs
Preset Programs: PROGRAM 2 to PROGRAM 7 are the preset programs. Press “ENTER” key to select TIME, DISTANCE, and AGE. Then, press ▲ or ▼ key to adjust the values. Users may exercise with different level of loading in different intervals as the profiles show. After pressing “START/STOP”... -
Page 16: Pulse Recovery
the value of WATT setup by users. With the input of age, the computer may suggest a target heart rate to exercise. The suggested heart rate is 85%(220 – age). So, if the heart rate detected equals to or greater than the TARGET H.R., the value of HEART RATE will keep flashing. -
Page 17: Use Of Stepper
USE OF STEPPER Whether you are looking for a nice figure, relaxation, or improved physical condition, the stepper is an aerobic equipment that you can quickly enjoy because of its positive influence on the cardiovascular and circulatory system. In fact, steppers simulate walking down the stairs. Additionally, compared to just walking down the stairs, they do not burden the joints and are therefore more suitable for overweight people and people with joint problems. -
Page 18: Maintenance
Calf-Achilles Stretch Lean against a wall with your left leg in front of the right and your arms forward. Keep your right leg straight and the left foot on the floor; then bend the left leg and lean forward by moving your hips toward the wall. Hold, then repeat on the other side for 30-40 counts. - Page 19 The Seller provides the Buyer a 24 months Warranty for Goods Quality, unless otherwise specified in the Certificate of Warranty, Invoice, Bill of Delivery or other documents related to the Goods. The legal warranty period provided to the Consumer is not affected. By the Warranty for Goods Quality, the Seller guarantees that the delivered Goods shall be, for a certain period of time, suitable for regular or contracted use, and that the Goods shall maintain its regular or contracted features.
- Page 20 26847264 VAT ID: CZ26847264 Phone: +420 556 300 970 E-mail: eshop@insportline.cz reklamace@insportline.cz servis@insportline.cz Web: www.inSPORTline.cz inSPORTline s.r.o. Headquaters, warranty & service center: Električná 6471, Trenčín 911 01, SK CRN: 36311723 VAT ID: SK2020177082 Phone: +421(0)326 526 701 E-mail: objednavky@insportline.sk reklamacie@insportline.sk servis@insportline.sk...
Need help?
Do you have a question about the PROFI Imperial and is the answer not in the manual?
Questions and answers