Table of Contents
Advertisement
Quick Links
Advertisement
Table of Contents

Related Manuals for Sencor SDB 521T


Summary of Contents for Sencor SDB 521T
- Page 1 SET TOP BOX USER'S MANUAL SDB 521T...
-
Page 3: Table Of Contents
Table of Contents Table of Contents SAFETY INFORMATION ........................5 INTRODUCTION Front panel ............................9 Rear panel ............................9 Side view ............................9 Remote control ..........................10 SYSTEM CONNECTION General information ........................11 Connecting to a television ......................11 GETTING STARTED Welcome ............................ - Page 4 Table of Contents TOOLS Tools main menu .......................... 22 Information ............................22 Factory Settings ..........................22 Software Upgrade .........................23 Remove USB device safely ......................23 MULTIMEDIA PLAYER Multimedia player main menu ....................24 Media Playback ..........................24 HDD Information ...........................26 DVR Setting ............................ 27 TIME SHIFT / RECORDING Timeshift ............................28 Record ..............................29...
-
Page 5: Safety Information
Safety Information Safety Information TO MINIMIZE FIRE HAZARD OR INJURY BY ELECTRICAL SHOCK, DO NOT EXPOSE THIS DEVICE TO RAIN OR HUMIDITY. NOTE RISK OF ELECTRIC SHOCK DO NOT OPEN CAUTION To minimize fire hazard or electric shock, do not remove the cover (or the rear panel) of the device. - Page 6 Safety Information IMPORTANT SAFETY INSTRUCTIONS During the manufacture of this set-top-box, great attention has been paid not only to meeting quality requirements, but also to providing safety which is a key factor in designing all of our products. Providing security, however, requires your actions as well. This document contains important information that will help you learn how to correctly use this set-top box and its accessories to your satisfaction.
- Page 7 Safety Information Accessories - To avoid any danger, do not use any accessories other than those recommended by this set-top-box manufacturer. 10. Do not expose the appliance to the effects of dripping or spraying water and do not place objects filled with a liquid such as vases on the appliance. Attention: Ensure safety when using electric energy.
- Page 8 Safety Information Repairs 17. Repairs - No not attempt to repair this set-top-box by yourself as opening the cabinet and removing the covers may expose you to a dangerous voltage or other risk. Have all repairs performed by qualified service technicians. 18.
-
Page 9: Introduction
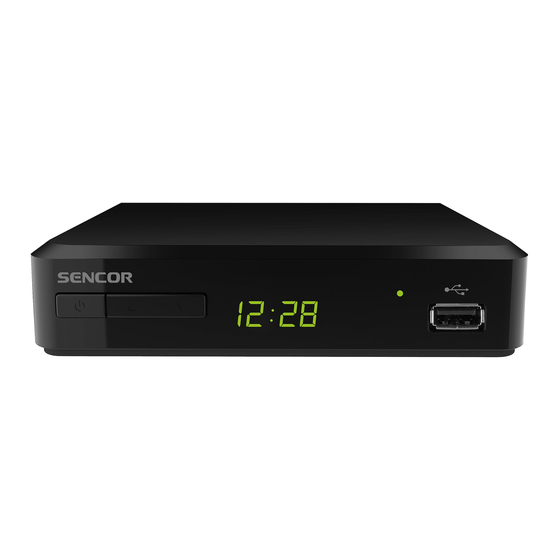
Introduction Introduction Information about this STB Front panel Power On indicator Channel up/down Standby - on/off USB port (only for USB flash memories) Control sensor Rear panel Antenna HDMI output TV SCART to connect to a TV set VF bypass loop for external device Side view 5V/1A DC power supply... -
Page 10: Remote Control
Introduction Remote control RED/GREEN/YELLOW/BLUE button (For interactive features / Buttons of the nested menu features) TV/RADIO (TV/radio) (Switching between the television and radio modes) MEDIA (Media) (Open the Record menu) AUDIO (Audio) (Select the sound mode and track) EPG (Electronic programming guide) (Opening the electronic programming guide menu) OK button... -
Page 11: System Connection
System connection System connection General information There many various types of TV sets and other devices that can be connected to this STB. This manual describes the most common methods of connecting your equipment. Connecting to a TV set HDMI TV Antenna VF cable Battery power supply... -
Page 12: Getting Started
Getting Started Getting Started Welcome When using this STB for the first time, “Welcome" menu will appear. Press the cursor keys to set Region, Language, Display Mode and Aspect Mode. Highlight “OK” and press “OK” to start searching the channels. Installation The Installation menu allows you to set channel searching and LCN Installation option. - Page 13 Getting Started Channel Scan The “Channel scan” menu allows you to set manual channel searching. Select “Channel Scan” and press "OK” to open the Channel Scan menu. Press the cursor buttons to set Scan Mode, Scan Band, Channel No. Frequency, Bandwidth, then highlight “Search”...
-
Page 14: Operation
Operation Operation Changing channels There are three channel selection methods available - step-by-step browsing the channel list, selecting by number and selecting from the screen channel list. Step-by-step browsing the channel list: To move in the channel list, press the arrow up or down button on the remote control. Selecting by a number: Enter the channel number directly using the numeric buttons, then press OK to select the desired channel. -
Page 15: Editing Channels
Editing channels Editing channels Edit Channel menu Press the “MENU” button to show the main menu. Press the “UP” or “DOWN” button to highlight “Edit Channel” and press “RIGHT” to open the “Edit Channel” menu. Press the “UP” or DOWN” cursor button to highlight the desired item, then press “OK”... -
Page 16: Radio Channel List
Editing channels • Press the “BLUE” button to open the nested Edit channel menu. • Press “OK” again to cancel the relevant function. • Press the “colour” button again to exit the relevant function. Press “Exit” to save and return to the ”Edit Channel” menu. Radio Channel List In the Edit Channel menu, select ”Radio Channel List”... -
Page 17: Language
System Settings Press the “UP” or DOWN” cursor button to highlight the desired item, then press “OK” to open the nested menu. Press the “EXIT” button to exit. Language This menu allows you to set the language of system, audio, subtitles and teletext and enable the subtitle function. -
Page 18: Tv System
System Settings TV System This menu allows you to set Video Resolution, Aspect Mode and Digital Audio Out. Video Resolution: Setting various video signal resolutions Aspect Mode: 16:9 Full / 4:3PS / 4:3LB / 16:9PS Digital Audio Out: LPCM Out (LPCM output) / BS Out (BS output) Local Time Setting This menu allows you to make region and time settings. -
Page 19: Timer Setting
System Settings Timer Setting This menu enables you to set the program timers. You can set up to 8 timers. Timer Mode: Off / Once / Daily / Weekly / Monthly Timer Service: Channel / Record Wakeup Channel: Allows you to set the channel to be tuned during the wakeup. Wakeup Date: Press the numeric buttons to set the wakeup date. -
Page 20: Osd Setting
System Settings OSD Setting This menu allows you to set the display duration and transparency of your OSD menu. OSD Timeout: 1-10 seconds. OSD Transparency: To set the OSD menu transparency to Off / 10% / 20% / 30% / 40%. Favorite This menu allows you to rename the favorite group. -
Page 21: Audio Description Setting
System Settings Audio Description Setting This menu allows you to set Use AD as default and AD Volume Offset: This is only applicable to programs for which the sound description is broadcast by a TV station Use AD as default: On/Off AD Volume Offset: -3 ~ 3 Other This menu allows you to set Antenna Power, Channel Play Type, Auto Standby... -
Page 22: Tools Main Menu
Tools Tools Tools main menu Press the “MENU” button to show the main menu. Press the “UP” or “DOWN” button to highlight “Tools” and press “RIGHT” to open the “Tools” menu. Press the “UP” or DOWN” cursor button to highlight the desired item, then press “OK”... -
Page 23: Software Upgrade
Tools Software Upgrade This unit offers features for the user to update the software version - either wirelessly (OTA) or using a USB flash drive. Open the “Tools“ menu, select “S/W Upgrade by OTA” or "Upgrade by USB” and press “OK” - Software Upgrade menu appears. Press the cursor buttons to select a desired option and then highlight “Start”... -
Page 24: Multimedia Player
Multimedia player Multimedia player Multimedia player main menu Make sure that external data storage device is connected to the USB port. Press the “MENU” button to show the main menu. Press the “UP” or “DOWN” button to highlight “Media Player” and press the “RIGHT” button to open the multimedia player menu. - Page 25 Multimedia player “1” button: Press to switch among Music /Image /Video /Record tabs. EXIT (End) button: Return to the parent directory. Video: BLUE button: Press the “BLUE” button to open the nested Edit channel menu. “1” button: Press to switch among Music /Image /Video /Record tabs. “2”...
-
Page 26: Hdd Information
Multimedia player HDD Information This menu allows you to display some parameters of the exchangeable disc. In the Media Player menu, select “HDD Information“ and press “OK” to open the USB disc information window. Press the “EXIT” button to exit. Press the YELLOW button to open the Format menu. -
Page 27: Dvr Setting
Multimedia player DVR Settings This menu allows you to set the DVR Setting parameters. In the ”Media Player” menu, select “DVR Setting” and press “OK” to open the “DVR Settings” menu. Press the “UP” or “DOWN” cursor button to select the desired item, then press the “LEFT”... -
Page 28: Time Shift / Recording Timeshift
Time shift / recording Time shift / recording Connecting a Mass Storage Device to the USB port will enable the Time Shift/Record feature for a broadcast program. • Pause the program being broadcast and resume the watching later on (Time Shift feature). -
Page 29: Record
Time shift / recording Record Instantaneous record • To start recording the main channel immediately, press "RECORD” in the view mode. • Press “RECORD” once again to set the time duration. To stop the recording, press “STOP” - a confirmation window will appear. •... -
Page 30: Troubleshooting
Troubleshooting Troubleshooting Problem Possible cause What to do Standby mode Power cord disconnected Check the power cord indicator is not lit Blown power supply fuse. Check the fuse No signal has been Disconnected antenna Check the antenna cord captured Damaged / incorrectly adjusted Check the antenna antenna Please consult your dealer... -
Page 31: Technical Specifications
Technical specifications Technical specifications TUNER AND CHANNEL • HF INPUT CONNECTOR × 1 (IEC TYPE, IEC169-2, FEMALE TYPE) • HF OUTPUT CONNECTOR × 1 (IEC TYPE, IEC169-2, MALE (BYPASS LOOP)) • FREQUENCY BAND: 174MHz ~ 230MHz (VHF) 470MHz ~ 862MHz (UHF) •... - Page 32 FAST ČR, a.s. hereby declares that the radio device type SDB 521T conforms to the 2014/53/EU directive. For full version of the EU declaration of conformity, please refer to www.sencor.eu website.
- Page 34 Cases when the claiming product cannot be indentified according to the presented documents (e.g. the serial number or the warranty seal has been damaged). Authorized service centers Visit www.sencor. for detailed information about authorized service centers. 34 EN Copyright © 2020, Fast ČR, a. s.
Need help?
Do you have a question about the SDB 521T and is the answer not in the manual?
Questions and answers