Table of Contents
Advertisement
Available languages
Available languages
Advertisement
Table of Contents

Related Manuals for cecotec Bongo A Advance Connected Series


Summary of Contents for cecotec Bongo A Advance Connected Series
- Page 1 advance connected Patinete eléctrico/Electric scooter Manual de instrucciones Instruction manual Manuel d’instructions Bedienungsanleitung Manuale di istruzioni Manual de instruções Instructiehandleiding Instrukcja obsługi Návod k použití...
-
Page 2: Table Of Contents
ÍNDICE INHALT INHOUD 1. Piezas y componentes 1. Teile und Komponenten 1. Onderdelen en componenten 2. Advertencias 2. Warnung 2. Waarschuwing 3. Instrucciones de seguridad 3. Sicherheitshinweise 3. Veiligheidsinstructies 4. Montaje del producto 4. Montage 4. Het product in elkaar zetten 5. -
Page 3: Piezas Y Componentes
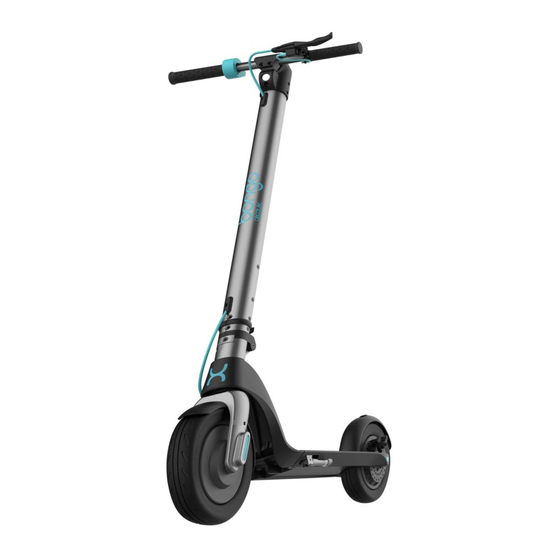
1. PIEZAS Y COMPONENTES Parts and components/Pièces et composants/Teile und Komponenten/ Parti e componenti/Peças e componentes/Onderdelen en componenten/ Części i komponenty Části a složení Accélérateur Acceleratore Frein Freno Frein avant Faro anteriore Barre Barra manubrio Anneau de fixation Anello di chiusura Moteur Motore Béquille... - Page 4 Versneller Akcelerator Hamulec Voorlicht Przednie światło Stuur Kolumna Vouwring Pierścień podtrzymujący Motor Silnik Standaard Nóżka Schijfrem Tarcza hamulcowa Stuur Kierownica LCD scherm Wyświetlacz LCD Bedieningspaneel Panel sterowania Sluitingspunt Blokada pozycji Oplaadpunt Gniazdko ładowania Vouwscharnier Zacisk Anti-slip voetondersteuning Platforma antypoślizgowa Achterste spatbord Tylny błotnik Achterlicht Tylne światło...
-
Page 5: Advertencias
2. ADVERTENCIAS Warning /Avertissements /Warnung / Avvertenze/Advertências/Waarschuwing / Varování Freno del manubrio Hamulec ręczny Display LCD Wyświetlacz LCD Pulsante di funzione Przycisk trybu Pulsante di potenza Przycisk on/off Leva di accelerazione Dźwignia przyspieszenia Indicatore di errore Kontrolka ostrzegawcza: błąd Batteria Bateria ES •... - Page 6 ES • No utilice el teléfono ni escuche música mientras conduce el patinete. EN • Do not use the phone or listen to music while riding the scooter. FR • N’utilisez pas votre téléphone et n’écoutez pas de musique pendant que vous conduisez la trottinette. DE • Verwenden Sie während des Betriebs kein Handy und hören Sie keine Musik.
- Page 7 ES • Circule siempre con las dos manos sobre el manillar. EN • Always drive the scooter holding the ES • Este patinete no está diseñado para ser conducido por carreteras, autovías o autopistas. handlebar with both hands. FR • Lorsque vous circulez, vos deux mains doivent toujours se trouver Consulte la legislación vigente de su municipio sobre dónde está...
- Page 8 ES • No conduzca sobre charcos ni superficies mojadas. EN • Do not ride through puddles or other ES • Modere la velocidad en caso de descender por pendientes y utilice ambos frenos. EN • Watch wet surfaces. FR • Ne conduisez pas sur des flaques ni sur des surfaces mouillées. DE • Fahren your speed when travelling downhill.
-
Page 9: Instrucciones De Seguridad
Guarde este manual para referencias futuras o nuevos usuarios. • Cecotec no asumirá ninguna responsabilidad derivada del mal uso del producto o del incumplimiento tanto de las normas de tráfico como de las instrucciones de este manual. •... - Page 10 • No permita que niños/as ni animales toquen la batería. • Cecotec will not assume any responsibility resulting • Desenchufe la batería antes de conducir el patinete y antes from product misuse or from not complying with traffic de montarlo o desmontarlo.
- Page 11 • Do not allow children or animals to touch the battery. • Cecotec n’assumera aucune responsabilité dérivant d’une • Unplug the battery before riding and before assembling or mauvaise utilisation du produit ou du non-respect du code disassembling it.
-
Page 12: Sicherheitshinweise
• Ne laissez pas les enfants ni les animaux toucher la batterie. • Cecotec übernimmt keine Haftung von unsachgemäßer • Débranchez toujours la batterie avant de conduire la Verwendung des Produktes oder Nichteinhaltung dieser trottinette et avant de la monter ou la démonter. - Page 13 Beaufsichtigung ist geboten, wenn das Gerät nuovi utenti. in der Nähe von Kindern verwendet wird. • Cecotec non si assumerà nessuna responsabilità derivata SICHERHEITSHINWEISE DES AKKUS dal mal utilizzo del prodotto o inadempienze tanto relative alle norme stradali quanto alle istruzioni di questo manuale.
- Page 14 Non utilizzare la batteria in presenza di segni insoliti quali l’emissione di odori, calore eccessivo o fughe. Se la batteria • Cecotec não assumirá nenhuma responsabilidade derivada gocciola, non toccare il liquido. do mau uso do producto ou do incumprimento tanto das •...
- Page 15 • Não permita que crianças nem animais toquem na bateria. • Cecotec zal geen enkele verantwoordelijkheid nemen in het • Desligue a bateria da corrente elétrica antes de conduzir a geval van slecht gebruik van het product of het niet naleven trotineta e antes de montar ou desmontar.
- Page 16 WAARSCHUWING: gebruik enkel het oplaadmateriaal verstrekt • Nie używaj hulajnogi w sposób szkodliwy dla innych osób i door Cecotec. obiektów. • Nie można w żaden sposób modyfikować hulajnogi, gdyż może to zaburzyć jej funkcjonowanie , uszkodzić jej struktury i spowodować...
- Page 17 • Cecotec nepřebírá žádnou odpovědnost, která by mohla jeśli uprzednio zostały dokładnie poinstruowane w zakresie plynout ze špatného používání tohoto produktu nebo z obsługi maszyny. Nie można pozwolić dzieciom na zabawę...
-
Page 18: Montaje Del Producto
Ajuste el freno con una llave hexagonal M6. Apriete y ajuste el manillar prestando atención al sentido de rotación. • Nepokoušejte se nabíjet vadnou baterii. Pokud nefunguje správně, vyhoďte ji. Upozornění: používejte pouze baterie a nabíječky poskytnuté firmou Cecotec. BONGO SERIE A ADVANCE CONNECTED MAX advance connected... -
Page 19: Funcionamiento
ESPAÑOL ESPAÑOL Doblar 5. FUNCIONAMIENTO Gire el anillo de sujeción para aflojarlo. Abra la pestaña de plegado. BOTONES • Interruptor de encendido: mantenga pulsado este botón para encender o apagar el patinete. • Acelerador: utilícelo para arrancar el patinete y para acelerar. •... - Page 20 ESPAÑOL ESPAÑOL pulsados hasta que se muestre P0. Luego, pulse el botón menú hasta seleccionar P1. Una vez en P1, acceda a la función (velocidad crucero) y seleccione el valor 1 (desactivado) o 3_Coloque ambos pies en el apoyapiés. 0 (activado). Para confirmar, pulse ambos botones y vuelva al display inicial.
-
Page 21: Limpieza Y Mantenimiento
No intente reparar el patinete por su propia cuenta. En caso de que presente algún daño INSTALACIÓN DE LA BATERÍA o no funcione bien, póngase en contacto con el Servicio de Asistencia Técnica de Cecotec. Cómo extraer la batería ALMACENAMIENTO •... -
Page 22: Resolución De Problemas
Si en alguna ocasión detecta una incidencia con el producto o tiene alguna consulta, póngase Batería: 36 V, 7800 mAh en contacto con el Servicio de Asistencia Técnica oficial de Cecotec a través del número de Potencia nominal: 350 W teléfono +34 96 321 07 28. -
Page 23: Product Assembly
ENGLISH ENGLISH 4. PRODUCT ASSEMBLY Fold Turn the fixing ring to loosen it. Open the folding tab. Unfold Pull up the stem while pressing down the rear fender. Raise the stem, place the folding tab in a close position and turn the fixing ring to hold the tab. -
Page 24: Operation
ENGLISH ENGLISH 5. OPERATION is displayed. Then, press the menu button until you select P1. Once you have selected P1, enter to the function (cruise speed) and select 1 (deactivated) or 0 (activated). To confirm, press both buttons and return to the home display. PUSH BUTTONS •... - Page 25 ENGLISH ENGLISH HOW TO CHARGE THE SCOOTER Open the charge port cover. Make sure it is clean and dry. 3_Place both feet on the footrest. Connect the charger with the battery and the other end to the power supply. Check the battery indicator is on.
- Page 26 Insert the battery horizontally into the pole. 8. TECHNICAL SPECIFICATIONS Push it down until the lock latch on the battery case is fixed into place. Bongo A Advance Connected Series Frequency Bands: 2.4 - 2.48 GHz Model No.: 07028 Maximum Transmission Power: 20 dBm...
- Page 27 If at any moment you detect any problem with your product or have any doubt, do not hesitate to contact Cecotec Technical Support Service at +34 963 210 728. Ajustez le frein avec une clé hexagonale M6. Serrez et ajustez le guidon en faisant attention au sens de rotation.
- Page 28 FRANÇAIS FRANÇAIS 5. FONCTIONNEMENT Plier Tournez l’anneau de fixation pour le desserrer. Ouvrez la languette de pliage. BOUTONS • Interrupteur de connexion : maintenez appuyé ce bouton pour allumer ou éteindre la trottinette. • Accélérateur : utilisez-le pour démarrer la trottinette et pour accélérer. •...
- Page 29 FRANÇAIS FRANÇAIS B.- Vitesse de croisière Le mode croisière peut être activé ou désactivé. Pour ce faire, vous devez maintenir les deux touches enfoncés jusqu’à ce que P0 soit affiché. Appuyez ensuite sur la touche de 3_ Placez les deux pieds sur le repose-pieds. menu jusqu’à...
- Page 30 • N’essayez pas de réparer l’appareil vous-même. Si le robot ne fonctionne pas, veuillez INSTALLER LA BATTERIE contacter le Service Après-Vente Officiel de Cecotec. Comment extraire la batterie ? STOCKAGE Tirez sur la sécurité de la coque de la batterie.
- Page 31 Si vous détectez un incident ou un problème avec le produit, vous devez contacter le Service Batterie : 36 V, 7800 mAh Après-Vente Officiel de Cecotec au +34 9 63 21 07 28. Puissance nominale : 350 W Puissance maximale : 700 W IP 54 Made in China I Conçu en Espagne...
- Page 32 DEUTSCH DEUTSCH 4. MONTAGE Abklappen Drehen Sie die Festhaltungsring, um ihn zu lockern. Öffnen Sie die Klapplasche. Aufklappen Ziehen Sie die Stange nach oben, indem Sie den Schutzblech nach unten gedrückt halten. Heben Sie die Stange, stellen Sie die Klapplasche in geschlossener Position und schwenken Sie die Festhaltungsring, um die Lasche festzuhalten.
- Page 33 DEUTSCH DEUTSCH 5. BEDIENUNG B.- Reisegeschwindigkeit Reisegeschwindigkeit kann ein- bzw. ausgeschaltet werden. Um das zu tun, halten Sie beide TASTEN Tasten gedrückt, bis der Bildschirm zeigt P0 an. Drücken Sie danach die Menü-Taste • Einschalter: Halten Sie diesen Schalter gedrückt, um den Scooter ein- oder ausschalten. und wählen Sie P1 aus.
- Page 34 DEUTSCH DEUTSCH WIE DEN SCOOTER LADEN Öffnen Sie den Deckel des Akkus. Vergewissern Sie sich, dass es trocken und sauber ist. 3_Legen Sie beide Füße auf die Trittfläche. Schließen Sie das Ladegerät mit dem Akku und das Kabel mit der Steckdose ein. Uberprüfen Sie, dass den Akkuanzeiger an ist.
- Page 35 Versuchen Sie niemals das Gerät selbst zu reparieren. Falls der Roboter Schäden aufweist werden, um die Verwertung und das Recycling der enthaltenen Materialien zu optimieren und nicht funktioniert, kontaktieren Sie den Technische Kundendienst von Cecotec. die Auswirkungen auf die menschliche Gesundheit und die Umwelt zu reduzieren.
-
Page 36: Montaggio Del Prodotto
Verbraucher zugerechnet werden kann. Das Produkt von Personen demontiert, repariert oder modifiziert wurde, die nicht vom offiziellen Technischen Kundendienst durch Cecotec autorisiert worden sind. Der Grund hierfür durch die normale Abnutzung und Verschleiß der Teile und des Zubehörs entstanden ist. -
Page 37: Funzionamento
ITALIANO ITALIANO 5. FUNZIONAMENTO Piegare Girare l’anello per allentarlo. Aprire la linguetta di chiusura. TASTI • Interruttore di accensione: mantenere premuto questo tasto per accendere o spegnere il monopattino. • Acceleratore:: utilizzarlo per far partire il monopattino e per accelerare. •... - Page 38 ITALIANO ITALIANO il valore 1 (disattivato) o 0 (attivato). Per confermare, premere entrambi i tasti tornare al display principale. 3_Collocare entrambi i piedi sul poggiapiedi. C.- Spinta automatica La spinta automatica può essere attivata o disattivata. Per far ciò, è necessario mantenere premuti i due tasti fino a che venga mostrato P0.
-
Page 39: Pulizia E Manutenzione
• Non cercare di riparare il monopattino per conto proprio. Nel caso di danno o di mal INSTALLAZIONE DELLA BATTERIA funzionamento, contattare il Servizio di Assistenza Tecnica di Cecotec. DEPOSITO Come posso rimuovere la batteria •... -
Page 40: Risoluzione Di Problemi
Qualora ci fosse un problema con il prodotto o avere una consulenza, contattare il Servizio di Potenza massima: 700 W Assistenza Tecnica ufficiale di Cecotec attraverso il numero di telefono +34 96 321 07 28. IP 54 Made in China | Progettato in Spagna 9. -
Page 41: Montagem Do Produto
PORTUGUÊS PORTUGUÊS 4. MONTAGEM DO PRODUTO Dobrar Gire o anel de sujeição no sentido contrário, para desapertar. Abra a lingueta de dobragem. Desdobrar Puxe a barra para cima enquanto pressiona para baixo o guarda-lamas traseiro. Alinhe a barra na vertical, feche a lingueta de fixação/dobragem e bloqueie com o anel de fixação. -
Page 42: Funcionamento
PORTUGUÊS PORTUGUÊS 5. FUNCIONAMENTO selecionar P1. Uma vez em P1, aceda à função (velocidade cruzeiro) e selecione o valor 1 (desativado) ou 0 (ativado). Para confirmar, pressione ambos botões e volte ao BOTÕES display inicial. • Interruptor de ligar: mantenha pressionado este botão para ligar ou desligar a trotineta. •... - Page 43 PORTUGUÊS PORTUGUÊS COMO CARREGAR A BATERIA DA TROTINETA Abra a tampa do porto de carga. Certifique-se de que esteja limpo e seco. Conecte o carregador à bateria e o outro extremo do cabo à corrente elétrica. Verifique que o 3_Uma vez em movimento, coloque ambos os indicador de bateria está...
-
Page 44: Limpeza E Manutenção
Não tente reparar o dispositivo por si mesmo. Em caso de que apresente algum dano ou não funcione bem, entre em contacto com o Serviço de Assistência Técnica de Cecotec. O símbolo de contentor riscado recorda a sua obrigação de descarta este produto de forma correta. -
Page 45: Het Product In Elkaar Zetten
Se deteta uma ocorrência com o produto ou tem alguma consulta, entre em contacto com o Maak de handvaten vast en pas ze aan. Let op de draairichting. Serviço de Assistência Técnica oficial de Cecotec através do número de telefone +34 96 321 07 28. -
Page 46: Werking
NEDERLANDS NEDERLANDS 5. WERKING Opvouwen Draai de bevestigingsring om de hefboom van het vouwscharnier los te maken. Open de hefboom van het vouwscharnier. KNOPPEN • Aan/uit knop: houd deze knop ingedrukt om de step in of uit te schakelen. • Versneller: gebruik de versneller om de step te starten en om te versnellen. - Page 47 NEDERLANDS NEDERLANDS ingedrukt houden totdat P0 wordt weergegeven. Druk vervolgens op de menuknop totdat P1 is geselecteerd. Open in P1 de functie (kruissnelheid) en selecteer de waarde 1 3_ Plaats beide voeten op de voetondersteuning. (gedeactiveerd) of 0 (geactiveerd). Druk ter bevestiging op beide knoppen en keer terug naar het beginscherm.
-
Page 48: Schoonmaken En Onderhoud
Probeer niet zelf de step te repareren. In het geval dat de step beschadigingen vertoont of BATTERIJ INSTALLATIE niet goed werkt, neem dan contact op met de officiële Technische Ondersteuningsservice van Cecotec. Como extrair a bateria OPSLAG Trek aan de vergrendeling van de batterijhouder. -
Page 49: Probleemoplossing
Als u in elk geval een incident met het product detecteert of als u een vraag heeft, neem IP 54 dan contact op met de officiële Technische Ondersteuningsservice van Cecotec via het Gemaakt in China | Ontworpen in Spanje telefoonnummer +34 96 321 07 28. -
Page 50: Montaż Urządzenia
POLSKI POLSKI 4. MONTAŻ URZĄDZENIA Składanie Przekręć pierścień podtrzymujący, aby zwolnić zacisk. Otwórz zatrzask składania. Rozkładanie hulajnogi Naciskając na tylny błotnik, podnieś kolumnę. Ustaw ją pionowo, zamknij zacisk i przekręć pierścień podtrzymujący, aby podeprzeć zacisk. Opuść zacisk, a następnie kolumnę. Dopasuj otwór na tylnym błotniku do blokady pozycji i dociśnij, aby złożyć... -
Page 51: Obsługa Urządzenia
POLSKI POLSKI 5. OBSŁUGA URZĄDZENIA dopóki na wyświetlaczu nie pojawi się P0. Następnie naciśnij przycisk menu i wybierz P1. Kiedy już aktywujesz P1, wybierz tą funkcję: (tempomat) i ustaw wartość 1 (wyłączony) lub 0 (włączony) Aby zatwierdzić, naciśnij oba przyciski i powróć... - Page 52 POLSKI POLSKI ŁADOWANIE HULAJNOGI Otwórz osłonkę gniazdka ładowania. Sprawdź, czy gniazdko jest czyste i suche. 3_Postaw obie nogi na platformie. Podłącz ładowarkę do baterii i drugi koniec kabla do gniazdka. Sprawdź, czy kontrolka baterii jest włączona. Kontrolka, podczas ładowania, będzie świecić się na czerwono. Kiedy bateria całkowicie się...
-
Page 53: Czyszczenie I Konserwacja
środowisko zostaje znacznie zredukowany. nieprawidłowego funkcjonowania skontaktuj się z oficjalnym Serwisem Pomocy Technicznej Cecotec. Symbol przekreślonego kołowego kontenera na odpady informuje o obowiązku zadbania o oddanie zużytego sprzętu do specjalnego punktu zbiórki ZSEE. Jeśli urządzenie jest zasilane PRZECHOWYWANIE baterią... - Page 54 Seřiďte brzdu pomocí šestistranného klíče M6. W przypadku wykrycia ewentualnego defektu urządzenia lub w razie potrzeby konsultacji Upevněte a nastavte řítítka. Věnujte při tom pozornost směru otáčení. skontaktuj się z Serwisem Obsługi Technicznej Cecotec pod numerem +34 96 321 07 28. advance connected...
-
Page 55: Fungování
ČEŠTINA ČEŠTINA 5. FUNGOVÁNÍ Složení Vytáhněte kroužek pro uvolnění pojistky. Otevřete pojistku. TLAČÍTKA • Tlačítko zapnutí/vypnutí: podržte stisknuté toto tlačítko pro zapnutí nebo vypnutí koloběžky. • Akcelerátor: použijte ho pro nastartování koloběžky a pro zrychlení. • Brzda: držte brzdu stisknutou, abyste zastavili. Jemně sešlápněte zadní blatník, abyste posílili proces brždění. - Page 56 ČEŠTINA ČEŠTINA programu P1 vyberte funkci tempomat a zvolte hodnotu 1 (vypnutí) nebo 0 (zapnutí). Pro potvrzení stiskněte obě tlačítka a vraťte se na základní menu. C.- Automatické nastartování 3_Postavte se oběma nohama na nášlap. Funkci automatického nastartování je možné vypnout a zapnout. Pro její aktivování musíte tisknout tyto dvě...
-
Page 57: Čištění A Údržba
části. • Nepokoušejte se opravit přístroj vlastními silami. V případě zjištění jakékoli anomálie nebo havárie kontaktujte Asistenční technický servis Cecotec. USKLADNĚNÍ • Ujistěte se, že je koloběžka nabitá, než ji uskladníte na dlouhou dobu. Nabíjejte ji alespoň... -
Page 58: Řešení Problémů
Baterie: 36 V, 12800 mAh Pokud se stane, že na výrobku najdete závadu nebo budete mít dotaz, spojte se s oficiálním Nominální výkon: 350 W zákaznickým servisem Cecotec na telefonnímčísle +34 96 321 07 28. Maximální výkon: 700 W IP 54 Vyrobeno v Číně... - Page 59 Grupo Cecotec Innovaciones S.L. C/ de la Pinadeta s/n, 46930 Quart de Poblet, Valencia (Spain) YV01191213...
Need help?
Do you have a question about the Bongo A Advance Connected Series and is the answer not in the manual?
Questions and answers
Como ligar o bluetooth ao telemóvel
To connect Bluetooth on the Cecotec Advance Connected Series, pair the scooter with your smartphone using the mobile app. The Bluetooth connection allows you to view information and settings on your phone.
This answer is automatically generated
My scooter beeps 5 time is red when turning on and won't go over 5koh pkease help