Table of Contents
Advertisement
Quick Links
Advertisement
Table of Contents

Related Manuals for Ross OpenGear DSS-8224


Summary of Contents for Ross OpenGear DSS-8224
- Page 1 DSS-8224 User Guide...
- Page 2 Ross has become well known for the Ross Video Code of Ethics. It guides our interactions and empowers our employees. I hope you enjoy reading it below. If anything at all with your Ross experience does not live up to your expectations be sure to reach out to us at solutions@rossvideo.com.
- Page 3 Ross Video. While every precaution has been taken in the preparation of this document, Ross Video assumes no responsibility for errors or omissions. Neither is any liability assumed for damages resulting from the use of the information contained herein.
- Page 4 Operation of this equipment in a residential area is likely to cause harmful interference in which case the user will be required to correct the interference at his own expense. Notice — Changes or modifications to this equipment not expressly approved by Ross Video Ltd. could void the user’s authority to operate this equipment. Canada This Class “A”...
- Page 5 To avoid the potential release of those substances into the environment and to diminish the need for the extraction of natural resources, Ross Video encourages you to use the appropriate take-back systems. These systems will reuse or recycle most of the materials from your end-of-life equipment in an environmentally friendly and health conscious manner.
-
Page 7: Table Of Contents
Contents Introduction Related Publications ..............................9 Documentation Conventions ............................ 9 Interface Elements ..............................9 User Entered Text ..............................9 Referenced Guides ..............................9 Menu Sequences ..............................10 Important Instructions ............................10 Contacting Technical Support ..........................10 Before You Begin Overview ................................11 Features ................................ - Page 8 Operation Overview ................................27 Cable Length Requirements ...........................28 Operating Modes with the RCM-8120 Control Module ..................29 7x1 Mode ................................30 Multiple Remote Module Operation ........................30 GPI Operation ................................30 GPI Switch Operation ............................31 GPI Level Operating Modes ..........................31 Software Upgrades DashBoard Menus Status Tabs ................................35 Signal Tab ................................35 Hardware Tab ..............................36 Product Tab .................................36...
-
Page 9: Introduction
• “Service Information” provides information on the warranty and repair policy for your card. • “Glossary” provides a list of terms used throughout this guide. Related Publications It is recommended to consult the following Ross documentation before installing and configuring your DSS-8224 card: • DashBoard User Manual, Ross Part Number: 8351DR-004 •... -
Page 10: Menu Sequences
IP Address, Subnet Mask, and Gateway for your device. Contacting Technical Support At Ross Video, we take pride in the quality of our products, but if problems occur, help is as close as the nearest telephone. -
Page 11: Before You Begin
Before You Begin Overview The DSS-8224 is a dual serial switch designed for broadcast use in a multi-definition broadcast environment. This card supports both standard definition 270Mbps and high definition 1.485Gbps SDI video, as well as other common serial digital signals at 143Mbps, 360Mbps, and 540Mbps. Each DSS-8224 has four inputs and two outputs. -
Page 12: Functional Block Diagrams
Functional Block Diagrams This section provides the functional block diagrams that outline the work-flow of the DSS-8224. OUT 1A Optional Reclocker OUT 1B* IN 1 Input and EQ IN 2 Input and EQ IN 3* Input and EQ IN 4* Input and EQ OUT 2A Optional... -
Page 13: User Interfaces
User Interfaces The following interfaces are available for control and monitoring of your DSS-8224. DashBoard Control System DashBoard Control System enables you to monitor and control openGear frames and cards from a computer. DashBoard communicates with other cards in the frame through the Network Controller card. For More Information on... - Page 14 14 • Before You Begin DSS-8224 User Guide (v6.0)
-
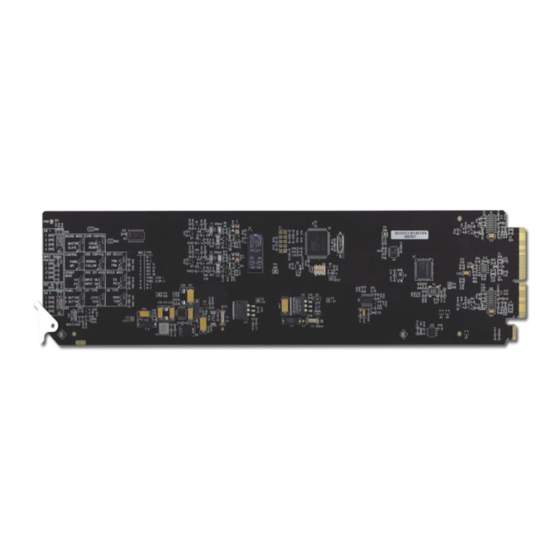
Page 15: Hardware Overview
Hardware Overview This chapter provides a general overview of the DSS-8224 components, supported rear modules, and cabling designations. Wait 30 seconds after the last setting change to ensure all changes are saved to the non-volatile memory of the card. Card Overview This section provides a general overview of the DSS-8224 components. -
Page 16: Control And Monitoring Features
14.Bootload Button (SW3) This button is used for factory service in the unlikely event of a complete card failure. Do not press this button unless instructed to do so by Ross Technical Support. For More Information on... • the operating modes for the DSS-8224, refer to the section “Operation Modes” on page 23. -
Page 17: Status And Selection Leds On The Dss-8224
Status and Selection LEDs on the DSS-8224 The front-edge of the DSS-8224 has LED indicators for card power, and communication activity. Basic LED displays and descriptions are provided in Table 3.1. Table 3.1 LEDs on the DSS-8224 Color Display and Description Green When lit green, this LED indicates that the card is functioning correctly. - Page 18 18 • Hardware Overview DSS-8224 User Guide (v6.0)
-
Page 19: Physical Installation
Unpacking Unpack each DSS-8224 you received from the shipping container and ensure that all items are included. If any items are missing or damaged, contact your sales representative or Ross Video directly. Installing the DSS-8224 This section outlines how to install a Rear Module in an openGear frame. The same procedure applies regardless of the frame or card type. -
Page 20: Installing The Dss-8224
Installing the DSS-8224 This section outlines how to install the DSS-8224 in an openGear frame. If the DSS-8224 is to be installed in any compatible frame other than a Ross Video product, refer to the frame manufacturer’s manual for specific instructions. -
Page 21: Cabling For The Dss-8224
Cabling for the DSS-8224 Connect the input and output cables according to the following sections. The inputs are internally terminated at 75ohm. It is not necessary to terminate unused outputs. DFR-8310 Series Frame Cabling Each R1A-8258 occupies one slot and accommodates one card. This rear module provides four inputs, four outputs and two GPI connections. - Page 22 22 • Physical Installation DSS-8224 User Guide (v6.0)
-
Page 23: Configuration
Configuration Control Modes This section outlines how to use the card-edge controls to configure the DSS-8224 for remote control, select the control mode, and select the GPI type. Configuring Card Control Use the following procedure to configure the card control for the DSS-8224: •... -
Page 24: Configuring The Operating Mode
• 7x1 switch • Dual 2x1 switch with input selection for each output • Dual 2x1 switch with tracking, where Output 2 tracks Output 1 When in Dual 2x1 Mode, there is an option in DashBoard to enable an Auto Change Over (ACO) Mode. This option is disabled in the 4x1 or 4x2 Modes. -
Page 25: Auto Change Over (Aco) Mode
Auto Change Over (ACO) Mode When in ACO Mode, a Loss of Signal (LOS) or Loss of Lock (LOL) on the primary input will cause the output to switch to the secondary input. Once the output is switched, the card will check the presence of the primary input to return. -
Page 26: Selecting The Reclocking Mode
Selecting the Reclocking Mode The DSS-8224 provides an optional reclocker on each output. Reclockers provide a cleaner signal over long cable lengths, but can sometimes increase jitter if connected to another reclocking device over a short cable. To select the reclocking mode of the DSS-8224 •... -
Page 27: Operation
Operation This chapter provides a detailed explanation of operating your DSS-8224 via GPI or remote panel. Overview The DSS-8224 can be operated using a remote control module. Each control module provides push buttons inserts with LED indicators. The following diagram shows a MRP-8120 Rackmount Control Panel with one of each type of remote control module. -
Page 28: Cable Length Requirements
Figure 6.3 displays a 7x1 configuration where two DSS-8224 cards are used. You must have two DSS-8224 cards with one configured as the Master. The Master card must be enabled for 7x1 operation. *Card is configured for 7x1 operation Figure 6.3 Example of Signal Flow with 7x1 Operation — Two DSS-8224 Figure 6.4 displays a 7x1 configuration where two DSS-8224 cards and two AVS-8764 cards are used. -
Page 29: Operating Modes With The Rcm-8120 Control Module
• If using the BNC to make the connection, the coax can be up to 1200ft long. • If using the 3-pin audio connector, use a good quality audio/control cable (i.e. Belden 1503A 22AWG shielded pair). • Do not exceed 400ft of audio/control cable. •... -
Page 30: 7X1 Mode
7x1 Mode When the DSS-8224 is configured for 7x1 mode, two four-button panels are connected together with the two 7x1 switches. Note that Panel 1 connects to GPI 1 on both DSS-8224 cards. The upstream switch will have one panel connected in slave mode and will listen for button presses and changes the outputs accordingly. -
Page 31: Gpi Switch Operation
GPI Switch Operation This section briefly outlines the operating modes when using GPI Switch control. GPI Level Operation To control the card by GPI Level, use the following jumper configurations: • Set . This enables input selection to be controlled by GPI. •... - Page 32 GPI Edge Operation To control the DSS-8224 via the GPI Edge configuration, use the following jumper configurations: to control the Input selection by GPI. to determine the input selection by high-to-low GPI transitions. EDGE In this mode, the DSS-8224 operates as a 2x1 switch with both outputs controlled by GPI transitions on GPI 1 and 2.
-
Page 33: Software Upgrades
This chapter provides instructions for upgrading the software for your DSS-8224 using the DashBoard Control System. To upload software to the DSS-8224 Contact Ross Technical Support for the latest software version file. In DashBoard, display the Device tab of the DSS-8224 by double-clicking its status indicator in the Basic Tree View. - Page 34 34 • Software Upgrades DSS-8224 User Guide (v6.0)
-
Page 35: Dashboard Menus
DashBoard Menus This chapter briefly summarizes the menus, items, and parameters available from DashBoard for your DSS-8224. Default parameters are noted with an asterisk (*). Status Tabs This section summarizes the read-only information displayed in the Status tabs. The fields in the Status tabs can vary in severity from green (valid), yellow (caution), to red (alarm). -
Page 36: Hardware Tab
Table 8.3 summarizes the read-only information displayed in the Product tab. Table 8.3 Product Tab Items Item Parameters Description Product DSS-8224 Supplier Ross Video Ltd. Board Rev Serial Number ###### Rear Module Type of rear module in the slot Software Rev ##.##... -
Page 37: Remote Control Tab
Remote Control Tab The Remote Control tab is only available when the DSS-8224 is configured for Remote Control ( is set to ). The options available in the Remote Control menu depends on the mode that the DSS-8224 is REMOTE operating in. -
Page 38: Dual 2X1 Mode
Table 8.6 Remote Control Menu Items - 4X1 Mode Item Parameters Description Output 1 Source Input 1 BNC 1 is the source for Output 1 Input 2 BNC 9 is the source for Output 1 Input 3 BNC 2 is the source for Output 1 Input 4 BNC 10 is the source for Output 1 Output 2 Source... -
Page 39: Dual 2X1 With Tracking Mode
Table 8.7 Remote Control Menu Items - Dual 2X1 Mode Item Parameters Description Output 2 Auto Change Enabled, Primary Assigns BNC 9 as the source for Output 2 Over Mode Source: Input 2 Enabled, Primary Assigns BNC 2 as the source for Output 2 Source: Input 3 Enabled, Primary Assigns BNC 10 as the source for Output 2... -
Page 40: Alarms Tab
Table 8.8 Remote Control Menu Items - Dual 2X1 Mode with Tracking Mode Item Parameters Description Output 2 Auto Change Enabled, Primary • ACO Mode is enabled Over Mode Source: Input 3 • BNC 1 is the source for Output 1 •... - Page 41 Table 8.10 Jumpers Menu Items Item Parameters Description Panel - Master Designates the card as a Master; only one card can be Control Mode configured as Master on a bus Panel - Slave Designates the cards as a Slave GPI Level Source selection GPI levels is controlled by GPI levels GPI Edge Source selection is controlled by GPI transitions...
- Page 42 42 • DashBoard Menus DSS-8224 User Guide (v6.0)
-
Page 43: Technical Specifications
Technical Specifications This chapter provides the technical specifications for the DSS-8224. Specifications are subject to change without notice. Table 9.1 DSS-8224 Technical Specifications Category Parameter Specification Serial Digital Number of Inputs Video Inputs Data Rates and SMPTE 270Mbps (SMPTE 259M-2006 Standards Accommodated 1.485Gbps (SMPTE 292-2006) 195Mbps, 360Mbps, 540Mbps... - Page 44 44 • Technical Specifications DSS-8224 User Guide (v6.0)
-
Page 45: Service Information
Bootload Button In the unlikely event of a complete card failure, you may be instructed by a Ross Technical Support specialist to perform a complete software reload on the DSS-8224. To reload the software on a DSS-8224 Eject the card from the frame. - Page 46 This DSS-8224 User Manual provides all pertinent information for the safe installation and operation of your openGear Product. Ross Video policy dictates that all repairs to the DSS-8224 are to be conducted only by an authorized Ross Video Limited factory representative. Therefore, any unauthorized attempt to repair this product, by anyone other than an authorized Ross Video Limited factory representative, will automatically void the warranty.
-
Page 47: Glossary
Glossary The following terms are used throughout this guide: Active image — the portion of the video picture area (production aperture) that is being utilized for output content. Active image excludes letterbox bars and pillar-box bars. Card — refers to the DSS-8224 unless otherwise noted. DashBoard —...
Need help?
Do you have a question about the OpenGear DSS-8224 and is the answer not in the manual?
Questions and answers